
Communication continues to be the most important aspect of business operations. This is why 75% of people have adopted new communication tools in the last year. These tools, like Zight, offer impressive communication features like the screen recorder app, screenshot tool, GIF maker, and webcam recording platform.
Are you looking for a communication tool too? With the right one, you should be able to screen record on Lenovo.
Screen recording is one way to improve communication between businesses, customer support, team members, and family. Find something you think will make work easier or bring a smile to someone’s face. Just screen record and share it – no more lengthy chats, email threads, or phone calls!
But this also means one thing – you need a tool that’s easy to use. Just like we did for Dell, HP, and Chromebook, we know just the five tools to use for this Windows laptop, so read on as we tell you how to screen record on Lenovo with each software below!
1. Best Lenovo Screen Recording Software – Zight
Zight is the cream of the crop when it comes to screen recording software for Lenovo laptops. And not only is it the most advanced screen recording software for Windows laptops, but it is also an all-in-one solution for visual communication.
With Zight, you can capture screenshots, create GIFs, record your webcam, and even leverage AI tools for captions, titles, and translations. If you’re serious about creating professional-quality screen recordings, Zight is your go-to tool.
Here are just some types of videos you can screen record on Lenovo with Zight:
- Explainer videos for your products
- How-to or instructional videos for clients and employees
- Training materials for your team
- Customer onboarding guides
- YouTube content
- Sales letter videos
- Pre-meetings and meeting recaps on Google Meet, Skype, Microsoft Teams, Zoom, and other types of presentations
- Motivational videos for your staff
a) Installation and Compatibility
Zight works nicely on Lenovo laptops and can easily record screens on Windows 10 and 11. Here’s how to get started:
- Visit the Zight website and click “Download.”
- Run the installer and follow the prompts
- Sign in or create an account
- You’re ready to go!
b) How to Screen Record on Lenovo with Zight
Once you install Zight, here’s how you can screen record on Lenovo laptop in a few simple steps:
- Click the Zight icon in your system tray
- Select “Record.” But Zight is a good productivity tool, so if you’re pressed on time, you can use easy-to-remember Windows shortcuts. To record screen on Lenovo, hit Alt + Shift + 6, and it opens the Record feature.
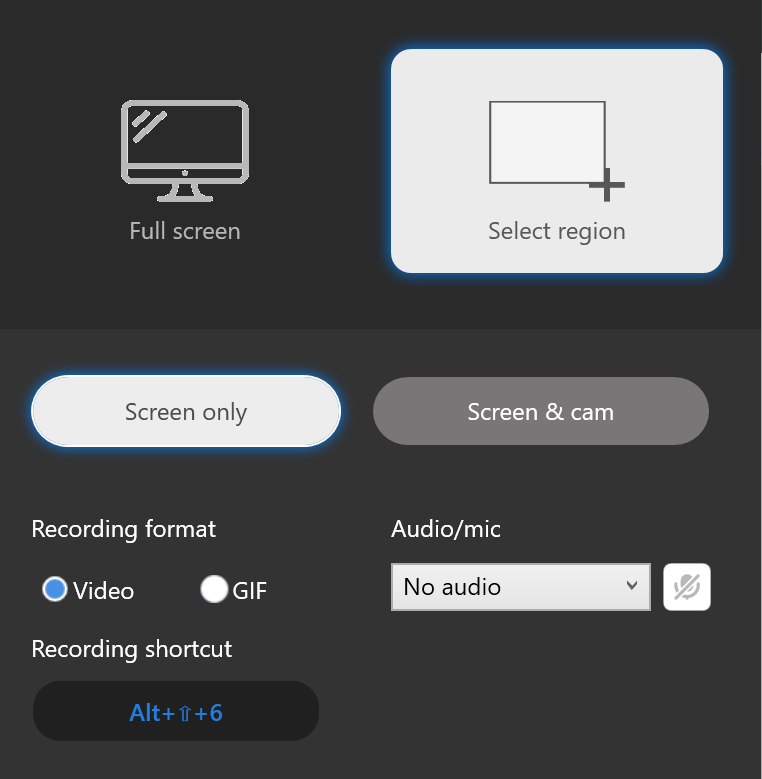
- You will need to customize your recording, starting with the area you need to record. You can choose Full Screen or select a region on your screen. In addition, choose between recording Screen Only or Screen & Cam. The latter means you’ll have a webcam overlay on one corner of your screen – be sure to move it around so all your content is visible.
- The next thing is to select whether to record a video or GIF. If you choose video, you can also turn on your mic to record system sound and the camera (for Screen & Cam) – there’s a dropdown menu where you can choose which tool to use between the native mic or camera and any external tools you’re connected to. If you want to record a GIF, you will not be able to use the mic.
- Everything is set now; just hit the blue “Start Recording” button and get a 3-second timer before the recording starts.
c) Annotating Your Lenovo Screen Recordings
Need to add some flair to your screen recording?
Pause your recording and use Zight’s annotation tools. Add lines, arrows, shapes, or highlights with custom colors and even timers to draw attention where it matters.
Resume recording when you’re done, and repeat annotating as needed.
d) Uploading, Editing, and Security
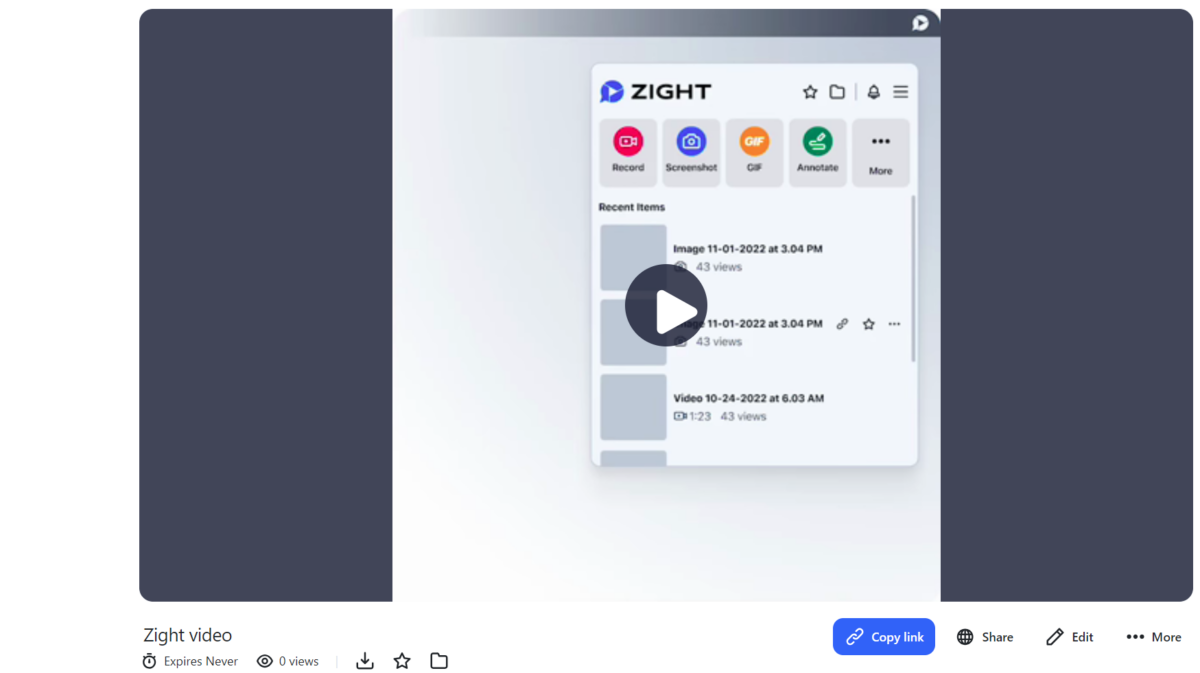
Done recording your Lenovo screen? Just click “Finish,” and Zight will automatically upload your video to the cloud. The video link is copied to your clipboard and opens in your default browser.
Time to edit your video some more. Click “Edit” and enjoy using these features;
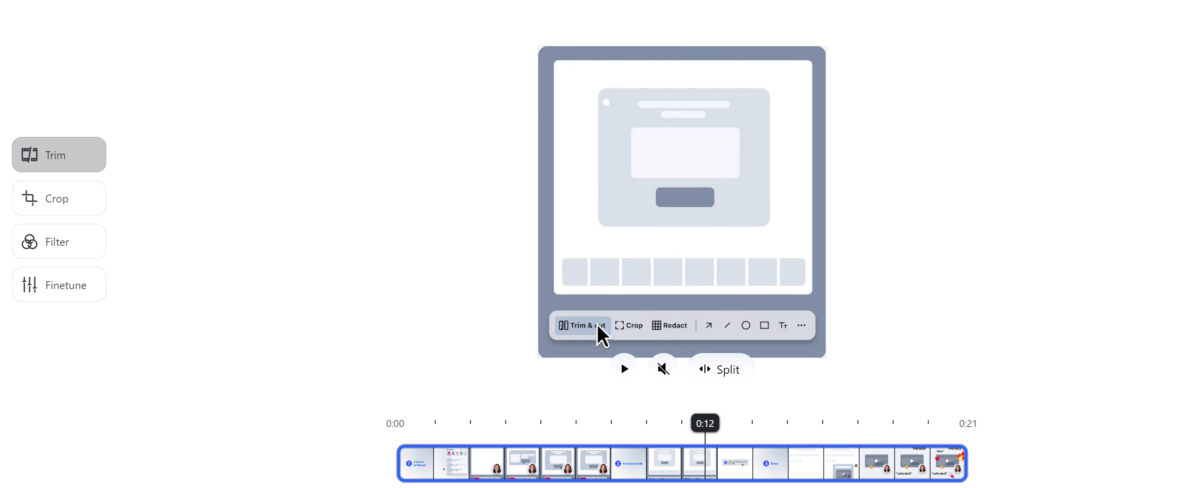
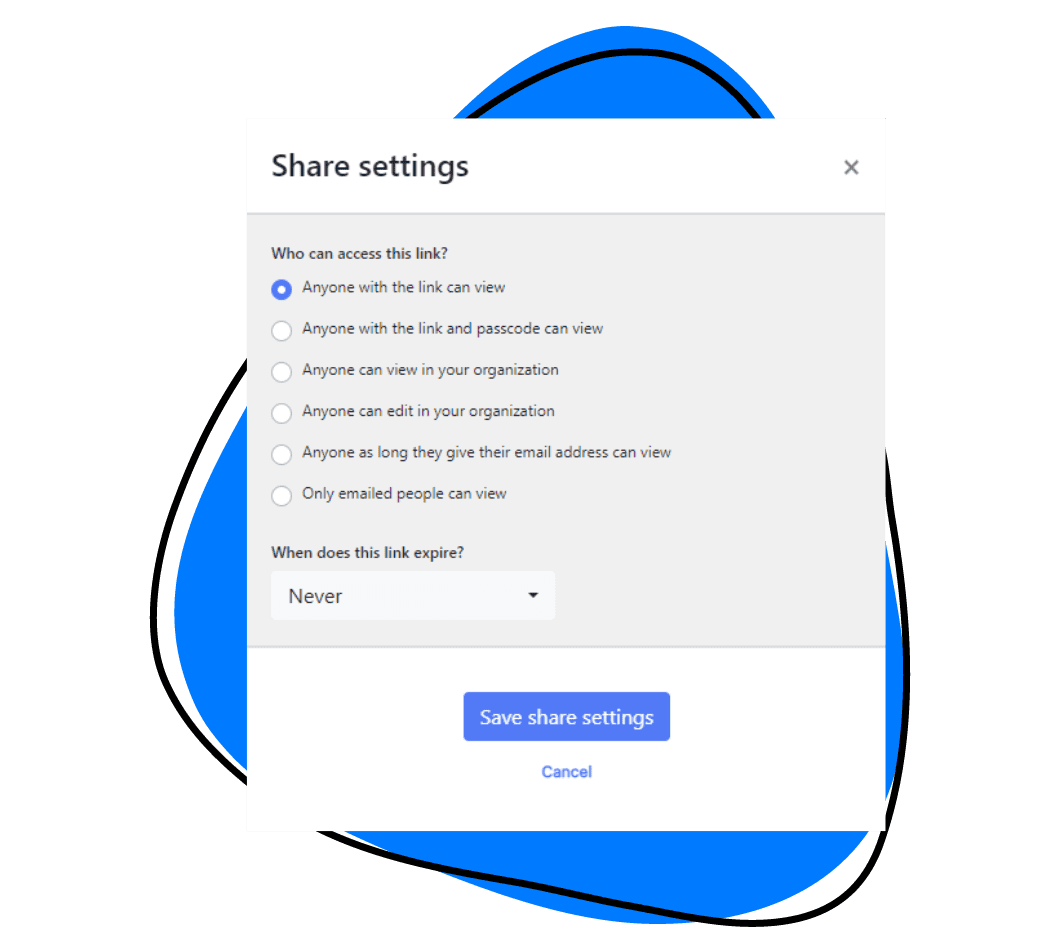
With Zight, you can trim, crop, add filters, split and merge sections, and finetune the video. You can also set viewing permissions, add expiry dates, and track who’s watched your content. Click “Done” to save all settings.
e) Sharing the Lenovo Screen Recording
After you polish your screen recording, only one thing remains – sharing the video, which couldn’t be easier.
Click the “Share” button on Zight:
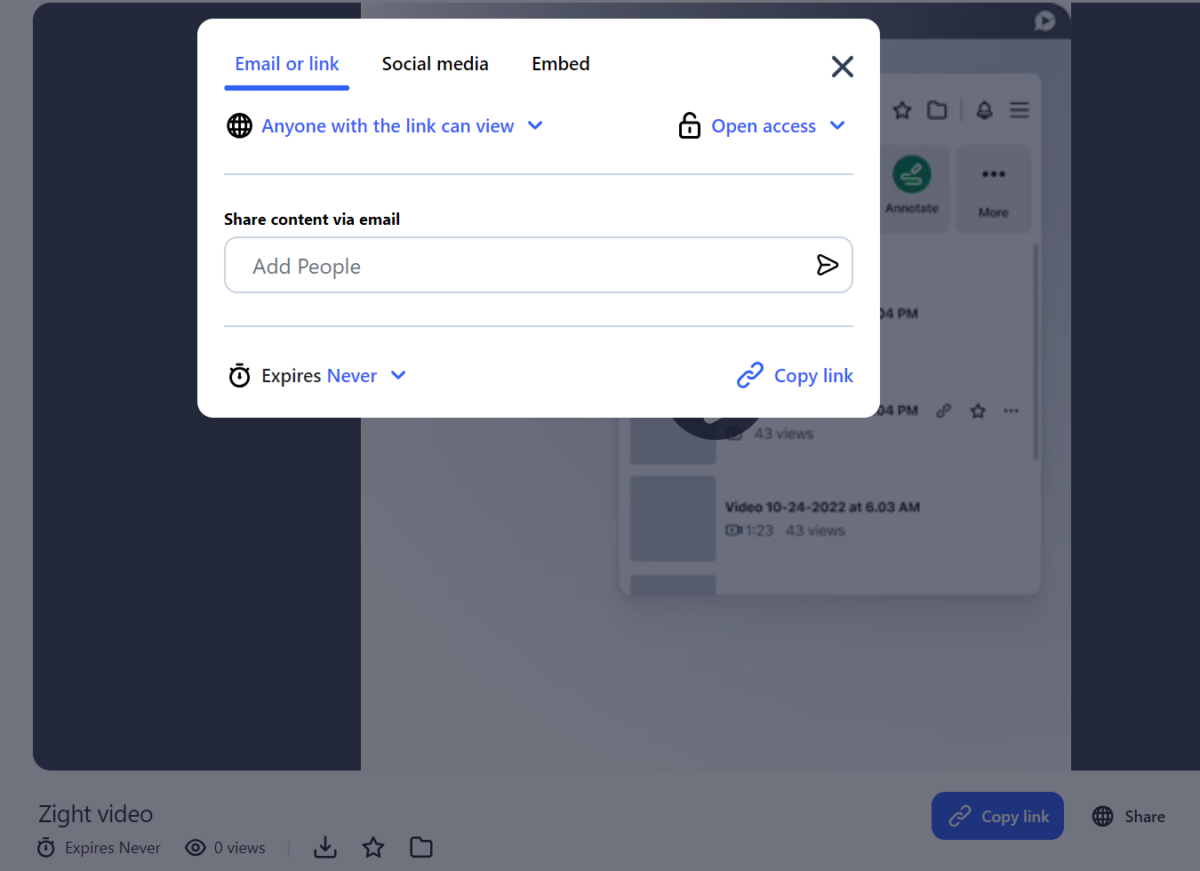
The easiest sharing method is to add recipients from your Zight dashboard, as shown above, or copy and paste your shareable video link into Slack, WhatsApp, email, or any messaging platform.
The best part? Recipients can view your video recording online even if they don’t use Zight.
Best Alternatives for Screen Recording on A Lenovo Laptop – Native Tools
While Zight offers the most comprehensive feature set, your Lenovo also has built-in quick capture options. Let’s explore them below:
2. Snipping Tool for Lenovo Laptop Windows 11
The Snipping Tool has evolved from a simple screen capture utility to a capable screen recorder. It’s free, pre-installed, and perfect for quick screen recordings.
You need to have a Lenovo with the Windows 11 operating system to use the built-in screen recorder. Here’s how:
- Press the Windows + Shift + S Snipping tool shortcut to activate the software overlay. Alternatively, you can find the Snipping Tool in the Start Menu under ‘All Apps’ or search for it directly in the search bar.
- Recording Your Screen:
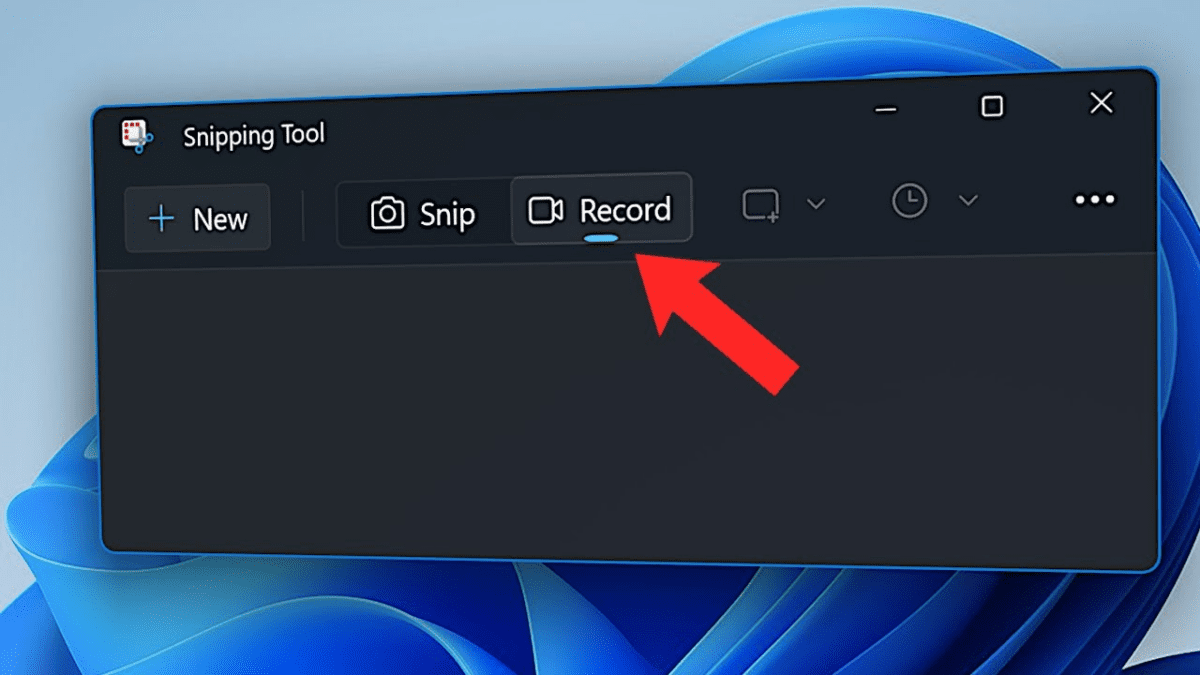
- Once open, click the camera icon, then the”Record” button
- Select the area of your screen you wish to record. The tool allows you to define the recording window to capture only the relevant part of your screen. Click “Start.”
- Unlike Zight’s advanced features, you do not have a lot of editing features to work with. So, you can pause your recording to sort the content on your screen and resume when everything is clean for better video flow.
- When you finish recording, hit the “Stop” button and then “Save.”
- Your recording saves automatically to your clipboard and opens in the Snipping Tool editor. From here, you can trim the video and save it as an MP4 file. Sharing is a bit of a process compared to Zight, too – you’ll attach the file to emails or messages.
3. Record Lenovo Screen Using Xbox Game Bar – for All Operating Systems
Don’t let the name fool you – The Xbox Game Bar is a versatile, built-in feature available on all modern Windows operating systems, including Windows 11 and 10.
It may be designed primarily for gamers to record their gameplay, capture screenshots, and broadcast live, but this tool is also exceptional for professionals and casual users. You can use it to record a detailed tutorial, capture a memorable moment, or document software bugs.
Here’s how to use it as a Lenovo laptop screen recorder:
- Press the Windows + G keys simultaneously to open the Xbox Game Bar. If it’s your first time using it, you might have to enable it from the settings by going to Settings > Gaming > Xbox Game Bar and toggling it on.
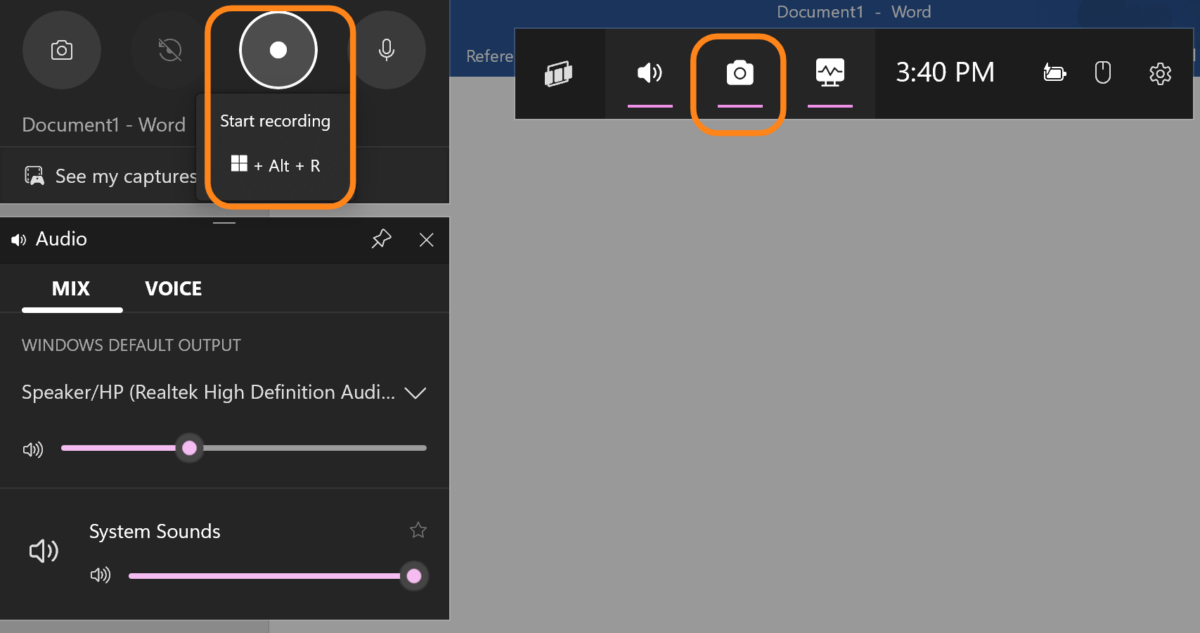
- With the Game Bar open, you’ll see several widgets. Locate the “Capture” widget, which includes options for screen recording.
- Click on the “Start Recording” button (a circle with a dot in the center) to begin capturing your screen. If you want to record audio from your microphone as well, toggle the microphone icon on before starting.
- A small bar will appear on your screen, showing the recording time and providing options to stop or pause the recording.
- You can continue to use your Lenovo laptop as usual, and the Xbox Game Bar will record everything within your specified window or the entire screen.
- Click the “Stop” button (a square icon) in the recording bar or the same button in the Game Bar to end your recording.
- The video will automatically be saved in the ‘Videos’ folder under ‘Captures.’ You can access it directly through the Xbox Game Bar, where it offers a preview and quick trimming options.
Share your recording by navigating to the ‘Videos\Captures’ folder, finding the video file, and using your preferred method to distribute it -whether through email, social media, or file-sharing services.
4. Record Screen Using PowerPoint – for Any Lenovo Laptop
Surprise! Your presentation software doubles as a screen recorder. If you’re already working in PowerPoint, this option is incredibly convenient.
Here’s how to create presentations or instructional videos directly from your desktop activities on a Lenovo laptop:
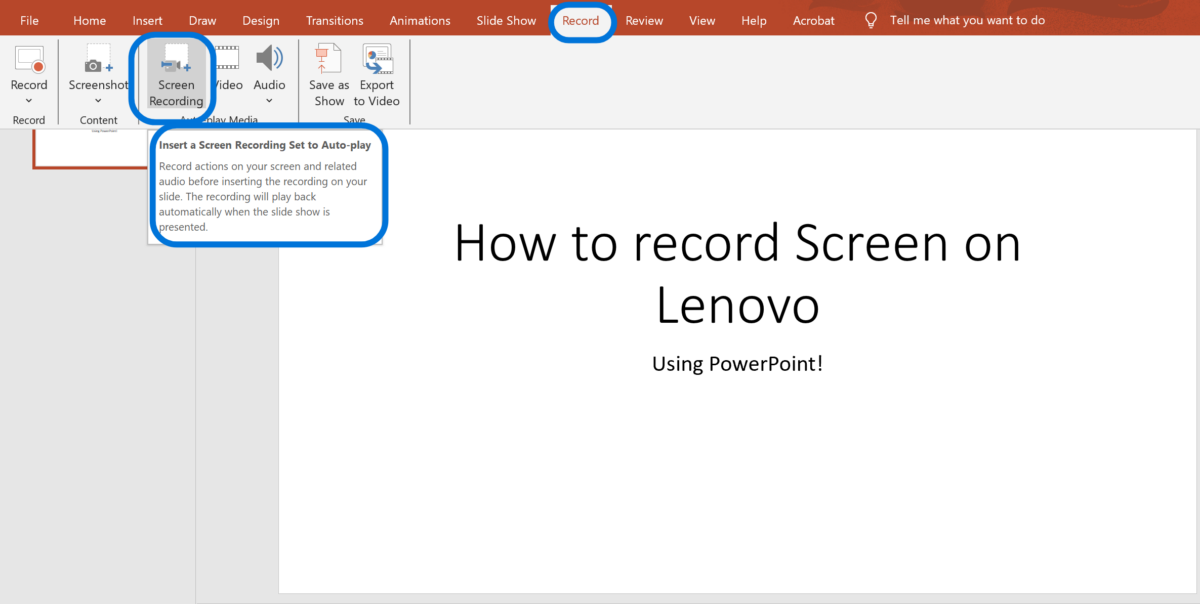
- Open PowerPoint and navigate to the “Record” tab on the ribbon, which is specifically dedicated to recording and broadcasting features.
- Click on “Screen Recording,” located within the media section. This will prepare PowerPoint to capture screen activity on your Lenovo laptop.
- Once you activate screen recording, your screen will dim slightly, and a small control panel appears at the top. Click “Select Area” (or use the keyboard shortcut Windows logo key + Shift + A). You can then click and drag to select the portion of your screen you want to record. If you don’t select an area, PowerPoint will record the entire screen by default.
- Press the “Record” button on the control panel (or use the keyboard shortcut Windows logo key + Shift + D). Before recording, you can choose to include audio by toggling the microphone on or off. If you want to record pointer movements, ensure that the option is selected.
- The control panel minimizes during the recording but can be brought up by hovering at the top edge of the screen. Use this panel to pause (Windows logo key + Shift + R) or stop (Windows logo key + Shift + Q) your recording.
- When you stop the recording, PowerPoint automatically inserts the captured video into the currently selected slide.
- Right-click on the video within the slide to save it externally. Choose ‘Save Media as…’ to store the file anywhere on your Lenovo laptop.
PowerPoint provides options to trim the video, add captions, and perform basic edits directly within the slide. Then, you can share your video by sending the PowerPoint file or exporting the video.
5. How To Screen Record Using Lenovo Vantage – An Option on Select Devices
Lenovo Vantage is primarily a system management and optimization tool for Lenovo devices. While not universally available as a screen recording option, some Lenovo models may offer this functionality through Vantage. It’s important to note that this feature isn’t standard across all Lenovo laptops, so your mileage may vary.
Lenovo Vantage typically comes pre-installed on Lenovo devices. If you don’t have it, visit the Microsoft Store, search for “Lenovo Vantage,” and click “Get” to download and install.
If your Lenovo device supports screen recording through Vantage:
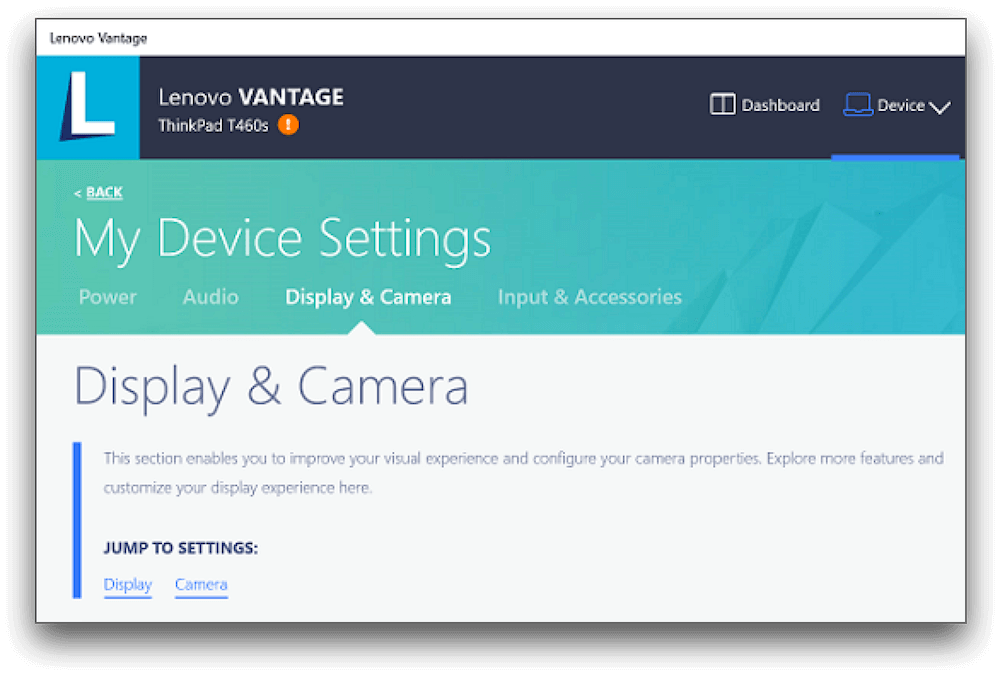
- Launch Lenovo Vantage from the Start menu
- Click on “My Device Settings”
- Select “Display & Camera” from the left-hand menu
- Scroll to find “Camera Privacy Mode” and toggle it on
- Open the app or screen you want to record
- Press Ctrl + Shift + R to start recording
- Press Ctrl + Shift + R again to stop
Recordings are typically saved in your “Videos” folder. To share:
- Locate the video file in your Videos folder
- Right-click and select “Share” for quick options, or
- Attach the file to an email or upload to your preferred cloud storage service
Remember, this method isn’t available on all Lenovo devices. If it doesn’t work for you, refer to the more universal options like Zight or the native Windows tools we discussed above.
Wrapping Up…
Screen recording on your Lenovo has never been easier. Whether the feature-rich Zight or the built-in Windows tools, you have options for every scenario. The key is choosing the tool that fits your needs and workflow.
If you’re a busy professional looking for reliability, advanced features, and seamless sharing, Zight is simply your best option. Its cloud storage, editing capabilities, and easy sharing make it indispensable for teams relying on constant, clear visual communication.


