How to Record Google Meet Meetings in 2025 (With or Without a Paid Plan)
⚡ Quick Answer
To record a Google Meet with the built-in recorder: Join the meeting on desktop → click the Activities icon (bottom-right) → Recording → Start recording. This only works on paid Google Workspace plans (Business Standard and above).
On a free Google account or Business Starter? Use Zight’s screen recorder — it records any Google Meet session regardless of your Workspace plan, saves instantly to the cloud, and generates a shareable link in seconds. No admin permissions needed.
Recording a Google Meet session is one of the most useful things you can do for your team — and one of the most frustrating if you don’t have the right Google Workspace plan. Your colleague joins 10 minutes late, a stakeholder can’t make the call, or you simply need to revisit what was discussed during a sprint review. A recording solves all of this.
The problem? Google locks its built-in Meet recording behind paid Workspace editions. If you’re on a free Gmail account or the Business Starter plan, the record button either doesn’t exist or is greyed out. After testing both Google’s native recorder and several third-party alternatives across dozens of meetings, I’ve put together the most complete guide to recording Google Meet in 2025 — covering every plan, every device, and the workarounds Google doesn’t tell you about.
Can You Record a Google Meet?
Yes — but with significant caveats. Google Meet does include a built-in recording feature, but it is only available on paid Google Workspace plans (Business Standard, Business Plus, Enterprise, and certain Education editions). If you’re using a free @gmail.com account or the Workspace Business Starter plan, you’ll see one of these messages:
- “Recording is unavailable”
- “You’re not allowed to record this video call”
- The Recording option simply doesn’t appear in the Activities panel
When I tested this on a free Gmail account in January 2025, the Activities panel showed Whiteboards and Polls but no Recording option at all. On a Business Starter account, the option appeared but was greyed out with a tooltip pointing to the admin console.
Here’s why you might be blocked from recording:
- Wrong Workspace edition: Free Gmail, Google Workspace Individual, and Business Starter plans do not include recording. You need Business Standard ($14/user/month) or higher.
- Admin has disabled recording: Even on supported plans, your Workspace admin can turn off recording at the organizational unit level via the Admin Console (Apps → Google Workspace → Google Meet → Meet video settings → Recording).
- You’re not the organizer: Only the meeting organizer or someone in the same Google Workspace organization as the organizer can start a recording. External guests cannot record.
- You’re on mobile: Google Meet’s built-in recording only works on desktop (Chrome, Firefox, Edge, or Safari). There is no record button in the iOS or Android Meet apps.
- Google Drive is full: Recordings save to the organizer’s Google Drive. If the Drive is at capacity, the recording will fail.
- 8-hour limit: Recordings automatically stop after 8 hours.
The fastest workaround for all of these limitations: use a desktop screen recorder like Zight. It captures your screen — including the Google Meet window — regardless of your Workspace plan, admin settings, or whether you’re the organizer. I’ve used Zight to record dozens of Meets on a free Gmail account without any issue.
Which Google Workspace Plans Can Record Google Meet?
This is the most common point of confusion. Here’s the definitive breakdown as of January 2025:
| Google Workspace Plan | Monthly Price (per user) | Meet Recording? |
|---|---|---|
| Free Gmail (@gmail.com) | $0 | ❌ No |
| Google Workspace Individual | $9.99 | ❌ No |
| Business Starter | $7 | ❌ No |
| Business Standard | $14 | ✅ Yes |
| Business Plus | $22 | ✅ Yes |
| Enterprise Starter | Contact sales | ✅ Yes |
| Enterprise Standard | Contact sales | ✅ Yes |
| Enterprise Plus | Contact sales | ✅ Yes |
| Essentials | $8 | ✅ Yes |
| Education Plus | Contact sales | ✅ Yes (staff & student licenses) |
| Education Fundamentals | Free for qualifying institutions | ⚠️ Limited (admin must enable) |
If your organization is on Business Starter or a free plan, upgrading to Business Standard solely for Meet recording means paying an extra $7/user/month. For a 50-person team, that’s $4,200/year. A tool like Zight costs significantly less and gives you screen recording, instant file sharing, annotations, and GIF creation on top of meeting capture.
What Does Google Meet’s Built-in Recorder Actually Capture?
Before you hit record, know exactly what you’ll get — and what you won’t. I’ve compared the output of Google Meet’s native recorder against Zight’s screen recording to document the differences.
What the built-in recorder captures:
- ✅ Video and audio of all participants (active speaker view)
- ✅ Screen shares and presentations
- ✅ In-meeting chat messages (saved as a separate .SBV file)
- ✅ The active speaker’s video tile highlighted
What it does NOT capture:
- ❌ Private/direct messages in the chat
- ❌ Annotations on shared documents
- ❌ Live captions (these are generated in real-time and not saved in the recording file)
- ❌ Other windows or applications on your screen
- ❌ System notifications or pop-ups
- ❌ Breakout room content (only the main room is recorded)
- ❌ Participant gallery view — only the active speaker and shared content are captured
That last point surprised me. When I tested Google’s recorder in a 12-person meeting, I expected to see the gallery grid. Instead, the recording only showed the active speaker’s tile plus the shared screen. If you need to capture the full gallery view (useful for workshop-style meetings or team retrospectives), a screen recorder like Zight captures exactly what you see on your screen — including all video tiles, your browser tabs, and any annotation overlays you add.
Method 1: How to Record Google Meet with the Built-in Recorder (Paid Workspace Plans)
If you’re on a supported Workspace plan and have recording permissions, here’s the step-by-step process. It takes about 10 seconds.
Step 1: Join or start the meeting on desktop
Navigate to meet.google.com or click the meeting link from your Google Calendar invite. Make sure you’re using a Chromium-based browser (Chrome or Edge work best) or Firefox. The recording feature does not work in the mobile app.
Step 2: Open Activities and start recording
- Look at the bottom-right corner of the Meet interface. Click the Activities icon — it looks like a triangle, square, and circle grouped together.
- In the side panel that opens, click Recording.
- Click Start recording.
- A consent dialog will appear: “Let everyone know. This meeting is being recorded. Everyone in the meeting will be notified that the recording has started.” Click Start.
All participants will see a red REC indicator in the top-left corner of their Meet window. A voice announcement also plays: “This meeting is being recorded.”
Step 3: Stop the recording
You have two options:
- Manual stop: Click Activities → Recording → Stop recording → Confirm.
- Automatic stop: The recording stops automatically when the last participant leaves the meeting or after 8 hours, whichever comes first.
Step 4: Find and share your recording
After the meeting ends, Google processes the recording. In my testing, a 45-minute meeting took about 10–15 minutes to process. Once ready:
- The recording file (MP4) is saved to the meeting organizer’s Google Drive under My Drive → Meet Recordings.
- An email with the recording link is sent to the organizer and the person who started the recording.
- If the meeting was created from a Google Calendar event, the recording link is also added to the Calendar event.
- A separate
.SBVfile with the chat transcript is saved alongside the video.
Pro tip: The recording is saved to the organizer’s Drive, not yours — unless you are the organizer. If you started the recording but didn’t create the meeting, ask the organizer to share the Drive file with you. This catches people off guard regularly.
Method 2: How to Record Google Meet for Free with Zight (Any Account)
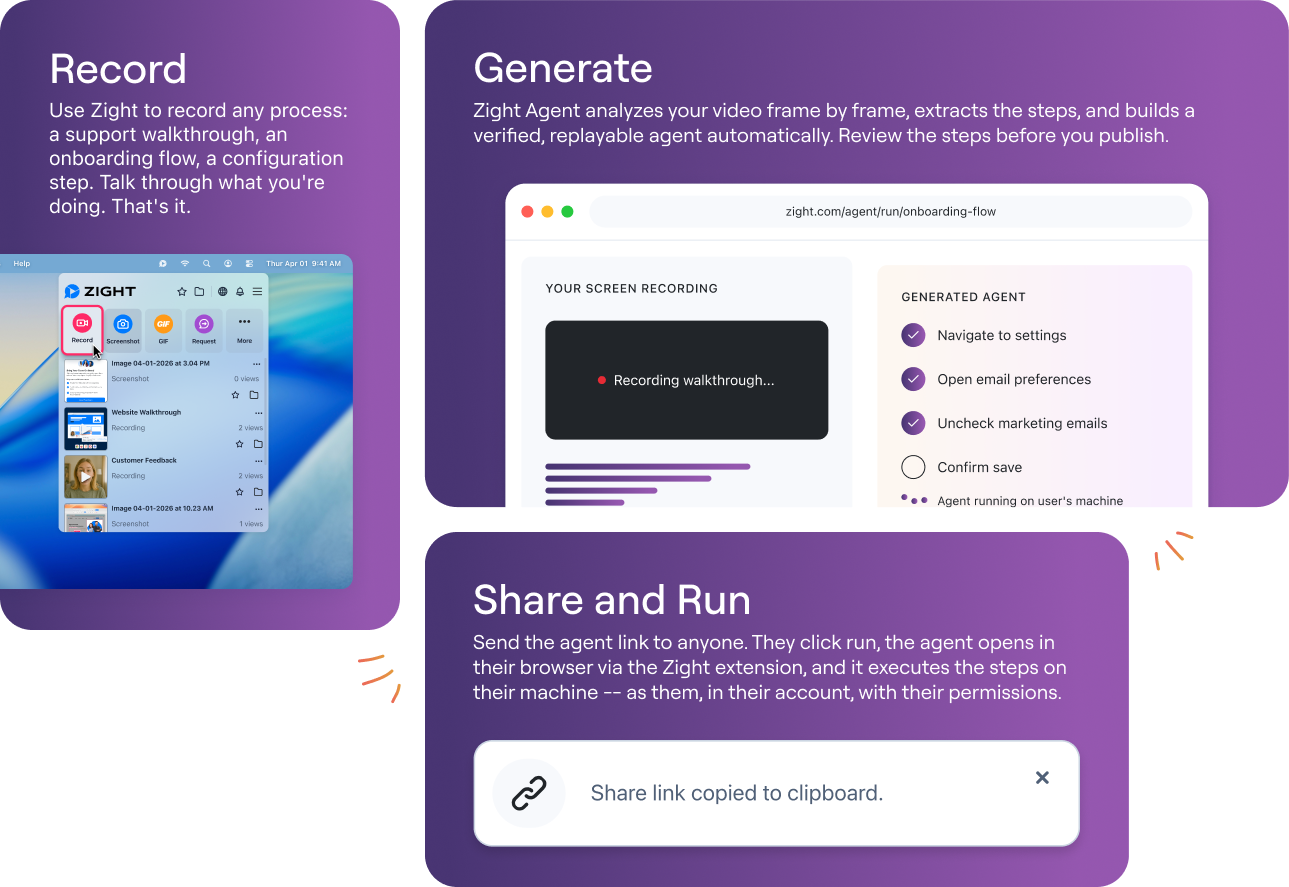
Zight is a screen recording, screenshot, and async video tool for Mac, Windows, and Chrome. It records whatever is on your screen — including Google Meet — regardless of your Workspace plan. There’s no dependency on admin permissions, no notification sent through Google’s system, and no 8-hour processing wait. When you stop recording, Zight uploads the video to its cloud and gives you a shareable link instantly.
I’ve used Zight to record Meet calls on a free Gmail account, on Business Starter, and even when joining as an external guest to a client’s Enterprise meeting. It works in all three scenarios identically.
Step 1: Install Zight
Download the Zight desktop app for Mac or Windows, or install the Zight Chrome extension. The desktop app gives you the most control (system audio capture, webcam overlay, annotation tools), but the Chrome extension works well if you only need tab-level recording.
Step 2: Configure your recording settings
- On Mac: Click the Zight icon in the menu bar → Record Screen. Choose to record your full screen, a specific window, or a custom region. Toggle System Audio on to capture the meeting audio (macOS 14 Sonoma and later supports this natively; on earlier versions, Zight installs a lightweight audio driver during setup).
- On Windows: Click the Zight icon in the system tray → Record Screen. Select your capture area. System audio is captured by default on Windows.
- On Chrome: Click the Zight extension icon → Record Tab. This captures the Google Meet tab, including audio.
Step 3: Join your Google Meet and start recording
Join the Google Meet as you normally would. Once you’re in the meeting, press your Zight recording hotkey (default: ⌘+Shift+6 on Mac, Ctrl+Shift+6 on Windows) or click Start Recording in the Zight widget. A small recording indicator appears on your screen.
Step 4: Stop recording and share
Click the stop button or press the same hotkey. Zight automatically uploads the recording and copies a shareable link to your clipboard. You can paste that link into Slack, email, Notion, Jira — anywhere. No waiting for Google Drive to process. No hunting for the file in someone else’s Drive.
In my testing, a 30-minute 1080p recording uploaded in under 90 seconds on a standard broadband connection. The resulting file was about 85 MB — compared to Google’s native recorder, which produced a 120 MB file for a similar-length meeting (Google records at a fixed quality; Zight lets you adjust resolution).
Pro tip: After recording, use Zight’s built-in trimmer to cut out the first 30 seconds of “can you hear me?” and the last minute of goodbyes. It takes two clicks — drag the start and end handles, then save. The trimmed version replaces the original at the same shareable link, so anyone you’ve already sent the link to sees the clean version.
Method 3: How to Record Google Meet on iPhone and Android
Google Meet’s built-in recording does not work on mobile — period. If you need to capture a Meet session from your phone or tablet, you’ll need to use your device’s native screen recorder.
On iPhone (iOS 17+)
- Open Control Center (swipe down from the top-right corner on iPhones with Face ID, or swipe up from the bottom on older models).
- Long-press the Screen Recording button (circle icon).
- Toggle the Microphone on to capture meeting audio through your phone’s mic.
- Tap Start Recording. A 3-second countdown begins.
- Switch to the Google Meet app and proceed with your meeting.
- To stop, tap the red status bar at the top of the screen → Stop.
- The recording is saved to your Photos app.
Limitation: iOS captures audio through the microphone, not directly from the app’s audio output. If you’re in a noisy environment, the recording quality will suffer. Using AirPods or headphones routes the output audio to your ears instead of the mic, so you may only capture your own voice. For best results, use a quiet room with the phone on speaker mode.
On Android (Android 11+)
- Swipe down from the top of the screen to open Quick Settings.
- Tap Screen Recorder (you may need to swipe left to find it, or tap the pencil/edit icon to add it to Quick Settings).
- Choose your audio source: Device audio (captures the meeting audio directly), Device audio and microphone (captures both), or Microphone only.
- Tap Start. A countdown begins.
- Open Google Meet and join your call.
- To stop, swipe down and tap Stop in the notification panel.
- The recording is saved to your Gallery/Files app.
Android has a significant advantage here: the “Device audio” option captures the meeting’s audio output directly, resulting in much cleaner recordings than iOS.
Google Meet Built-in Recording vs. Zight: Feature Comparison
After using both extensively, here’s an honest side-by-side comparison:
| Feature | Google Meet (Built-in) | Zight Screen Recorder |
|---|---|---|
| Price to record | $14+/user/month (Business Standard) | Free plan available; paid from $9.95/month |
| Works on free Google accounts | ❌ No | ✅ Yes |
| Requires admin permission | Yes | No |
| Must be meeting organizer | Yes (or same org) | No |
| Records on mobile | ❌ No | Desktop only (use native mobile recorder) |
| Participant notification | Yes — visual + audio alert to all | No Meet-level notification |
| Captures gallery view | ❌ Active speaker only | ✅ Whatever is on your screen |
| Captures other windows | ❌ No | ✅ Full screen or custom region |
| Webcam overlay | Built into Meet | ✅ Picture-in-picture webcam bubble |
| Annotation tools | ❌ None | ✅ Draw, arrows, text during recording |
| Video trimming | ❌ Download and use separate editor | ✅ Built-in trim editor |
| Instant shareable link | ❌ Wait for processing (10–30 min) | ✅ Link copied to clipboard on stop |
| Storage location | Organizer’s Google Drive | Zight cloud (download option available) |
| Max recording length | 8 hours | Depends on plan (5 min free, unlimited paid) |
| Output format | MP4 | MP4, GIF, or link |
| Viewer analytics | ❌ No | ✅ See who viewed and when |
Where Google’s built-in recorder wins: It’s zero-setup if you’re already on a paid Workspace plan, it automatically captures all participant audio in the highest quality (direct stream, not screen capture), and the chat transcript is saved as a separate file. For organizations already paying for Business Standard or higher, it’s the path of least resistance.
Where Zight wins: Everything else — especially for teams on free plans, external guests, or anyone who wants to share recordings instantly without waiting for Drive processing. The annotation and trim tools also mean you can create a polished recording without ever opening a separate video editor.
Where Are Google Meet Recordings Saved?
This trips people up more than any other step. Here’s exactly where to find your recordings depending on your method:
Built-in Google Meet recordings:
- Location: The meeting organizer’s Google Drive → My Drive → Meet Recordings folder.
- Format: MP4 video file + .SBV chat transcript file.
- Access: An email with the recording link is sent to the organizer and the person who started the recording. The link is also attached to the Google Calendar event if the meeting was scheduled via Calendar.
- Processing time: 10–30 minutes after the meeting ends (longer meetings take longer to process).
- Retention: Recordings stay in Drive until manually deleted. They count against the organizer’s Drive storage quota.
Zight recordings:
- Location: Zight’s cloud dashboard (accessible at share.zight.com or in the desktop app).
- Format: MP4, viewable directly from a shareable link. Download option available.
- Access: Shareable link is copied to your clipboard the moment you stop recording. You can also organize recordings into team collections for collaborative access.
- Processing time: Typically under 2 minutes for upload + processing.
- Retention: Depends on your plan. Paid plans include unlimited storage.
Pro tip: If you’re using Google’s built-in recorder and can’t find the recording, check the organizer’s Drive — not yours. This is the #1 support question we see from teams. If you organized the meeting via Calendar but someone else started the recording, the file still goes to your Drive as the organizer.
Why Should You Record Your Google Meet Meetings?
Recording meetings isn’t just about having a backup — it fundamentally changes how your team works. After using meeting recordings daily for over two years, here are the use cases that deliver the most value:
1. Catch up teammates in different time zones
Instead of scheduling meetings that force someone to join at 6 AM, record the session and share the link. With Zight, you can even add a webcam-overlay summary video that gives a 2-minute overview with timestamps — so the viewer doesn’t have to watch the entire recording.
2. Replace written meeting notes
Meeting notes are subjective. A recording is the source of truth. When a disagreement arises about what was decided in the sprint planning session, the recording settles it instantly.
3. Onboard new hires without repeating yourself
Record your recurring team meetings, process walkthroughs, and tool demos. Build a library of recordings that new employees can watch during their first week. We’ve seen teams using Zight cut onboarding time by 40% by sharing recorded meetings instead of scheduling 1-on-1 recap calls.
4. Create training and documentation from live sessions
A recorded Q&A session or product demo becomes a reusable training asset. Trim the recording, add annotations to highlight key moments, and share it via Zight’s shareable links — no need to produce a separate training video from scratch.
5. Review client conversations accurately
Customer success and sales teams benefit enormously from recorded calls. Revisit the exact phrasing a client used to describe their problem, share the recording with the product team for context, and reduce the game of telephone that happens between meetings and Jira tickets.
Can You Record Google Meet Without Permission? (Legal and Ethical Guide)
This is a question we see frequently, and it’s important to address it directly.
Technically: Yes, a desktop screen recorder like Zight can record your screen — including a Google Meet session — without triggering Google Meet’s participant notification system. Unlike Google’s built-in recorder, which announces “this meeting is being recorded” to all attendees, a screen recorder operates at the OS level and is invisible to other meeting participants.
Legally and ethically: You should always inform participants before recording. Here’s why:
- One-party vs. two-party consent: In the United States, laws vary by state. Some states (like California, Florida, and Illinois) require all parties to consent to recording a conversation. Other states only require one party (the recorder) to consent. If you have participants in multiple states or countries, the strictest law applies.
- GDPR (EU/UK): Recording someone without their knowledge likely violates GDPR data processing requirements, as video and audio constitute personal data.
- Workplace policies: Many organizations have internal policies about recording meetings. Check with your HR or legal team.
- Trust: Beyond legality, recording without telling people erodes trust. A simple “I’d like to record this for the team — is that OK?” takes five seconds and builds goodwill.
Best practice: Announce at the start of every recorded meeting: “I’m going to record this so the team can review it later. Does anyone object?” If you’re using Zight, you can even add a webcam intro at the beginning of the recording noting the consent — creating a clear record of permission.
7 Tips for Better Google Meet Recordings
After recording hundreds of Google Meet sessions, these are the practices that consistently produce the best results:
- Use a wired internet connection if possible. Wi-Fi drops cause audio glitches in recordings that are impossible to fix later. A wired ethernet connection eliminates this.
- Close unnecessary tabs and apps. If you’re recording your full screen with Zight, stray Slack notifications and email popups will appear in the recording. Use “Do Not Disturb” mode on macOS (
⌘+Control+D) or Focus Assist on Windows (Settings → System → Focus Assist). - Pin the speaker. In Google Meet, click the three dots on a participant’s tile and select “Pin.” This keeps their video front and center in the recording, which is especially useful if you’re screen-recording with Zight.
- Use an external microphone. Built-in laptop mics pick up keyboard clicks, fan noise, and room echo. A $40 USB microphone (like the Samson Q2U or Fifine K669) dramatically improves audio quality.
- Record in 1080p. In Google Meet, go to Settings → Video → Send resolution and set it to the highest available. In Zight, ensure your recording resolution is set to 1080p (the default for paid plans).
- Trim immediately after recording. The first and last few minutes of most meetings are filler. With Zight’s built-in trimmer, you can cut these in seconds before sharing the link.
- Add a title and description. In Zight’s dashboard, rename your recording from “Screen Recording 2025-01-15” to something meaningful like “Q1 Sprint Planning — Jan 15.” Future-you (and your team) will thank you when searching for it later.
Troubleshooting: Common Google Meet Recording Issues
Even with everything set up correctly, recording issues happen. Here are the most common problems and their fixes:
“Recording is unavailable” error
Cause: Your Google Workspace plan doesn’t support recording, or your admin has disabled it.
Fix: Ask your admin to check Admin Console → Apps → Google Workspace → Google Meet → Meet video settings → Recording. If your plan doesn’t support it, use Zight instead.
Recording started but no file appeared in Drive
Cause: The organizer’s Google Drive was full, or the recording was under 2 seconds (which Google discards).
Fix: Check the organizer’s Drive storage. Free up space or upgrade the storage plan. Also, allow 30+ minutes for processing after the meeting ends before assuming the file is missing.
Recording has no audio
Cause (built-in recorder): This is rare but can happen if participants were muted or if there was a temporary audio stream disconnection.
Cause (Zight / screen recorder): System audio capture wasn’t enabled. On macOS, Zight requires a one-time permission grant: System Settings → Privacy & Security → Screen & System Audio Recording → Zight → toggle on.
Fix: Always do a 10-second test recording before the actual meeting to verify audio capture.
Recording is blurry or low resolution
Cause: Google Meet dynamically adjusts video quality based on bandwidth. If your connection dropped during the call, the recording reflects that reduced quality.
Fix: Use a wired connection and close bandwidth-heavy applications (cloud sync, streaming, large downloads). In Google Meet settings, manually set the send and receive resolution to the highest available.
Frequently Asked Questions
Can you record Google Meet for free?
Not with Google’s built-in recorder — that requires a paid Google Workspace plan (Business Standard at $14/user/month or higher). However, you can record Google Meet for free using a third-party screen recorder. Zight offers a free plan that includes screen recording up to 5 minutes per clip, which is sufficient for quick discussions. For longer meetings, Zight’s paid plans start at $9.95/month with unlimited recording length.
Can you record a Google Meet if you’re not the host?
Using Google’s built-in recorder: only if you’re in the same Google Workspace organization as the meeting organizer. External guests cannot start a recording. Using Zight: yes — since it records your screen rather than using Google’s recording API, it works regardless of whether you’re the host, a participant, or an external guest.
Does Google Meet tell people when you’re recording?
Google’s built-in recorder: yes. All participants see a red “REC” badge and hear a voice announcement. A third-party screen recorder like Zight: no notification is sent through Google Meet. However, you should always inform participants before recording (see the legal section above).
How long does it take for a Google Meet recording to appear?
Google’s built-in recordings typically take 10–30 minutes to process after the meeting ends, depending on the meeting length. Zight recordings are available almost immediately — usually within 1–2 minutes of stopping the recording.
Can you record Google Meet on your phone?
Not with Google’s built-in recorder (desktop only). On iPhone, use the iOS Screen Recording feature (Control Center). On Android 11+, use the built-in Screen Recorder in Quick Settings. See the detailed mobile instructions above.
Where do Google Meet recordings go?
Built-in recordings are saved to the meeting organizer’s Google Drive in the “Meet Recordings” folder. A link is emailed to the organizer and the person who started the recording. Zight recordings are saved to Zight’s cloud with an instant shareable link.
Can you record a Google Meet breakout room?
Google’s built-in recorder only captures the main meeting room — not breakout rooms. If you need to record a breakout room session, use Zight to screen-record while you’re in the breakout room.
Start Recording Your Google Meet Calls Today
Recording Google Meet shouldn’t require a $14/user/month Workspace upgrade, admin approval, or organizer privileges. Whether you’re a customer success manager recording client calls, a developer capturing a bug triage session, or a remote worker who needs to share a meeting with a teammate in another timezone, the process should be simple: press record, stop, share.
If you’re on a paid Google Workspace plan with recording enabled, the built-in method works fine — follow Method 1 above. But if you’re locked out of native recording, or you want instant shareable links, video trimming, annotations, and viewer analytics, give Zight a try. It takes 60 seconds to install, and your first recording is free.


