
Screen recording is a valuable skill, whether you’re a tech enthusiast, a dedicated gamer, or a professional looking to create high-quality training materials. To get the job done right on your Windows PC, you’ll want the best screen recorder with audio and use the proper steps.
Also, to be on the safe side, the best way to screen record on Windows should cater to you no matter the purpose. This will help minimize the need for multiple applications and ease. In this article, we’ll explore the top available options to record your screen with audio and provide a step-by-step guide. Let’s dive in and learn how to capture your vision.
The Best Screen Recorder for Windows – Zight

Zight is a screen recording software that simplifies creating high-quality videos, GIFs, and screenshots. Its screen recording feature is a convenient tool for training employees and assisting clients with troubleshooting, among other benefits.
With Zight, you can effortlessly share screen recordings with your clients, and it seamlessly integrates with project-tracking tools and productivity apps that your teams use daily. Using the drag-and-drop feature, your teams can easily insert content into Google Docs or Microsoft Office or embed it in emails.
Now, let’s explore how to install Zight and then how to screen record on Windows:
How to Install Zight on Windows
Installing Zight on your Windows 10 or 11 PC is straightforward. Follow these simple steps to install Zight:
a). Visit the Zight Website – Open your web browser and go to the official Zight website.
b). Navigate to the Download Section – Once on the Zight website, look for a section labeled “Download Zight” or similar.
c). Choose Your Windows Version – Select the version corresponding to your operating system, which is essential to ensure compatibility.
d). Download Zight – Click on the download link for the version of Zight that matches your Windows operating system.
e). Run the Installer – Locate the installer file once the download is complete. It is usually in your computer’s Downloads folder. Double-click the installer file to run it.
f). Follow and Complete the Installation Wizard – The Zight installation wizard will guide you through installation. After configuring your settings, click “Install” or “Finish” to begin the installation.
g). Launch Zight – Once the installation is complete, you can launch Zight by locating its shortcut on your desktop or Windows Start Menu and double-click the Zight icon to open the application.
How to Record Your Screen on Windows with Zight
Now that you have Zight installed, you can begin recording your screen by following these steps:
- Launch Zight: Open Zight from your desktop or start menu.
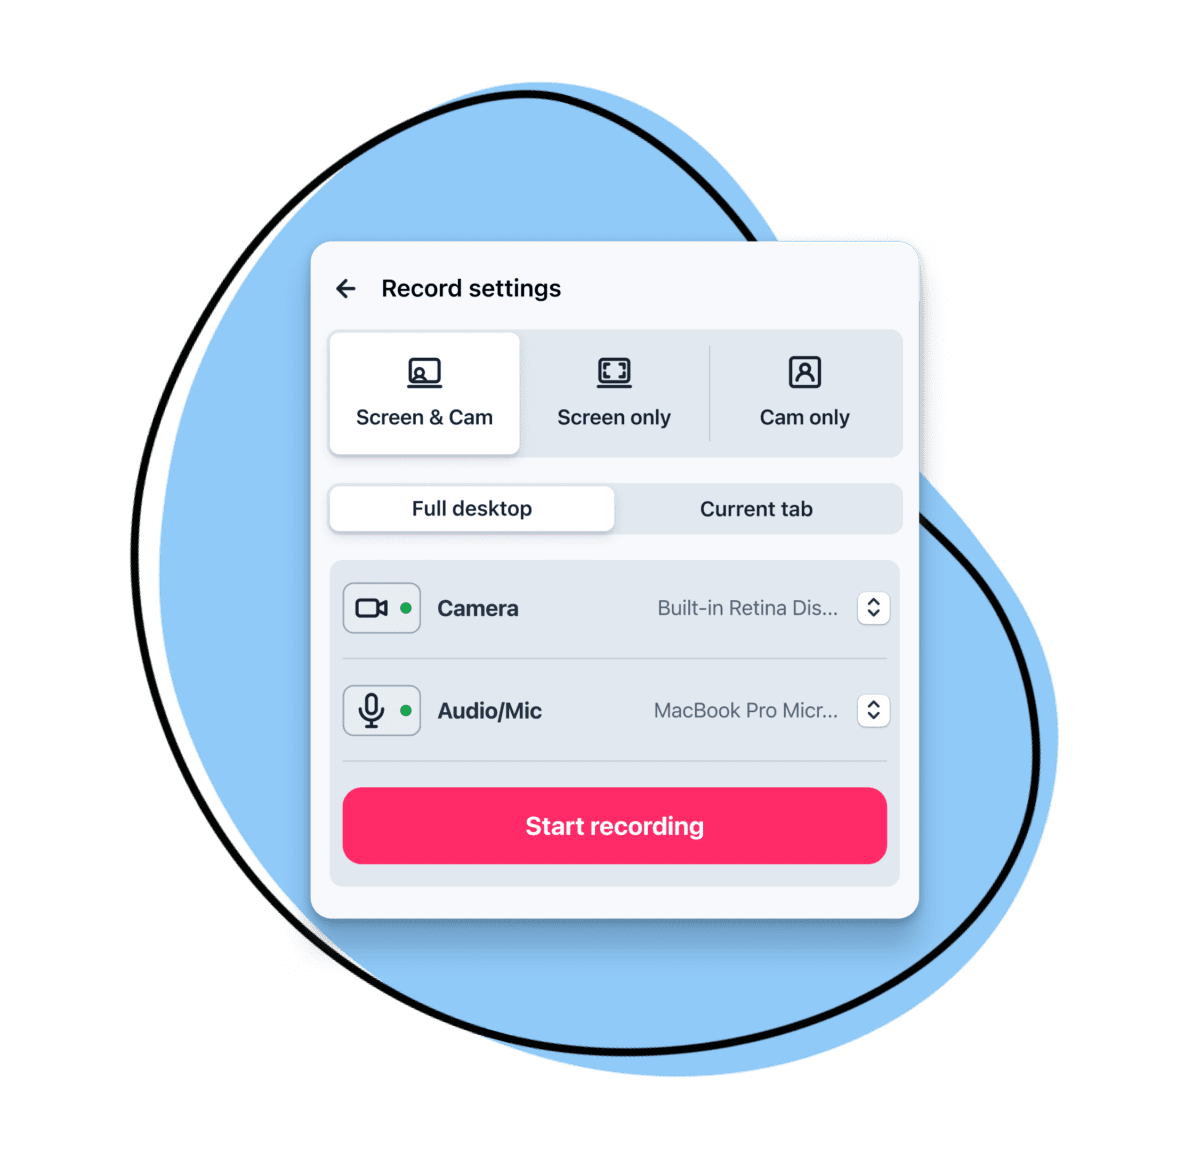
- Configure Recording Settings: Before you start recording, configure your recording settings. You can choose the area of the screen to capture either full screen or selected region, choose between screen and cam or screen or cam only.
- Select the Audio Source: On the Zight Windows app, click the drop-down menu on Audio/Mic. This will be set to No Audio; you want to change that to your PC’s speakers, e.g., Realtek High Definition Audio.
- Start Recording: Click the “Record” button to begin your screen recording. Zight will start capturing your screen and audio based on your configured settings.
- Perform Your Screen Recording: Carry out the activities you want to capture on your screen.
- Stop Recording: After recording, click the “Stop” red button within the Zight interface.
- Edit (If Needed): Zight provides built-in editing features, so you can trim, crop, or enhance your recording as required.
- Save Your Recording: After editing (if necessary), save your recording to your preferred location on your Windows computer.
You’ve successfully installed Zight on your Windows 10 or Windows 11 system and recorded your screen. Enjoy high-quality screen recordings with this versatile and user-friendly software.
Keyboard Shortcuts on Windows
In your Zight app, you can configure and employ different keyboard shortcuts according to your preferences. For screen recording:
- Launch your Zight app.
- Use the keyboard shortcut ‘Alt + Shift + 6‘ to activate the Record function.
- Once the recording tab is displayed, you can enable the microphone and camera and set a recording time limit. Then, initiate the recording by clicking the blue Start button, and when you’re finished, click the red button.
- When the file is ready for sharing, press Ctrl + V to paste the link to your team.
What are the Benefits of Using Zight as a Windows Screen Recorder with Audio?
- High-Quality Screen Recording: Zight will offer excellent video quality, ensuring crisp and clear recordings. Say goodbye to grainy or pixelated captures.
- Audio Recording: Zight doesn’t just capture video; it also records audio. Whether you need to record your voice, system audio, or both simultaneously, Zight has you covered.
- Versatile Screen Recording: Zight allows you to record your entire screen, a specific application window, or even a selected portion of your screen.
- User-Friendly Interface: Zight boasts an intuitive and user-friendly interface. You don’t need to be a tech expert to start recording your screen; Zight makes it accessible for everyone.
- Advanced Features: Zight comes packed with advanced features for professional-grade recordings. From adjustable frame rates to custom recording settings, it provides the tools you need.
- Editing Capabilities: Zight offers built-in editing features, making it easy to trim, crop, and enhance your recorded video without needing external editing software.
- Microphone and System Audio: Whether you want to record from your microphone or capture system audio, Zight gives you a choice. You can even record both simultaneously for a comprehensive recording experience.
- Reliable Customer Support: Zight provides robust customer support, so you’re never left in the dark. Contact their support team for assistance if you encounter any issues or have questions.
How Can You Use Zight?
Zight is versatile and fits a wide range of use cases. Here are some examples of how Zight can benefit you:
- Gaming: Record your gameplay with high-quality video and audio to share on platforms like YouTube or Twitch.
- Educational Content: Create how-to and instructional videos or online courses with ease.
- Webinars: Host and record webinars for future reference or sharing.
- Product Demos: Showcase your software or products with live demonstrations.
- Business Presentations: Record professional business presentations with screen recordings and audio for reference or distribution.
Other Top Windows Screen Recorders:
If, for any reason, you are unable to utilize the Zight screen recording feature, there are alternative free options available on your devices. You can explore alternatives such as the Windows Snipping Tool and the Xbox Game Bar, which are well-known choices for Windows PCs. Let’s take a look at each:
1. Windows Snipping Tool
The Windows Snipping tool is a built-in screen recorder on every Windows OS and is completely free. It captures images from your screen and lets you choose a section of your screen to begin recording a video.
Here are the steps to follow to screen record using a Windows snipping tool:
- Set up the region or window you want to record.
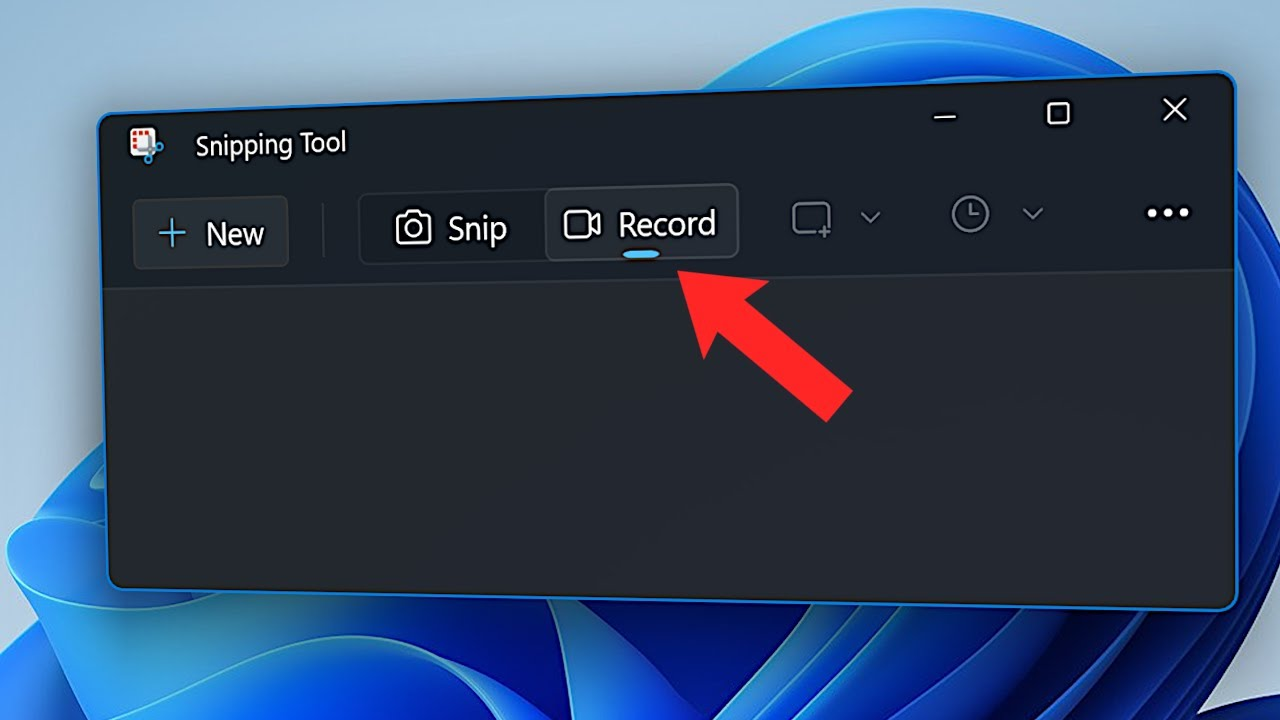
- Open the Snipping Tool app or use the Win + Shift + S shortcut.
- Next, click on its video camera icon, then click click New.
- From the recording toolbar, select your recording preferences, then click Start. You can click Pause if you need to change something on your screen, then resume when you sort everything.
- Once done, click Stop, then Save.
Unlike the Zight tool, you’ll need to save this recording as an MP4 file to share it with your teams later. In addition, you cannot annotate your recordings as you can with the Zight app.
2. Xbox Game Bar

Xbox Game Bar is seamlessly integrated into Windows 11 as a native application and is also available as an add-on. It’s equipped with various gaming-related features, including access to game-specific widgets and the ability to chat with friends while indulging in Xbox games. Additionally, the free screen recorder provides a widget for capturing and recording your screen:
- To enable the Xbox Game Bar, open it, press Windows+G, or look for it in the Start menu search.
- Click the Camera icon to capture your screen as a video or a screenshot.
- If you’re recording a video, turn off your microphone by clicking the Microphone icon.
- Start recording by clicking the Record button (it looks like a white circle).
- When you’re done, hit the Stop button (it looks like a white square where the Record button was).
- To see your recordings, choose “Show all captures” at the bottom of the window.
How to Choose the Best Screen Recording Software for Windows?
Choosing the right screen recording software for your Windows PC can be crucial, especially considering all the available options. Here is a guide to help you choose the best screen recording software for Windows:
1. Define Your Purpose
Before you start your search, determine your primary purpose for screen recording. Ask yourself, “What do I plan to use it for?” Are you into gaming and want to share your gameplay on platforms like YouTube or Twitch? Do you need it for archiving conferences or hosting webinars? Is it for educational purposes or business presentations?
Knowing your intended use is essential because different screen recording tools prioritize features such as picture quality, sound, precision, and more. To make the best choice, ensure your priorities align with the capabilities of the software you select.
2. User-Friendly Interface
Convenience matters. Ensure that the software you choose has a user-friendly interface. Is it easy to use, even for someone without prior experience? You don’t want to end up with a tool that requires extensive training or constant customer support. Avoid tools that need extensive training or frequent customer support inquiries.
3. Price and Licensing
Understand the pricing model of the software. Is it a free version or a paid solution? If it’s paid, you should understand if there’s a free trial period with limitations.
Also, some free tools may hide advanced features behind a paywall, limit video length, or add watermarks to recordings. Knowing all the conditions and what you’re signing up for is essential. Then, evaluate your budget and the specific features you need before deciding.
4. Editing Functionalities
Check if the software provides adequate editing capabilities. You wouldn’t want to choose a screen recording tool only to discover that it lacks the necessary editing features since not all have built-in features. Ensure the software aligns with your editing needs, whether trimming, cropping, joining, or more advanced editing tasks, as these can make your life easier.
5. Screen-Recording Options
Investigate how the software records your screen since the screen-recording capabilities vary between tools. Some tools can record the entire screen, while others can record the screen in specific areas. Find out how the software records your screen and audio. Does it support microphone input, system audio recording, or both simultaneously?
Can it superimpose a webcam feed over the screen capture, and whether it promises high-quality recordings without watermarks or time limits? Additionally, check for the quality of the recording; you don’t want a grainy mess. Ensure the software’s capabilities match your requirements.
6. Sharing Options
If you plan to share your recordings, consider how the software facilitates this. Most tools allow you to save recordings in various formats (e.g., GIF, MP4) and share them on platforms like YouTube or cloud services. Also, check if you can generate sharing links for cloud-based sharing. Ensure the screen recorder software aligns with your file-sharing preferences.
7. Customer Support
Don’t underestimate the importance of accessible customer support. Although it might not seem a top priority, it can be crucial when encountering issues or having questions.
Having reliable customer support can save you from spending time searching for solutions online. Ensure the software you choose offers customer support options, especially if it’s a lesser-known tool.


