As a marketing or sales pro, which is your best approach to communicate better, whether with teams or clients? If you ask us at Zight, you should incorporate video into your business.
If you look at video marketing statistics, you’ll notice that most people prefer watching videos to reading text. In fact, video now accounts for more than 82% of all website traffic. That’s four-fifths of internet users wanting to watch something – so how can you easily record videos for your business communication?
Not sure where to start? Good that you’re here today! In this article, we want to show you how to create videos with only your Acer laptop. We are going to tell you how to screen record on Acer laptops using Zight’s screen recorder and other native tools so that you can tap into the benefits of video marketing today!
1. Best Screen Recording Tool for Acer: Zight
Do you want to create different types of videos for your business, including training videos, explainer videos, and how-to videos? Or maybe you’re trying to fix software bugs? One of the easiest ways is to record on your desktop or laptop screen.
Screen recording is crucial for businesses because you can bridge the gap between face-to-face communication and text – you can show and tell, provide simple-to-follow steps, and maintain human interaction.
To record your Acer laptop screen, you need the most reliable screen recording software – and that would be Zight.
It is the most advanced screen recorder for Windows laptops like Acer, HP, Dell, Lenovo, and even Chromebook – you can use it to record, annotate, edit, share, and collaborate on your videos – the latter makes asynchronous communication easy.
On your Acer laptop, open your favorite browser, search for https://zight.com/windows/, and click download. If you don’t have an account, you can create one and then install the app. It’s a productivity tool, too, so do get the Chrome Extension to screen record when working on Chrome – without leaving your workflow!
Ready to screen record? Here are some tips to help you navigate the app or extension:
- Once you download the app, pin it to your Acer laptop taskbar for easy accessibility. You can also pin your Chrome extension at the top bar, so you never have to leave your window when you need to screen record!
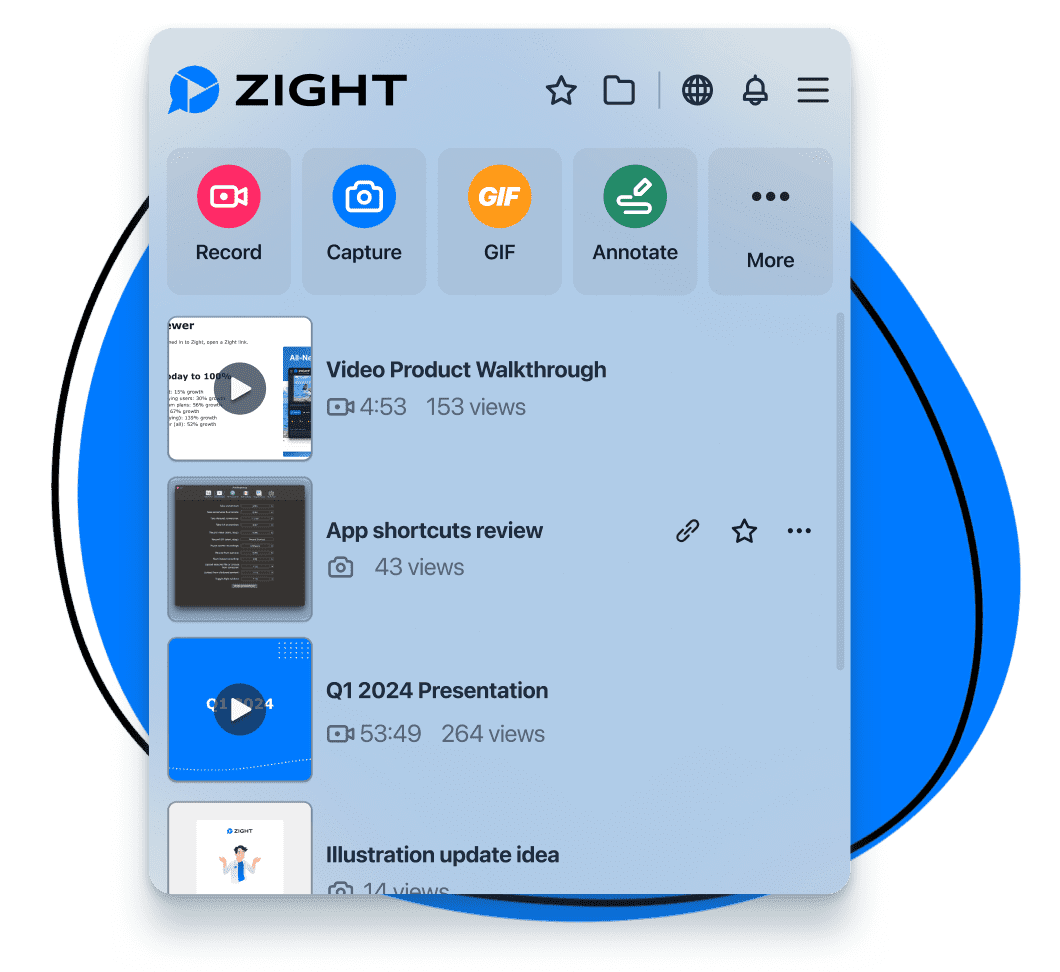
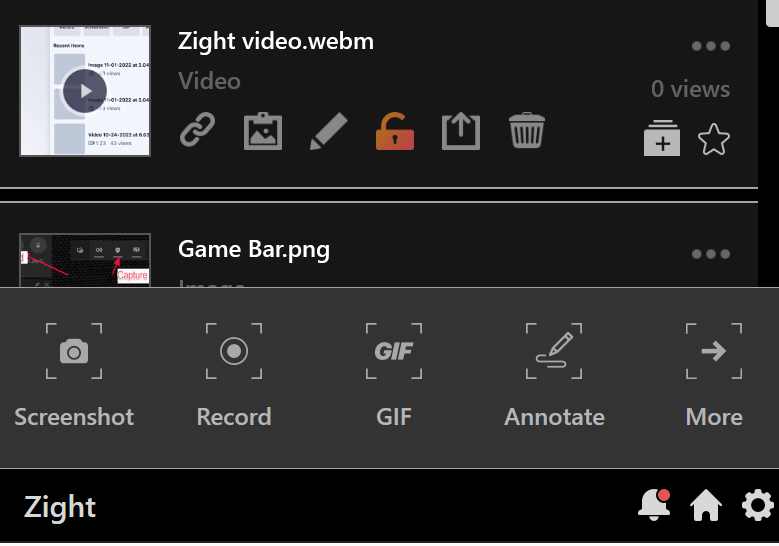
- Zight offers several features – Screenshot, Record, GIF, Annotate, and a “More” button for even more features and shortcuts. For the purposes of this article, we will focus on using the Record feature.
- Once you record your video, you can always access it from the app’s “Items” list. You can lock it, copy the content or link, preview the content in the viewer, share it, delete it, add it to a collection (especially for team projects), or star it.
I. How to screen record on Acer laptop with the Zight app:
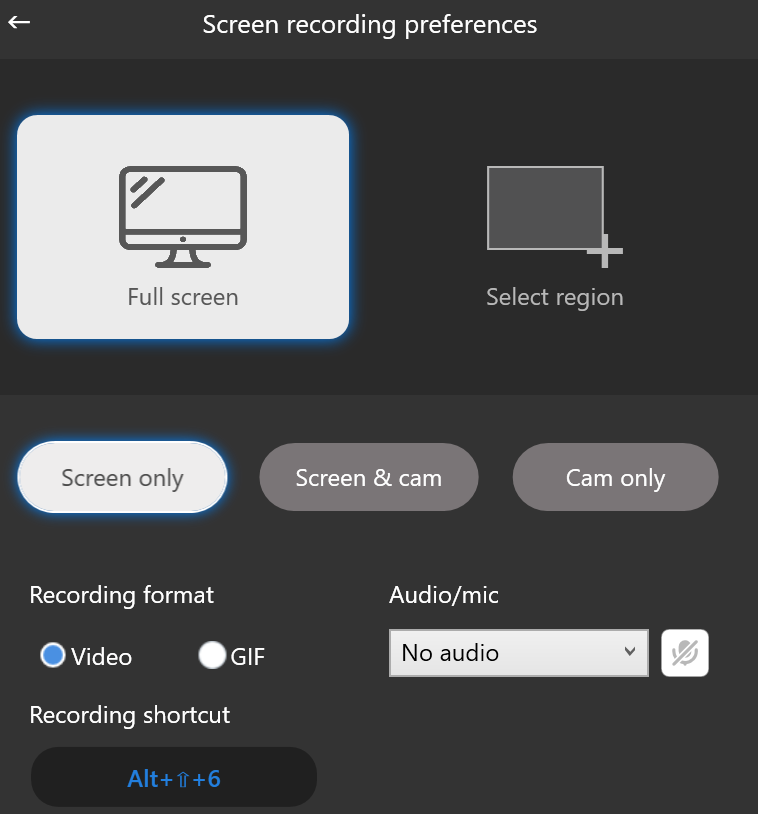
- Open the Zight app and click Record or the Windows shortcut Alt + Shift + 6 to open a few screen recording preferences, the main being whether to record “Full Screen” or “Select Region.”
- Choose how to screen record between “Screen Only” and “Screen & Cam” – the former for only recording what’s on your Acer screen, and the latter will feature a webcam overlay on the screen you’re recording so you can speak to your viewer as you go. There’s a third option for “Cam Only,” but this records your webcam only, so it doesn’t apply to screen recording – though you might want to know how to record with your webcam for pre-meetings and virtual meetings.
- Select either “Video” or “GIF.” Video allows you to record longer videos with audio, while you can only record 15-second GIFs without audio.
- If you are going with a video and will be speaking, click the mic icon under “Audio/Mic” and choose your mic from the dropdown menu. You can use the native mic or an external one you might be connected to to record audio.
- If you’re also recording “Screen & Cam,” select your camera under the “Camera” menu if you have an external high-quality camera. If you don’t, you can use your native Windows webcam.
- Click the blue “Start Recording” button. You’ll get a 3-second timer to get your setup in order before you can start recording.
II. How to Annotate Your Acer Laptop Screen Recording
As you use the Zight screen recorder, you can pause anytime to annotate the video.
Want to highlight something? Throw in an arrow or a shape. You can even put in timers to draw attention to specific areas. When you’re done, just hit resume and keep going.
III. How to Edit Your Recorded Video
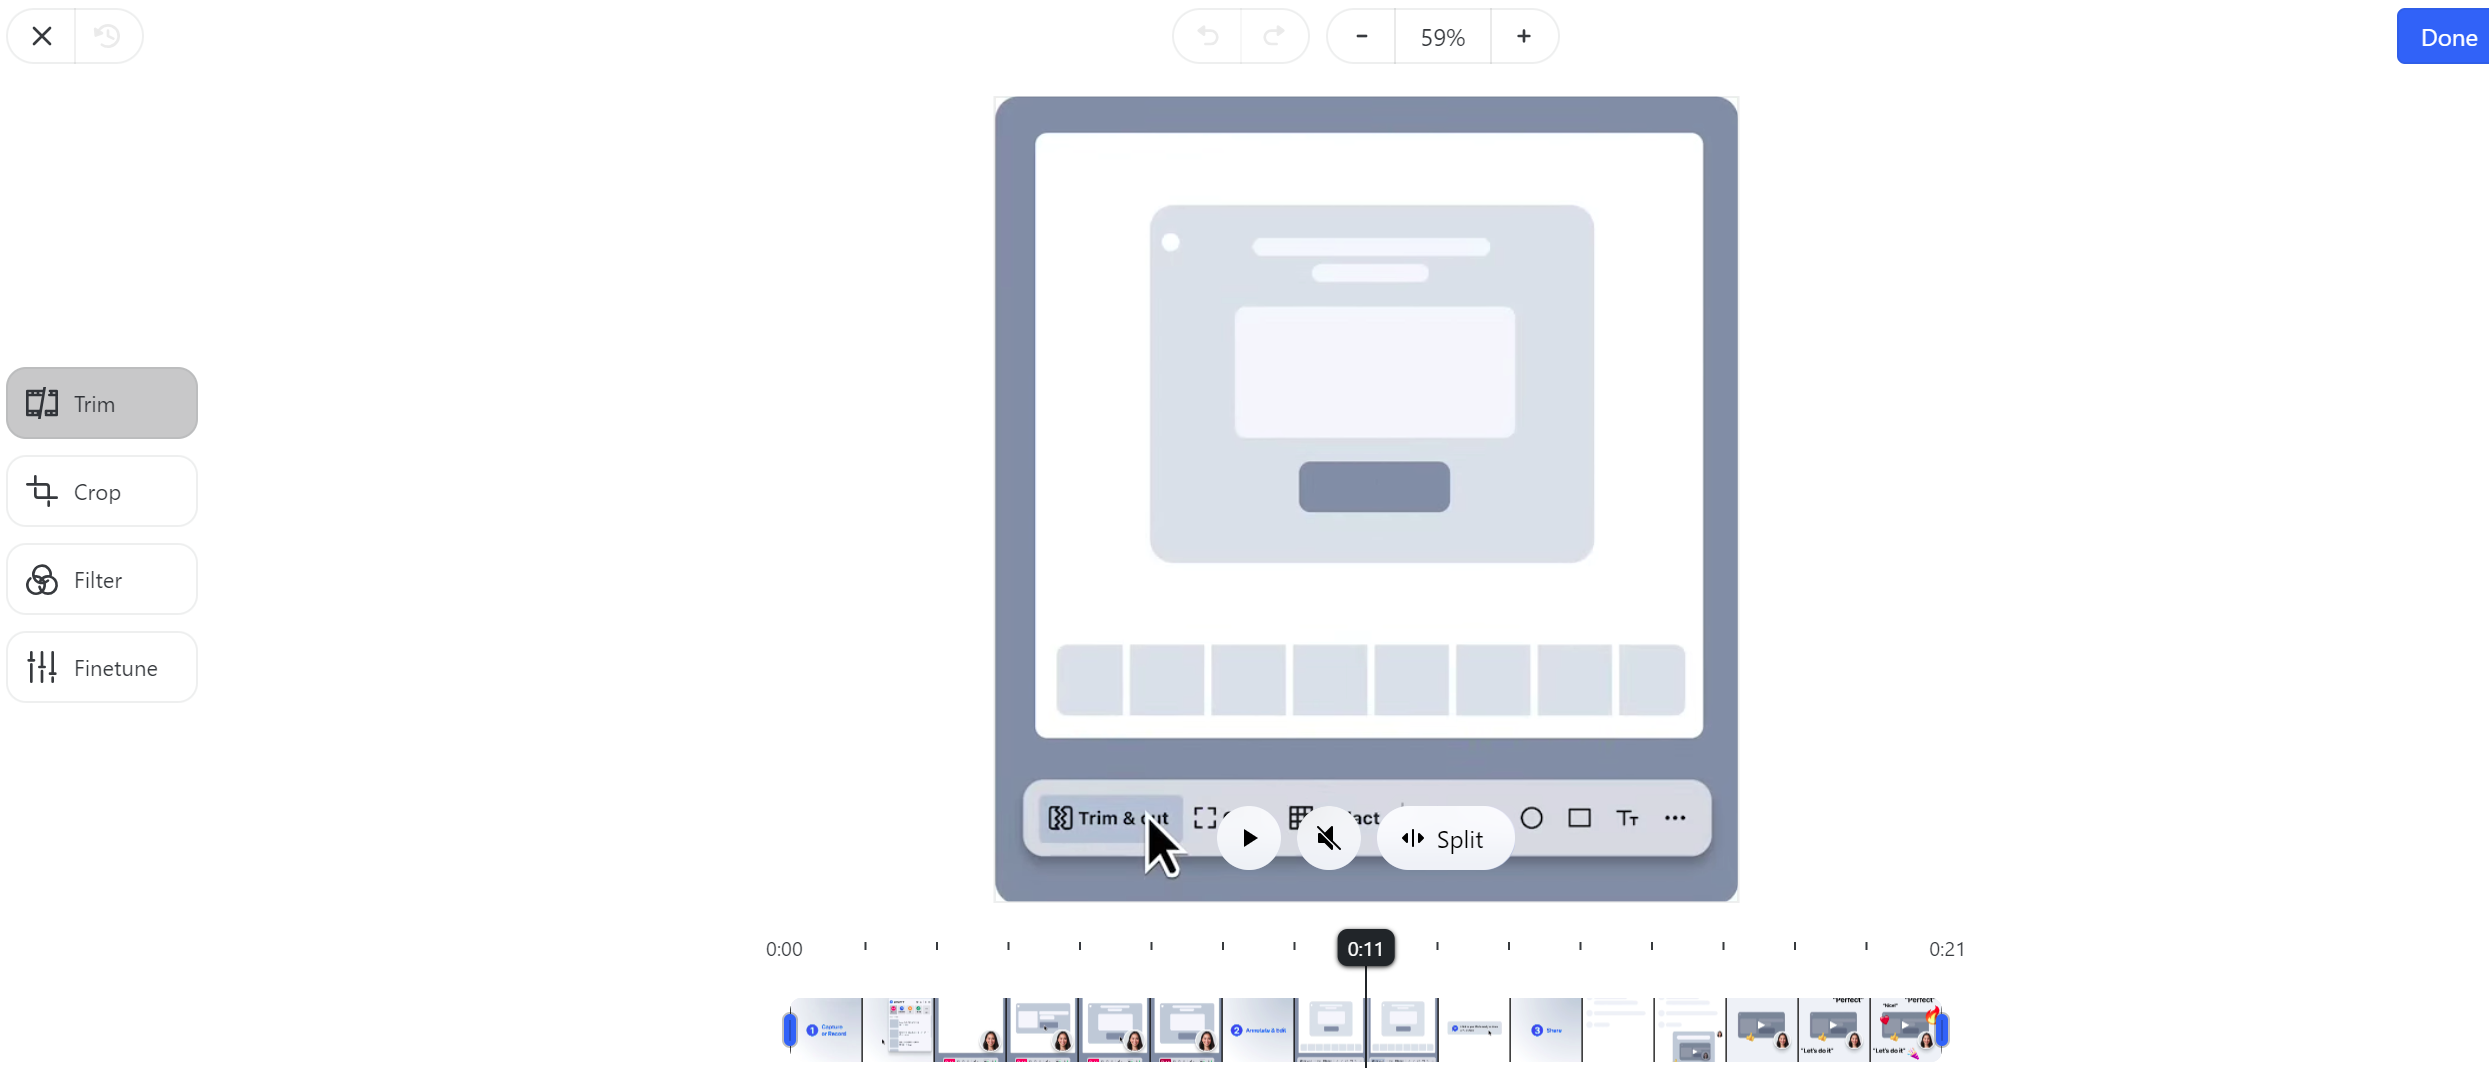
When done, click the green “Finish” button, and Zight will automatically save your recording for your cloud storage. The video link will also be copied to your clipboard, and Zight will open it automatically on your default browser.
To edit your video, you can trim the awkward pauses, split and merge sections, set viewing permissions, add expiry dates to your links, and even crop the video.
Zight also has the best AI features to improve video delivery and distribution. You can use these to add captions, add titles, and transcribe your video content in different languages for different audiences.
When you finish editing, click the “Save Changes” button; all left is for you to share the computer screen recording.
IV: How to Share Your Acer Screen Recording
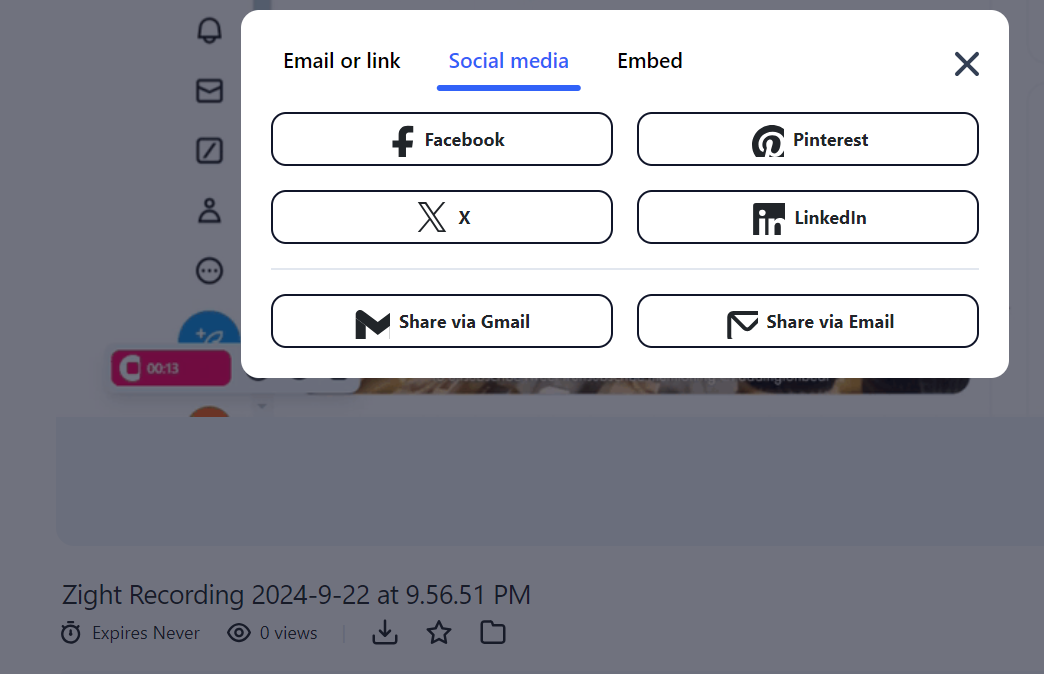
Zight lets you share large videos with so much ease. If you’ve just finished recording, the software will copy the video link to your clipboard – paste that link anywhere – Slack, Trello, Asana, WhatsApp, you name it.
You can also embed the video file into email marketing campaigns, and if you want to upload it to YouTube or store it offline, hit the “Download” button on your Zight dashboard, and it will save to your Downloads Folder on Acer.
You can also upload the video to your website – click “Share” on your dashboard and hit “Embed” to generate the HTML code. Copy and paste to WordPress. Alternatively, you can share your video directly to social media platforms like Facebook, Pinterest, X (formerly Twitter), Instagram, and LinkedIn.
The best part? Anyone can watch your video, even if they don’t have Zight. No downloads, no fuss!
How to Record Screen on an Acer Laptop Using Built-in Windows Tools
While Zight is our top pick, your Acer laptop has built-in quick capture options. Let’s check them out:
2. The Windows Snipping Tool
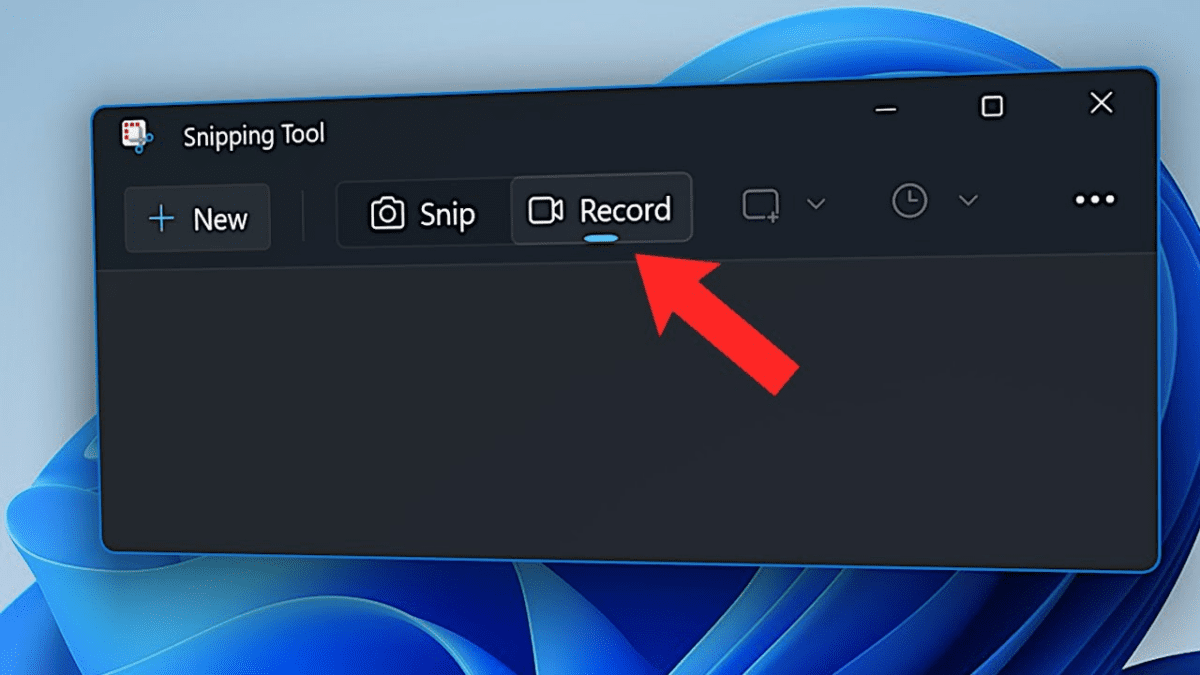
Every Windows laptop comes pre-equipped with the Snipping Tool. It’s the native screenshots tool, but if you’re running on Windows 11, you can use it to screen record on Acer!
Here’s how:
- Press the Start button, type “Snipping Tool” into the search bar, and select the application from the results.
- In the Snipping Tool interface, look for the ‘Record’ button. This may be located in the ‘Mode’ dropdown menu or displayed as a separate button.
- Click on ‘New’ to initiate a new recording. You’ll then be able to select the specific area of your screen you wish to capture. Click and drag the cursor to define the recording frame.
- Click the ‘Start’ button to begin recording. There will be a brief countdown before the recording starts. During the recording, you can pause or stop the session using the controls on the screen.
- When finished, the tool may prompt you to save the file. Choose an appropriate location on your system to save the file for easy retrieval.
The Snipping Tool is excellent for quick captures but is pretty basic. You can’t add annotations while recording or do any fancy editing afterward. Also, remember that this video recording feature is only available on Windows 11. If your Acer is running an older version of Windows, you can only take screenshots with the Snipping Tool.
Plus, you can only upload the entire recorded video to share.
3. Windows Xbox Game Bar
The Xbox Game Bar is a built-in feature for Windows that allows users to record gameplay, capture screen activity, and broadcast live without needing any additional software. It’s particularly geared towards gamers but can be useful for any activity where screen recording is required. Here’s how to use it on your Acer laptop, Windows 10 or 11:
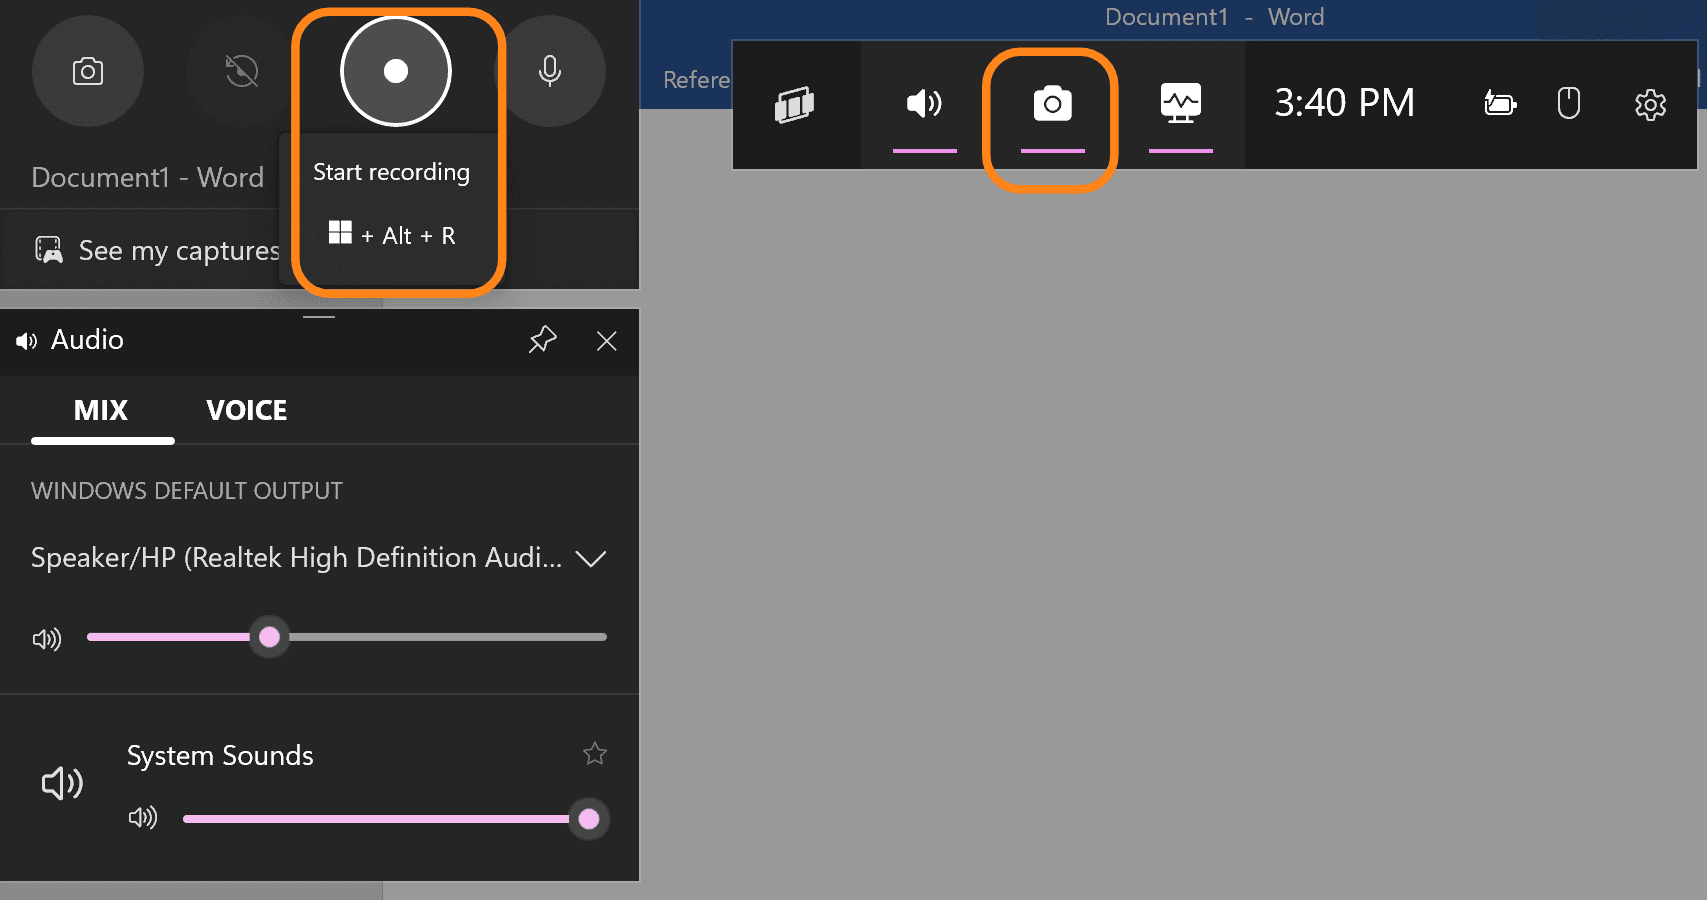
- Press the Windows key + G on your keyboard to open the Xbox Game Bar. If it’s your first time using it, you might need to confirm that you want to open the game bar.
- Look for the capture widget. It usually pops up automatically, but if not, click the camera icon in the top menu.
- Click the record button (a circle icon) or use the shortcut Windows key + Alt + R to start recording. A small recording bar will appear, usually in a corner of your screen, showing you the duration of your capture.
- Do your thing – whether it’s a software demo, a tutorial, or capturing a tricky bug. When you’re done, click the stop button on the floating bar or use the Windows key + Alt + R again.
- Once you’ve stopped recording, a notification will pop up in Windows. You can click this notification to view the recording. By default, videos are saved in the ‘Videos’ folder under ‘Captures’.
You can customize settings like the default save location, video quality, and more by going into the settings menu of the Xbox Game Bar. Access this by clicking the settings gear in the Xbox Game Bar.
The Game Bar is more flexible than the Snipping Tool. You can record audio from your microphone along with system audio, which is great for narrated tutorials. It also lets you record specific app windows instead of your whole screen.
One limitation: the Game Bar can’t record your Windows desktop or File Explorer. It’s designed for Windows, so keep that in mind when planning your recording.
4. PowerPoint
No, we don’t mean you should create or record a PowerPoint presentation today. But you can use the powerful software to record your Acer laptop screen. Here’s how:
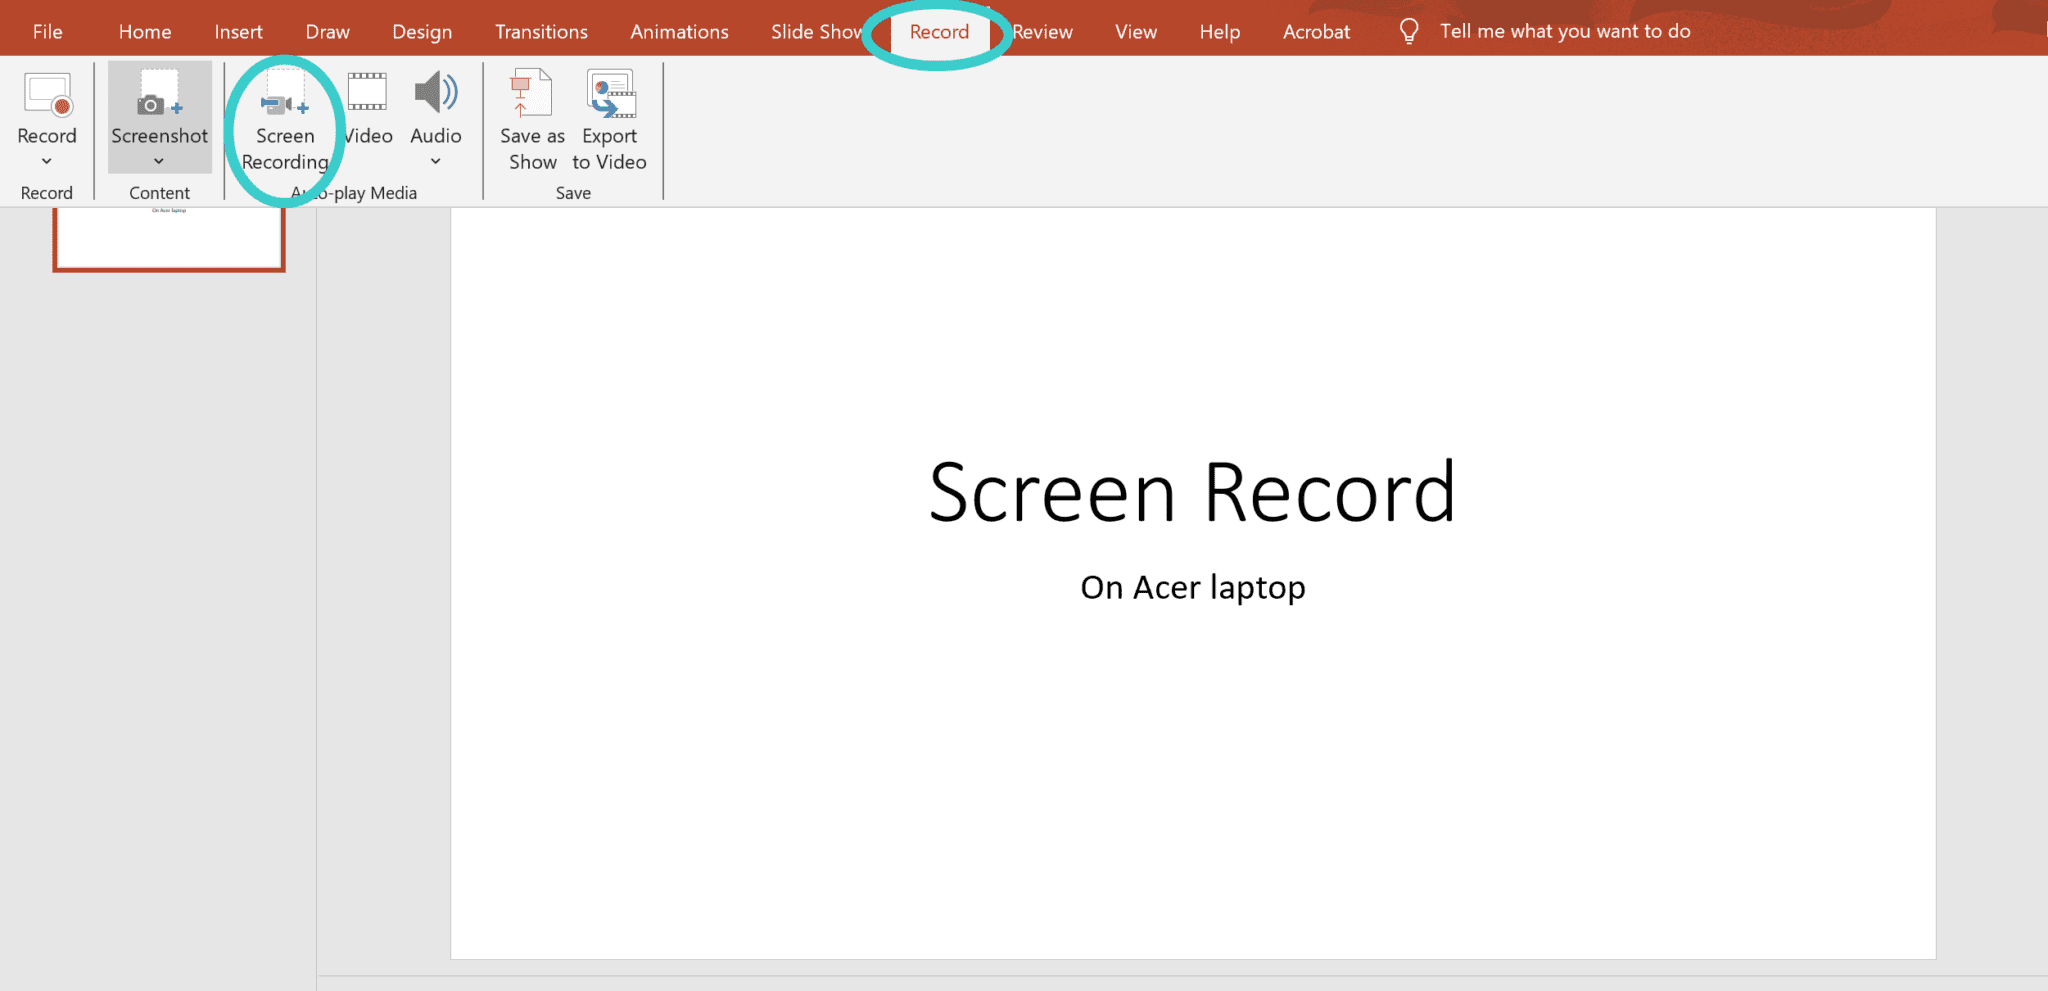
- Start by opening Microsoft PowerPoint. You can create a new presentation or open an existing one where you want to insert your screen recording.
- Select the’ Record’ tab in the PowerPoint ribbon at the top of your screen. You will see the ‘Screen Recording’ option on the left side of the Record toolbar. Click this to initiate the screen recording feature.
- Once you click ‘Screen Recording,’ a small control panel will appear at the top of your screen. Click on ‘Select Area.’ Your cursor will change into a crosshair, which you can use to select the specific part of your screen that you want to record. If you’re going to record the entire screen, just click and drag to cover the entire visible area on the display.
- After selecting the area, go back to the control panel and click ‘Record.’ If you want to record audio (such as narration or system sounds), enable the microphone before you start.
- To end your recording session, you can use the control panel at the top of the screen and click ‘Stop.’ The video will be automatically inserted into the selected slide in your PowerPoint presentation. You can save the video separately, trim it, or embed it within the presentation.
One quirk: PowerPoint’s screen recorder doesn’t capture your mouse cursor by default. If you need to show mouse movements, click the options button in the control bar before you start recording and check “Record Pointer.”
Best Tips for Screen Recording on Acer Laptops
Do you want the best recordings on your Acer laptop? Here are some tips to help you create the most professional video:
- Close unnecessary programs to ensure smooth performance during recording. This minimizes lag and ensures higher-quality video output.
- Check your microphone settings and environment to minimize background noise if your recording requires audio.
- Focus only on the part of the screen that is necessary for your viewers to keep their attention on what matters most.
- Do a short test recording to check for sound clarity and video quality. Adjust settings if needed before starting the actual recording.
- Plan your session with a video script to make the content engaging and easy to follow. You can divide longer recordings into smaller, manageable segments.
Conclusion
It’s easy to screen record on your Acer computer – whether using native tools or the best screen recorders like Zight. But if you want to include webcam recording, we’d recommend using Zight as it’s the only one that makes it easy to record webcam and screen simultaneously. Also, the video will be easier to annotate, edit, and share with any recipient.
So, which screen recorder will you use next time? Whichever tool you choose, remember to declutter your screen, pick the best microphone for superb audio recording, and test with a short video before you record the entire video.


