Do you want to capture the audio playing on your computer but don’t know where to start? If so, you are in the right place today since I will show you exactly how to record computer audio in simple steps.
Imagine you’ve just recorded an amazing gaming sequence to share with friends, but when you play it back, there’s no sound. None of the epic background music, no sound effects, nothing. Just silence. Frustrating, right? This happens because most basic screen recorders only capture what you see and say, not what you hear from your computer.
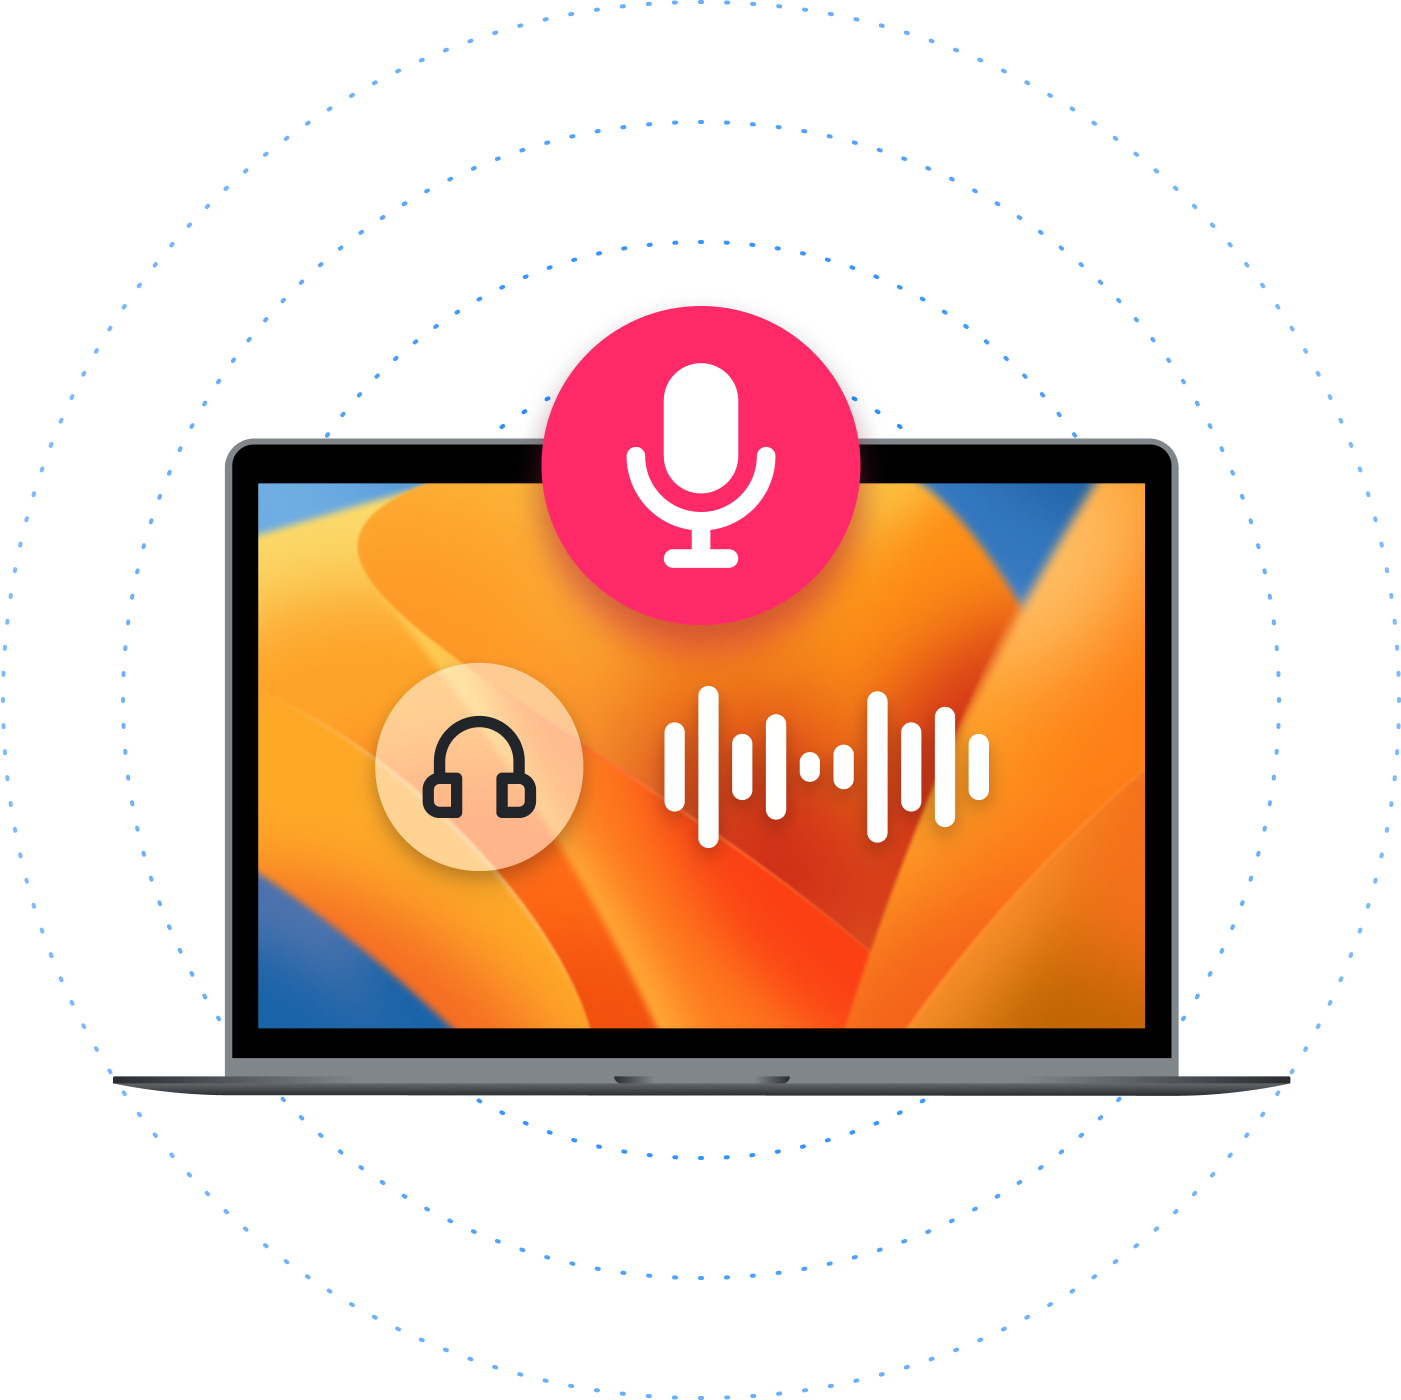
Luckily, Zight lets you record system audio and your mic directly within the screen recorder. In this complete guide, I will use Zight and other native/free tools to demonstrate how to record computer audio on Mac and Windows.
Method 1: Computer Audio Recording With Zight (Best Recommendation)
I’m sure that, by now, you use Zight for most screen and webcam recordings. If not, we have multiple guides on using Zight to screen record, recording your desktop screen, screen recording on Windows, and even how to record screen and audio on Mac. Today, I want to recommend using our new feature – Zight’s computer audio recorder. With this feature, you can record audio from your computer whenever you record the webcam or screen. Before we dive in, let me clarify how system audio is different from your microphone audio. Microphone audio captures external sounds through your microphone hardware (your voice, ambient sounds, etc.) Normally, mic recording is also accessible from the Zight interface, as you can see in the screenshot below: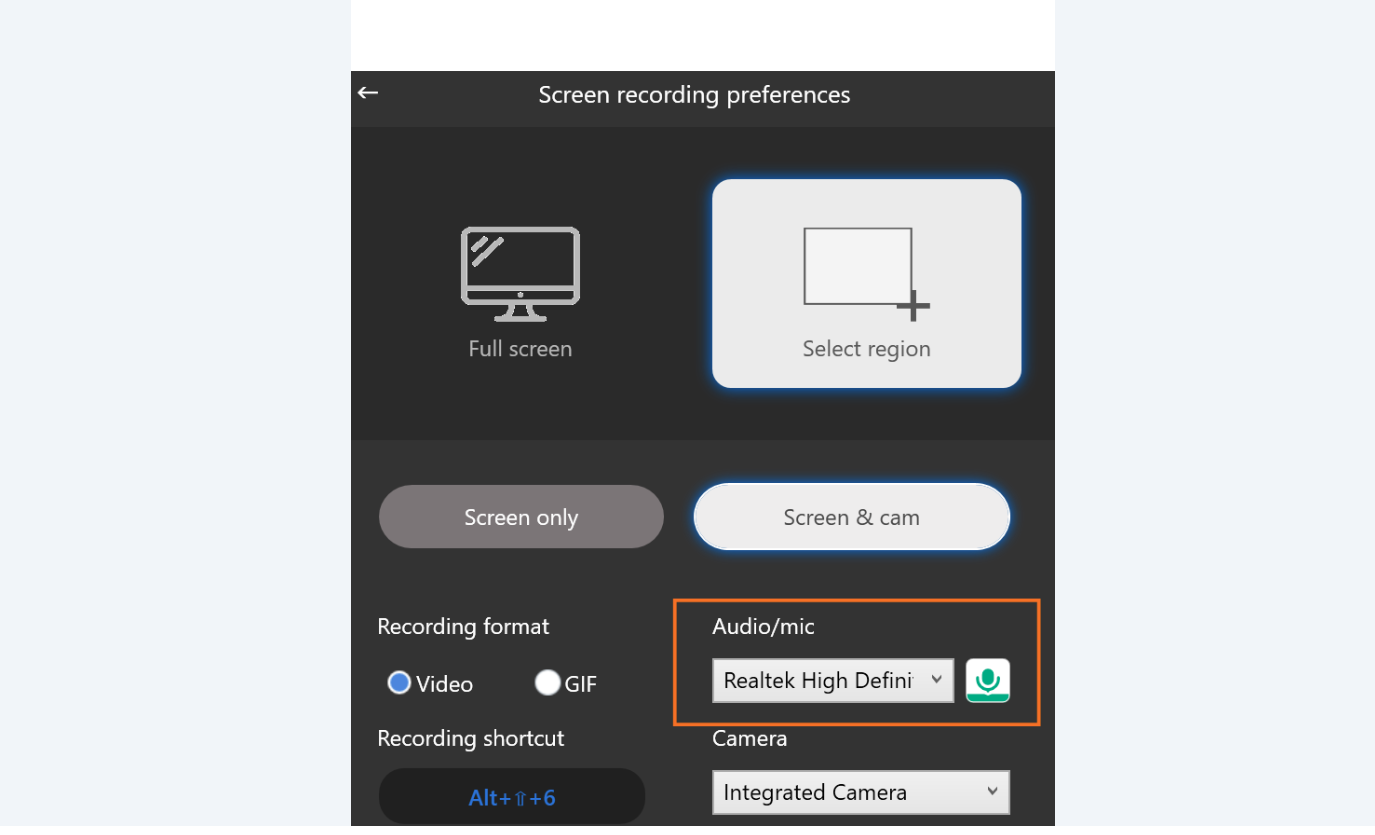 You can easily toggle it on and off before or during a screen recording session. However, it is not the feature you want to use to record desktop audio with Zight (although the Mic recording button will come in handy further down below.) By definition, computer audio (also called system audio) refers to any sound that your computer produces internally – this includes:
 - Sounds from applications (e.g., YouTube videos, Spotify music, saved videos, game sounds)
- System notification sounds
- Audio from web browsers
- Any other audio that would usually come through your speakers/headphones
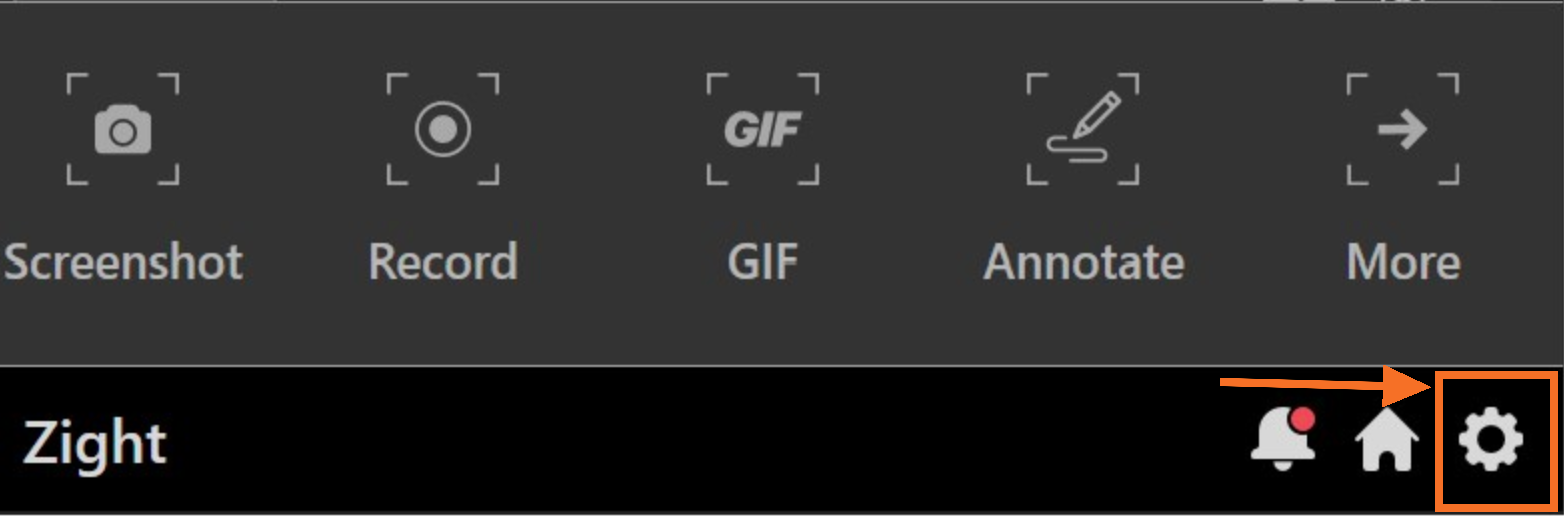 Then, click Settings:
 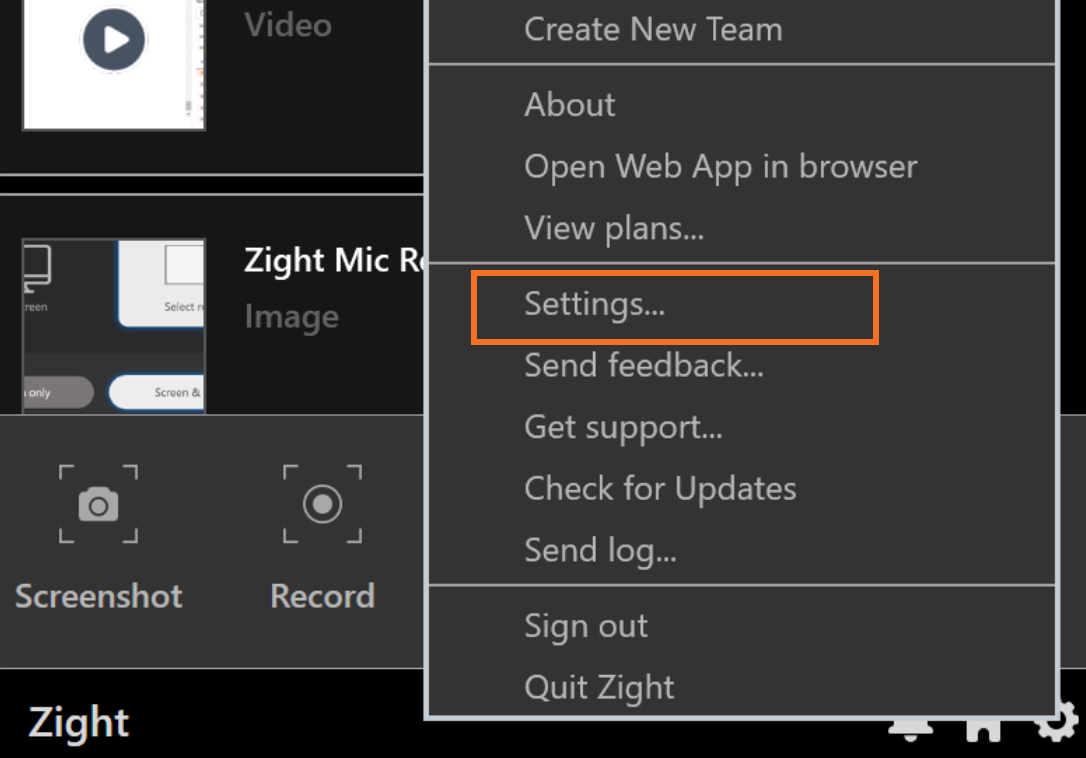 This will bring you to the following page, where you should click Recording, then scroll down to activate the automatic computer audio recorder as follows:
 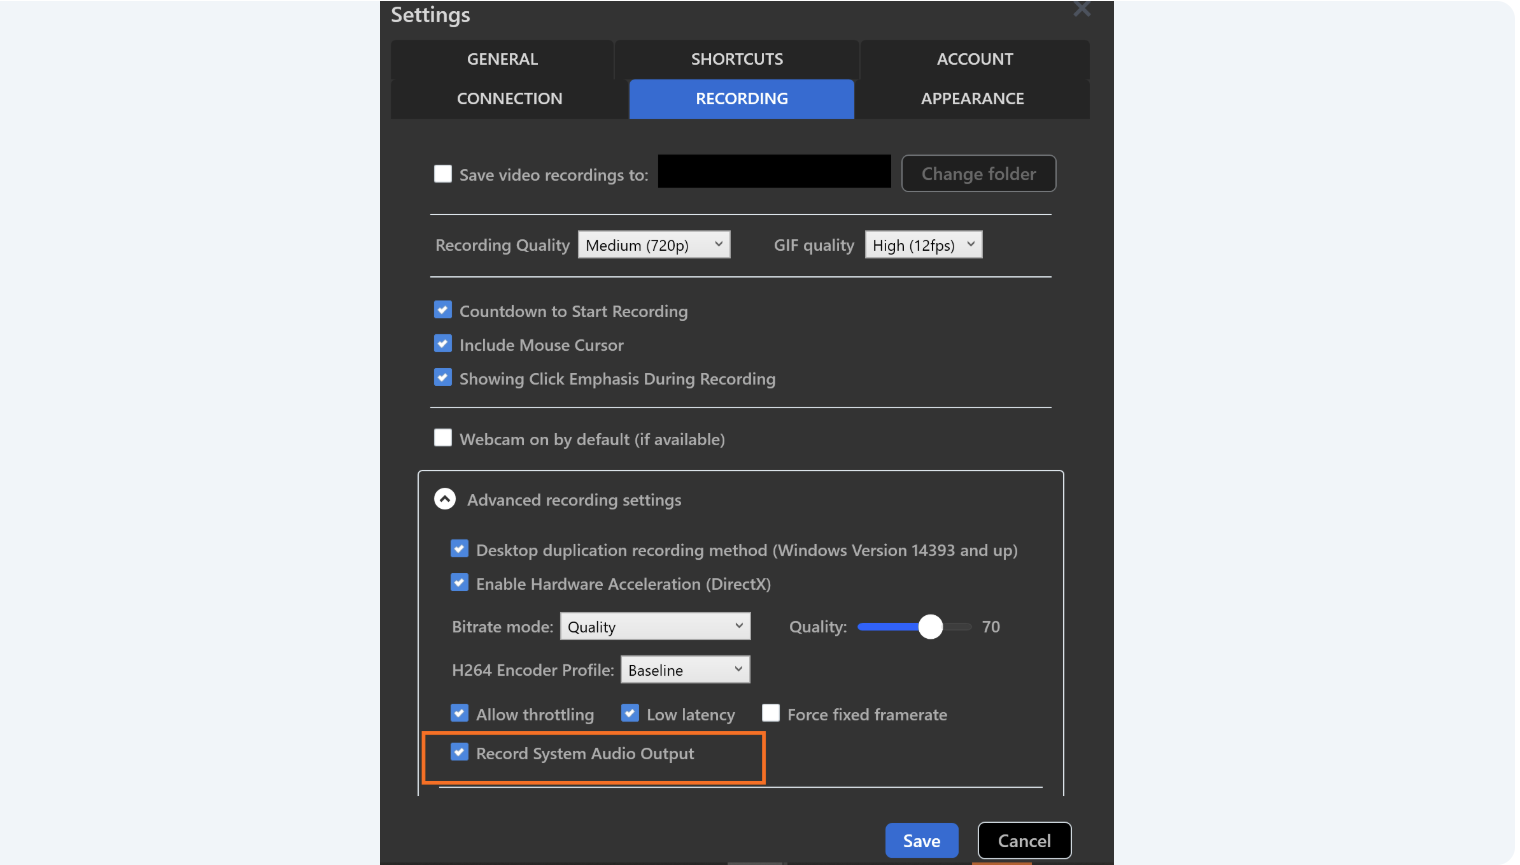 On Mac:
 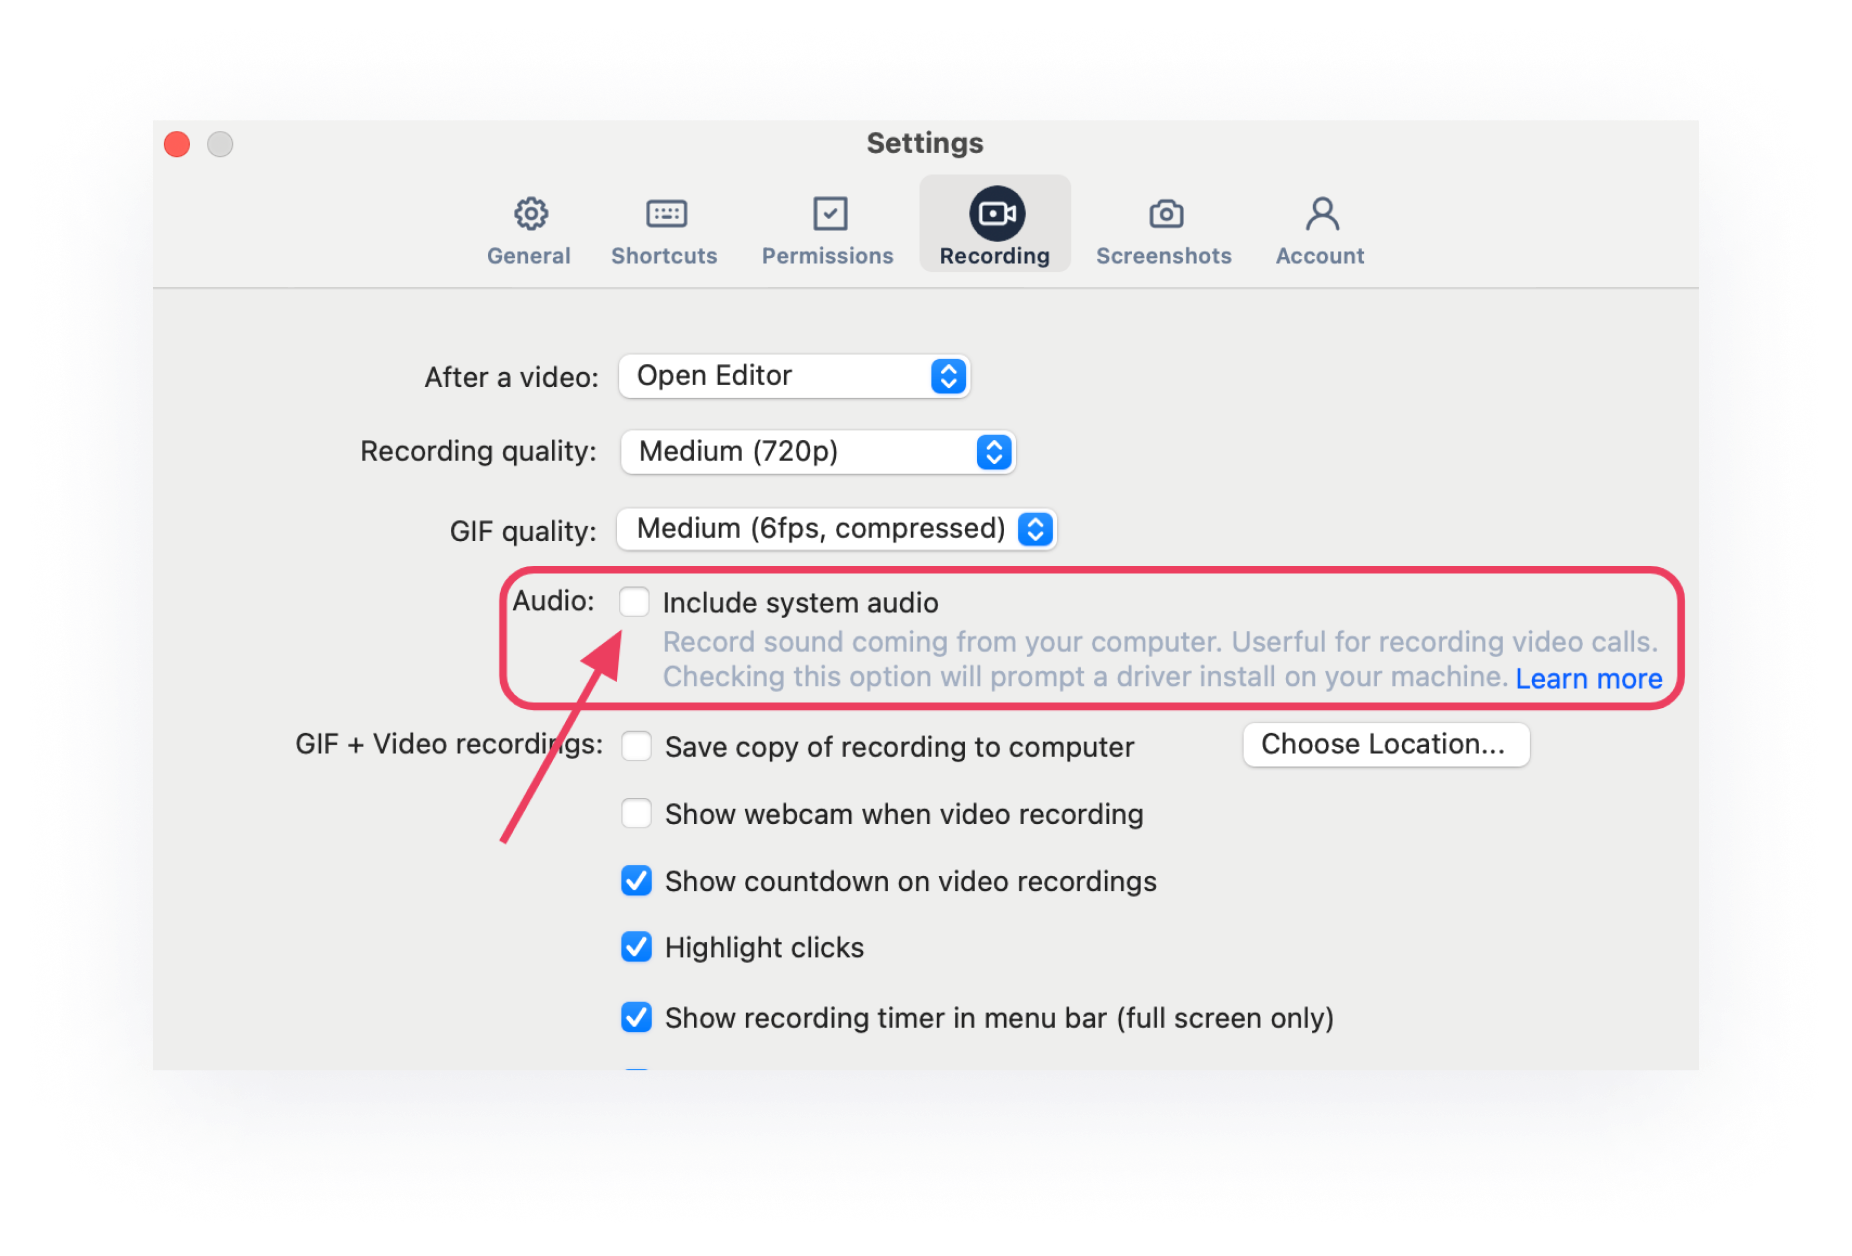 While you record system sound, Zight will also enhance the quality for crisp playback and automatically remove background echo/feedback, especially if you are also recording your mic simultaneously. You can also turn the feature off, especially if your current video recording does not require system audio. Maybe you want to record a product demo or training and explainer videos where your mic audio or commentary is more important than system sound. You won’t need to access settings again to toggle it off. Instead, you can just start recording your screen or webcam. After the 3-second timer, or at any time during the recording, access the system sound feature by clicking on your mic, then System Output to toggle the feature off as follows:
  The process is similar on Mac; just click on the Microphone, then System Audio, and select either on or off. Here’s how:
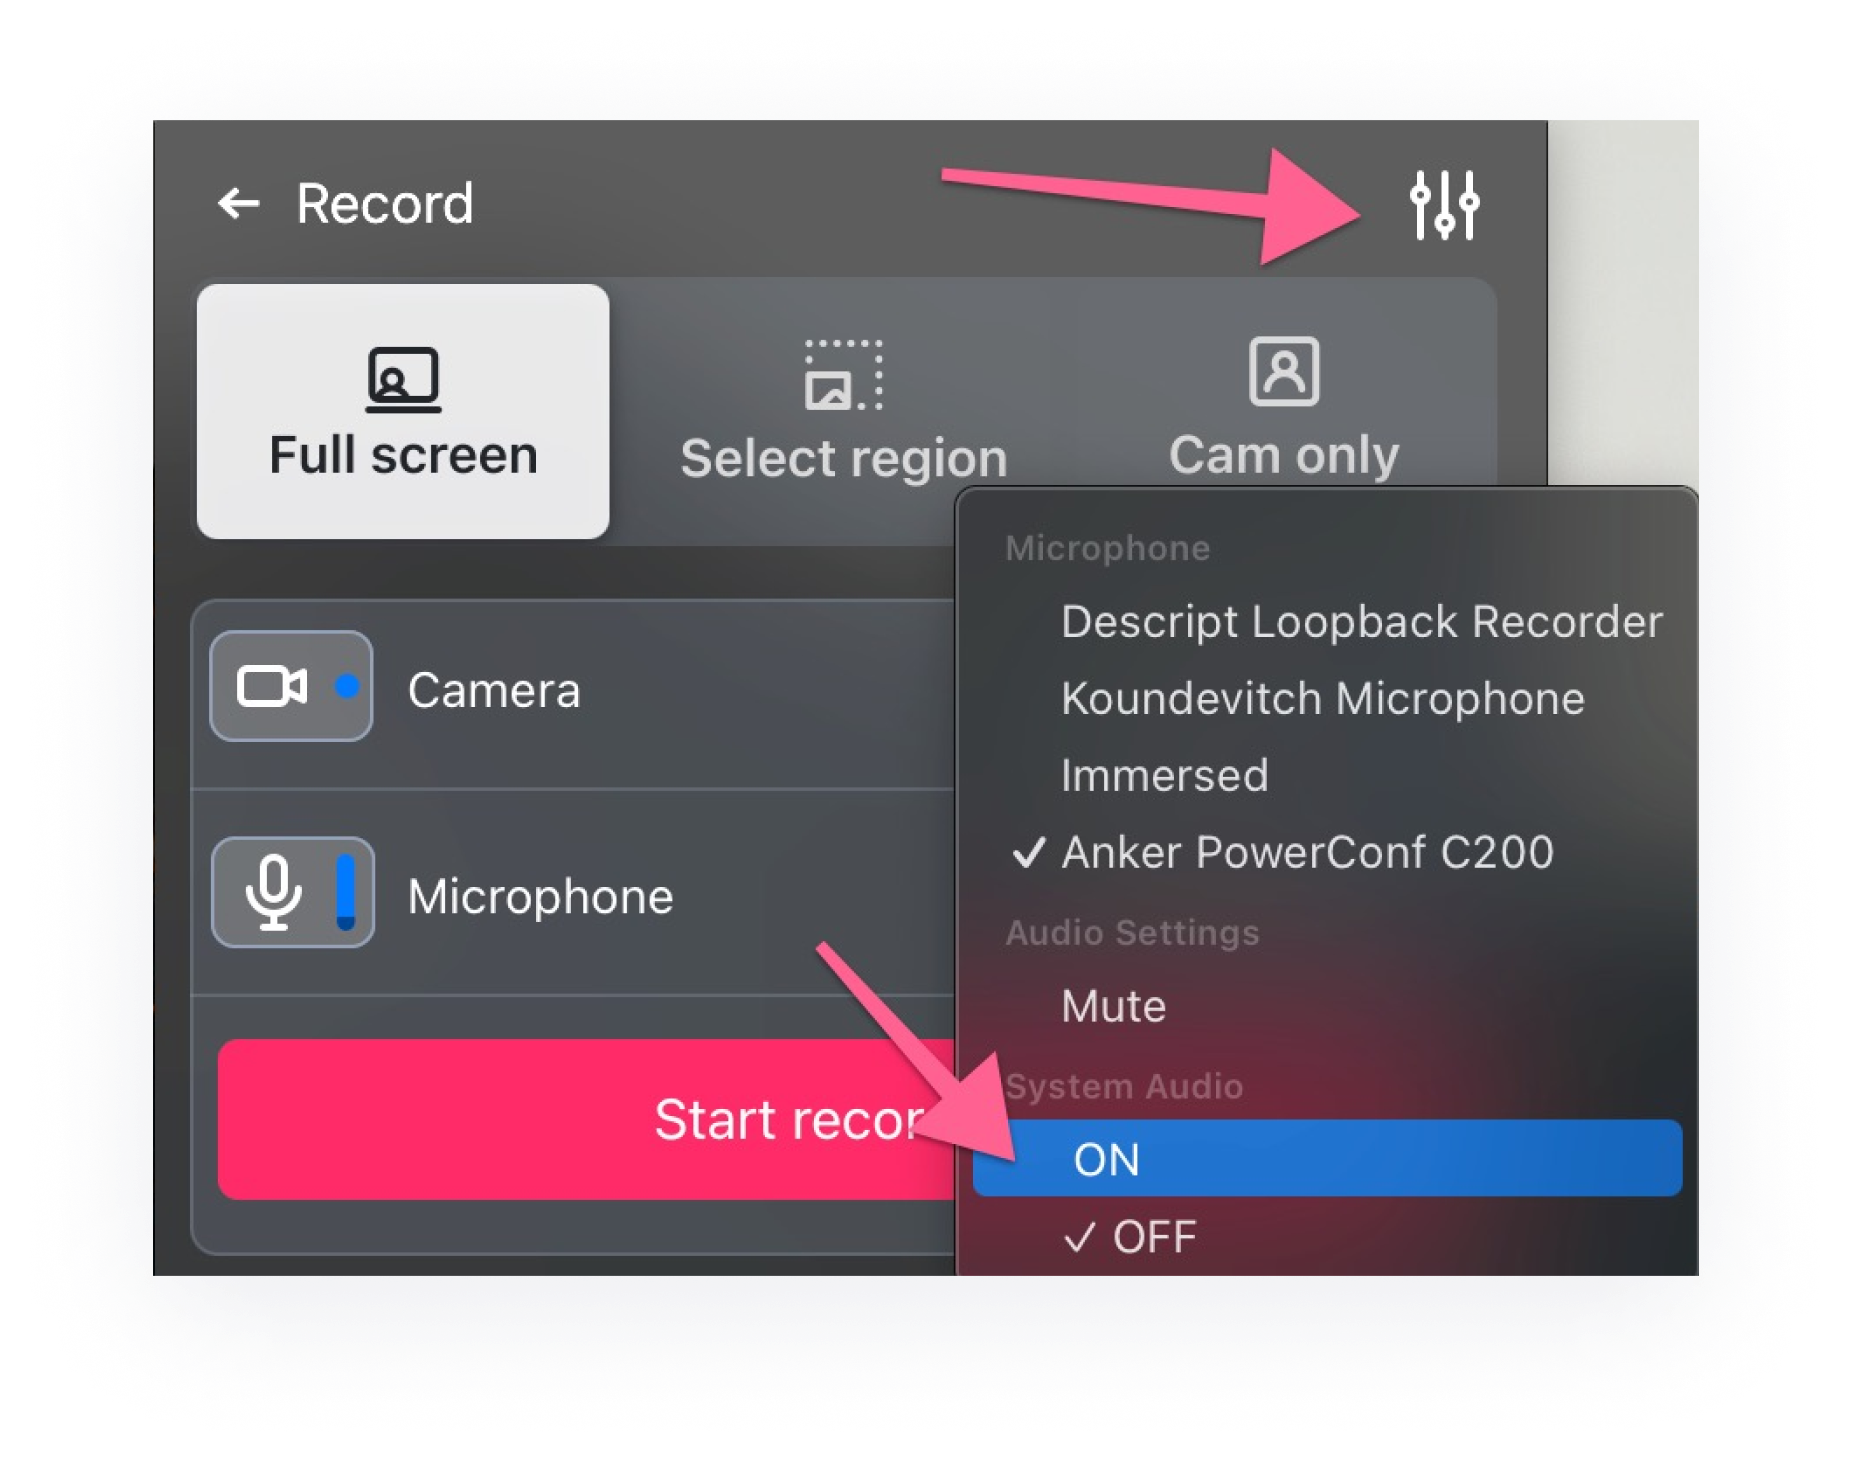
Method 2: Using QuickTime Player + SoundFlower to Record Mac Internal Audio
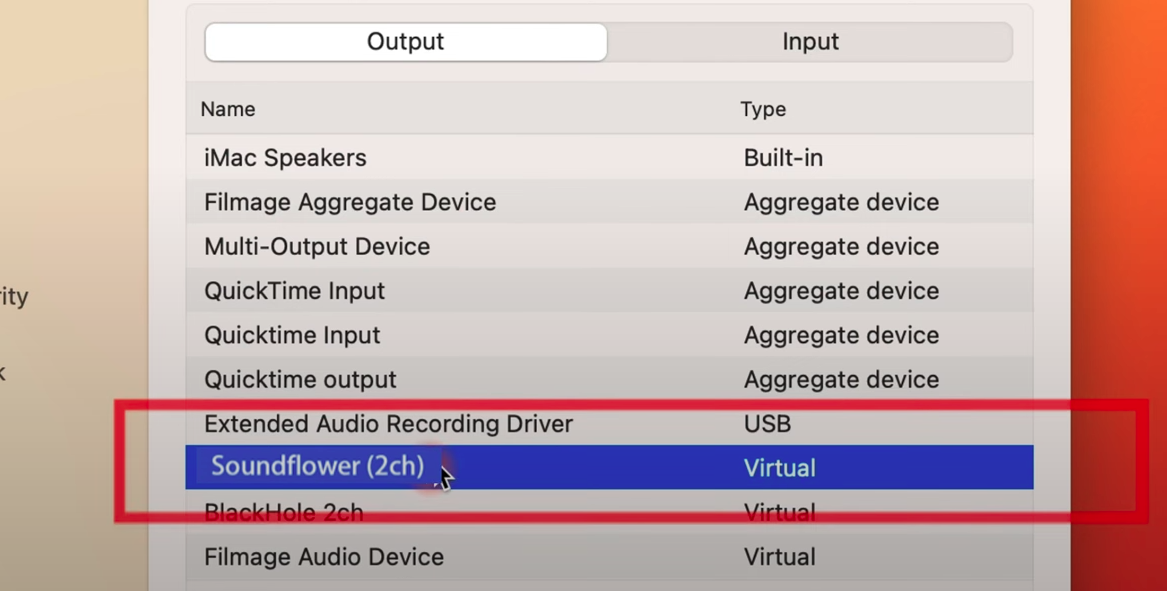
 The Zight method I’ve shared above is straightforward, even if you’re not a geek. It is also the easiest way to record Mac system audio for one reason – Mac users do not get a native app to record computer audio. Unfortunately, the native Mac screen recorder, QuickTime Player, still requires you to get additional software to capture internal audio. In this guide on how to record internal audio on Mac, we mentioned you’d need to download the free add-on app called Soundflower to allow QuickTime Player to record computer audio. Soundflower is a lightweight and free app that’ll let you change your Mac’s audio output to input, which would then capture internal audio. To use this method, start by downloading Soundflower from GitHub and installing it on your Mac. After restarting your computer, open System Preferences > Sound and set both Input and Output to “Soundflower (2ch).”
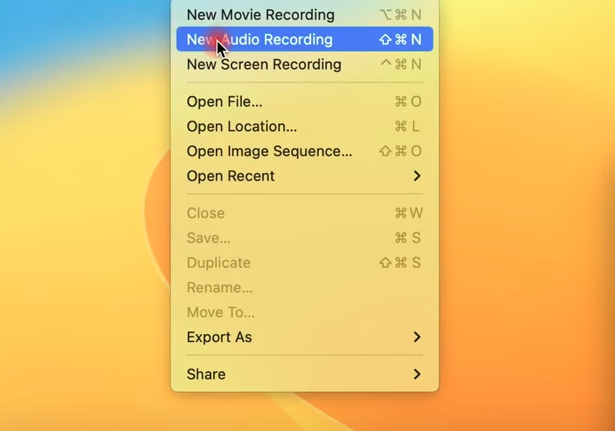
 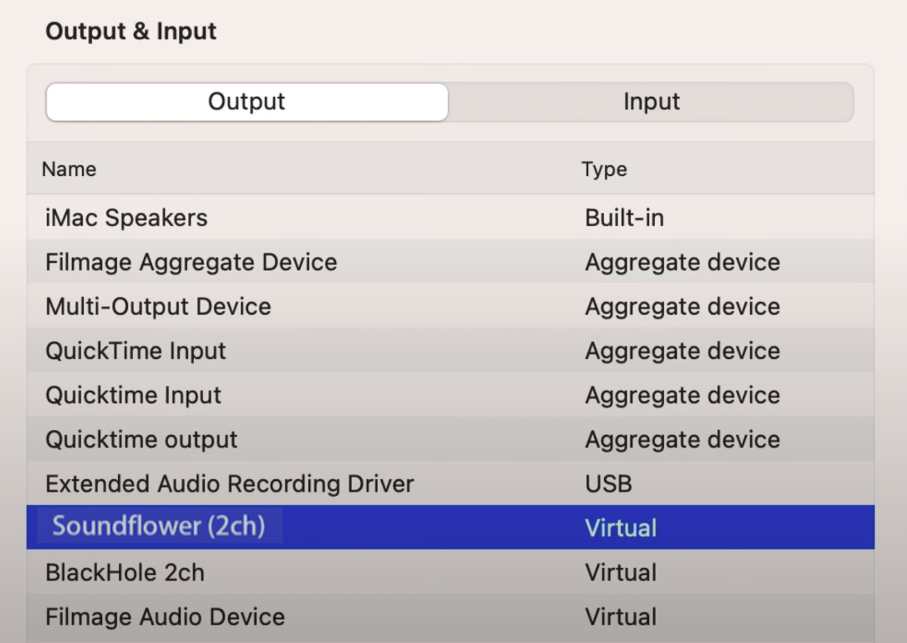 Next, launch QuickTime Player and start a new audio recording. Click the dropdown arrow next to the record button and select “Soundflower (2ch)” as your input source.
 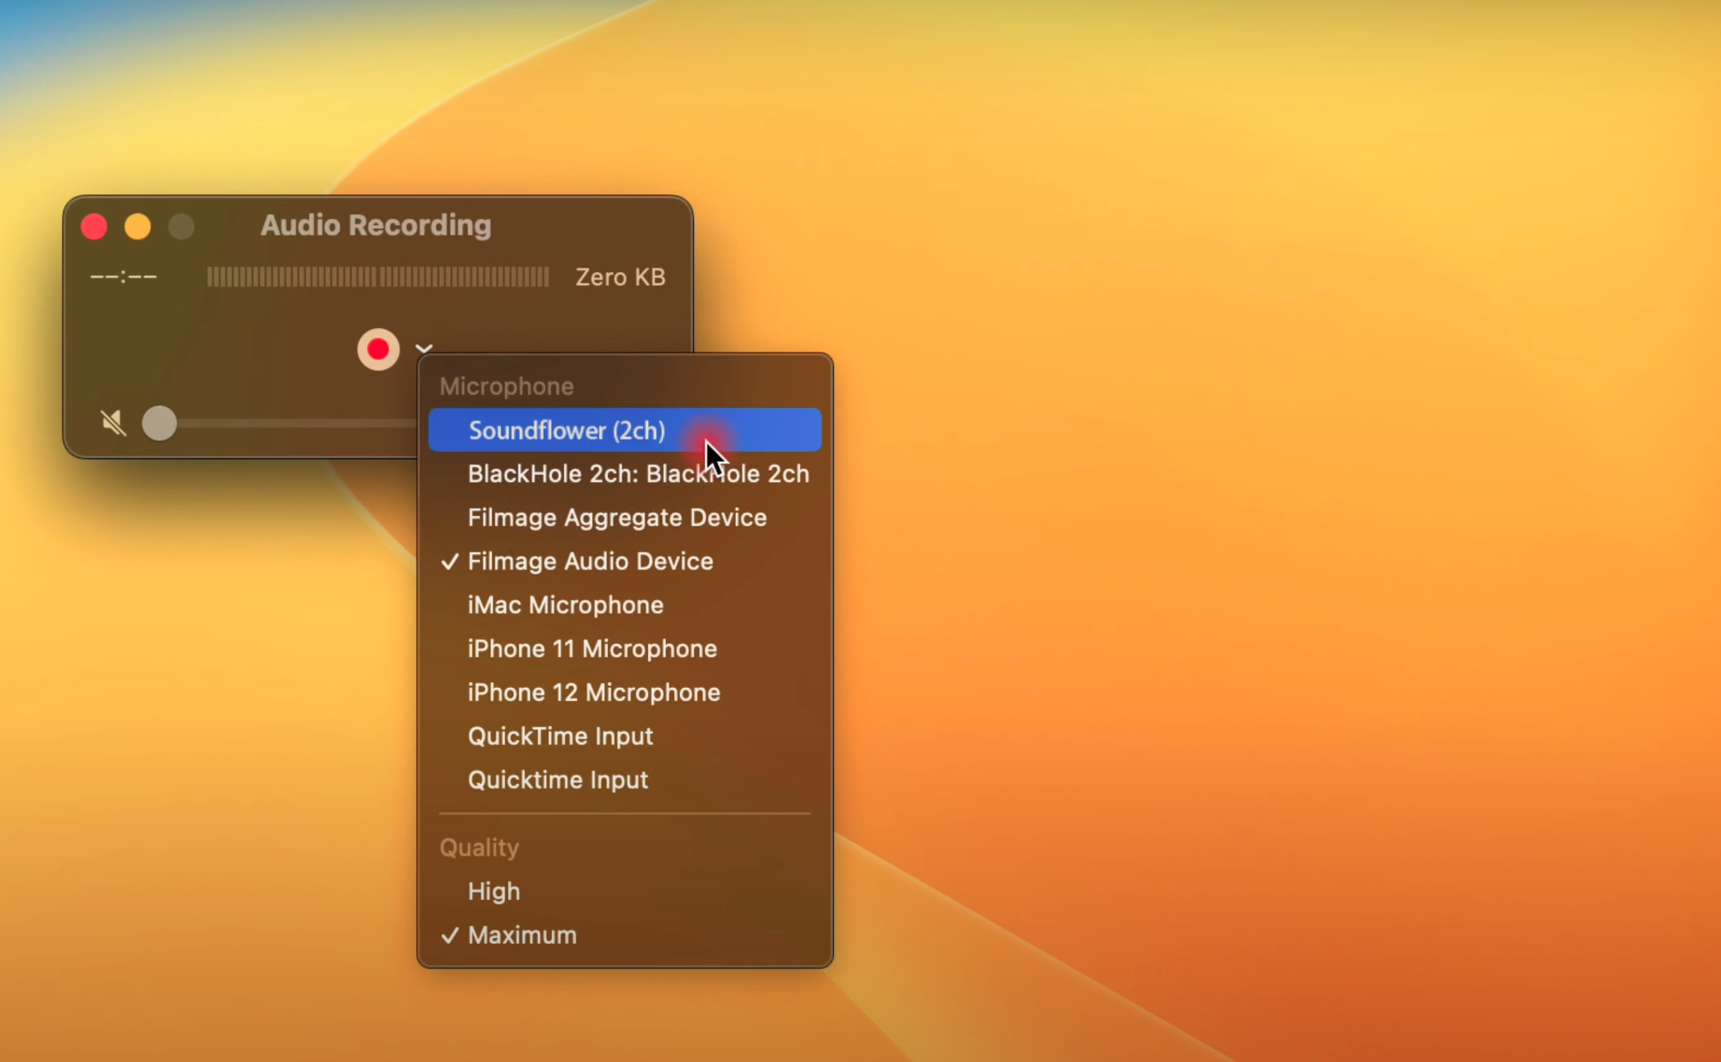 You can play whatever computer audio you want to capture at this point, then press the red record button and play the audio you want to capture. When finished, click stop and save your recording. You should also switch your sound settings back after recording. Go to System Preferences > Sound and change your Output to your speakers/headphones and Input to your microphone. While this process works, it is unnecessarily time-consuming and has a few dealbreakers you should keep in mind. These include:
 - You won’t hear audio during recording unless you set up a Multi-Output Device
- Soundflower requires additional setup for each macOS update
- This method only captures audio, not screen activity
Method 3: Using the Windows Voice Recorder
 Like the Mac method I discussed above, using Windows Voice Recorder only gives you audio-only captures. It is built into Windows 10 and 11, so you can use it to record meetings, narrations, or lectures where visuals aren’t needed. Windows Voice Recorder won’t always capture system audio by default – it only records through your microphone. To record computer sounds on some computers, you might even need to enable stereo mix in your Windows sound settings first (more on this below!) Even then, you can’t record system audio and microphone input simultaneously. This method only works well when you:
 - Need a simple audio recording without video
- Don’t require both system and mic audio
- Want to save storage space with audio-only files
- Already have Windows and don’t want to download additional software
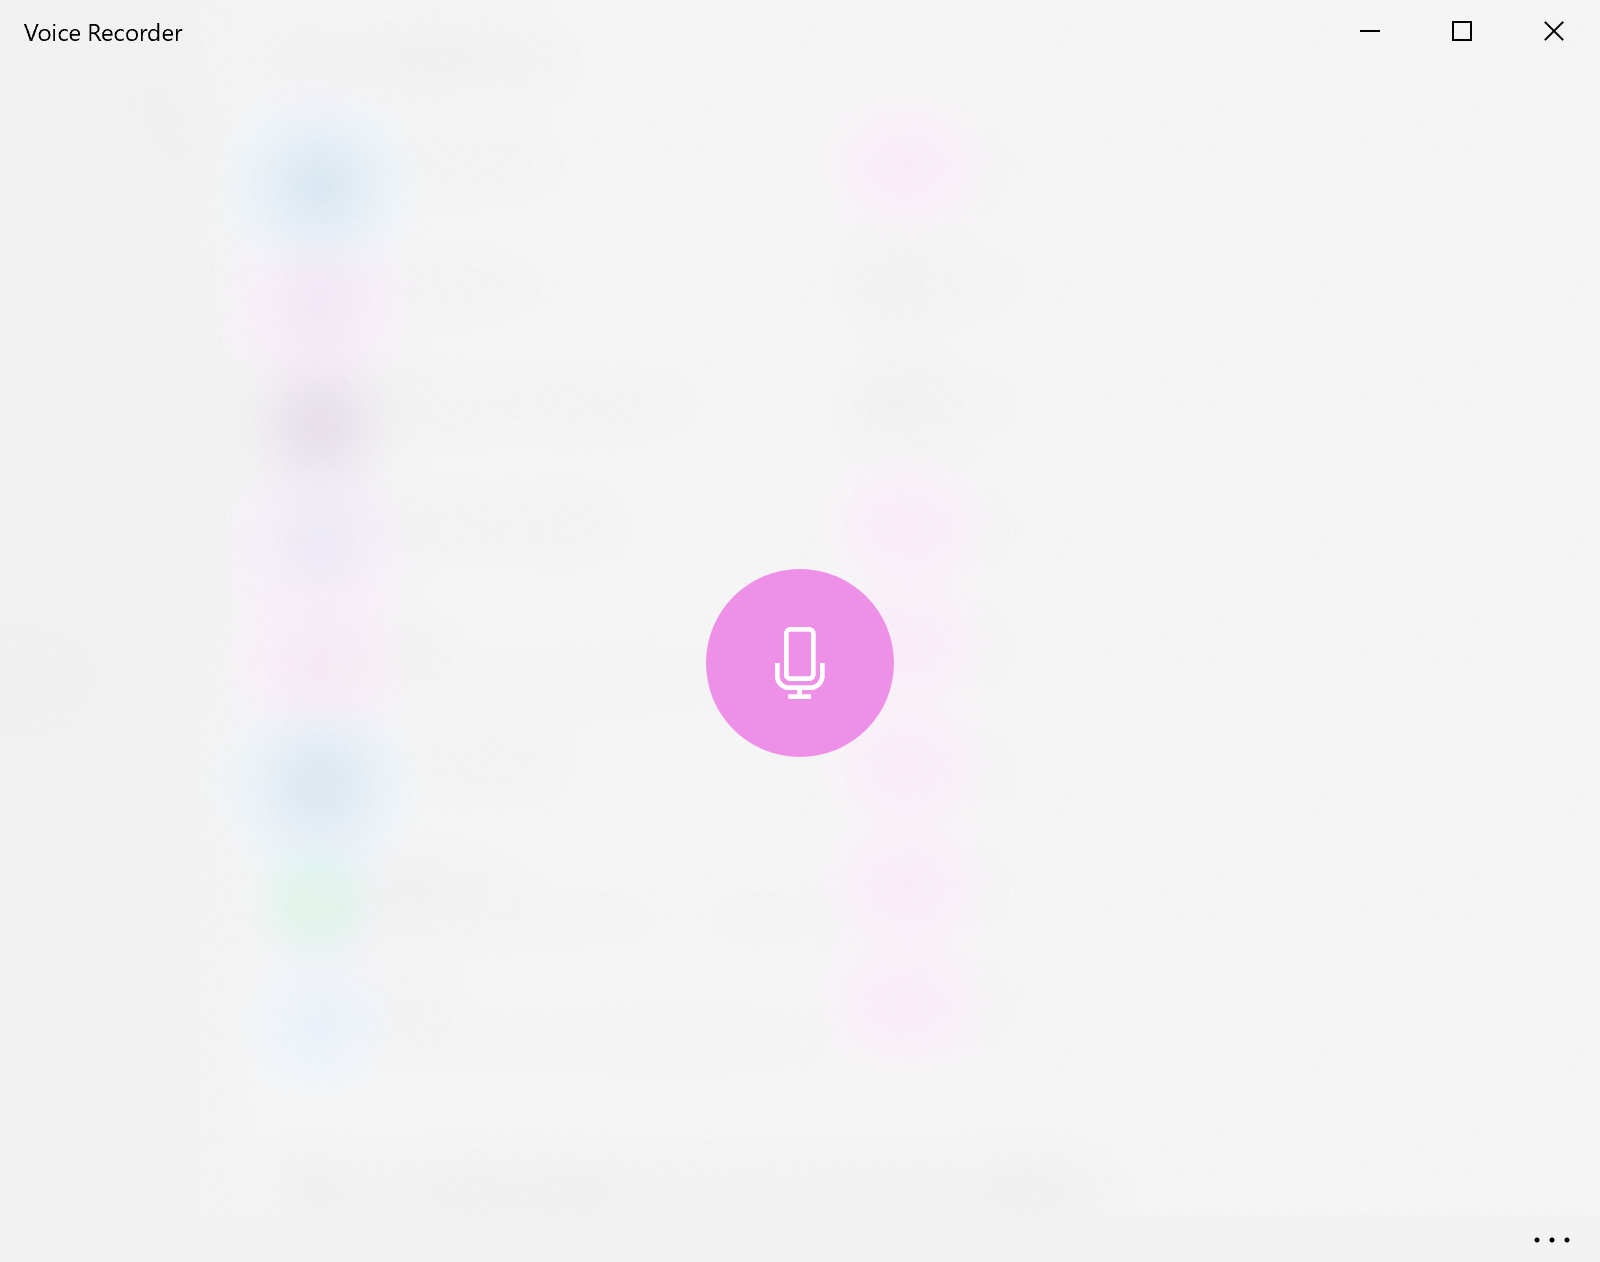
 If you’ve never used the app before, you might see that you need to set up a microphone once you open the app:
 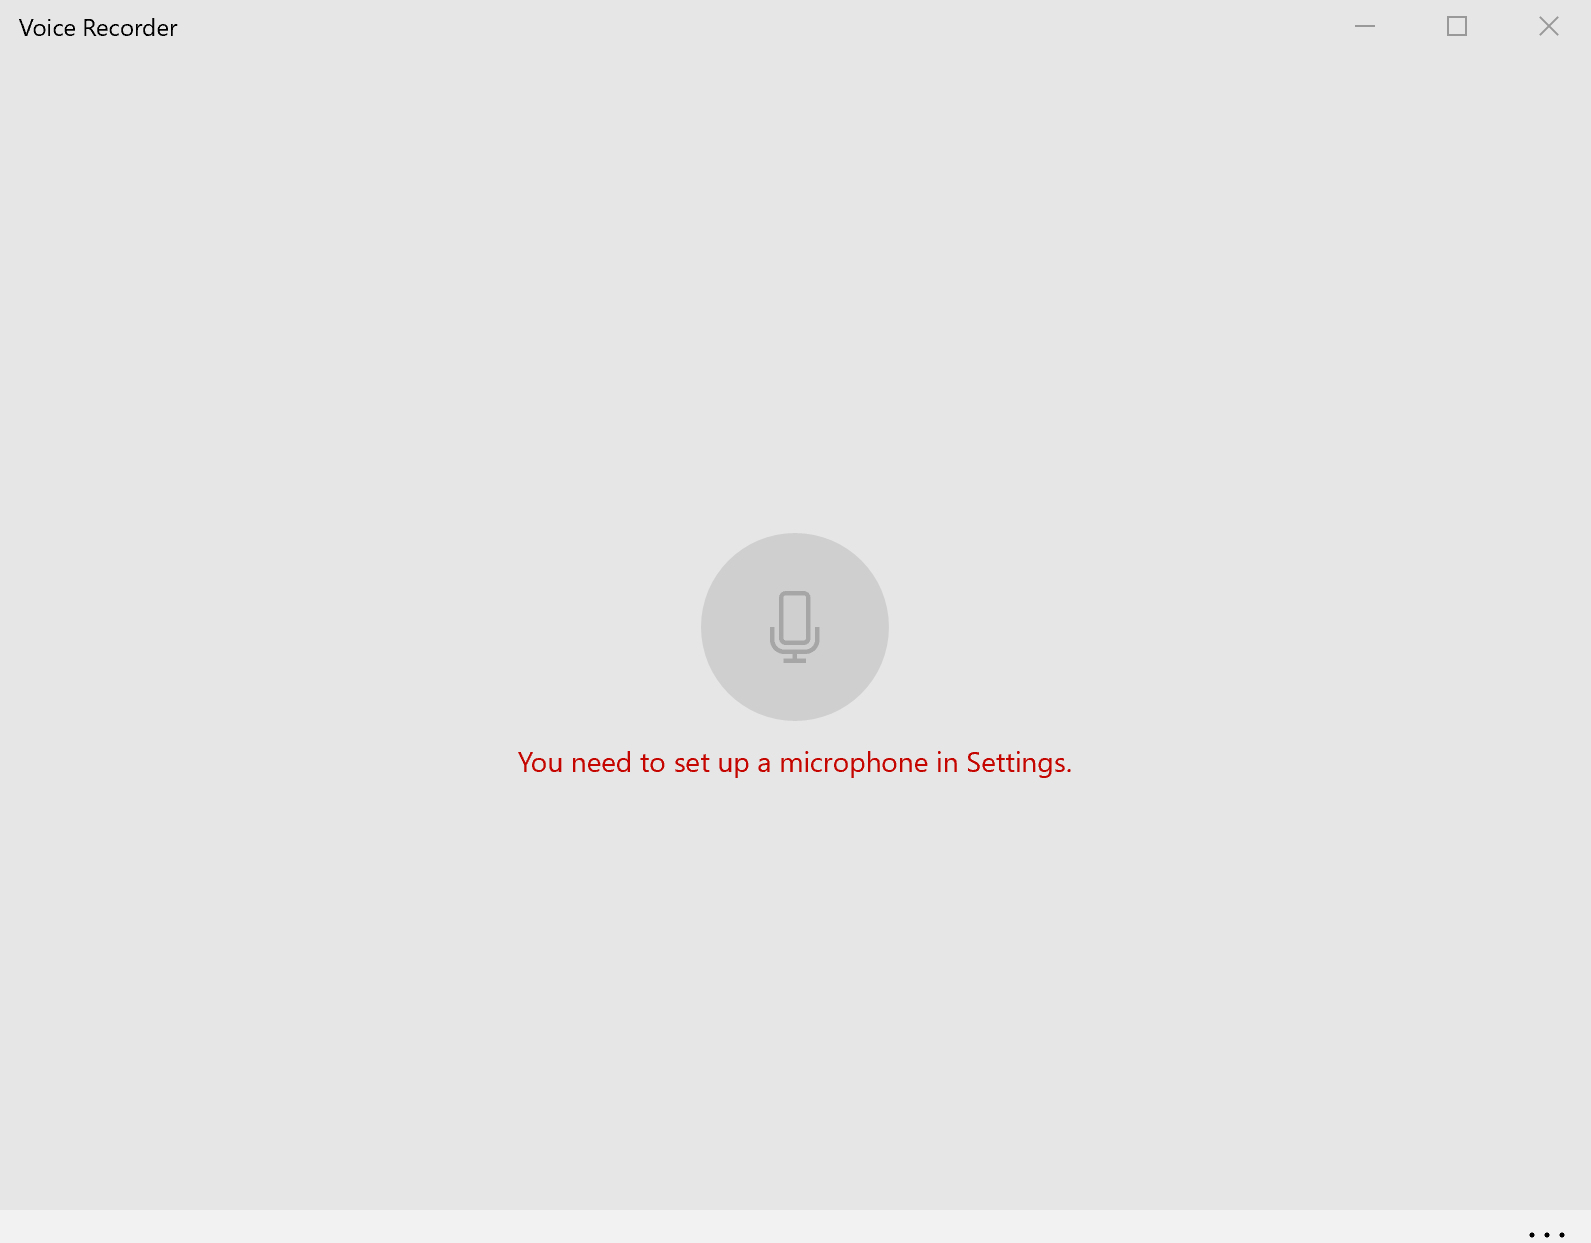 Go to settings, then click “Sound,” and “Microphone Privacy Settings” on “Related Settings” on the right. Scroll down the apps list until you find “Voice Recorder,” then toggle it on.
  You can now use the recording device to capture system sound. Play the audio you want to capture on your computer, then click the microphone icon on the app. The recorder will show a running timer and audio waves as it records
 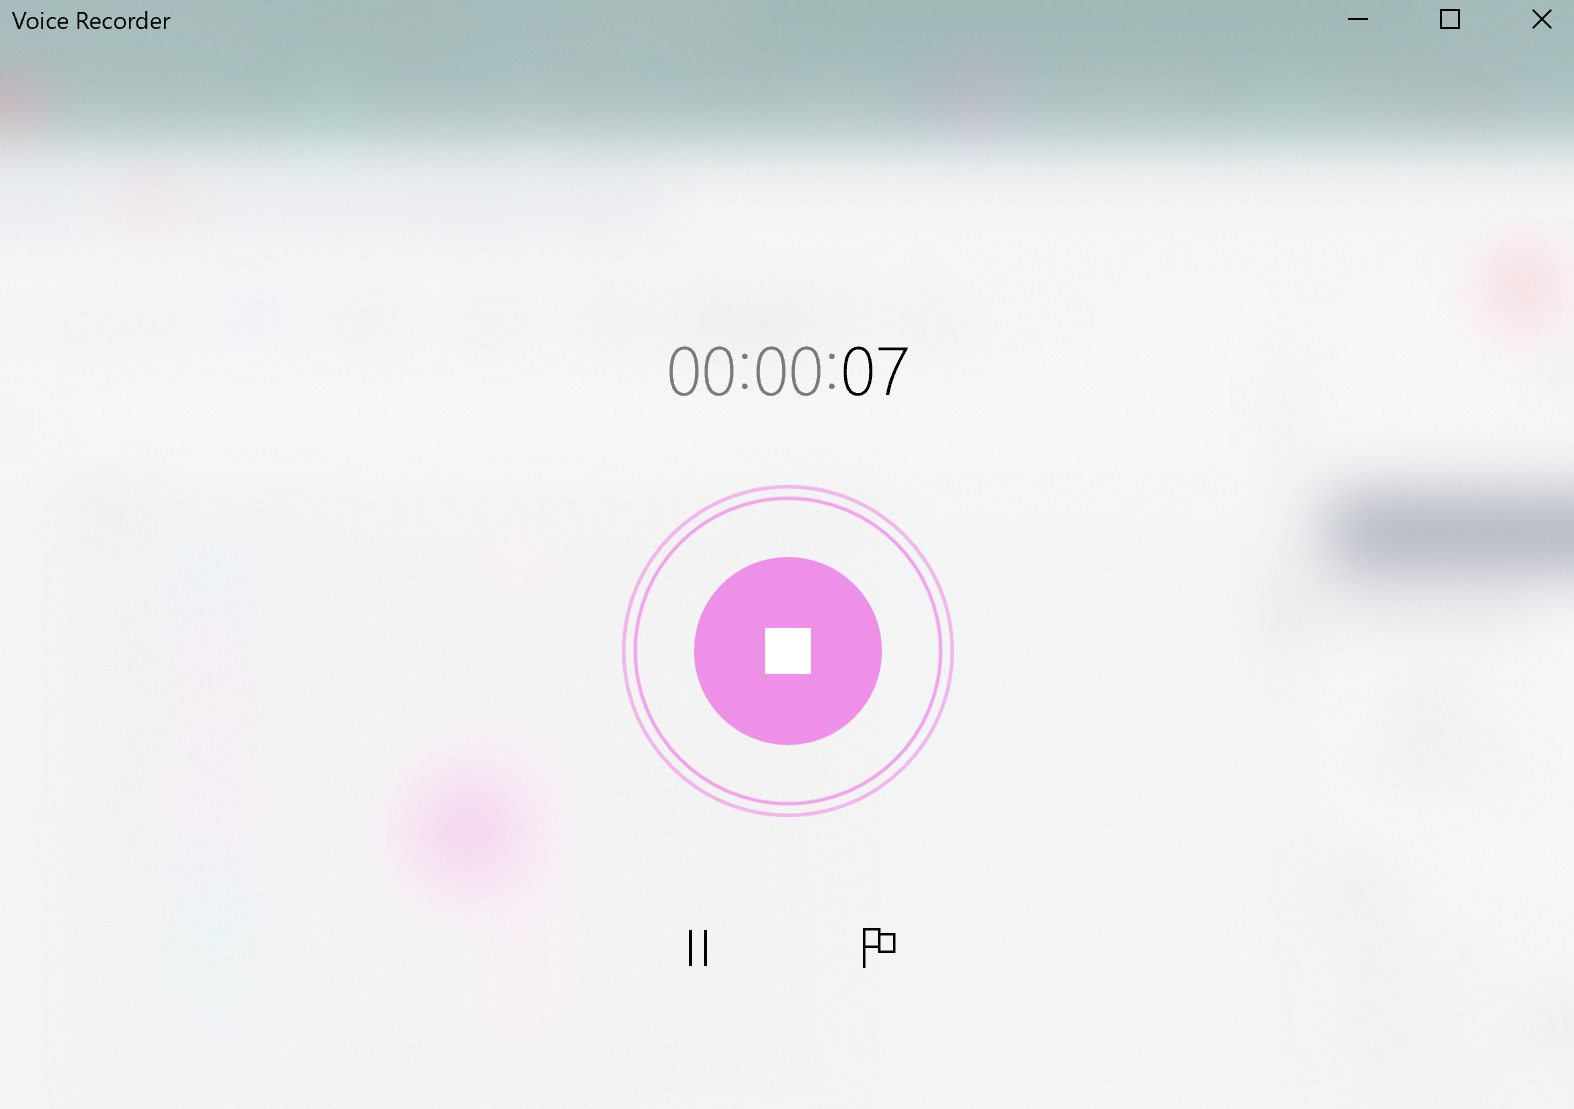 When done, click the stop button (square icon), and Video Recorder will automatically save the files for you in chronological order. You can always access them on the left bar when you open the app. For seamless file organization, right-click on the file, then rename it right after recording.
 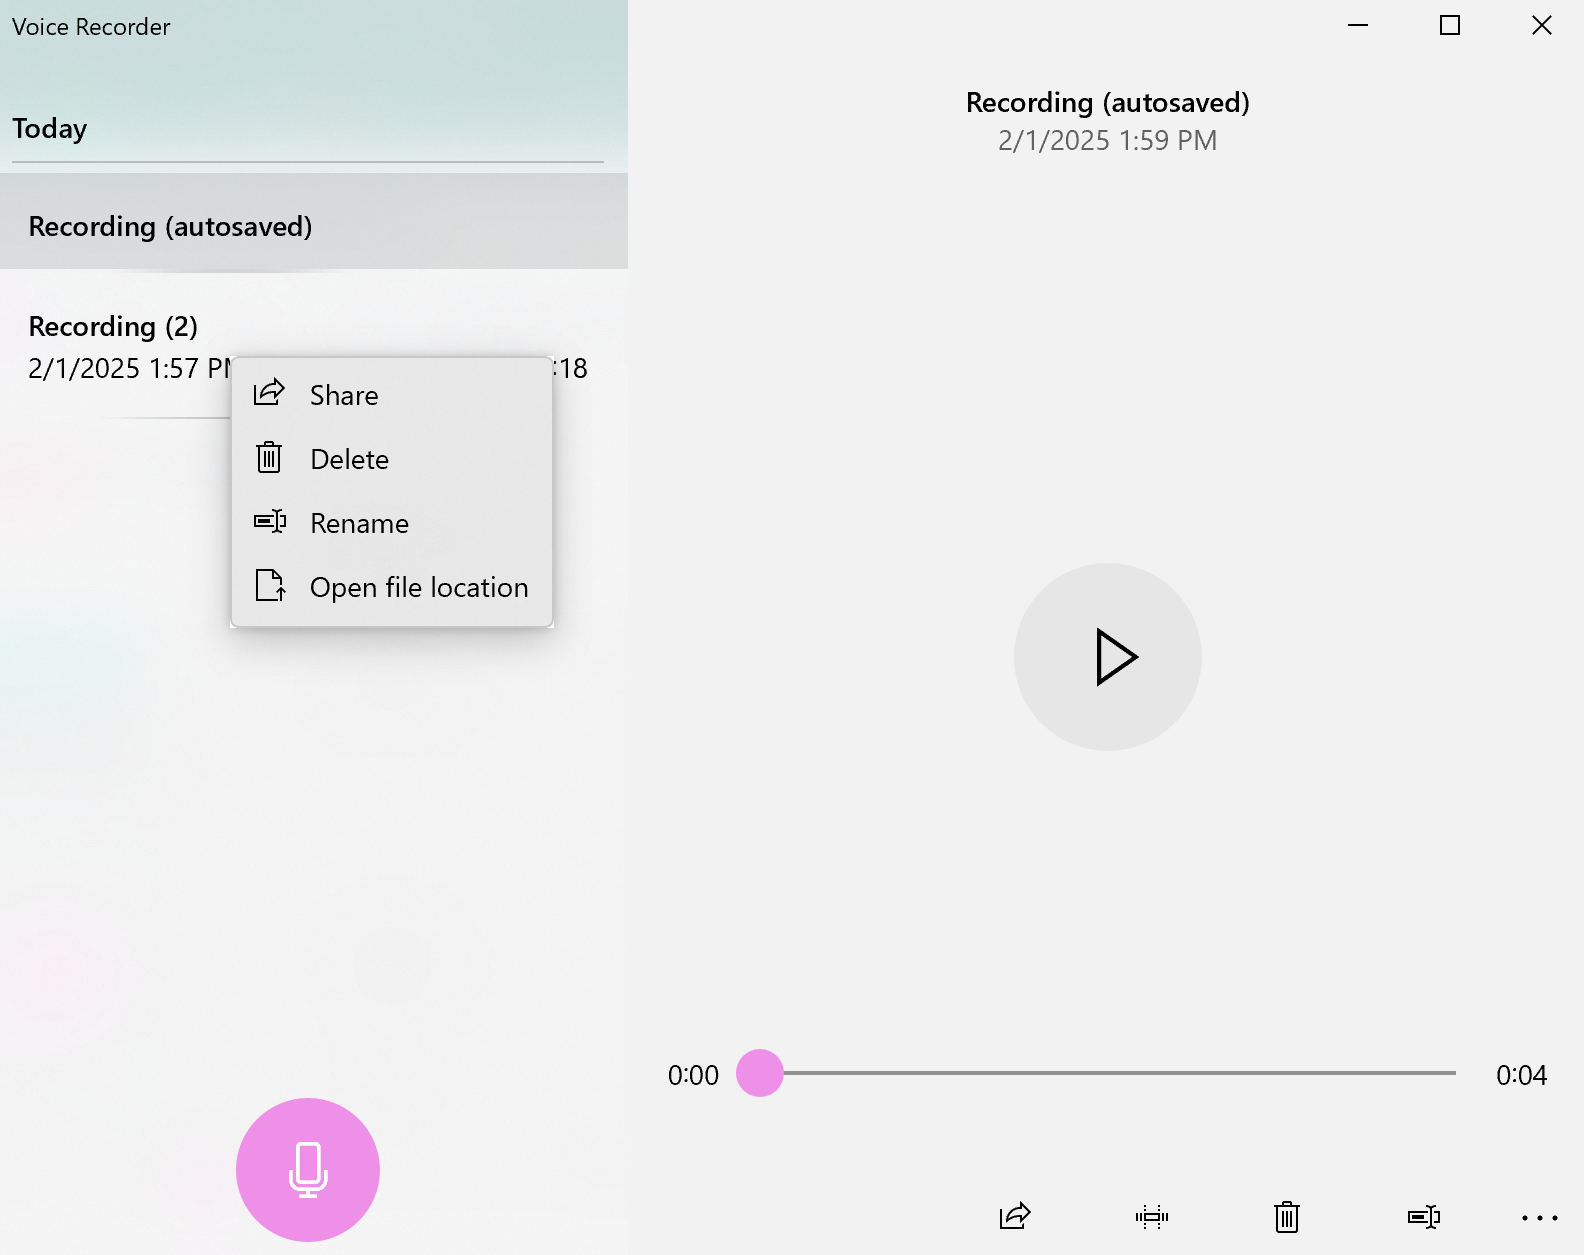 You can click any file to play it. Furthermore, you can right-click on the audio file to:
 - Share it with saved contacts or via a wireless connection like Bluetooth. You can also share the file via computer apps like Phone Link, WhatsApp, Quick Share, Mail, and more.
- Delete the audio file
- Open its storage location. This is usually This PC > Documents > Sound Recordings
Method 4: Use Audacity to Record Computer Audio
 You can also use the free app Audacity to record computer audio on Windows and Mac. However, while it’s a good alternative to Zight, this method entails downloading additional apps on your computer. Audacity is a free audio editing and recording program that works on Windows, Mac, and Linux. You can use it to record audio (internal and mic) with a maximum recording quality of 32-bit/384kH, edit recordings, and export them. It was developed in 1999 and is an open-source platform that’s quite popular with podcasters, musicians, and content creators.
 I. Using Audacity on Windows
If you want to use it on Windows, you will also need WASAPI to record computer audio. The process is straightforward but requires proper setup. To start, download and open Audacity and look for the audio settings near the top of the window. Click the dropdown menu for your audio host and select “Windows WASAPI.”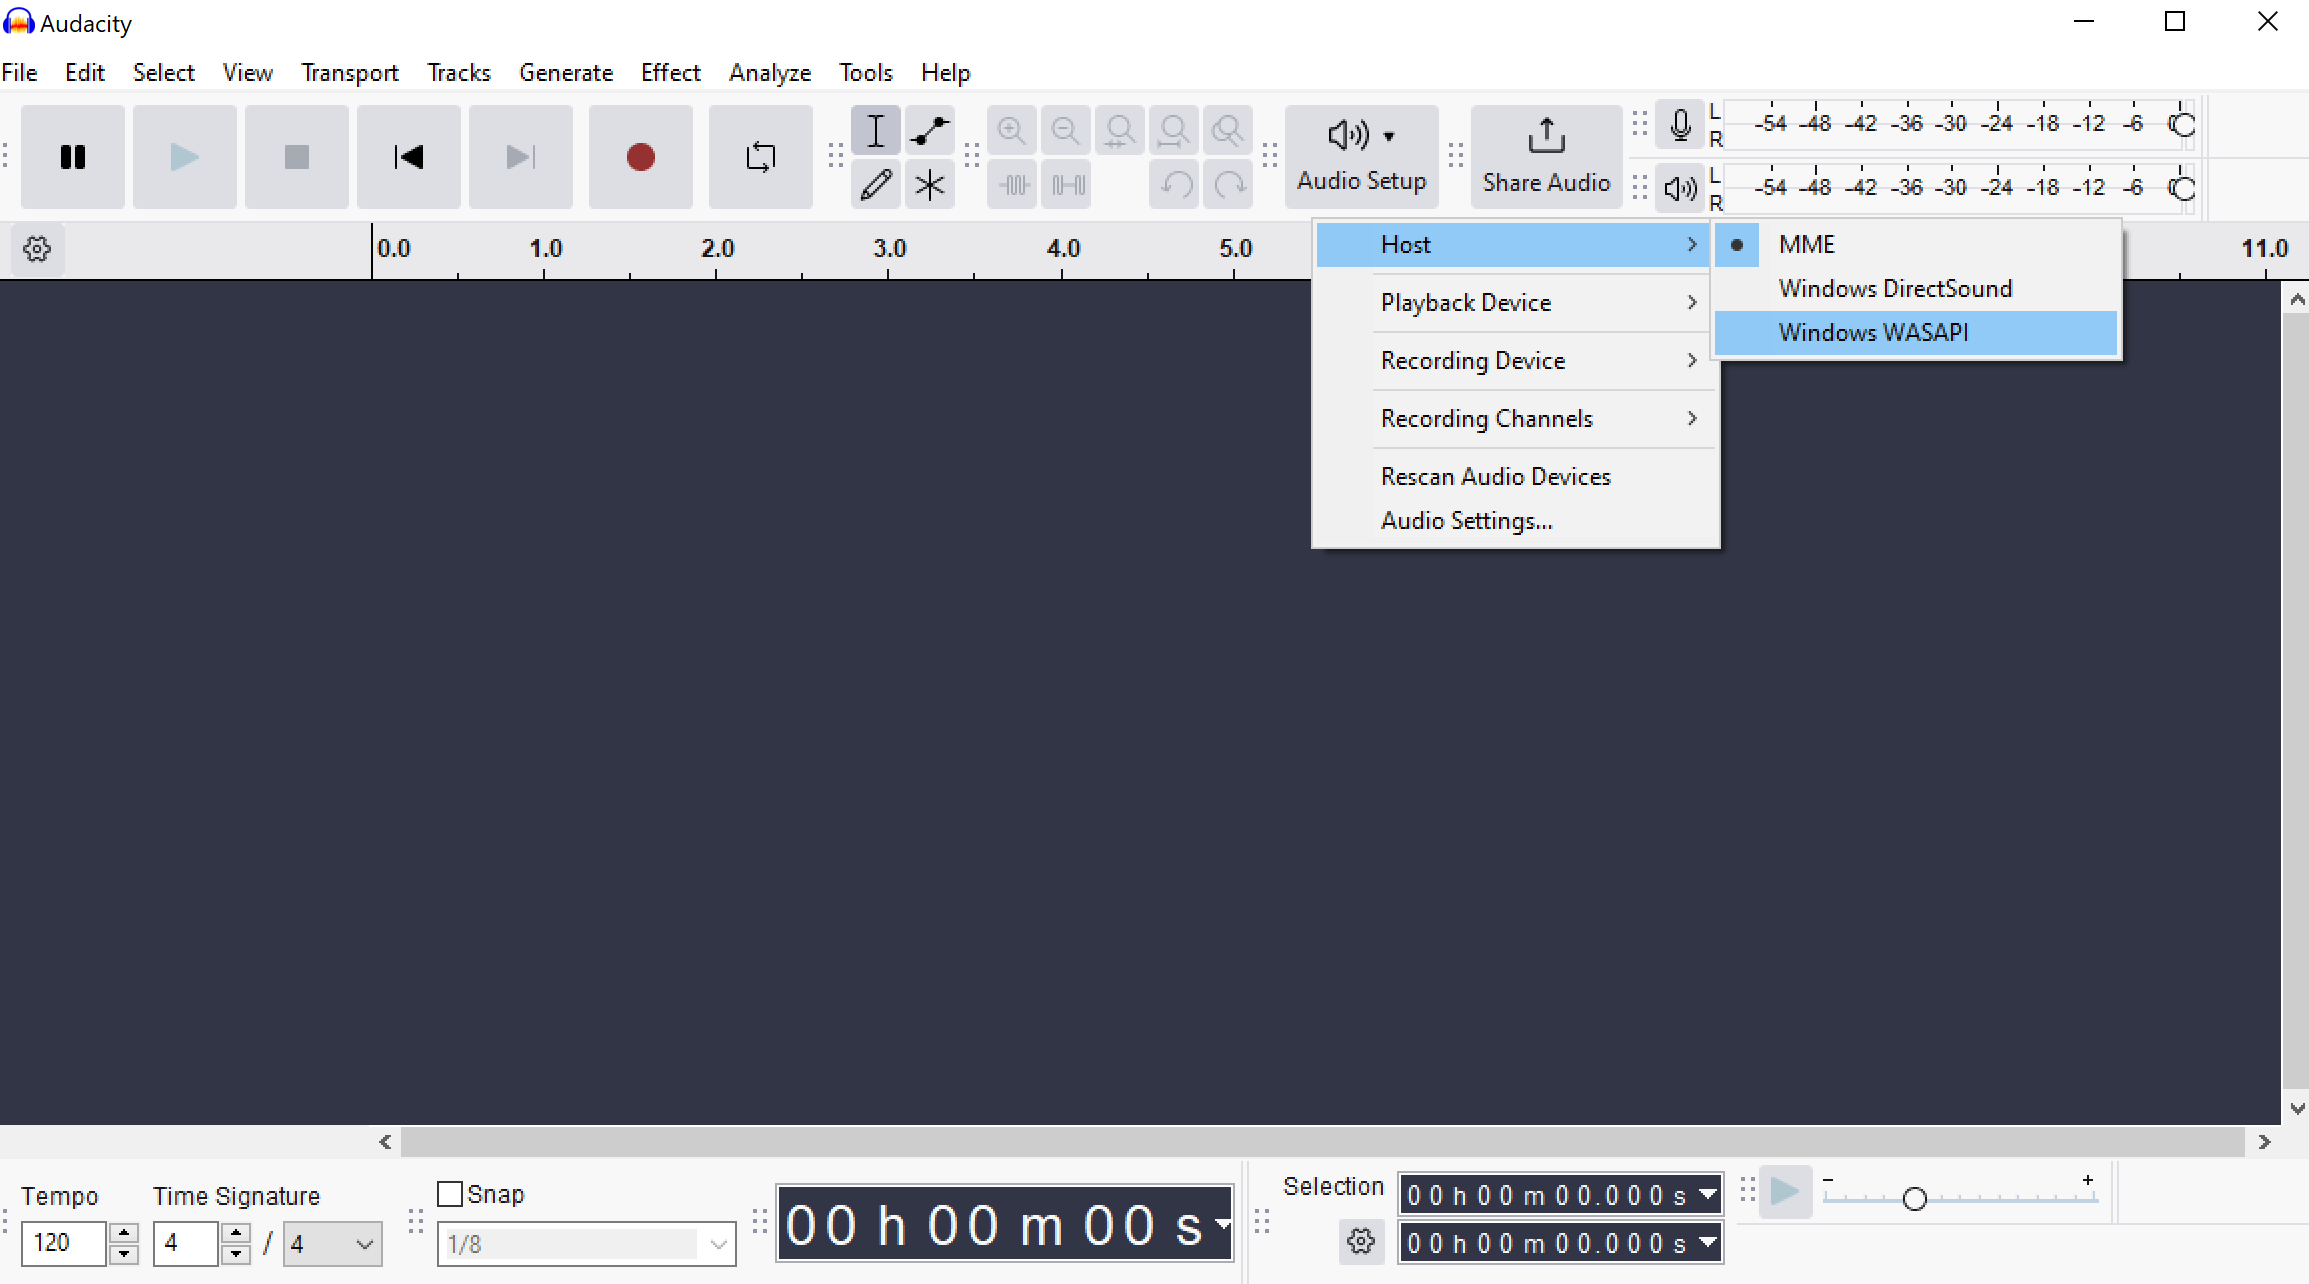 Next, choose your recording device – look for an option with “loopback” or your speakers/headphones with (loopback).
 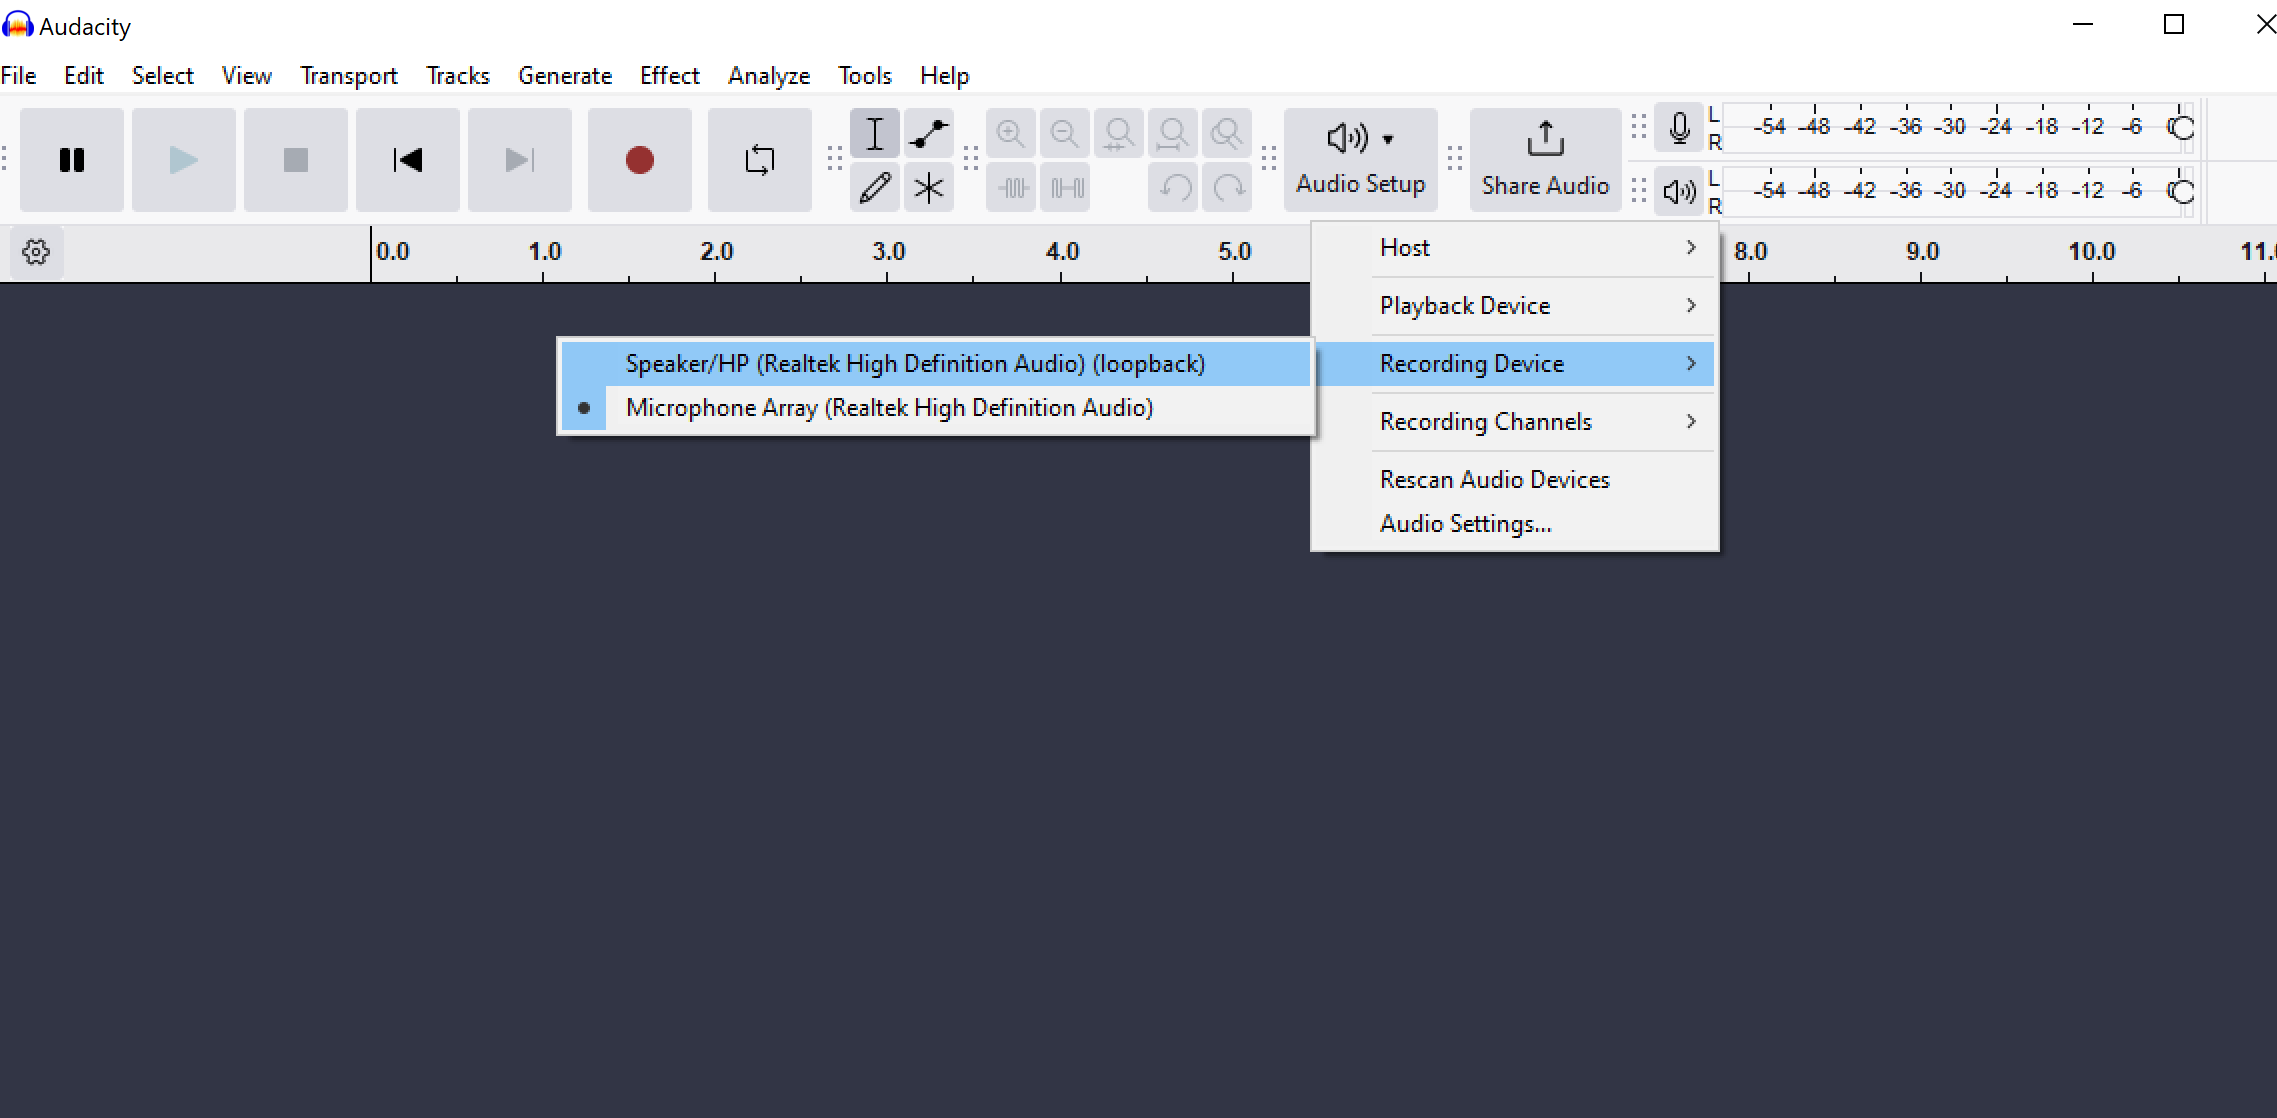 Press the record button and Audacity will start capturing any sound playing through your computer. You can record music, a browser video, or any other file on your computer.
 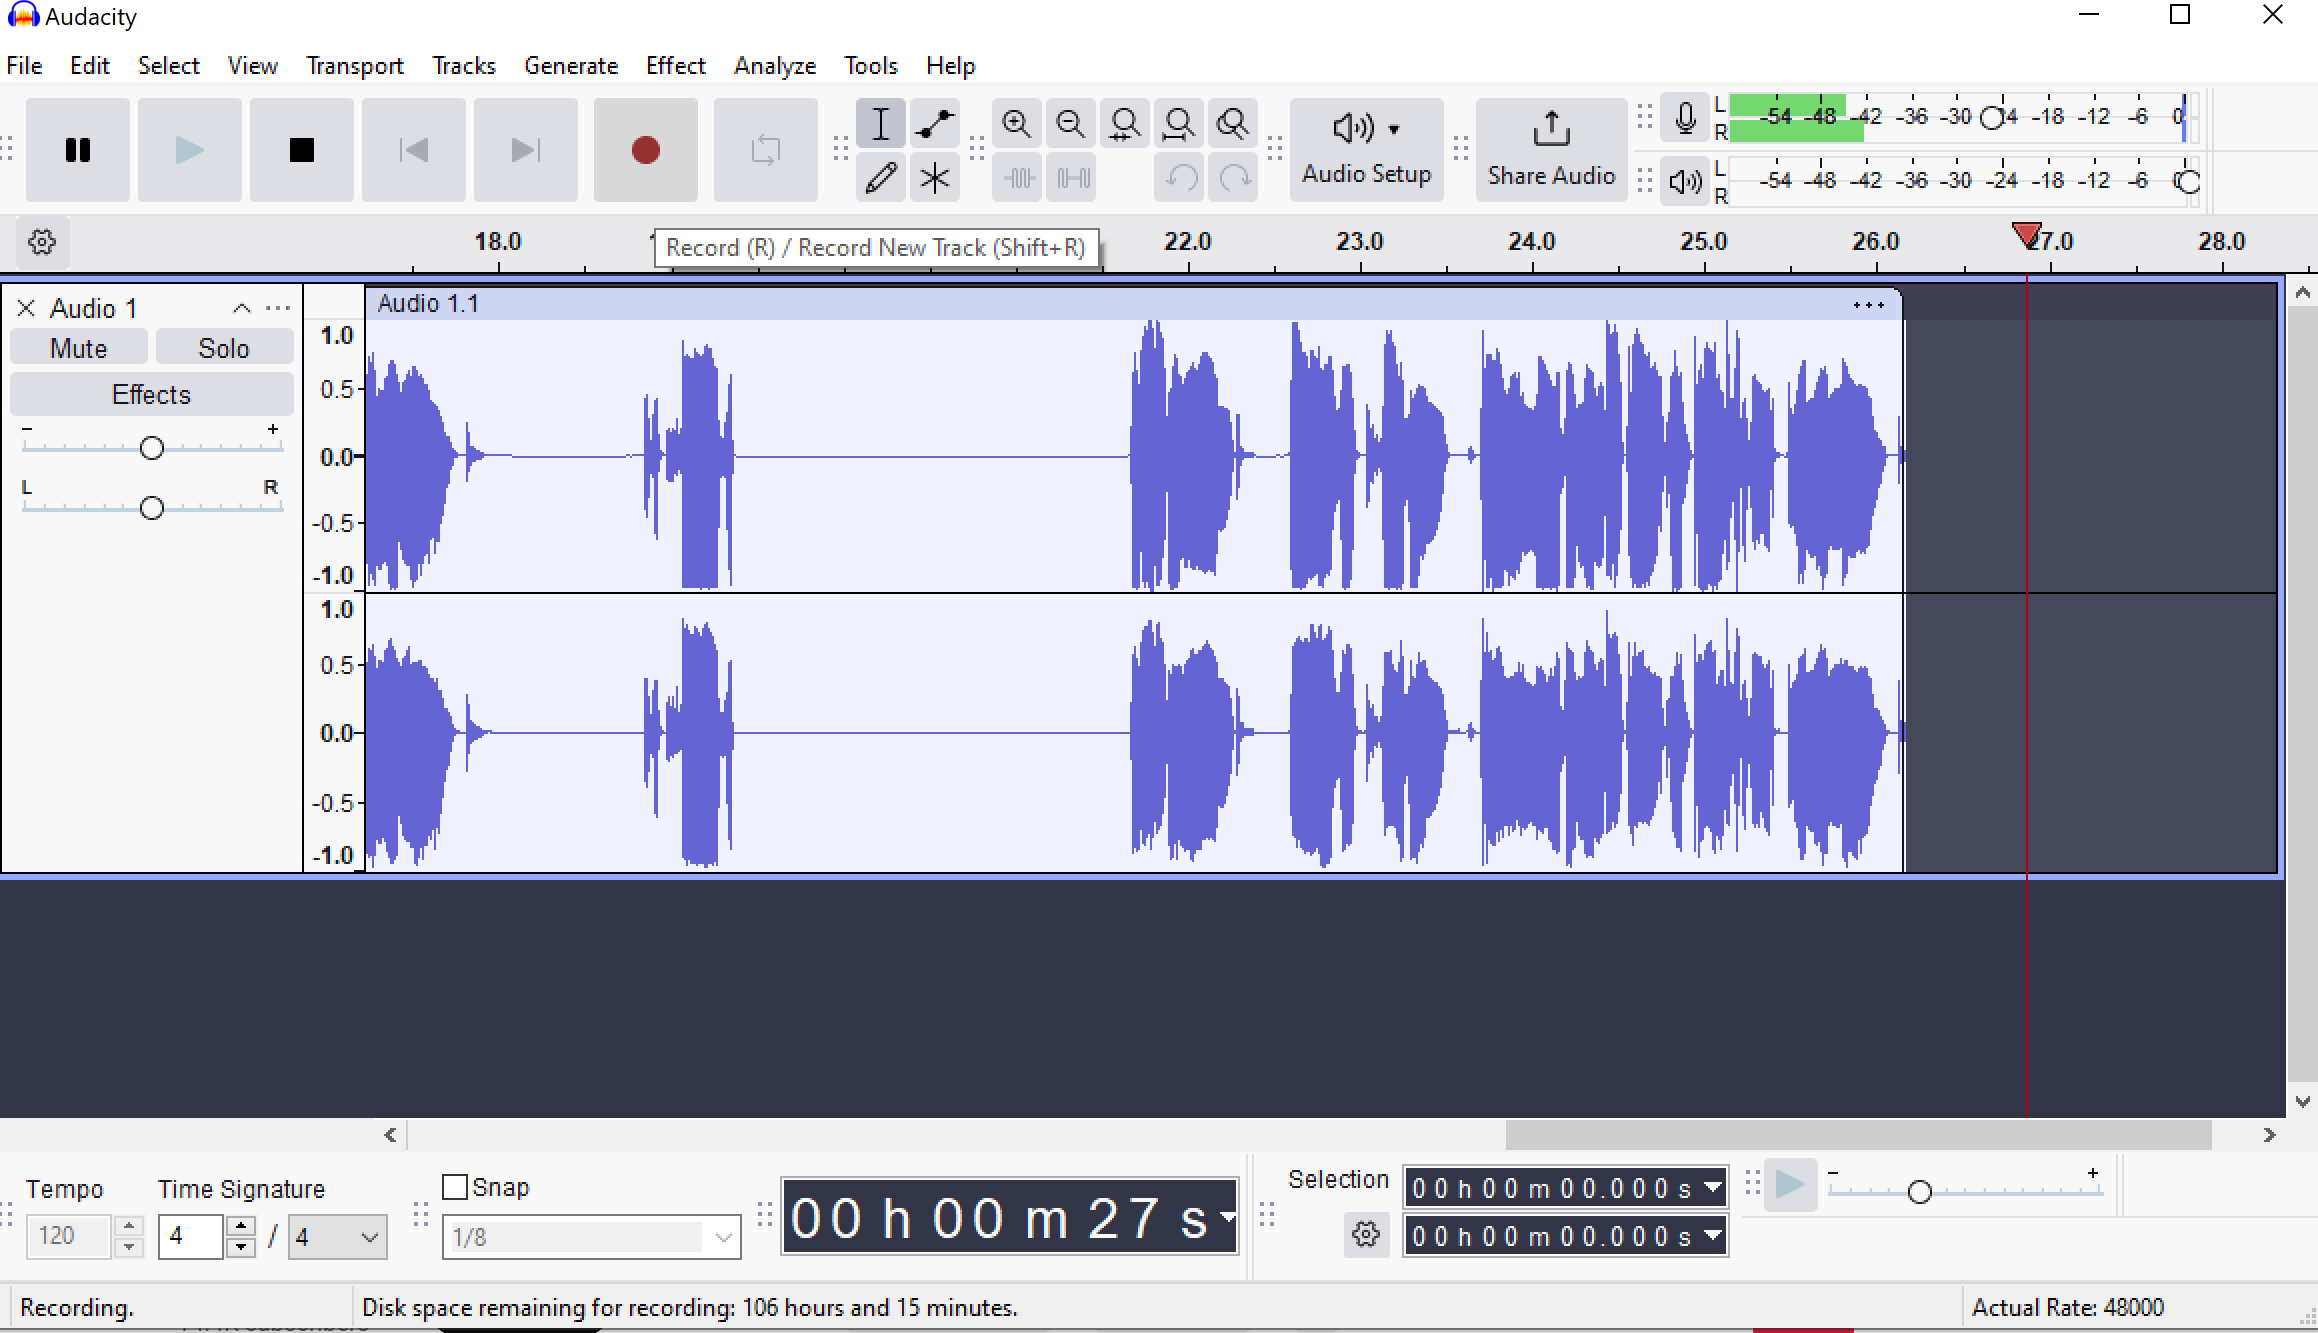 When you’re done, click stop, edit your file, replay it, and export it as an MP3 or WAV file.
 II. Using Audacity on Mac
While Audacity does work on Mac, it cannot record system audio directly on macOS like it can on Windows with WASAPI. On Mac, Audacity can only record:- Microphone input
- Audio from external devices
- Audio played through your computer using additional audio routing software (like BlackHole or Soundflower)
 Now, download and open Audacity and select Soundflower (2ch) as your recording device from the microphone dropdown menu. Set your project rate to 44100 Hz for the best quality. The recording meter should now show activity when you play audio on your Mac.
 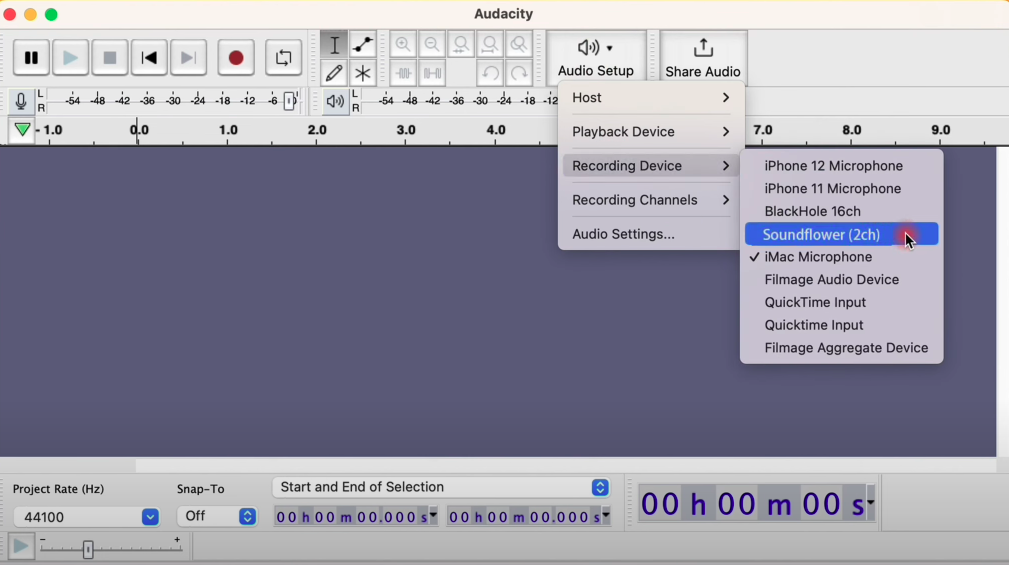 Click the red record button in Audacity and play the audio you want to capture. The waveform will appear as you record. Click stop when finished and export your file as MP3 or WAV. With this method, you will not be able to hear audio while recording unless you create a Multi-Output Device. After recording, remember to go back to System Preferences > Sound and reset your Input/Output to their original settings so you can hear audio through your speakers again.
 III. Editing Your Computer Audio Recording in Audacity (Windows and Mac)
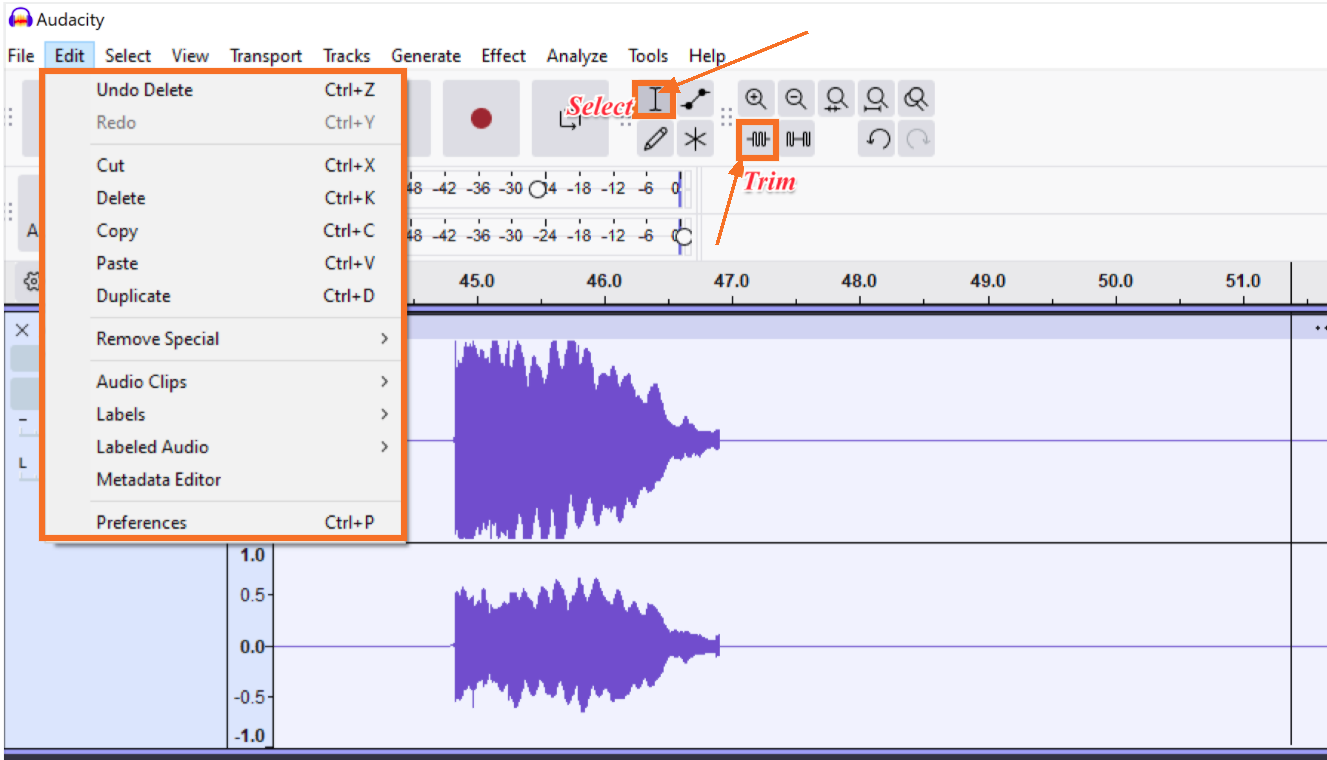
- Selection Tool (I-beam cursor): Click and drag to select parts of your audio
- Cut, Copy, Paste, Duplicate, Delete: Use these from the Edit menu or keyboard shortcuts
- Trim: Keep only your selected audio and remove everything else
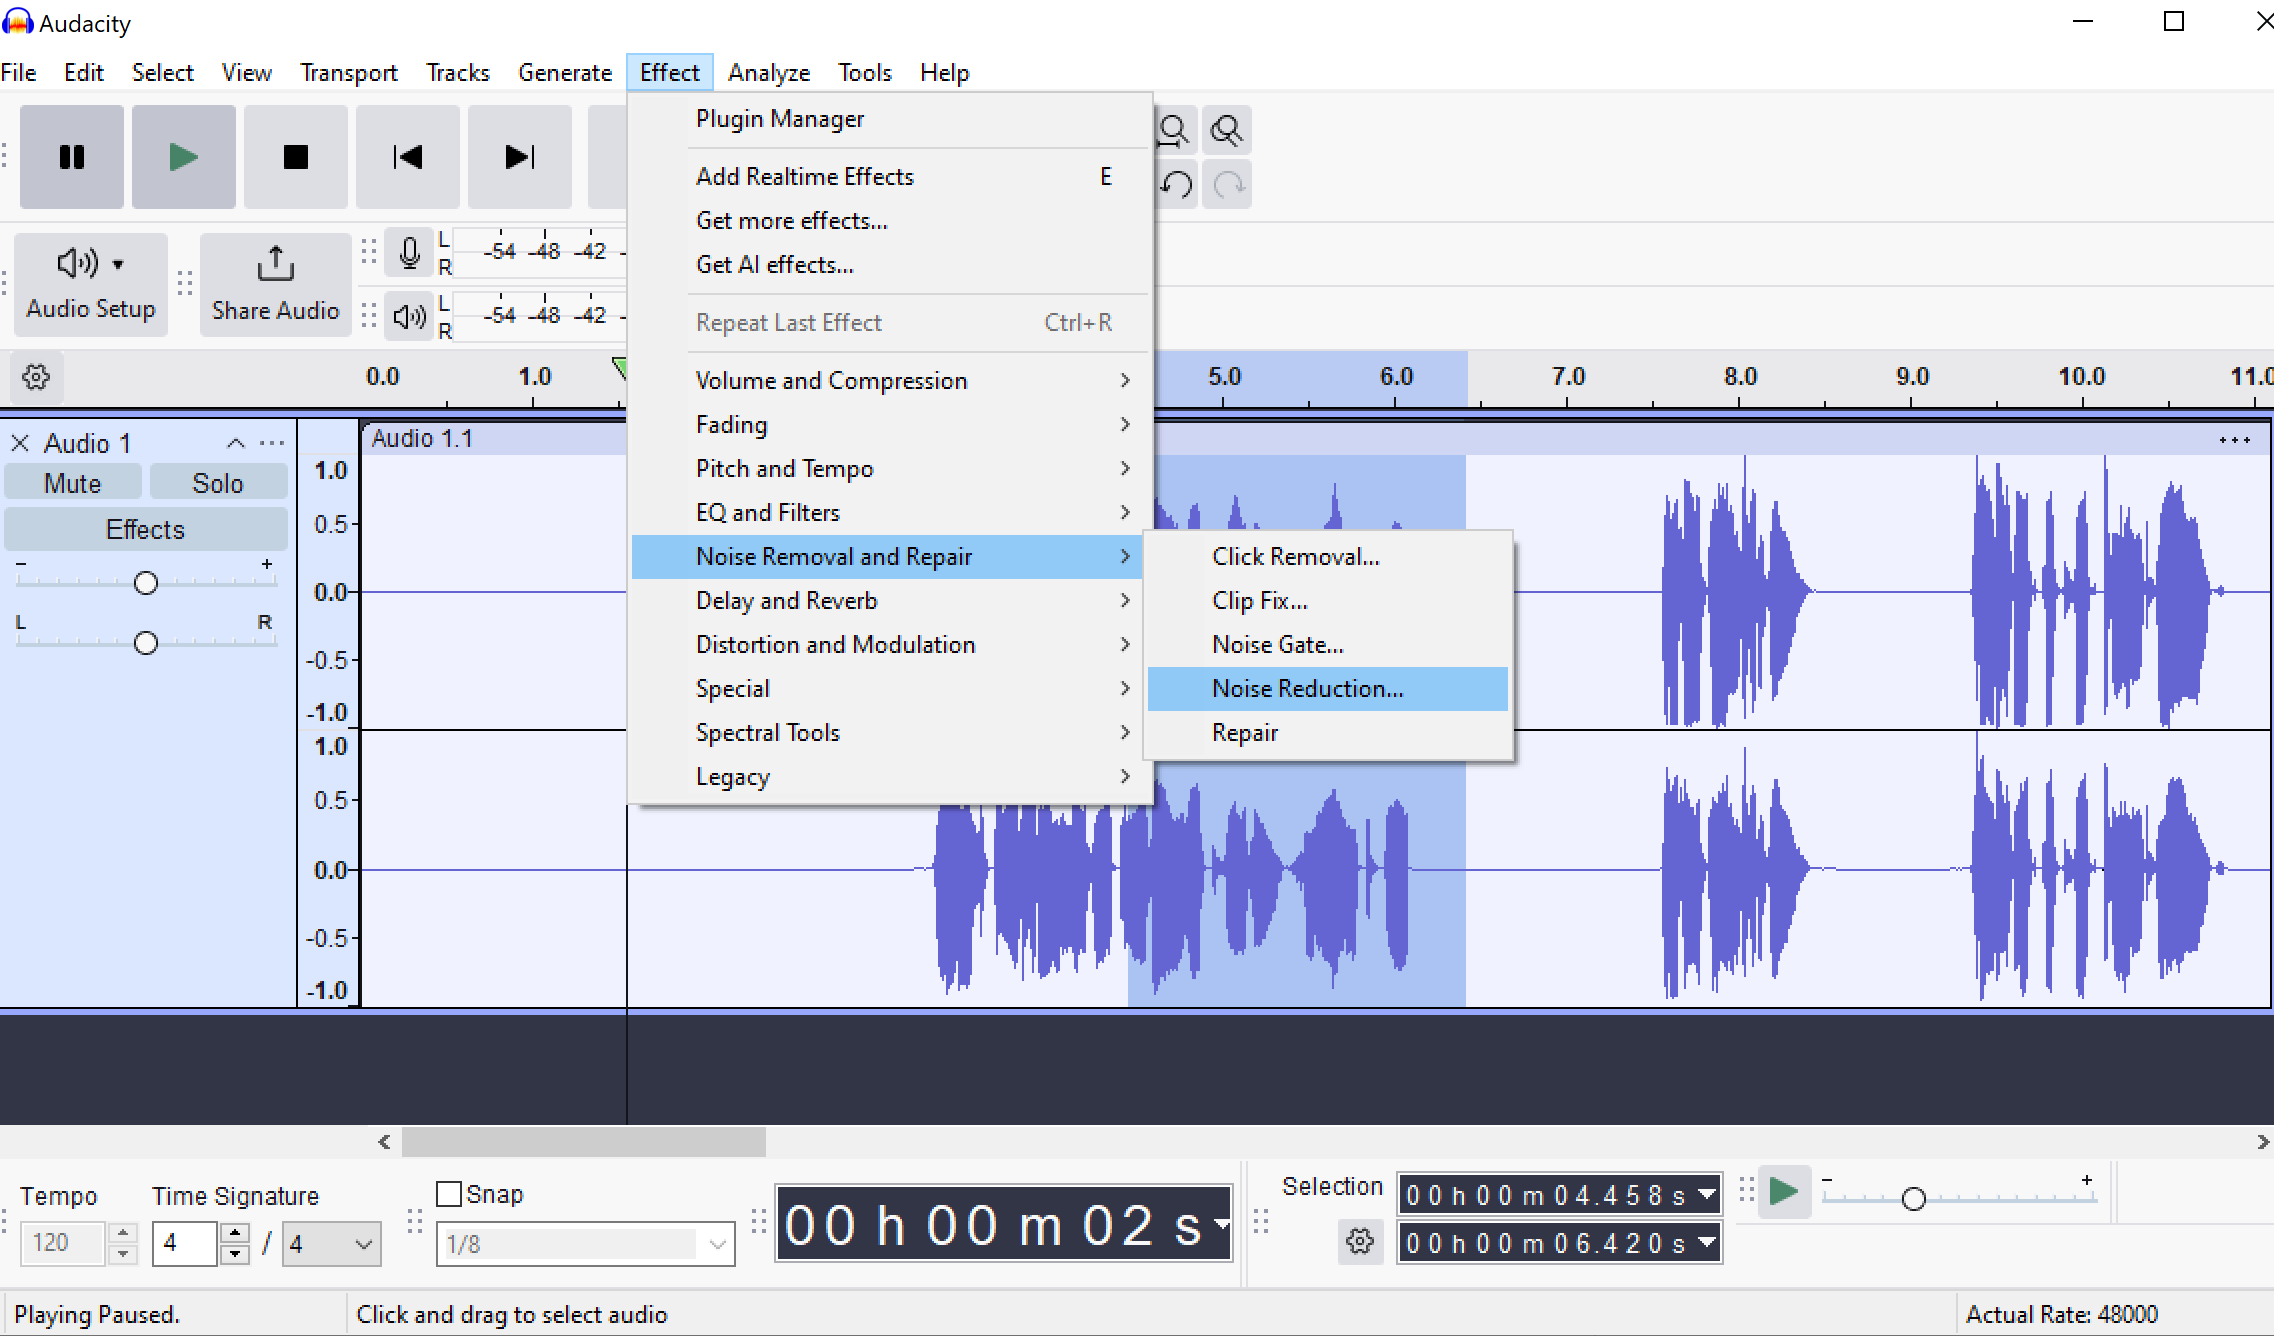 To do so, select a portion of audio containing only background noise, choose Effects > Noise Removal and Repair > Noise Reduction, and then click “Get Noise Profile.” Then, select your entire track and apply noise reduction. Remember to save your project regularly while editing to prevent losing your work.
 How to Record System Audio Like a Pro
Regardless of the method you use from my recommendations above, here are some tips I think should help you record a refined computer audio file that you can share even at work:- Test your audio levels before starting the actual recording
- Close unnecessary apps to prevent unwanted notification sounds
- Use headphones to monitor audio quality during recording
- Record a short test clip first to verify sound clarity
- Keep your computer’s volume at 75-80% for optimal quality
- Disable system sounds and notifications temporarily
- Set your recording quality to at least 44.1kHz, 16-bit
- Create a quiet recording environment with minimal background noise
- If recording your mic with system audio, balance both volumes carefully


