Understanding Voice Overs
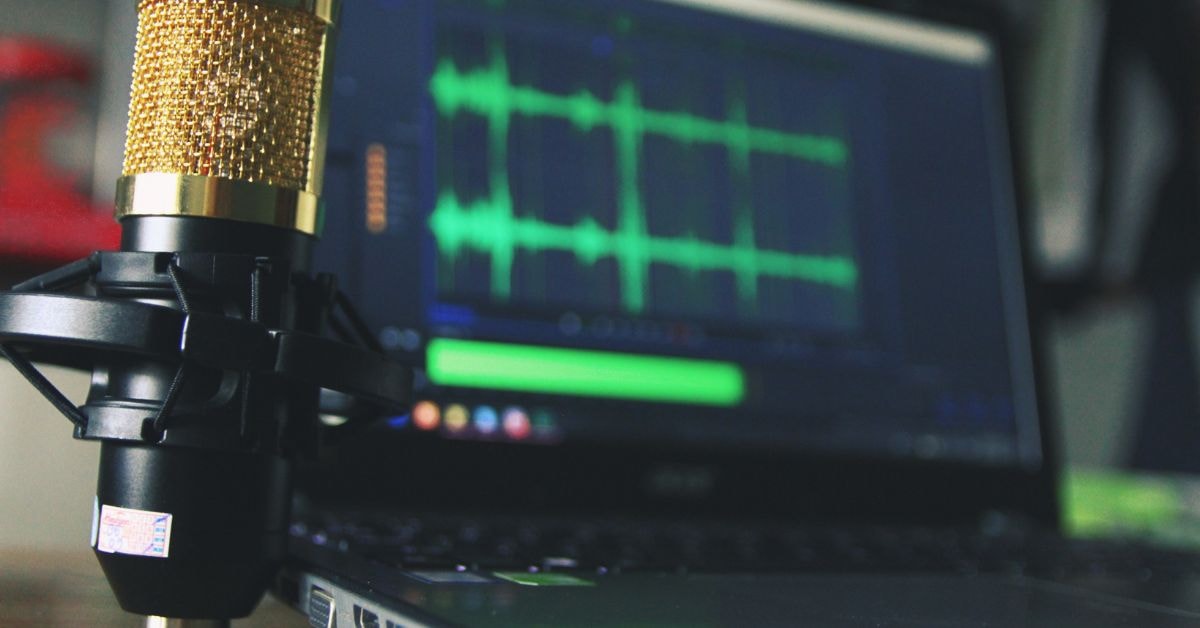
A voice-over or voiceover is an audio recording of your voice that plays over a video. Also called an off-camera or off-stage narration (in film), it’s separate from any audio captured during the original recording and gives you complete control over your narrative. With this separation, you can perfect your message without worrying about getting everything right during the video or screen recording. You’ve likely encountered voice-overs in countless tutorials and explainer videos. They’re the clear, professional-sounding narrations that guide you through processes, explain features, or provide commentary without background noise or recording mistakes. Every time you’ve watched a YouTube tutorial where the narrator’s voice sounds crystal clear as they demonstrate something on the screen, you’ve basically watched a voice-over recording.Different Types of Voice-Overs
That said, not all voice-overs serve the same purpose. Depending on your content, you’ll need a specific style to match your video’s tone and objective. Here are the three most common types of voice-overs:1. Narration Voice Over
Narration voice-overs guide the viewer through a story, process, or experience. These are common in documentaries, training guides, and different types of corporate presentations. The narrator’s tone is usually clear, steady, and engaging to keep the audience focused on the content.2. Instructional Voice Over
Instructional voice-overs provide step-by-step explanations, often accompanying tutorials, software walkthroughs, or e-learning content. This type requires clarity and pacing so that the viewer can follow along without confusion. A calm and articulate delivery is particularly key.3. Commentary Voice Over
Commentary voice-overs add personal insights, reactions, or explanations, which are commonly found in review videos and gaming content, as well as, sometimes, social media clips. The tone can be conversational or energetic, depending on the subject matter and target audience.Elements of a Professional Voice-Over
 A high-quality voice-over requires more than just speaking into a microphone. To achieve a professional result, focus on these key elements:
 1. Audio Clarity and Quality
Your voice-over must be clear and free from background noise. You should pick the right gear and record in a quiet, controlled environment to eliminate distractions like echo, hissing, or ambient noise. If necessary, you can use noise reduction tools to enhance audio clarity further. All said, the better your recording environment, the more professional your voice-over will sound.2. Pacing and Timing
A voice-over should flow naturally without feeling rushed or sluggish. Speaking too quickly can overwhelm listeners, while speaking too slowly may cause them to lose interest. When recording, aim to maintain a steady pace that complements the visuals.3. Vocal Tone and Inflection
Your tone will set the mood of your voiceover—a monotone delivery will make even the most exciting topic sound dull. At the same time, over-exaggerated inflections will come off as unnatural. You want to aim for a sweet spot to match your tone to the content—friendly and conversational for casual videos, authoritative and steady for professional content, and energetic for marketing materials. Strategic inflection will also keep listeners engaged by adding natural variations in pitch and emphasis.4. Clear Pronunciation and Diction
Your audience should never struggle to understand what you’re saying. So, ensure proper pronunciation and diction for clarity and professionalism, and avoid mumbling or trailing off at the end of sentences. You should also articulate each word clearly while maintaining a natural flow. If your script contains technical terms or brand names, ensure you’re pronouncing them correctly to maintain credibility.What You Need To Record a Professional Quality Voice-Over
Recording a professional voice-over requires the right setup and preparation. Here is what you need before you start recording:- A script: If you want to create a superb voiceover, then the script is what will ensure you meet all the four elements we discussed above.
- A high-quality microphone: You won’t rely on your computer’s microphone if you want to record professional audio quality. You need a good-quality external microphone, such as a USB or XLR microphone, that provides better sound quality than built-in laptops or phone mics. You can also use a condenser or dynamic microphone to capture detailed vocals.
- A microphone wind cover: You should also have a pop filter (for studio recordings) or a windshield (for outdoor recordings). It prevents plosive sounds—like harsh “p” and “b” noises—from distorting your audio file. It also reduces breath sounds and minor air disturbances that could affect your recording quality.
- A quiet recording environment: Background noise can ruin an otherwise great voice-over. To ensure a clean recording, pick a quiet space, preferably a soundproof room or one with minimal external noise, reduce echo by adding soft materials like carpets, curtains, or foam panels, and turn off any noisy devices like fans, AC units, or computer/phone notifications.
- Headphones: Monitoring your audio while recording is essential to catching any unwanted noise or distortion. You should use closed-back headphones to hear your voice clearly without feedback. A pair of good headphones will also ensure consistent volume and tone during the recording process and identify background noise before finalizing the recording.
- Audio recording software: You will need the recording software (DAW) to record and refine your voice-over. Here are some options that I recommend: Zight, Audacity, Windows Screen Recorder, and Adobe Audition (more on how to use them below!)
- A boom arm or mic stand: A stable microphone position is crucial for professional voiceover audio recording, which is why a boom arm or mic stand is an essential part of your setup. Trying to hold a microphone steady while reading your script is uncomfortable and can seriously impact your audio quality with unwanted handling noise and inconsistent sound levels.
How to Create a Voice-Over Script or Outline
 If you’ve read our guide on how to write a great video script, you’ll already be familiar with the basic process of scriptwriting. The good news? Creating a voiceover script follows many of the same principles, with a few key adjustments for audio-first content. Voice-over scripts require special attention to how they’ll sound rather than how they look on paper. You need to write like you speak—in a conversational tone that flows naturally when read aloud. Short, clear sentences work better than complex ones, as your viewers need to understand your message the first time they hear it. Let’s break down the key steps for adapting your script for voice-over:
 - Start with a solid brief – define your audience, purpose, and key message (just like with video scripts)
- Write conversationally – use contractions, simple words, and natural language
- Keep sentences short and focused – aim for 15-20 words maximum
- Include clear transitions between ideas
- Mark emphasis points and pauses in your script
- End with a clear call-to-action
How to Record a Voice-Over: Four Best Methods
Here’s how to record your professional voiceover audio file using straightforward tools, including this smart workaround with Zight!Method 1: Use Zight
Zight is primarily a screen recorder and video editing software, not a voice-over tool. However, you can still use its webcam recorder to create high-quality voiceovers. For this method and step, I am assuming you already have recorded your video, and you now just need to add voice-over narration for better clarity. To get started, locate the video you want to narrate, play it, and create a good script following the steps we discussed above. You can even upload the video to Zight and use the AI feature to get a transcription for the video if it had narration, then improve that into a good script! Next, open Zight and click “Record,” then “Full Screen.” Then, choose “Screen & Cam” or “Cam Only” from the recording options. Under camera settings, you can select a camera or even “No webcam.” What you want is for Zight to record your voice. So, make sure your microphone is selected in the audio settings, and you’re ready to start recording. As we mentioned above, this process will be even better if you have a pair of high-quality headphones that will cancel out background noise. You will get a 3-second timer, after which you can start reading your voice-over script at a steady pace. Once you are done, click Finish and wait as Zight uploads the video to the cloud. The video link will also automatically load on your default browser to take you to the video editor.
  Edit the video if necessary – Zight allows you to trim, split, and merge compatible sections and so much more. Once you’ve finished editing your voice-over recording, you should download the video to your computer as an MP4 file. To make it a voice-over, you want to convert the video into an audio file.
 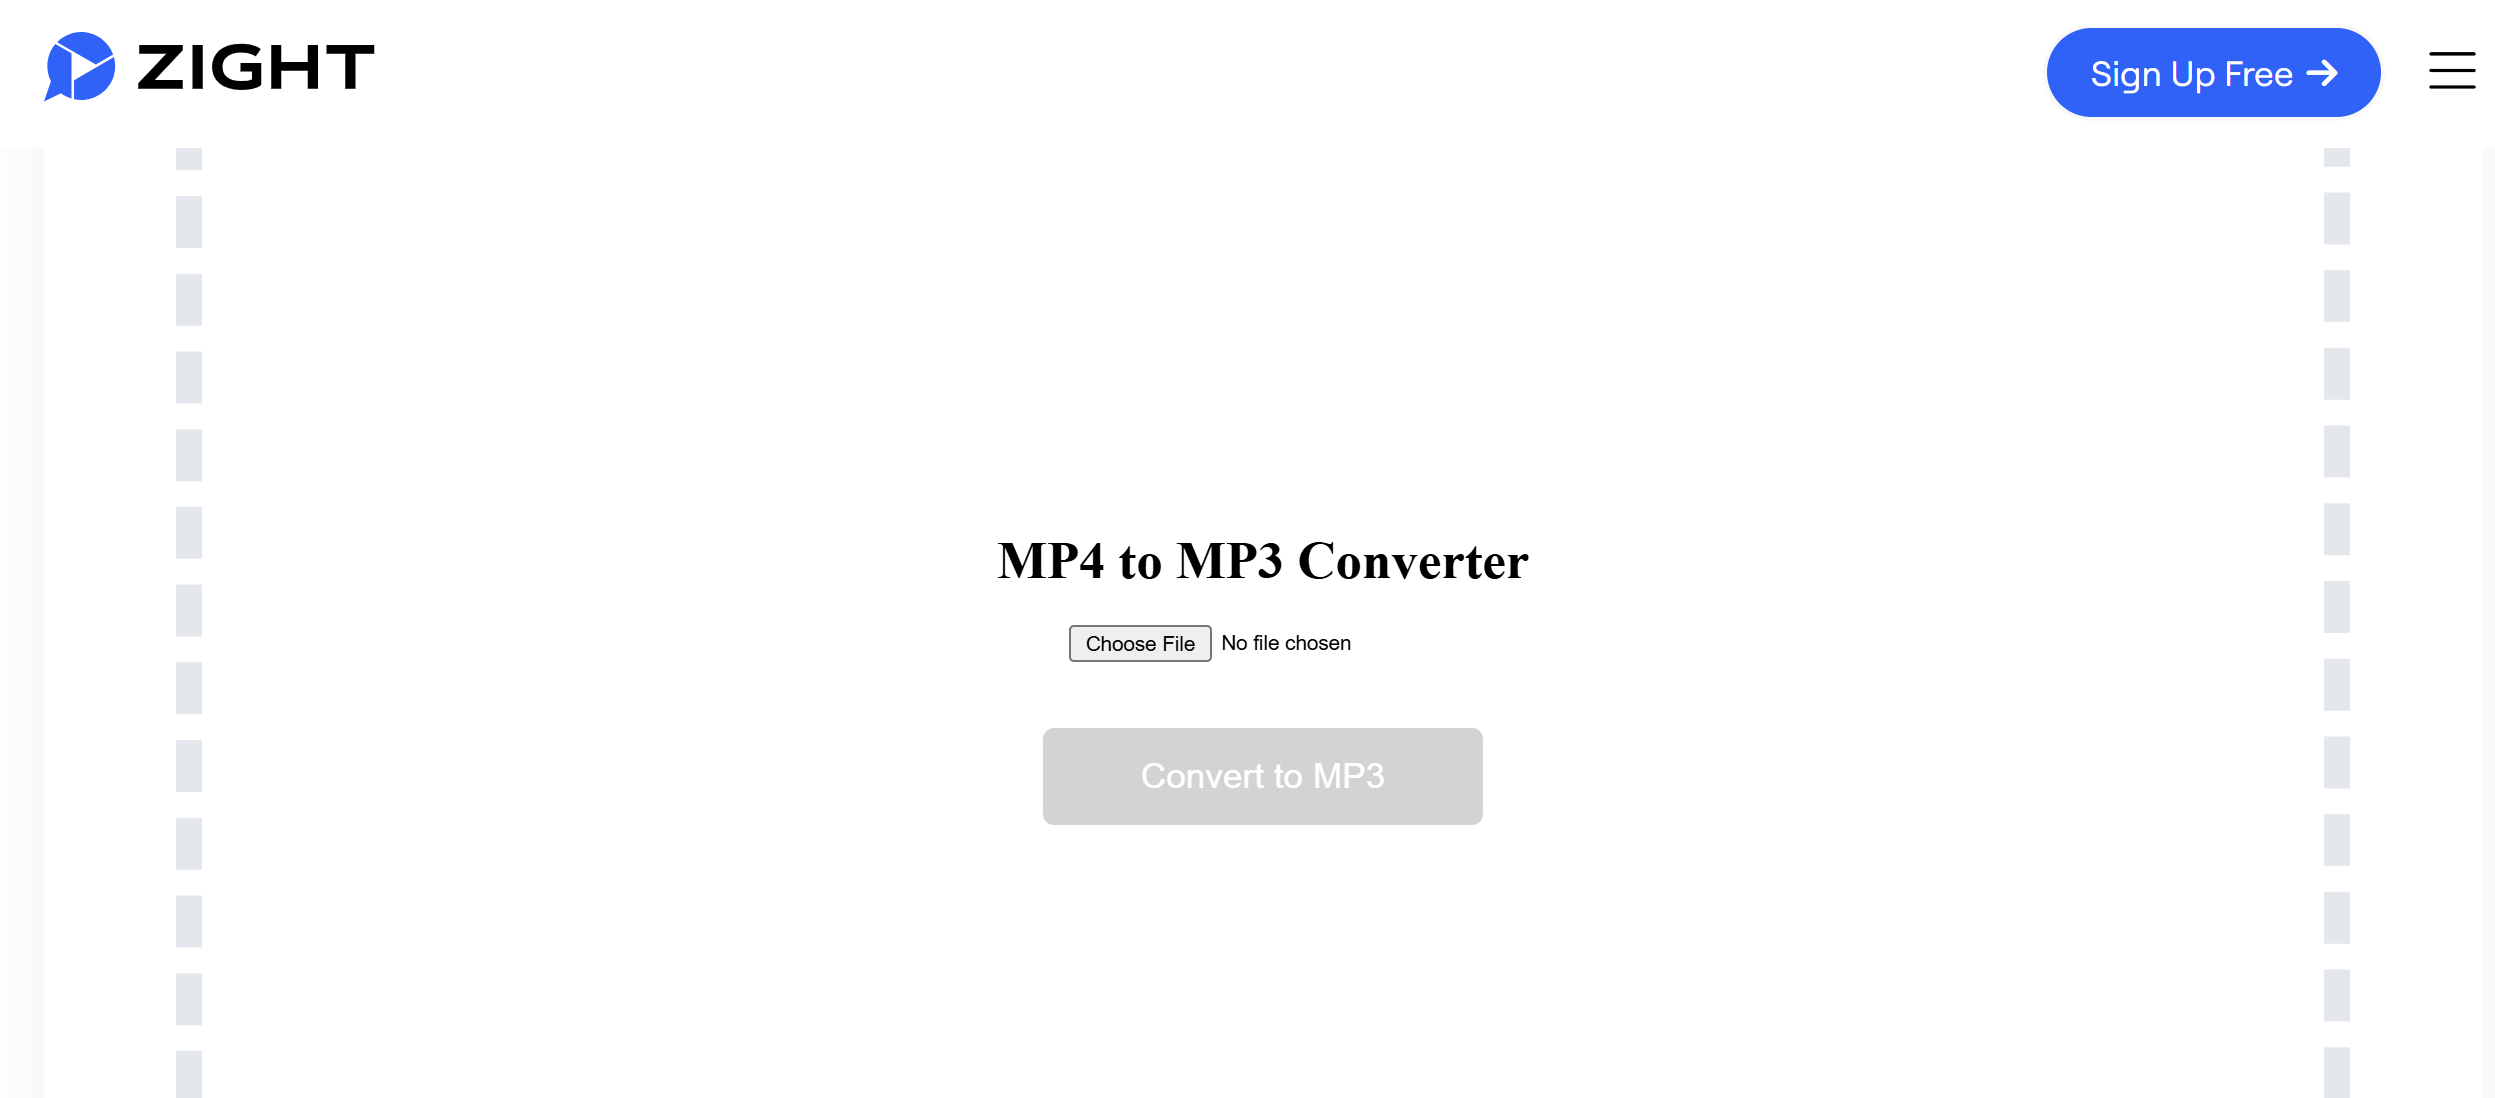 Upload the same video to Zight’s MP4 to MP3 converter so you can download it as an audio file that will be ready to be integrated into your video file later.
 Method 2: Using Audacity for Mac and Windows
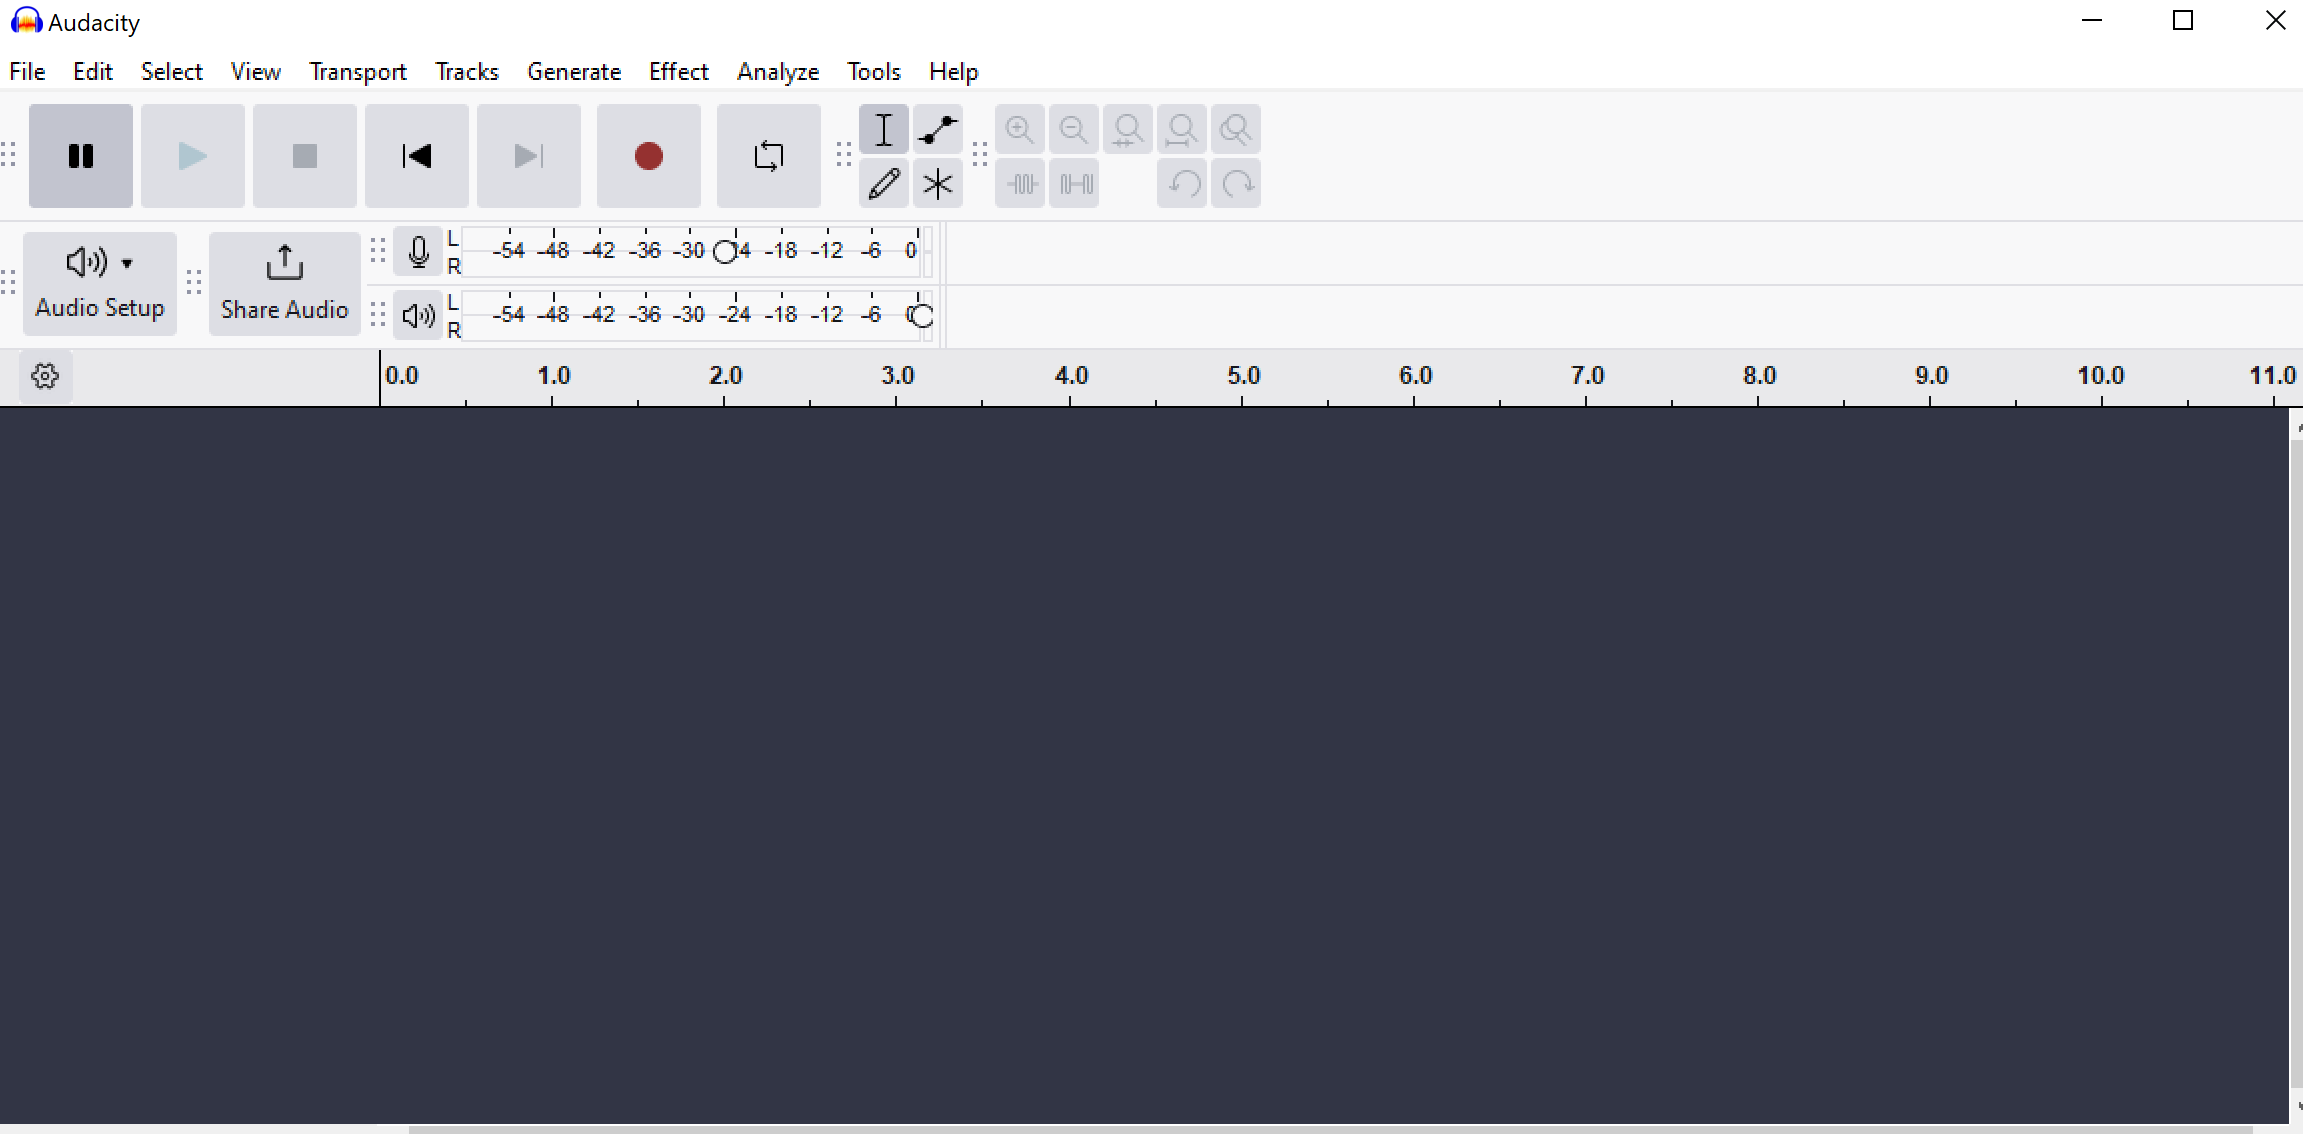 Another simple and free tool to use to record audio for your voice-over is Audacity. In our previous guide on how to record computer speakers, we detailed the simple steps to use this tool, including for audio editing, but let’s run it down below so you can also use it to record your voice-over. To record your voice-over with Audacity on Mac, head over to the website and download the compatible macOS app. The installation process is similar on Windows—head to the official Audacity website, download the latest version for Windows and run the installer. Follow the installation wizard’s prompts, and you’ll be ready to start recording in minutes: Once you have Audacity installed, recording your voice-over is surprisingly simple, but it’s crucial to configure your audio settings correctly. Here’s how to do it: Plug in your USB or XLR microphone and select it as your input device in Audacity’s preferences. Before recording, adjust the sample rate to 44.1 kHz for clear audio quality and set the recording mode to mono for a focused voice track. Ensure your recording space is quiet, and position your microphone correctly to minimize background noise. When you’re ready, click the red record button and begin speaking at a steady pace, maintaining clear articulation and natural inflection.
 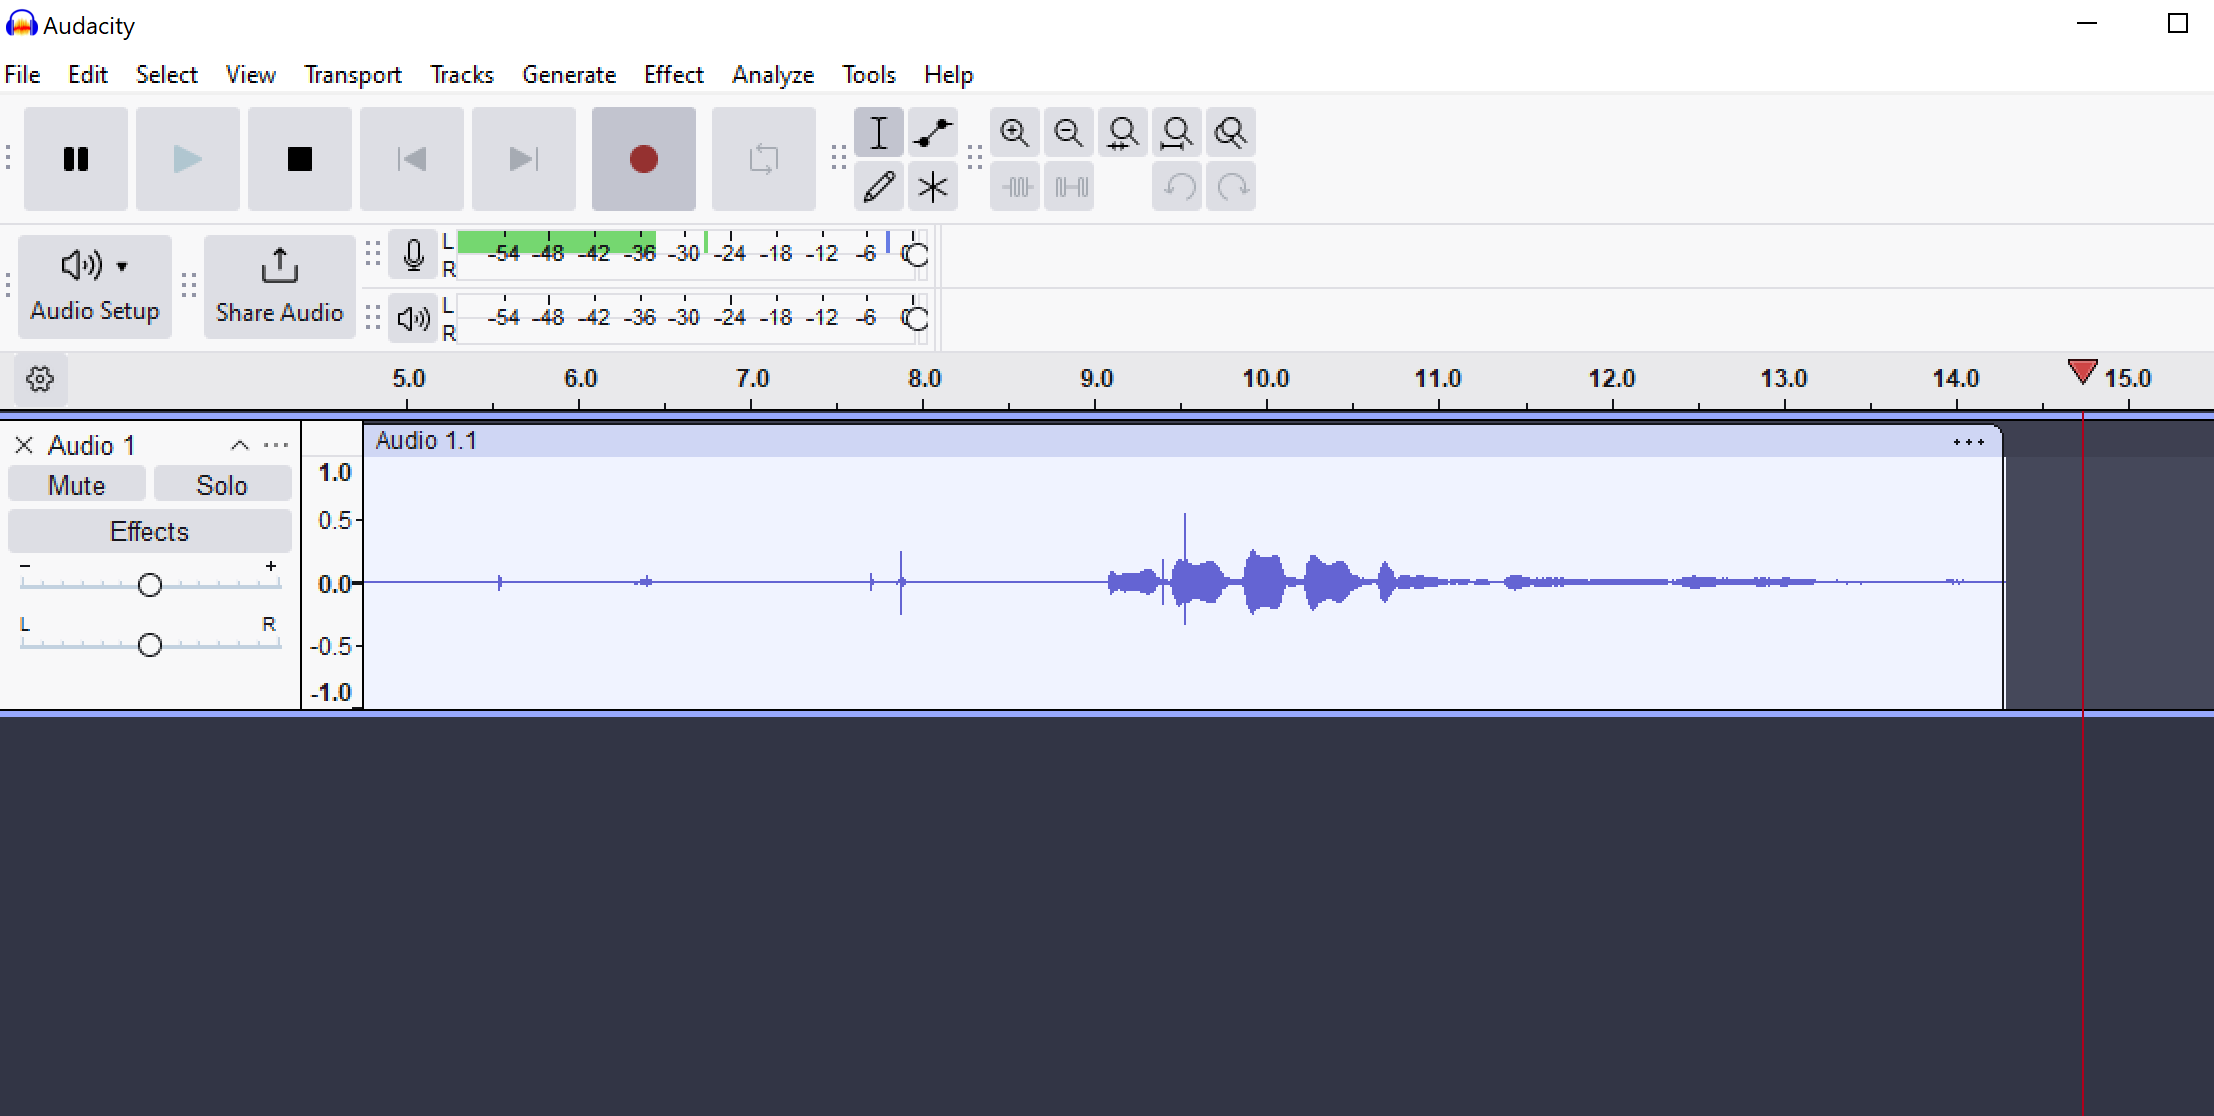 You can use the “Pause” button to take breaks or “Stop” when you’re done, then play it back to review the quality. Use Audacity’s built-in tools to trim silences, reduce background noise, and adjust volume levels for a polished result. When satisfied, export your file in WAV or MP3 format, ready for integration into your project.
 Method 3: Using the Windows Voice Recorder
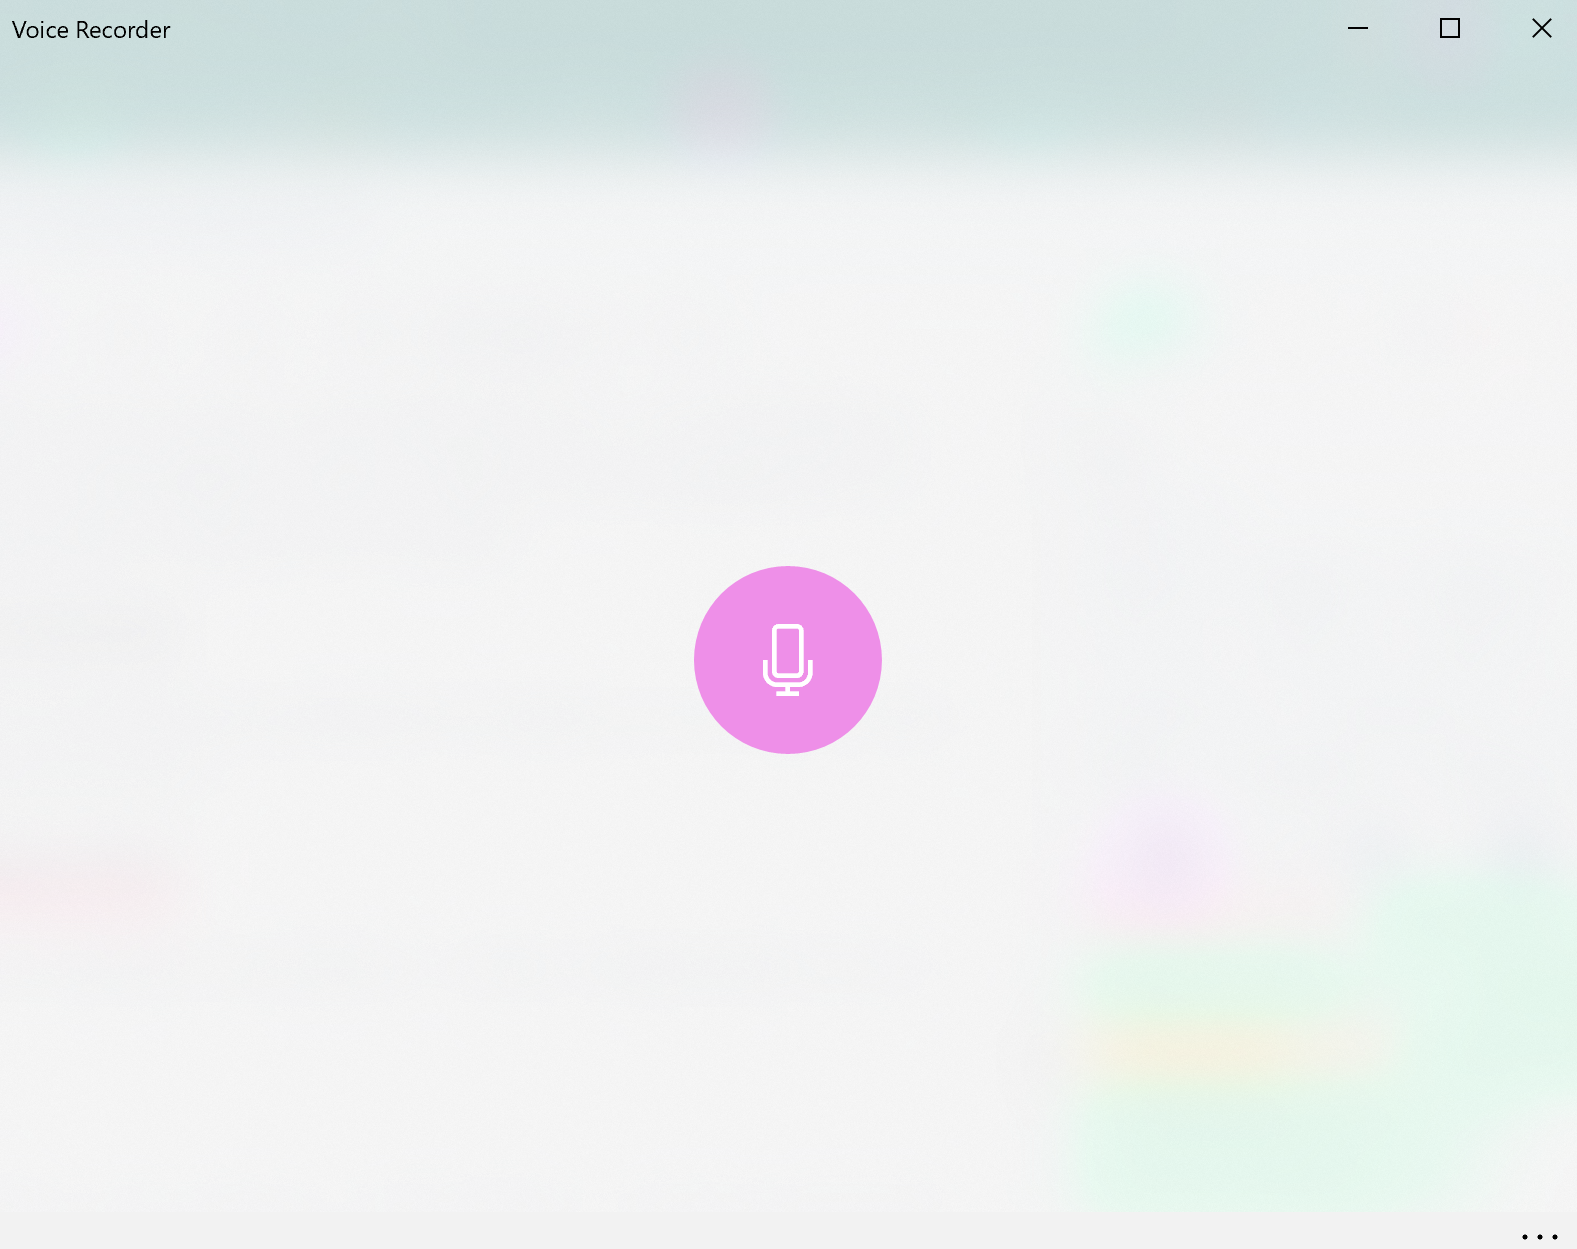 Another tool you can use for voice-overs is the native Windows Voice Recorder. It’s a simple tool to use, and you’ll end up with a file that sounds professional. First, open the Voice Recorder app. You can find it by clicking the Start menu and searching for “Voice Recorder.” Next, set up your microphone. Make sure it’s properly connected and working. To check, go to Settings > Sound and look under Input Devices. Select your microphone and test it by speaking—if the volume bar moves, it’s ready. Now, start recording. Click the Record button (the microphone icon), and begin reading your script. If you need to take a break, use the Pause button and resume when ready.
  When you’re finished, click Stop. The recording automatically saves in the Sound Recordings folder under Documents. To review it, click on the file within the app. If you need to make edits, use the built-in Trim tool to cut unwanted sections. Once edited, you can rename the file or share it directly through email, OneDrive, or other apps. The recording is saved as an M4A file, which you can convert to another format if needed so you can integrate it into the video next.
 Method 4: Record a Voice Over with Adobe audition
If you want professional recording studio-like audio quality, the best tool to use for your voice-over should be Adobe Audition. You’ll need an Adobe Pro account to access this and other tools, then you can follow these steps: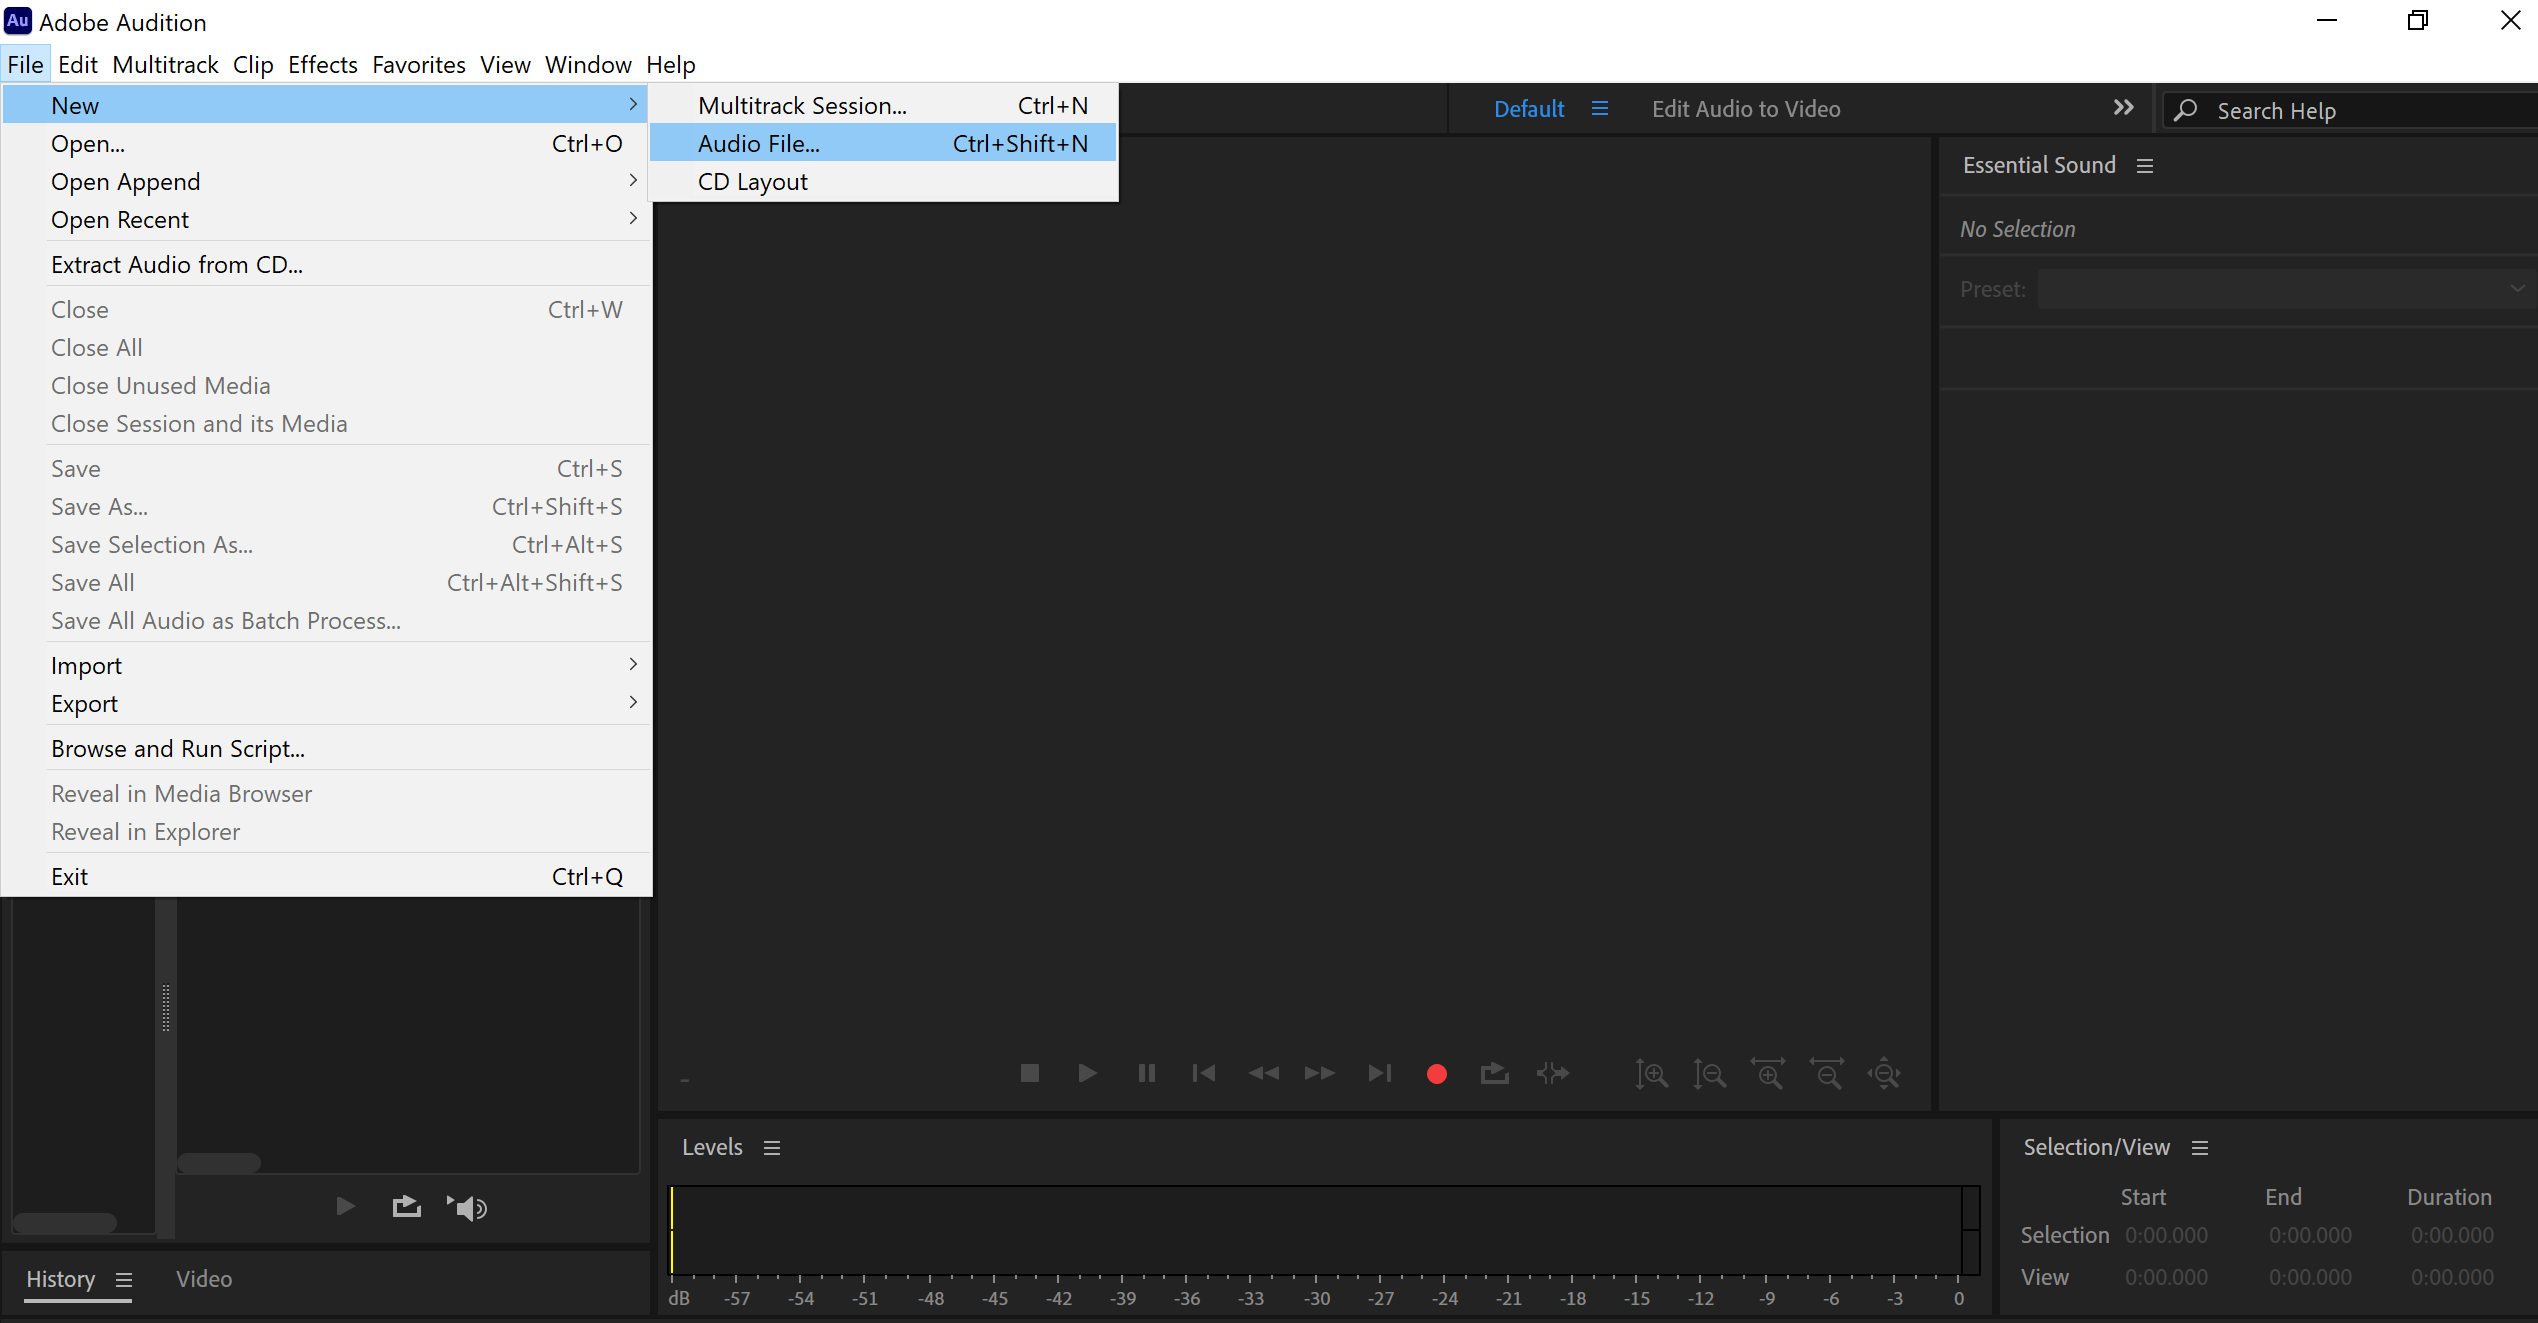 Open Adobe Audition and create a new project. Click File > New > Audio File, then name your project and set the sample rate (44.1 kHz or 48 kHz is standard for voice-overs).
 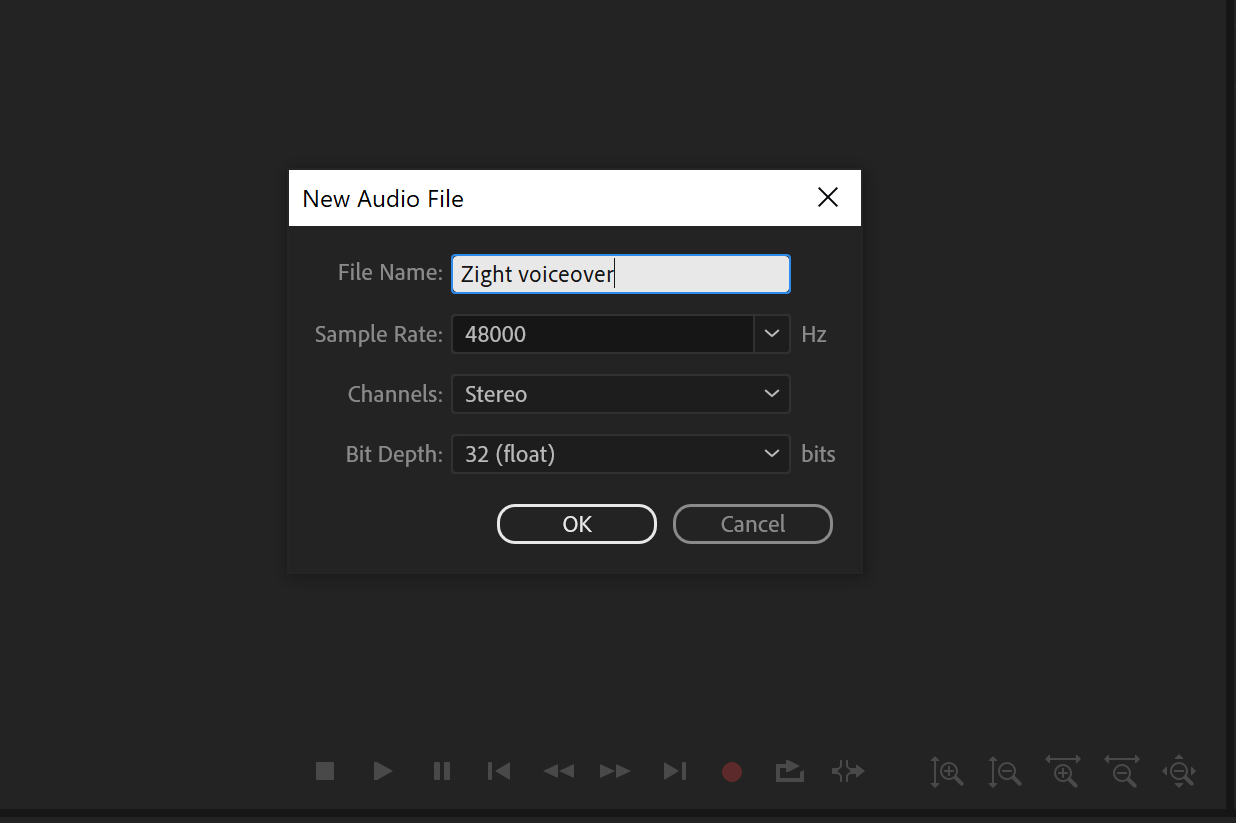 Next, set up your microphone. Go to Edit > Preferences > Audio Hardware and select your microphone as the input device. Ensure your output is set to your speakers or headphones so you can monitor playback.
 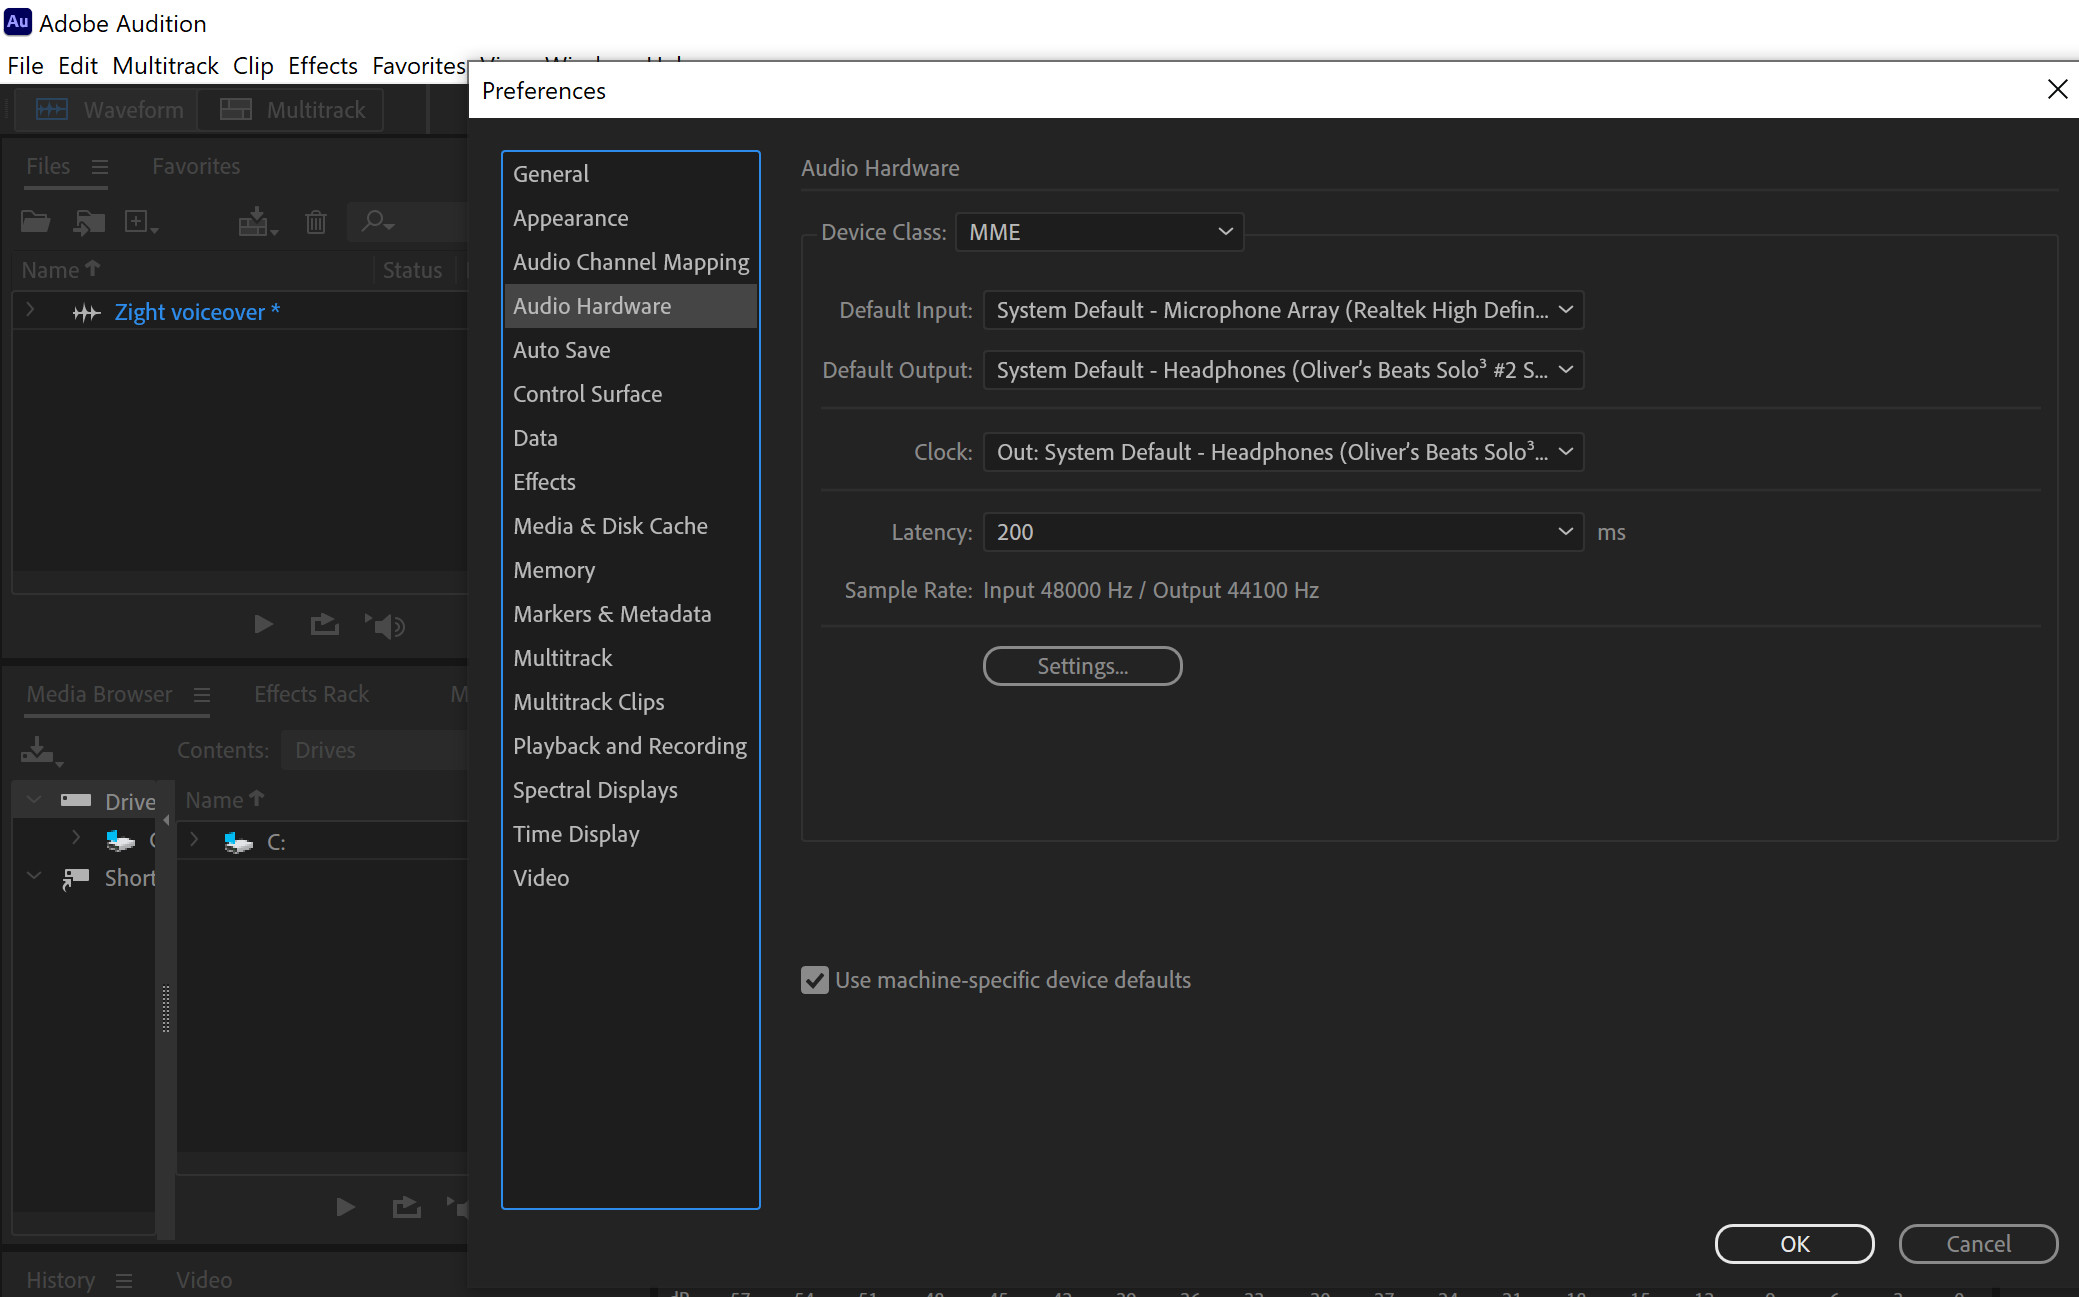 Now, start recording. Click the red Record button in the Editor view and begin reading your script in a natural tone.
 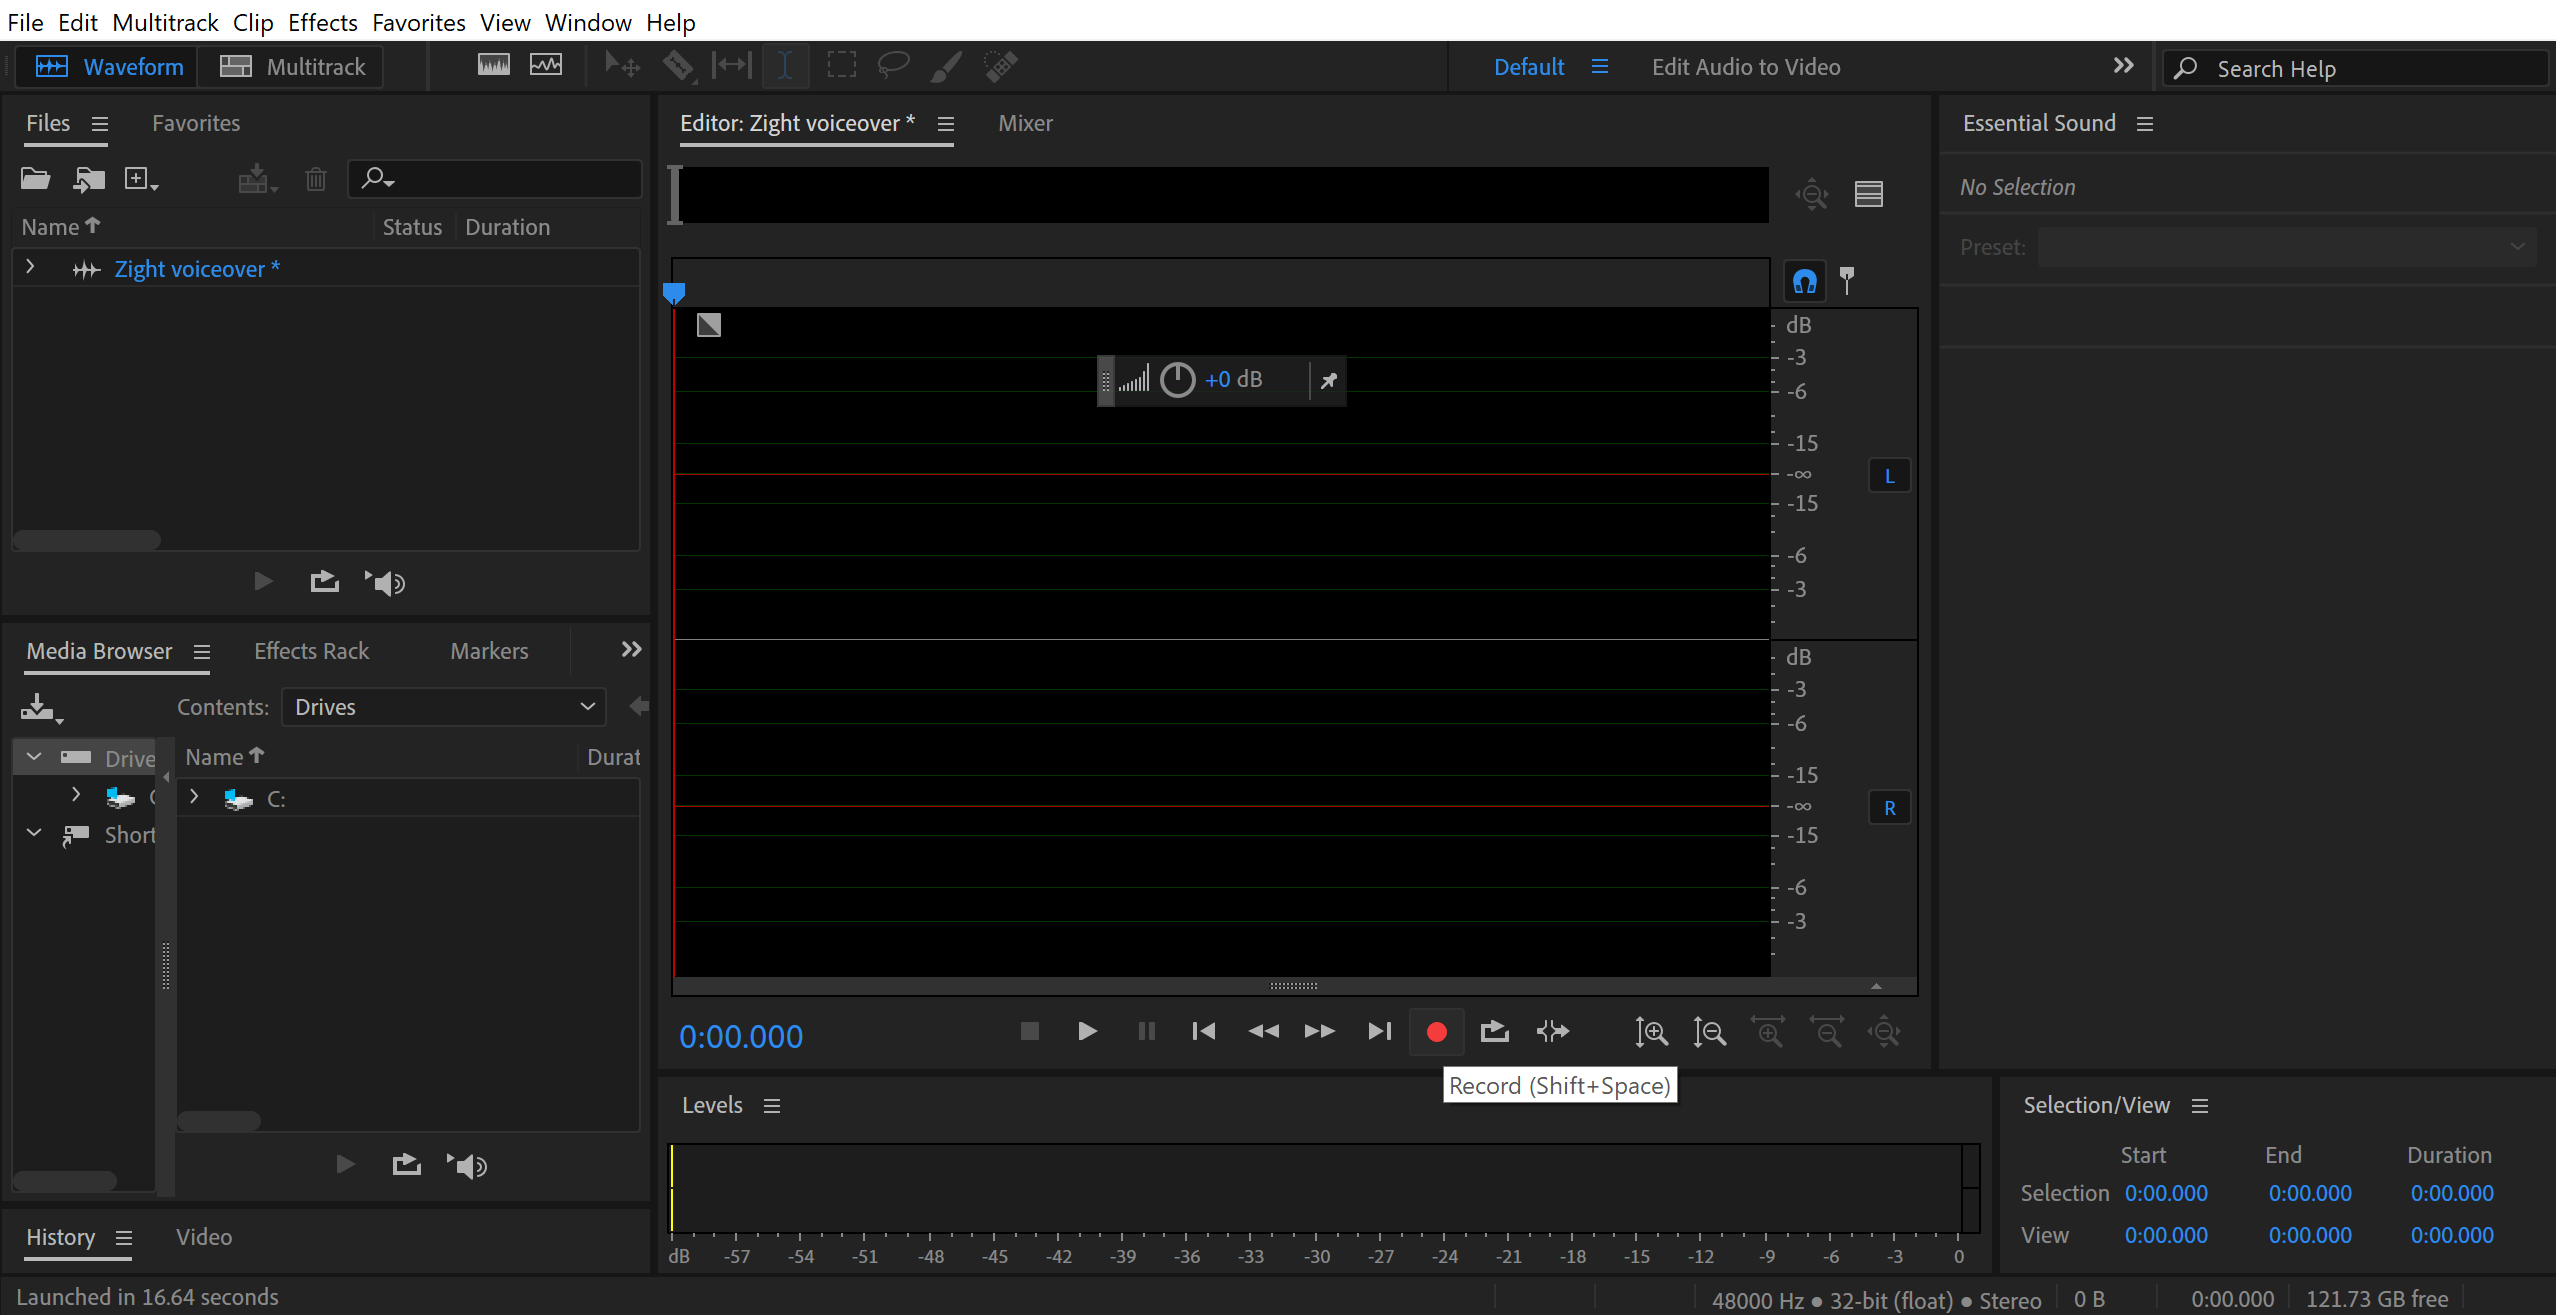 Once you’re done, press Stop and review your recording. You can trim unwanted sections by selecting them, right-clicking, and pressing Delete.
  You can also remove background noise by using Effects > Noise Reduction and applying a light reduction to keep the voice natural.
 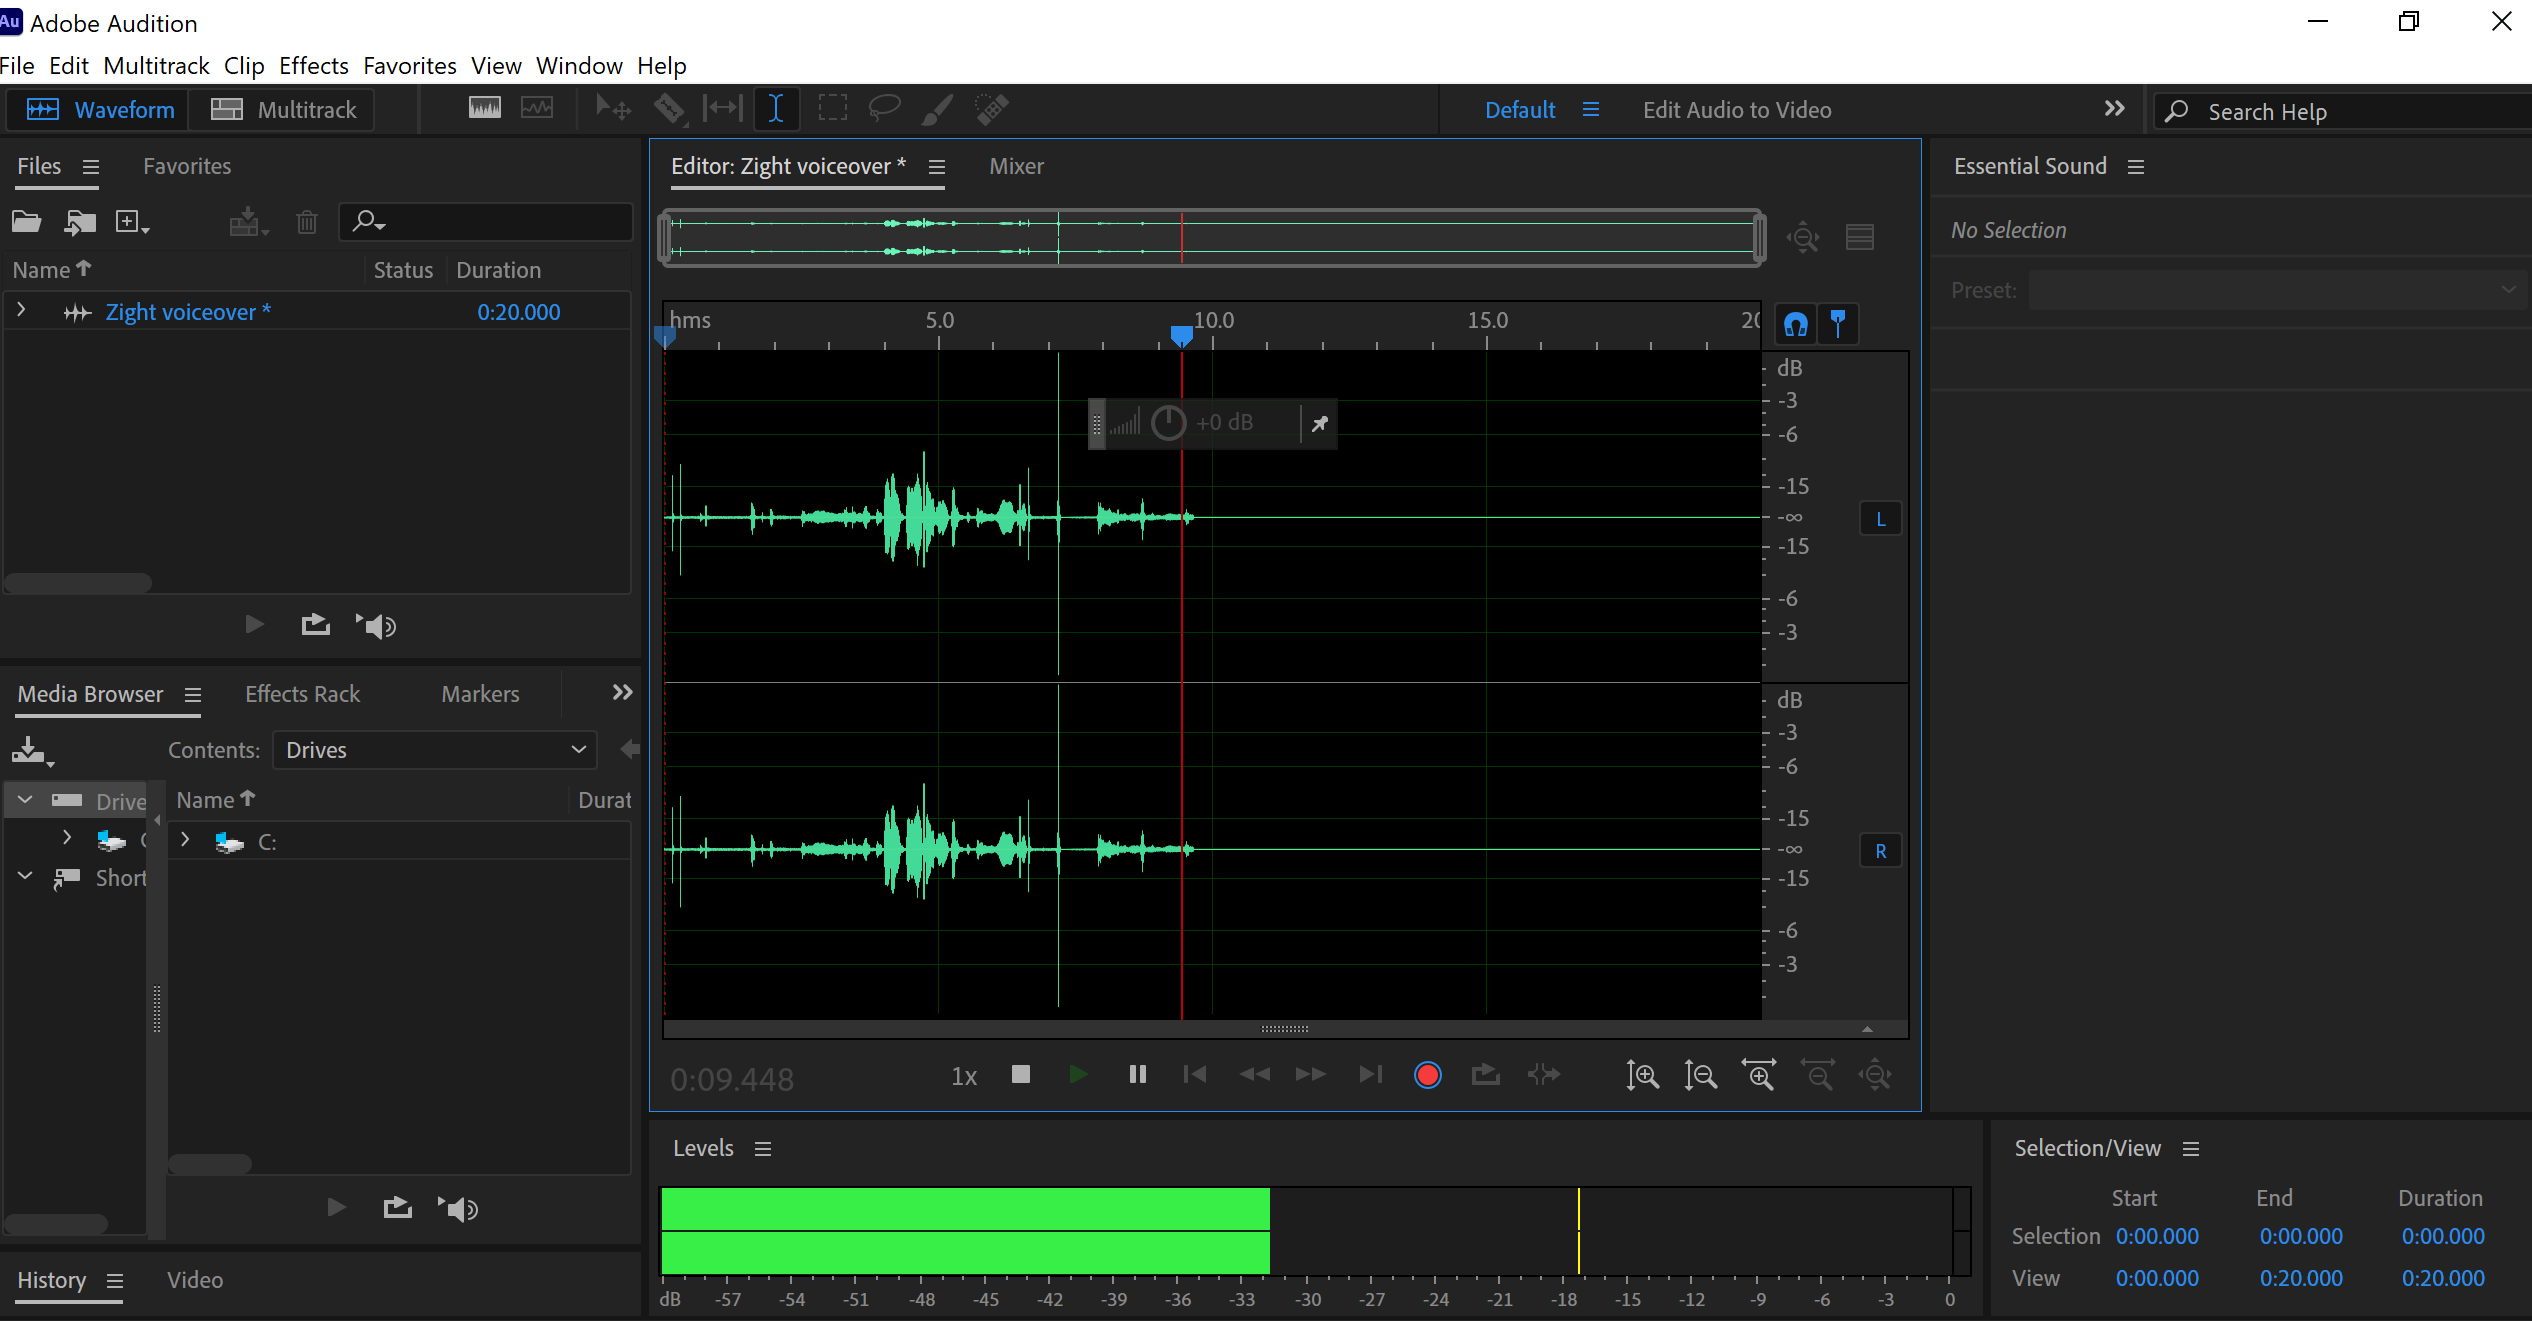 For better clarity, use Effects > Amplitude and Compression to adjust the volume levels. You can also enhance your voice with Effects > Filter and EQ to fine-tune the tone.
  Finally, export your voice-over. Go to File > Export > Multitrack Mixdown and choose a format like WAV or MP3. Your file is now ready to be added to your video.
 The Basics Of a Voice-Over Recording Process
By now, you know that a great voice-over starts long before you hit the record button. You need high-quality audio, so you must focus on preparation, technical precision, and consistency. Here’s how your before and after recording should play out:1. The Pre-Recording Checklist
Before recording, you should set up your environment and equipment properly. For starters, choose a quiet space with minimal background noise. Next, check your microphone placement—you should position it about 6 to 12 inches from your mouth, slightly off to the side, to avoid harsh plosive sounds (like “P” and “B” sounds). Set up your pop filter early to minimize these distortions. Finally, adjust your recording software settings—this should include setting the sample rate to 44.1 kHz or 48 kHz and the bit depth to 24-bit for high-quality audio. Also, confirm that your input device (microphone) is selected in the recording software.2. Test Recording Best Practices
Regardless of which software you want to use, never start a full recording session without a quick test. Record a 10- to 15-second sample of your voice at normal speaking volume, then listen with headphones. Check for background noise, echo, or distortion. If the audio sounds muffled, adjust your mic placement. If you hear room noise, try soundproofing further or lowering input gain to reduce sensitivity. In addition, you should monitor your breathing and mouth sounds – you would overlook these, but they can be really distracting. A good practice is to stay hydrated and avoid dairy or sugary drinks before recording, as they can cause mouth noises. If needed, practice controlled breathing techniques to minimize unwanted inhales between sentences.3. Volume Levels and Audio Monitoring
If there’s one thing you might not be able to do after recording, it’s got to be to edit audio. So, you need to ensure consistent volume levels for clarity before you start recording your audio track. Keep your microphone input levels between -12 dB and -6 dB to allow headroom for editing—if levels are too high (clipping into 0 dB), the audio will distort. If they’re too low, you’ll need to boost the volume later, which can introduce noise. You can also use live audio monitoring while recording. If your setup allows, wear closed-back headphones and listen to your voice in real-time. This can help you catch issues like background noise, uneven volume, or microphone pops. Many recording software options also include peak meters, which visually indicate if your levels are too high.4. Recording Techniques for Clear, Professional Audio
When recording, maintain a steady distance from the microphone to avoid inconsistent audio levels. And if you need to emphasize certain words, lean slightly in rather than increasing your volume too much – you will create a natural dynamic range without sudden spikes. In addition, speak in a controlled, natural tone. Avoid rushing – good voice-overs have intentional pacing, which allows listeners to absorb the information. If you’re narrating for a video, follow the script while keeping the delivery engaging. You can also smile while speaking to add warmth to your tone, especially for marketing or instructional content. For longer recordings, take breaks to prevent vocal fatigue. If you make a mistake, pause for a second, then redo the sentence rather than stopping the entire recording—you can easily cut the bad take without breaking the flow. Finally, record in sections instead of doing everything in one take. This allows for greater control over pacing and reduces the chances of errors affecting a long segment.5. Post-Recording Voice Over Audio Editing
Recording is only half the process. The next step is refining your audio for a professional voiceover. You can start by importing your recorded file into your audio editing software (Adobe Audition, Audacity, or another DAW) and trim unnecessary silence at the beginning and end of the recording. Use fade-in and fade-out effects to create a smooth transition. Next, normalize your audio levels. A good range for voice-overs is -3 dB to -6 dB to ensure the voice is clear but not overpowering. If your audio sounds uneven, use compression to balance volume fluctuations. A moderate ratio (3:1 or 4:1) helps maintain clarity while keeping dynamics natural. To eliminate background noise, apply a Noise Reduction effect. In Audacity, select a few seconds of silence, capture the noise profile, and apply the reduction to the full track. In Adobe Audition, the Adaptive Noise Reduction tool works well. However, don’t overdo it—too much noise removal can make your voice sound robotic. If your voice-over needs background music or sound effects, choose royalty-free audio that complements the tone of your content. Keep background music subtle—your voice should always be the focal point. Then export your files:- For video editing (YouTube, corporate videos), export in WAV (16-bit or 24-bit, 48 kHz) for maximum quality.
- For podcasts or online streaming, MP3 (320 kbps) balances quality and file size.
- For phone systems or compressed formats, use AAC or MP3 (128 kbps or higher).


