Why are YouTube Transcripts Important?
We have briefly mentioned why YouTube transcripts might be handy for viewers and content creators but let’s get into more detail. Here’s why:a). Improved Focus and Retention
Reading along with the audio can make it easy to follow and remember information. This is particularly useful if you are a visual learner who benefits from both seeing and hearing the content you are learning on YouTube.b). Better Accessibility
Transcriptions make YouTube videos more accessible and flexible for people who are hard of hearing or non-native speakers, whether you’re watching to learn or sharing information. They’re also useful if you’re in a noisy environment or need to keep the sound off.c). Convenient for Review
With YouTube transcriptions, you can quickly revisit specific parts of a video without needing to search through it. This can be useful for note-taking or quickly finding the information you need.d). Language Learning Aid
For those learning a new language, YouTube transcriptions offer a way to follow along with the spoken language, helping with pronunciation, sentence structure, and vocabulary.e). Pace Control
Transcripts allow you to read at your speed. Some people may find they absorb information more easily through reading, while others prefer reading YouTube transcriptions along with the video.f). Search Benefits for Creators
If you’re creating content, having transcripts can make videos more searchable, potentially helping more viewers find your content.1. Using the YouTube Transcript Generator
YouTube has a free transcription feature built into the app that works for both the desktop and mobile app.Step 1: Choose the Video
Head to YouTube on your desktop or laptop then search for the video you want a transcript of. Most long-form content will have a transcript compared to music videos and shorts which usually don’t provide transcripts. We’ll be using this video from our channel for this example.
Step 2: Access Video Options
Open the YouTube video, scroll down, and look for the Like and Dislike buttons. On the right side of that, there’s Share, Save, and a 3-dot icon next to the title, and click on it to reveal a dropdown menu.
Step 3: Click the “Show Transcript” Button
Click on “Show transcript” after accessing the dropdown menu. The transcript will appear on the right side of the video.
Step 4: Copy and Paste the Transcript
 Check the “Transcript” sidebar that opens up next to the video’s description. Once you click the show transcript button, you will have to scroll down to select it all, then copy and paste the transcript into a Microsoft Word document or Google Docs. However, the direct download option is not available on YouTube.
 Limitations of the YouTube Video Transcript Generator
The YouTube video transcript generator comes with some limitations such as:1. Accuracy Issues with YouTube’s Auto-Generated Transcripts
YouTube’s video transcript generator often struggles with accuracy. While it’s an automatic tool for converting video audio into text, it sometimes fails to produce effective transcripts. This is particularly noticeable with specialized terminology or unique names, leading to incomplete or incorrect versions of the video’s transcript. If you need accurate transcripts for professional use, YouTube’s built-in option might not be sufficient, especially when video plays in noisy environments. In these cases, using a more reliable transcript generator, like Zight, could save you time and ensure highly accurate transcriptions.2. Limited Language Options and Translation Challenges
One major drawback of YouTube’s transcript generator is the limited set of languages available. You can only access default languages, which means the tool falls short if you need to provide translations for a wider audience. If you want to make your video content more accessible to non-native speakers or improve the accuracy of YouTube transcriptions in multiple languages, this limitation becomes a challenge. For content creators looking to reach a global audience, these limitations make it hard to get a transcript that’s useful for social media posts or embedding in search engines.3. Impact of Accents, Dialects, and Background Noise
The background noise and accents in a YouTube video can significantly affect the quality of the transcript. For example, videos recorded in noisy environments may cause the transcript generator to miss important words or phrases. Accents such as British, Australian, or Indian English can distort pronunciation, making it harder for the tool to produce an accurate transcript. This issue is especially common in educational content, where precise language and terminology are critical. For video files with different speakers, the transcript text might fail to distinguish between voices, leaving you with a jumbled, hard-to-read text version of the video.4. The Need for Manual Correction and Editing
Given these challenges, manual editing is almost always necessary when using the YouTube video transcript feature. By correcting errors in the transcript, you ensure that the text document accurately reflects what’s being said. If you want to make the transcript clearer, you can open it in a text editor or Google Docs, and even download transcripts as a .text file or Word document. This step ensures clarity and consistency, especially for content creators who need their video transcripts to be presentable for professional use. Whether you’re using the YouTube app or YouTube Studio, these changes can be made with just a few clicks.5. When the Transcript Feature is Disabled
If the YouTube creator has disabled the video’s transcript, you’re left with no option to directly download the transcript from the platform. In these cases, you can use a free YouTube transcript generator like Zight to easily create YouTube transcripts. Simply paste the YouTube video URL into the tool, and it will generate a full, accurate transcript. These tools often offer additional features such as the ability to toggle timestamps, and they support multiple languages, allowing you to generate a transcript in the native language of your choice. Once you’ve downloaded the entire transcript, you can further edit it in a text file or Microsoft Word for better readability and professional presentation.2. Record a Video with Zight and get a Transcript using Zight AI
 One of the easiest ways to transcribe YouTube videos is with the help of Zight. You might be thinking, ‘Isn’t Zight a screen recorder?’ You’re right. It’s so much more. Not only can you record parts of a video, but Zight’s AI-powered tools also let you generate a full transcript in just a few clicks. Recording a video and obtaining a transcript using Zight AI is straightforward. Here’s how you can do it:
 a. Record Your Video with Zight:
Step 1: Set Up Zight – Create an account and download the app for Mac or Windows. Alternatively, use the Chrome extension or iOS app. Step 2: Start Recording – Open Zight and click Record. Choose from different recording options: full-screen, a selected region, or specific modes—screen only, screen + webcam, or webcam only. You can also create short GIFs instead of videos.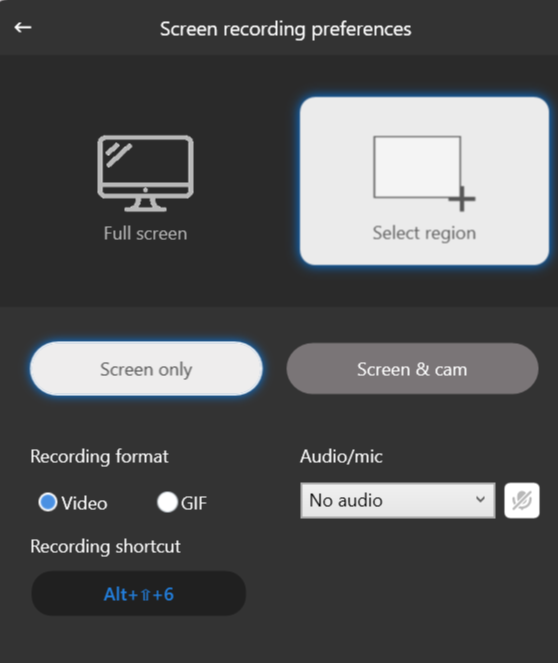 Step 3: Enable Mic and Camera – Turn on your mic and webcam if needed. Keep in mind that audio cannot be recorded for GIFs, so if you want to caption a GIF, your best solution could be to convert a captioned video to a GIF. Step 4: Begin Recording – Once you’ve selected your preferences, click Start Recording. You can annotate while recording using arrows, highlighters, shapes, and more. Pause the recording to add elements and resume when ready. For training or demo videos, use the annotation timer to highlight key sections. Step 5: Finish & Upload – When done, click Finish and wait for the video to upload to the cloud. Zight will automatically copy the video link to your clipboard and open it in your browser. Step 6: Edit Your Video – Once uploaded, make necessary edits—trim, fine-tune, crop, or add filters. You can also split and merge clips for a smoother flow, insert templates, and customize with buttons or your business logo. Save all changes before proceeding. Step 7: Prepare for Captions – Ensure your video is fully edited before adding captions to maintain clarity and professionalism. Already have a YouTube video? If you want to add captions to an existing file, go to your Zight dashboard and click Upload. You can upload multiple video files, edit them with Zight’s video editor, and then transcribe them seamlessly. We will use an old video for this example.
b. Generate a Transcript Using Zight AI:
Now that you’ve created and edited your video, here are the simple steps you want to follow to add captions:
Step 1: Access Your Video:
After recording, your video content will be saved in your Zight dashboard. Locate and open the video you just recorded.Step 2: Request Transcription:
- Below the video description box, locate and click on the ‘Transcription‘ option.
- Select ‘Request Transcription‘ to initiate the process.
 Your video will start getting transcribed, and automatic captions will be added to it. You can relax as you’ll get an email when your transcription and captions are added.
  There is even a correction mode in the transcription box which you can alter your YouTube transcript if it’s inaccurate. How cool!
Step 3: View Transcription and Captions:
- When you receive the email, open your video again from your Zight dashboard and see if everything looks good.
- The transcription will be available alongside the video, allowing you to read through or jump to specific parts.
- Enable Captions: To view captions during video playback, click the ‘CC‘ button located at the lower right corner of the video player. Adding captions and transcriptions enhances video accessibility, aids comprehension for non-native English speakers, and improves content discoverability.
- Use your transcriptions to skip some parts of your video content
- Toggle closed captions on or off. Simply click the CC on the lower right corner of the video player
3. Manually Transcribe YouTube Videos
If you’re up for the challenge, manually transcribing YouTube videos is an option. However, be warned, it’s a tedious process. While it gives you complete control over accuracy and formatting, it requires patience and time.Step 1: Play the Video and Type the Transcript
This is as simple as it sounds. Hit play and start typing. You’ll need to pause frequently to keep up, but typing the dialogue into a text document makes your editing much easier.Step 2: Add Timestamps for Key Sections
 YouTube’s built-in timestamps help viewers jump to important moments, and you can do the same from the transcript box. Manually adding timestamps makes your YouTube transcript more structured and searchable, allowing you to highlight key sections exactly how you want.
 4. How to Get the Transcript of a YouTube Video Directly on a Mobile Device
As a mobile user, you can get a transcript in the same way as on the YouTube app. This method is similar to the one we have shown you for the desktop version of YouTube only that can’t remove the timestamps. Therefore you can copy and paste the transcript to Notes or any other document app on your phone. Here’s how to get the transcript of a YouTube video on a mobile phone directly: Step 1: Open YouTube on your mobile phone and locate the video of interest. Step 2: Access the YouTube video details by tapping on the “…more” option below the video title and then tap “Show transcript.”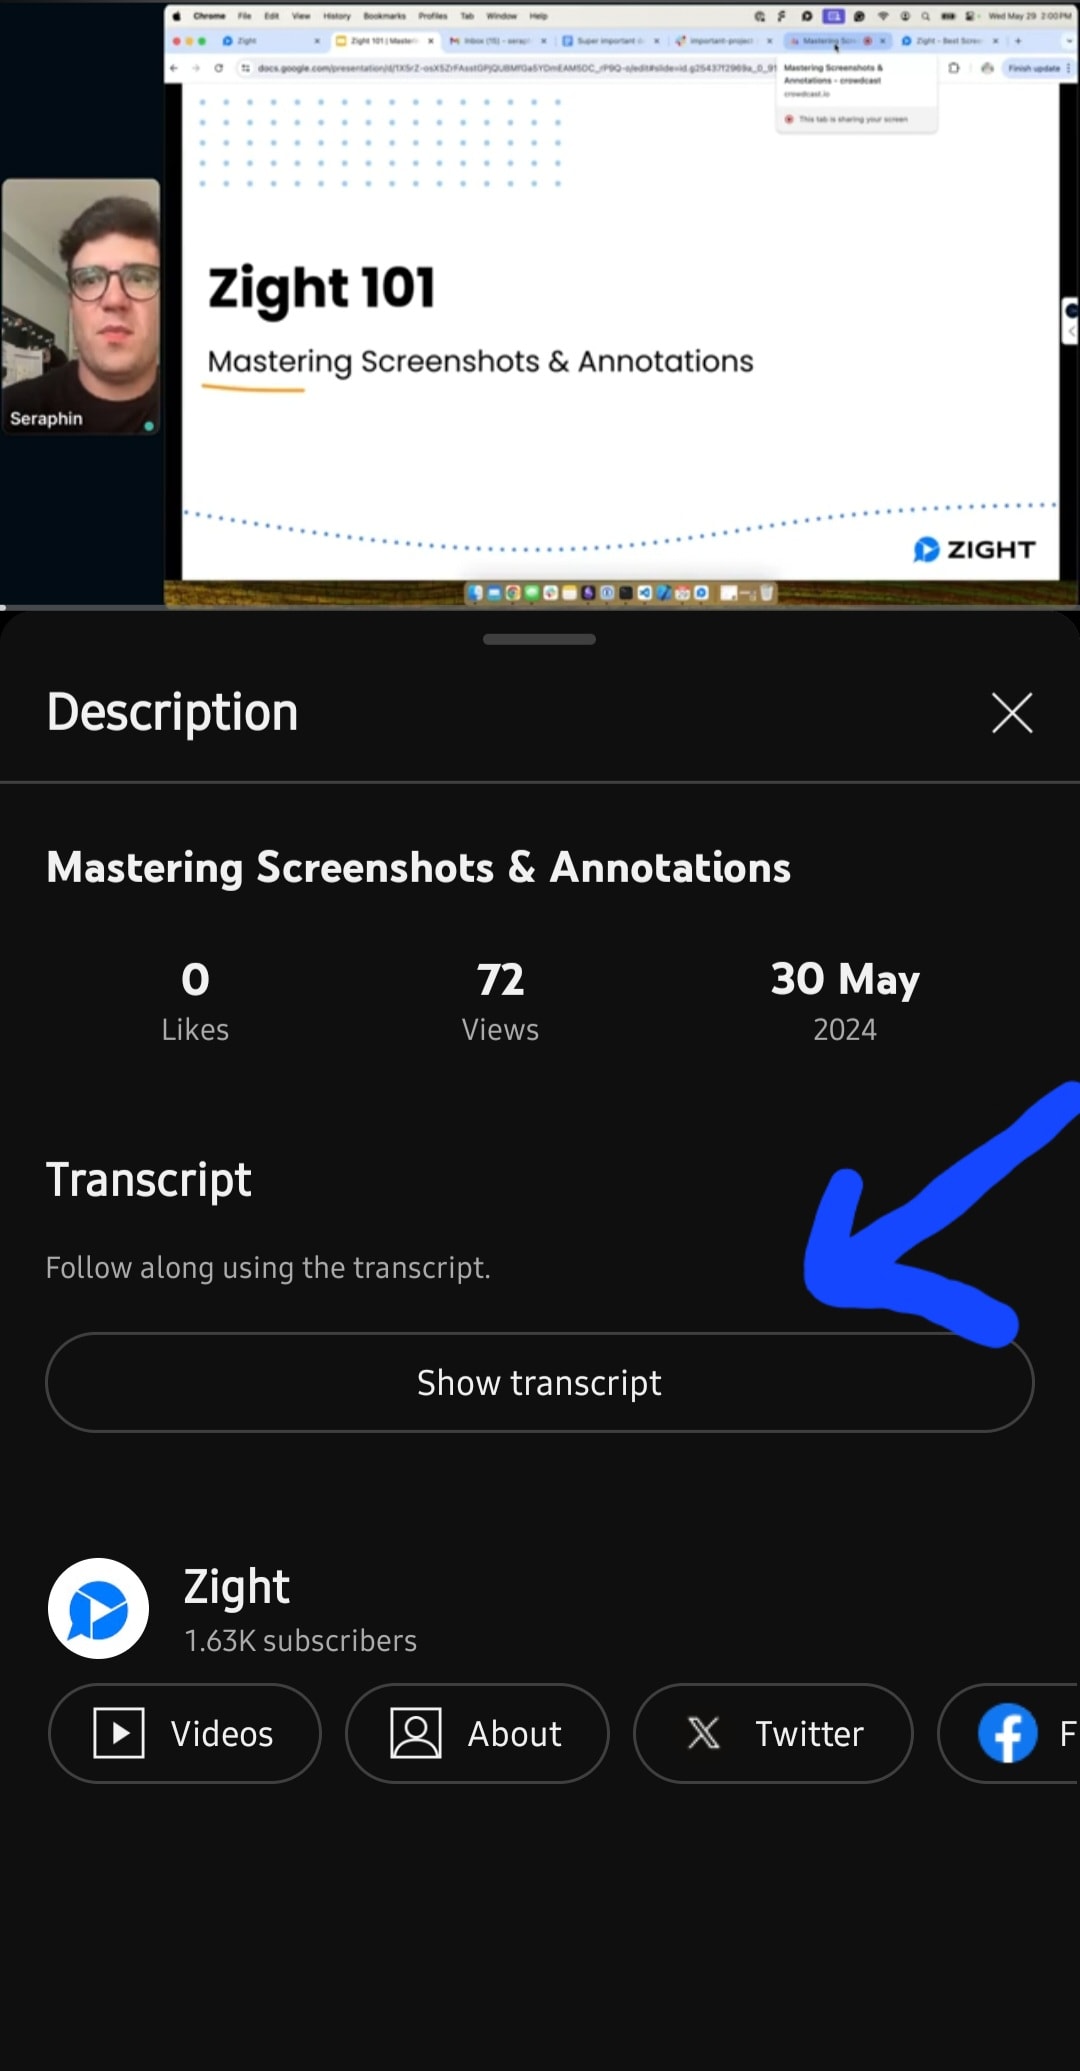 Step 3: Once the transcript is open, toggle timestamps per your preference and click on a timestamp to jump to that specific part of the video. Step 4: Choose the desired language for the mobile YouTube video transcription. Step 5: Since direct download options are unavailable on mobile, consider referencing the transcript as-is or switching to a computer for further actions.


