
Using a Mac is generally straightforward, but some features can be a bit hidden, especially for new users. Capturing what’s on your screen is one of those tasks that might seem tricky, whether you’re a newbie or a seasoned Mac user. Taking a scrolling screenshot, in particular, can be a bit of a challenge.
When you hear about taking a scrolling screenshot on a Mac, it usually means capturing a “full-page” or “long” screenshot. This lets you capture an entire webpage, document, or any screen content that goes beyond what you can see at once. It’s a great way to share more information while keeping the original layout intact, without needing multiple screenshots to get the full picture.
There are plenty of tools available for taking scrolling screenshots, including Mac’s built-in screenshot tools, browser extensions, online tools, and third-party apps. Read on to find the best method for capturing scrolling screenshots on your Mac.
Why Would You Need to Take a Scrolling Screenshot on Mac
Instead of capturing multiple screenshots and piecing them together, you can capture everything in one shot. This can be beneficial in some scenarios especially when you need to share or save information comprehensively and contextually. Some of the scenarios where scrolling screenshots can come in handy:
a). Long Web Pages
One of the scenarios a scrolling screenshot on Mac would be beneficial is when you need to save or share an article or a detailed forum thread. Capturing a scrolling screenshot on a long web page is not only more convenient but will also keep your information intact and in context, making it look more professional and organized.
b). Social Media Feeds
When you need to capture a social media conversation for a presentation or report, a scrolling screenshot ensures you don’t miss any part of the dialogue. This is particularly important if you’re documenting customer complaints, online harassment, or cyberbullying, where capturing the entire conversation in one continuous image provides clear and comprehensive evidence.
c). Work Documentation
In professional settings, taking scrolling screenshots can be incredibly useful. For instance, if you’re tracking progress on project management tools like Trello or Asana, capturing a full scroll of the board can provide a comprehensive overview. Similarly, when reviewing long code snippets that extend beyond the visible screen, a continuous screenshot ensures no part is overlooked, making peer reviews more efficient and thorough.
Ways to Capture Scrolling Screenshots on Mac
There are several ways to capture scrolling screenshots on Mac and we have listed all the possible ways with their step-by-step guides. Let’s look at each method below.
1. Best Third-Party Tool- Zight
Taking screenshots of extra-long web pages can be tricky. Sure, you could stitch together multiple screenshots in an image editor like Adobe Photoshop, but that’s a hassle. For Mac users, there’s a better way: Zight.
Here’s how to take a scrolling screenshot on a Mac using Zight:
Step 1: Download and Install Zight
Start by downloading and installing the Zight application on your Mac. You can find it on the Mac App Store or through the Zight website.
Step2: Launch the Zight App
Once Zight is installed, launch the application by double-clicking its icon in the Applications folder or by searching for it in Spotlight.
Step 3: Enable Full-Screen Capture
In the Zight interface, ensure that the option for full-screen capture is enabled. This usually involves clicking on the “Full Screen” within the Zight interface.
Step 4: Set Preferences (Optional)
Optionally, you can customize the preferences in Zight according to your preferences. This might include selecting the file format for the screenshot, setting a destination folder for saved screenshots, or adjusting other capture settings.
Step 5: Navigate to the Content to Capture:
Open the webpage, document, or any other content that you want to capture in a scrolling screenshot.
Step 6: Activate Zight Screenshot Capture
Once you’re ready to capture the scrolling screenshot, activate Zight. This may involve clicking on the Zight icon in the menu bar or using a keyboard shortcut, depending on your Zight settings. Once you click capture, it automatically captures the entire screen.
Step 7: Saving the Chrome Full-Page Screenshot
After capturing a screenshot, it will automatically upload to Zight’s secure cloud and add a Zight link to your clipboard. This means you can now paste the link or the content into your chosen platform by simply dragging the link on your clipboard.
If necessary, review the captured screenshot and make any edits or annotations using Zight’s built-in editing tools. This may take a few moments, depending on the length of the content.
Step 8: Share your Screenshot
Share your full-page screenshot by clicking the “Share” button, copying the autogenerated link to send it to anyone, dragging and dropping screen recordings into emails and chat apps, or sharing your video directly to platforms like Trello, Asana, and Slack, or embedding it in an email.
Alternatively, you can take a scrolling screenshot by recording content using Zight’s screen recording option. Here’s how to do it:
- Open Zight and Select GIF: Launch your Zight app and click on the GIF option. This feature lets you scroll through all the content on your screen and record it in a looping video that can be uploaded anywhere.
- Set Up Recording: Choose Full Screen and Screen Only, then click Start Recording. After the three-second countdown, begin scrolling through your page to capture all the content.
- Annotate as Needed: You can pause the recording at any time to add annotations. Zight offers various annotation tools, including a line, highlighter, ellipse, rectangle, and arrow.
- Finish and Upload: Once you’re finished, click the finish button. Your GIF will automatically upload to the cloud. You can then share it as a video link, avoiding the hassle of downloading and re-uploading files and making communication quick and efficient.
Here’s why Zight should be your go-to tool for capturing full-page screenshots:
While Zight will be the best screen capture tool for a full page, it also offers some other features that make it the best screen capture and communication tool:
- Screenshot: Capture specific areas, windows, or even delayed screenshots for perfect timing. Edit and annotate your screenshots directly within Zight.
- Crystal-Clear Screen Recordings: Record your entire screen or a selected area with audio. Zight lets you pause and resume recordings, add a webcam overlay, and choose between video or GIF formats. Perfect for creating tutorials or product demos.
- Webcam Recordings: Record videos with just your webcam or add a webcam overlay to your screen recordings. Add a personal touch and stand out in your communication.
- GIF Maker: Explain complex concepts or give clear instructions with loopable GIFs. Zight lets you record your screen as a GIF, eliminating the need for lengthy explanations in emails.
- Effortless Sharing: Zight creates easy-to-share links for any content you capture. You can also upload existing files like PDFs, JPGs, and GIFs and turn them into sharable links with optional password protection and expiration dates.
- Annotations: Add clarity to your screenshots and recordings with annotations. Use arrows, lines, emojis, shapes, and even blur sensitive information. Ensure your message is clear and nothing gets overlooked.
- Actionable Insights: See how many people have viewed your content and who they are with Zight’s analytics. Track your productivity with weekly reports that show items viewed and time saved.
- Flexible Editing: Don’t worry about getting it perfect the first time. Zight lets you edit your content after creation. Trim or clip recordings, crop screenshots, and make adjustments for optimal impact.
- Effortless Embedding: Share your content anywhere with Zight’s embed codes. Simply copy and paste the code wherever you want your screenshot, recording, or GIF to appear.
- Organized Collections: Create folders to keep your Zight creations organized. Find items faster and share them with team members more easily.
- Security First: Zight prioritizes your data security. With SOC2 Type II compliance certification, you can rest assured your information is protected.
- Customizable Workflow: Tailor Zight to your preferences. Set up custom shortcuts for a streamlined workflow and add a call-to-action button to your videos for increased engagement.
- Brand Consistency: Enhance brand recognition by adding your logo, custom redirect URLs, and custom domains to your Zight content.
Zight takes the hassle out of capturing and annotating full web pages. It’s the all-in-one solution for Mac users who want a quick, powerful way to grab and explain anything they see online. So ditch the frustration and give Zight a try – your screen will thank you!
2. Using Preview
Did you know your Mac’s built-in Preview app (it’s already there!) can capture entire web pages or documents in a single shot? Although this is not the most efficient method, it can work easily. Also, it’s not suitable for capturing long content and it’s more suitable for shorter scrolling captures.
Here’s the secret:
Step 1: Open what you want to capture: Find the webpage or document you need a screenshot of.
Step 2: Take a regular screenshot (almost): Press the familiar shortcut Command + Shift + 4. This normally lets you capture a specific area, but we’ll trick it a bit.
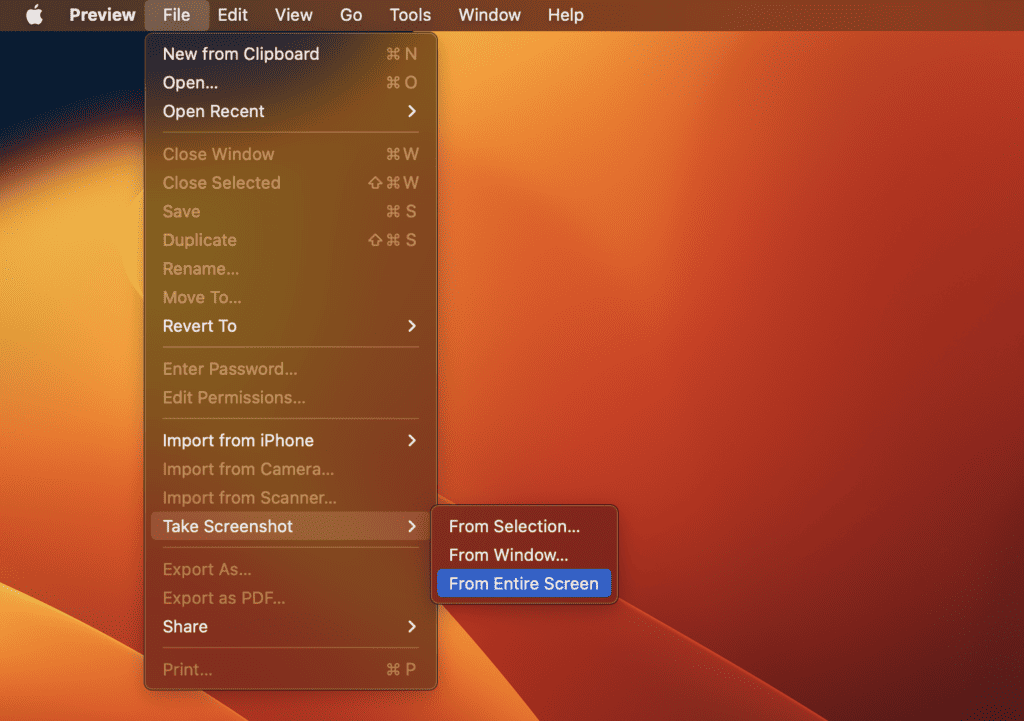
Step 3: Hold on, don’t click yet! Instead of selecting an area, keep your finger hovering. You’ll see a small thumbnail appear in the corner.
Step 4: Preview! Look closely at that corner thumbnail. You’ll see a tiny “Preview” option. Click that!
Step 5: Preview takes over: Voila! Preview opens with your entire capture, ready for editing or saving.
Now you can grab those long web pages or documents without needing any extra software.
3. QuickTime Player
Your Mac’s built-in QuickTime Player isn’t just for watching videos anymore. It also doubles as a handy screenshot tool, and the best part? No extra downloads are required.
This hidden feature lets you capture entire web pages or documents, even the parts that scroll off the screen. Here’s how to use it:
Step 1: Locate the page or document you want to screenshot.
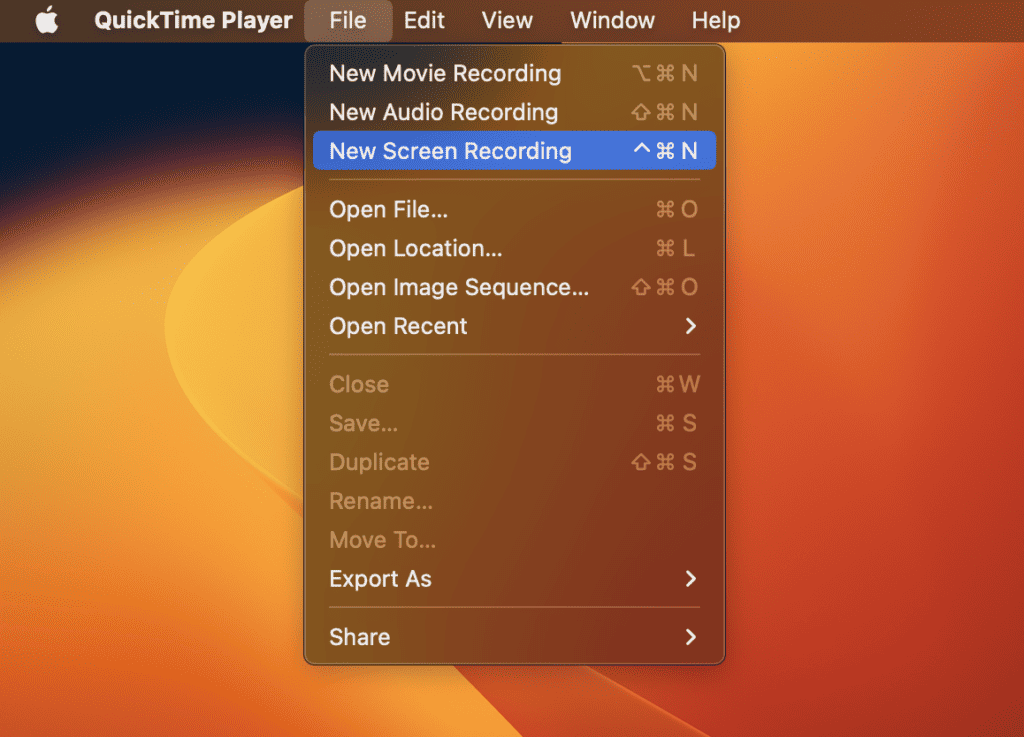
Step 2: Open QuickTime Player from your Applications folder or search for it in the Spotlight.
Step 4: Select File, then choose New Screen Recording, and click Record Entire Screen.
Step 5: Click the drop-down arrow next to the record button and select None under the microphone option. Navigate to the page you want to capture and click on it.
Step 6: Click on the red record button and select the area of the screen you want to capture. Scroll through the entire page or document to the bottom.
Step 6: Once you have selected the area, click the Start Recording button to start screen recording.
Step 7: Once you reach the end of the page, click on the stop button in the menu bar.
Step 8: The recording will automatically be saved as a .mov file. To save it as an image file, open it in Preview and select File, followed by Export. Choose the desired image format and save it.

4. Hotkeys
Forget downloading extra apps! Mac lets you capture screenshots on the fly using handy keyboard shortcuts (hotkeys). These built-in shortcuts let you grab your entire screen, a specific window, or just a custom area you choose – all without opening another program.
Step 1: Find what you want to capture: Open the webpage or document you need a screenshot of.
Step 2: Shortcut Time: Press Command + Shift + 5 on your keyboard simultaneously. This activates the screenshot tool.
Step 3: Turn it into a Camera: Hit the Spacebar key. This transforms the cursor into a little crosshair, ready to capture a specific area.
Step 4: Press the Record the entire screen button and then click anywhere on your screen. Scroll down to the bottom of the document or page
Step 5: Capture! Glide your mouse over the window or area you want to grab. For scrolling screenshots, hold down the Option key while clicking.
Step 6: Snap! Release the mouse button to save your screenshot. By default, it saves to your desktop, but you can change this in your System Preferences.
5. Browser Extensions for Chrome
If you don’t want to install an app and are looking for an easy way to go about it, the Zight Chrome extension is it. A quick and straightforward solution.
Step 1: Install the Zight Chrome Extension
Add the Zight extension to your Chrome web browser for quick and easy access.
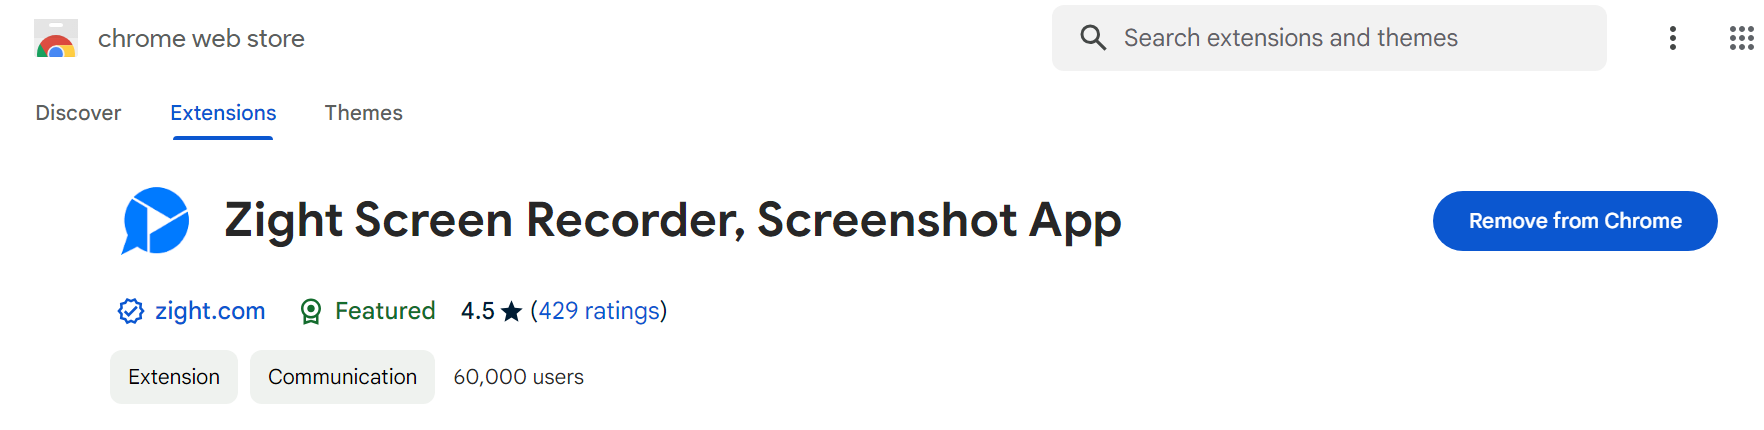
- To get started, search for Zight on the Chrome web store on your Mac
- Click ‘Add to Chrome’
- Once you see the popup, click ‘Add Extension’
- The extension will then download and appear in your toolbar
- You can also choose to ‘pin’ the Zight extension to get even quicker access
Step 2: Open Your Webpage
Open the webpage that you want to capture. Whether it’s a lengthy article, an entire webpage, or a long chat thread, Zight will do it for you.
Step 3: Choose Your Frame – Full Screen or Region
After activating the screenshot function, decide on the frame of your capture. Since we want to capture a full-page screenshot, select Full Screen to capture everything displayed on your device.
Step 4: Saving the Chrome Full-Page Screenshot
Once you’ve captured the screenshot, it will automatically upload to Zight’s secure cloud and add a Zight link to your clipboard. You can then paste the link or the content into your chosen platform.
Step 5: Share your Screenshot
To share your full-page screenshot, click the “Share” button. You can copy the autogenerated link to send it to anyone, drag and drop screen recordings into emails and chat apps, share directly to platforms like Trello, Asana, and Slack, or embed it in an email.
6. Developer Tools
Alternatively, Chrome users can also use developer tools to capture scrolling screenshots. Although it is a hidden menu bar, it can help to capture screenshots too. However, this is not the easiest method to take a scrolling screenshot, so it can be confusing for beginners. Luckily, we’ll break it down for you.
Step 1: Open the Google Chrome browser on your Mac. Alternatively, you can use the Alt + Command + I keyboard shortcut.
Step 2: Click on the three dots in the top right corner and click to open the Developer Tools.

Step 3: There is a menu bar within the Developer Tools screen. You’ll notice three vertical dots. Click on them, then select Run Command.

Step 4: Choose the desired size of your screenshot by clicking with your mouse pointer in the Run Command box that appears when you type “screenshot” to bring up related options. You will be looking for the Capture full-size screenshot result.
Step 5: Capture the screenshot by clicking on the three dots by the size settings. Choose Capture full-size screenshot to screenshot the entire page. Choose the folder and save the image to your computer. Then, select the Screenshot button, which will capture a screenshot of the current webpage (without displaying the underlying code).

Step 6: Save the Screenshot: Your screenshot will be saved within your default downloads folder, but remember to save it if prompted.
7. Safari Screenshot Tool
If you want to capture a full-page screenshot on your Mac using Safari, there’s a workaround you can try. However, it’s tricky and might not deliver the best results. For a smoother experience, we recommend using Firefox or Chrome to take your scrolling screenshots.
Nonetheless, if you prefer Safari, here’s how to go about it:
Step 1: Launch Safari and navigate to the webpage you want to capture.
Step 2: Click on the Develop menu in the menu bar and select Show Web Inspector. If the Develop menu is not visible, go to Menu → Safari → Settings → Advanced tab and check ‘Show Develop menu in menu bar’.

Step 3: In the Web Inspector window, select the Elements tab.
Step 4: Right-click on the <html> tag and choose Capture Screenshot from the menu.
The scrolling screenshot will be saved as an image file on your desktop. However, the resulting PNG might be less effective than a PDF, even after cropping.
8. Save as PDF

This method of capturing scrolling screenshots on your Mac is suitable for capturing text-heavy content because it preserves the original format of the content. This might seem a bit like a cheat. You act as if you’re going to print the webpage, but instead of printing, you save it as a PDF file on your computer! It’s faster than using extensions or online recorders.
However, it will limit you when it comes to selecting a specific region, and also the interactive elements might not be captured correctly. Also, you can’t choose the file format. If you need a PNG or JPG, you’ll have to convert the PDF later.
Here’s how to go about it:
Step 1: Navigate to the webpage you want to capture. Click the “File” button on the top or press Command + P
Step 2: Click the “Print” button from the list of the dropdown menu
Step 3: Select the “Save as PDF” button from the bottom PDF list
Step 4: Click the “Save” button to take a scrolling screenshot of your notes, webpage, or document as PDF on Mac.
Conclusion on Scrolling Screenshot on Mac
Since there are many ways you can take a scrolling screenshot on Mac, the choice is yours as it might depend on what you are looking for, whether in image, video, or PDF format. However, as per us, using a dedicated screenshot tool like Zight is the best as there are countless reasons why not to use native screenshot tools. After all, it comes with bonus features ensuring you maximize your productivity without downloading other tools.
Are you now going to get a Mac scrolling screenshot using the best tool? Get Zight today!


