
Have you ever seen something hilarious on a website or needed to grab a quick reminder on your Chromebook, only to realize you have no idea how to capture it? Unlike other devices, Chromebooks with their ChromeOS run the show a little differently when it comes to screenshots. This can be confusing if you’re used to the methods on a Mac or PC.
Nevertheless, capturing your screen on ChromeOS is surprisingly easy and downright fun. This guide will show you all the cool ways to capture what’s on your screen, so keep reading and get ready to screenshot like a pro!
Types of Screenshots a Chromebook Can Capture
Whether you need to capture the whole picture or just a specific detail, a Chromebook can capture different types of screenshots, such as:
1. Full-Screen Snapshot
This is your classic screenshot, grabbing everything displayed on your Chromebook screen. Think of it like taking a picture of your entire desktop, with all the windows and applications open. This is perfect when you want to share what you’re seeing or document the whole layout of your Chromebook.
2. Partial Screenshot
Let’s say you only need a specific part of your screen, like a funny meme or a weird error message. This is where the partial screenshot comes in. It’s like zooming in with your camera to capture a selected area. You can drag your mouse to create a rectangle around the part you want to grab, and voila! The selected part gets saved, leaving out the rest of the clutter.
3. Window Screenshot
Sometimes, you might be working on a specific program or document and want to capture just that window. This screenshot option acts like a window cleaner, grabbing only the content within that particular window and excluding everything else on your screen. It’s a great way to share something specific you’re working on without including any other open applications or your desktop background.
Notably, if you are wondering why we didn’t include scrolling screenshots above, Chromebooks themselves don’t have a built-in way to capture scrolling screenshots. This can be a bummer if you want to grab an entire webpage or a lengthy chat conversation.
How to Screenshot on Chromebook
1. How to Screenshot on Chromebook using Zight- A Feature-Rich Option
Capturing screenshots on a Chromebook is essential for various tasks, from saving critical information to sharing moments with others and transforming your screenshots into powerful communication tools. While Chromebooks offer native screenshot functionalities, using a dedicated screenshot tool like Zight can add extra features and flexibility to your screenshot-taking experience.
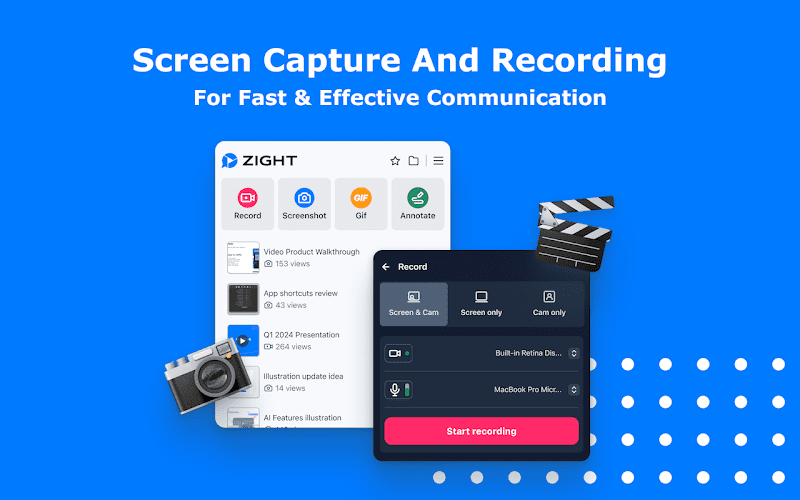
In addition, it is the best screenshot software since it offers a free screen recorder, HD screen, webcam recording, and GIF creation, all accessible in a user-friendly, enterprise-grade application. This enables you to create and share visual content swiftly.
Step 1: Install Zight
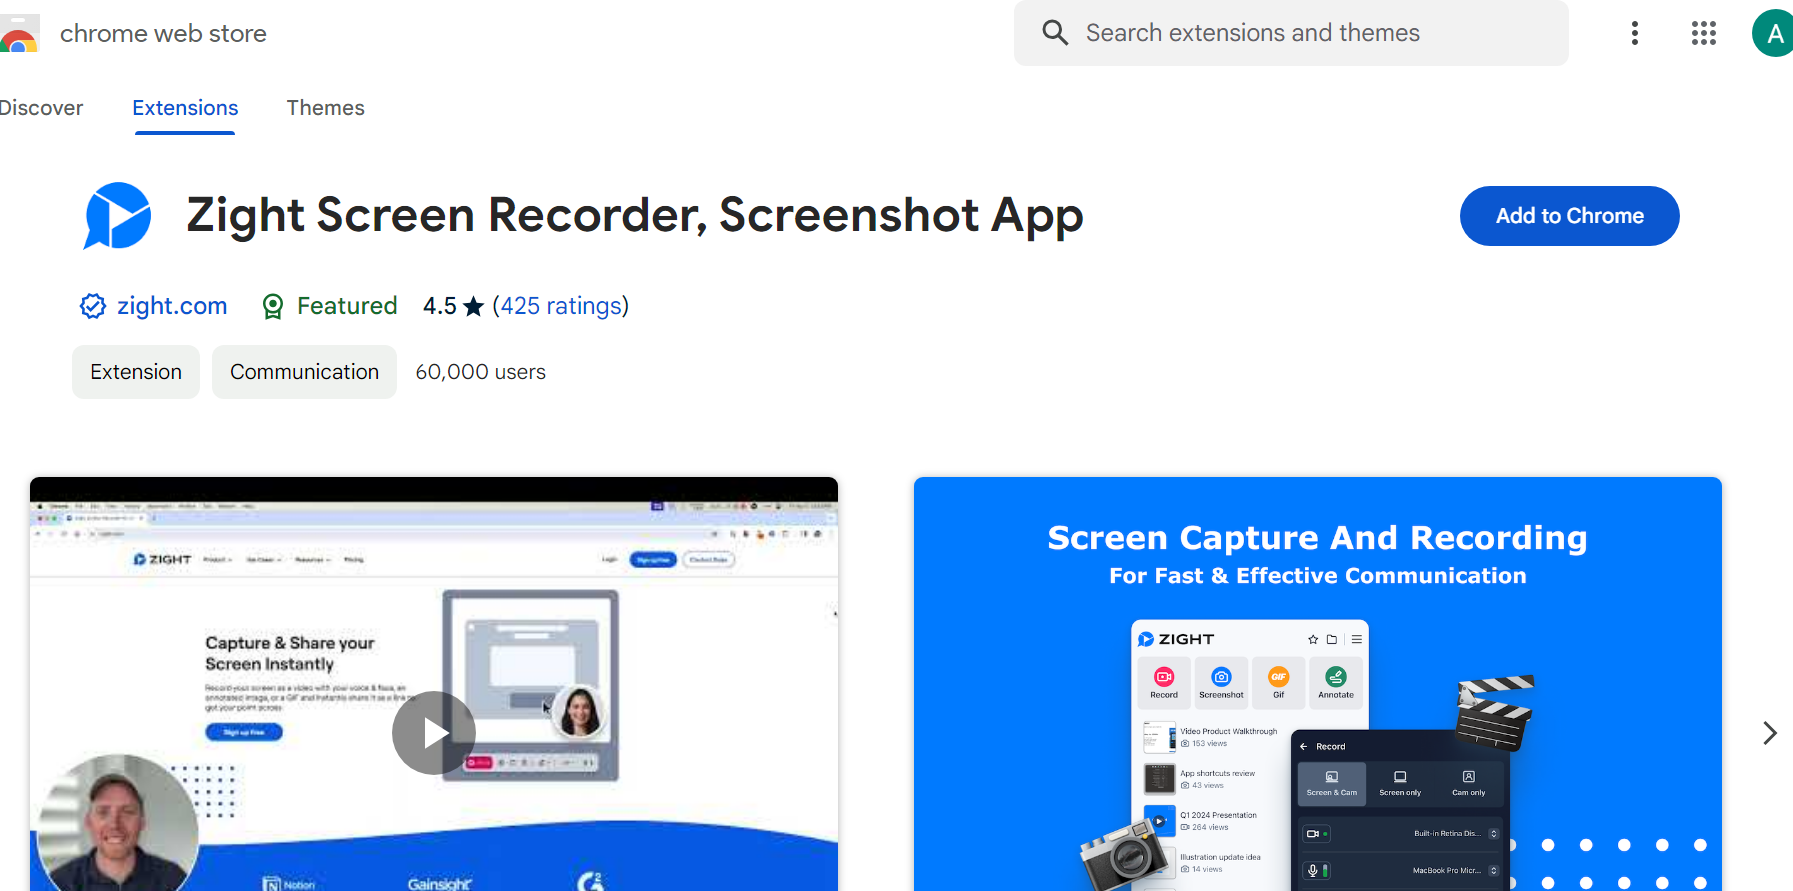
- Open the Chrome Web Store on your Chromebook.
- Search for “Zight” in the search bar.
- Click on the Zight extension from the search results.
- Hit the “Add to Chrome” button and confirm the installation of the Zight extension
Step 2: Open Zight
After installing Zight, you can access it by clicking on its icon in the Chrome browser toolbar or extensions toolbar, typically located at the top right corner of the screen. It looks like a camera lens with the letter “Z” inside.
Step 3: Select Capture Area
With Zight installed, you have multiple options for taking screenshots:
- Full Page: Capture an entire webpage, even if it extends beyond the visible area.
- Visible Area: Capture only what’s currently visible on the screen.
- Selected Area: Manually select a specific portion of the screen to capture.
When you click the Zight icon, a menu with various options appears. To take a screenshot, choose the “Capture Area” option. This allows you to select a specific portion of the screen to capture.
Alternatively, you can streamline the process as Zight offers keyboard shortcuts for quick screenshotting, such as:
Ctrl + Shift + 1: Capture the entire page.
Ctrl + Shift + 2: Capture visible area.
Ctrl + Shift + 3: Capture the selected area.
Step 4: Capture the Screen
After selecting “Capture Area,” your cursor will transform into a crosshair. Use your mouse to control the snipping tool, and select the area on your screen you wish to record. Release the mouse button when you’ve selected the desired area. Once you’ve done this, the screenshot will be captured.
Step 5: Edit and Save
Zight doesn’t stop at capturing screenshots. It empowers you to enhance them further!
When you capture your screen, two things happen immediately:
- The screenshot is saved to your clipboard as a shareable link or
- The screenshot link automatically opens in your default browser in a Zight editor window, where you can annotate and edit it before sharing.
At this point, you can add annotations, such as arrows, text boxes, shapes, or highlights, with the screenshot annotation tool to emphasize specific details.
Zight also allows basic image editing features like cropping, adding text, and resizing.
When you’re satisfied, Zight offers various sharing options:
- Save the screenshot locally to your Chromebook.
- Upload it directly to the cloud for easy access across devices.
- Share the screenshot with others via a generated link.
Step 6: Save or Share
After saving and editing your screenshot, save it to your Chromebook’s local storage by clicking the “Save” button. Alternatively, you can share it directly from Zight to various platforms like Gmail, Google Drive, or social media by clicking the “Share” button since Zight facilitates instant sharing by generating a screenshot link.
For example, you can use Zight to send the screenshot directly to Slack. Additionally, you can effortlessly share your captures in various online collaboration tools, such as Google Docs, JIRA, Trello, Zendesk, and more! You can now use it for various purposes, such as sharing on social media, including in presentations, or embedding it in documents.
Why not begin using the top-notch screenshot tool, Zight, by signing up for free today?
Step 7: Access your Saved Screenshots
All screenshots captured using Zight are typically saved in your Chromebook’s “Downloads” folder by default. You can access this folder by opening the Files app from the launcher and navigating to the Downloads section.
Want to explore more third-party screen capture apps? We have great articles like the best Greenshot alternatives, Lightshot alternatives, Fireshot alternatives, Snagit alternatives, and so much more! As you’ll see, not many screenshot software beat Zight for screenshots.
2. How to Screenshot on Chromebook using Keyboard Shortcuts
Another way to screenshot is to use Chromebook keyboard shortcuts, especially if you want to complete your tasks more quickly.
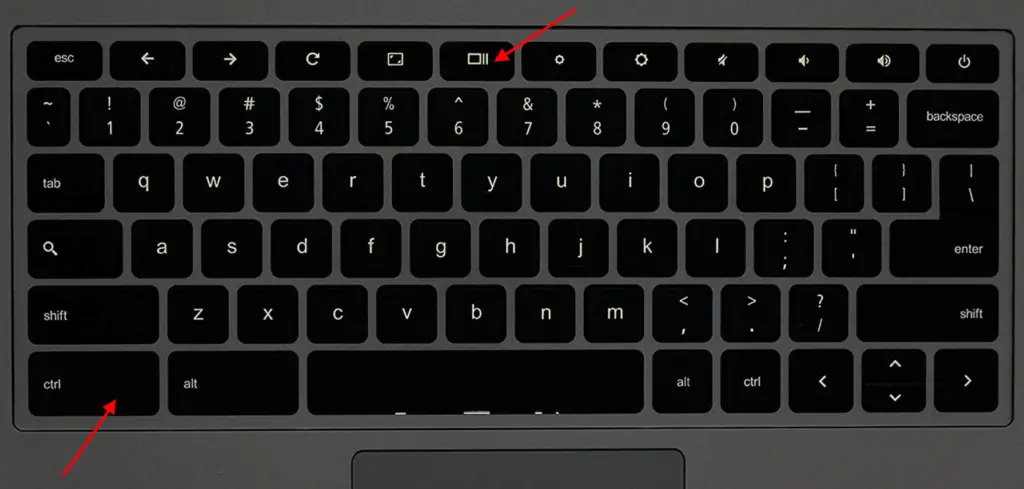
a). Capture your Entire Screen
- Press the “Ctrl” and “Show Windows” keys to capture the whole screen.
- The Show Window button is on the top row of your keyboard, which looks like a rectangle with two lines on the right side. It is the equivalent of using the F5 key on a PC keyboard.
- Your captured screenshot will be saved to your Downloads folder.
b). Partial Screenshot
Press “Shift,” “Ctrl,” & “Show Windows” keys together.
To find the keyboard shortcuts on your Chromebook, press Ctrl + F and enter what you want to find.
- Click on the time located at the bottom right corner.
- Choose “Settings.”
- Scroll down and click on “Keyboard.”
- Select “View keyboard shortcuts.”
3. Screenshot on Chromebook Using an External Keyboard

Do you have an External Keyboard? No Problem!
If you’re using a Windows or Mac keyboard not specifically made for Chrome OS, you might find that the usual keyboard shortcuts don’t quite fit due to different key setups.
Luckily, there’s an easy fix! Just hit Ctrl and F5 simultaneously for a full-screen screenshot, or Ctrl, Shift, and F5 together for a partial screen capture.
These Chromebook keyboard shortcuts are universally applicable across all models. However, some Chromebooks feature a dedicated Screen Capture key on the top row of the keyboard.
4. How to Capture a Screenshot on a Chromebook via the Quick Settings Menu
To take a screenshot using the quick settings menu,
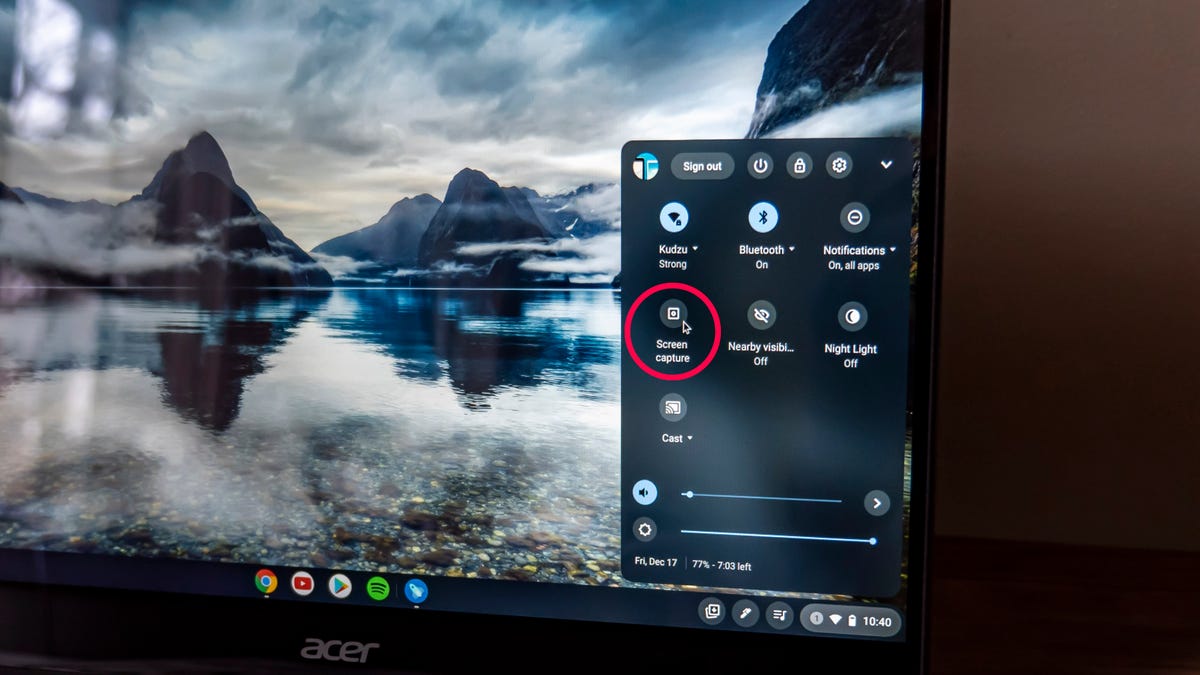
Step 1: Find the clock in the lower-right corner of your screen and click on it. This action will bring up your Quick Settings menu.
Step 2: Look for the Screen Capture icon, a circle inside a square, and click on it to launch the Screen Capture toolbar.
Step 3: Within the Screen Capture toolbar, you’ll find an arrangement of icons from left to right, each offering distinct functions:
- Screenshot: This allows you to capture still images.
- Screen record: Use this option to record videos.
- Take full-screen screenshots: Capture the entire screen with this option.
- Take partial screenshots: Select a specific screen portion using the crosshair icon. Click and drag to outline the desired area, then press the Capture button at the center of your screenshot.
- Take window screenshots: This option captures a single window.
- Settings: Access the settings menu to customize your audio input, activate your microphone, and select the storage folder for your screenshots or recordings.
Step 4: Choose your screenshot option and take the screenshot.
5. How to Take a Screenshot on a Chromebook in Tablet Mode
Chromebooks seamlessly convert into tablets, offering a versatile user experience. But how do you capture a screenshot when you’re rocking the tablet mode and your trusty keyboard is absent?
There are two simple methods at your disposal:
Method 1: Button Power
This method is a breeze, requiring just a quick press of two buttons:
- Find the Power button on the side of your Chromebook. It’s usually the top button.
- Press Power button and the Volume Down button (located on the side, usually below the Power button) simultaneously.
- You’ll see a brief animation or a sound indicating a successful screenshot capture.
Method 2: On-Screen Quick Settings
Alternatively, if you want to take a screenshot using a more visual approach, use the on-screen screenshot toolbar:
- Step 1: Swipe down from the top of your Chromebook screen to display the Quick Settings panel. It might take a moment to get used to the swiping gesture if you’re from a physical keyboard experience.
- Step 2: Locate the Screenshot button. It usually resembles a camera icon.
- Step 3: Tap the Screenshot button. Similar to the button method, you’ll see a brief animation or hear a sound confirming the screenshot capture.
- Step 4: You can find your screenshot in the “Downloads” folder in the Files app.
Bonus Tip: If you’ve taken a screenshot using any Chromebook methods discussed above but can’t find suitable annotation tools for providing clear instructions to your teams, consider using Zight. Open your Zight dashboard, click “Upload,” locate the screenshot in your File Explorer, and upload it to Zight for annotation. Once annotated, you can share it as a link or download it to your computer.
Bonus Tips for Capturing Screenshots on Chromebook
Here are some extra tips to help you take your screenshot game to the next level:
- Use Stylus for Precision (Stylus-equipped Chromebooks)
- If you have a stylus-equipped Chromebook, use the stylus to take more precise partial screenshots. This can be particularly handy when you need to capture intricate details or specific areas on your screen.
- Customize Screenshot Shortcuts
- Did you know you can customize your screenshot shortcuts? Go to
Settings > Device > Keyboardand remap your screenshot keys to something more convenient for you.
- Did you know you can customize your screenshot shortcuts? Go to
- Use Voice Commands
- Take advantage of Google Assistant by using voice commands to capture screenshots. Just say, “Hey Google, take a screenshot,” and it will capture the screen for you.
- Capture Screenshots of the Login Screen
- If you need to capture screenshots of the login screen for documentation or troubleshooting, you can use the
Ctrl + F5keys before logging in.
- If you need to capture screenshots of the login screen for documentation or troubleshooting, you can use the
- Use Chrome DevTools for Web Pages
- For developers or those needing precise webpage captures, Chrome DevTools offers powerful screenshot capabilities. Right-click on the webpage, select
Inspect, go to the three-dot menu in DevTools, and chooseRun Command. Then, type and selectCapture full-size screenshot.
- For developers or those needing precise webpage captures, Chrome DevTools offers powerful screenshot capabilities. Right-click on the webpage, select
- Annotate Screenshots with Built-in Tools
- After taking a screenshot, use the built-in image editor to quickly annotate your screenshot. Open the screenshot from the Files app, click the edit button, and add text, highlights, or shapes to your image.
- Keyboard Shortcut for Clipboard Only
- If you don’t want to save the screenshot automatically but just need it in your clipboard, use
Ctrl + Cright after taking the screenshot with the shortcuts. This copies the screenshot to the clipboard for immediate pasting.
- If you don’t want to save the screenshot automatically but just need it in your clipboard, use
- Utilize Chrome Extensions for Enhanced Features
- Extensions like Lightshot or Nimbus Screenshot offer additional features such as direct cloud storage, advanced editing tools, and more. Explore these options if you need more functionalities.
- Automate Screenshots with Scripts
- For advanced users, automate your screenshot-taking process using scripts. Use Chrome’s remote debugging protocol to trigger screenshots programmatically. This can be useful for regular documentation or monitoring tasks.
- Quickly Share Screenshots
- Once a screenshot is captured, you can quickly share it directly from the Files app. Right-click on the screenshot, choose
Share, and select the preferred sharing method (e.g., email, social media).
By utilizing these tips, you’ll be able to make the most out of your Chromebook’s screenshot capabilities, whether for work, study, or fun. Happy screenshotting!
Why Use Zight to Take Chromebook Screenshots?
Using Zight to capture screenshots on your Chromebook offers several advantages that go beyond the built-in capabilities of ChromeOS. Here’s why Zight stands out as a top choice:
- Enhanced Screenshot Options
- Full Page Capture: Unlike the native screenshot tool, Zight can capture an entire webpage, including content that isn’t visible on the screen without scrolling.
- Selected Area Capture: Easily select and capture a specific portion of your screen, offering flexibility in what you want to save.
- Window Capture: Focus on a particular application window, excluding other on-screen elements for a cleaner, more relevant screenshot.
- Annotation and Editing Tools
- Annotations: Add arrows, text boxes, shapes, and highlights to your screenshots. This is ideal for creating tutorials, emphasizing key points, or providing clear feedback.
- Image Editing: Basic editing features like cropping, adding text, and resizing allow you to perfect your screenshots without needing additional software.
- GIF and Video Creation
- Zight isn’t just for static images. You can also create GIFs and record your screen, which is perfect for dynamic content creation, such as demonstrating software features or sharing short, looping animations.
- Cloud Storage and Sharing
- Instant Sharing: After capturing a screenshot, Zight generates a shareable link that you can quickly distribute via email, chat, or social media.
- Cloud Upload: Save your screenshots to the cloud, ensuring they are accessible from any device and can be easily organized and retrieved.
- Integration with Other Tools
- Zight integrates seamlessly with popular productivity and collaboration tools like Google Drive, Slack, Trello, JIRA, and Zendesk, making it easier to incorporate screenshots into your workflow.
- User-Friendly Interface
- Zight offers an intuitive, easy-to-navigate interface that simplifies the screenshot-taking process. The extension is designed to be accessible even for users who are not tech-savvy.
- Keyboard Shortcuts
- Zight provides customizable keyboard shortcuts for quick and efficient screenshot capturing. This can significantly speed up your workflow, especially if you need to take multiple screenshots in succession.
- High-Quality Output
- Screenshots captured with Zight are of high resolution, ensuring clarity and detail in your images. This is crucial for professional use, where image quality can impact the effectiveness of your communication.
- Free Screen Recorder
- In addition to screenshots, Zight offers a free screen recorder, allowing you to create HD screen recordings and webcam recordings, further enhancing your ability to share visual content.
- Security and Privacy
- Zight prioritizes user security and privacy, ensuring that your screenshots and recordings are stored safely and can only be accessed by those you choose to share them with.
Conclusion on How to Screenshot on a Chromebook
So, there you have it! With these methods in your arsenal, capturing screenshots on a Chromebook should be straightforward. From the built-in keyboard shortcuts to the advanced features offered by extensions like Zight, you can now effectively capture any content displayed on your Chromebook screen. So, next time you want to capture on-screen content, remember the methods outlined here and their steps, and confidently take a screenshot.


