Ready to Boost Your Productivity?
Save time and money while boosting your productivity with Zight — free tools for screen recording, screenshots, GIFs, and webcam capture.
Try Zight for Free🔍 How to Use Zight’s Background Editor
Quickly enhance your images and code snippets with customizable backgrounds, ensuring your visuals stand out effortlessly.
Upload Your Image or Code Snippet
Start by adding the content you want to enhance.
Customize Your Background
Choose from solid colors, gradients, or texture options to match your style.
Adjust & Preview
Resize, reposition, and tweak your image for the perfect composition

Why Use Zight’s Background Editor?
✔ No Software Required – Use it directly in your browser.
✔ Customizable Styles – Create unique backgrounds for different use cases.
✔ Perfect for Content Creators – Ideal for social media, presentations, and branding.
✔ Fast & Efficient – Get high-quality visuals in seconds.

🔧 More Than Just a Background Editor
Zight offers a suite of powerful tools designed to enhance productivity and content creation. Looking for more? Check out these additional features:
📹 Screen Recording – Capture high-quality videos for presentations and tutorials.
🎬 GIF Maker – Create and share engaging animated GIFs.
📸 Screenshot Tool – Take quick, annotated screenshots for feedback and collaboration.
🔗 URL Shortener – Generate trackable short links for easy sharing.
Unlock More Tools
Expand your toolkit with these additional free tools
Start Communicating Using Annotated Screenshots Now
Drive your message across fast and easily using visuals like annotated screenshots, screen recordings and GiFs today!
Take a screenshot and annotate it nowHow to Use the Zight Image Background Editor, Code Background Editor
Suppose you’ve just finished an important analysis and need to share your findings. Your screenshot contains valuable insights, but against that stark white background, it looks like every other image floating around in your team’s chat. The same goes for that elegant code solution you crafted; it sits there and is barely distinguishable from the surrounding text.
You can use Zight’s background editor on your desktop or smartphone to make these visuals pop without compromising their professional appeal. This guide will walk you through enhancing both images and code snippets with custom backgrounds to make sure your work gets the attention it deserves.
A Quick Glance At The Zight Background Editor
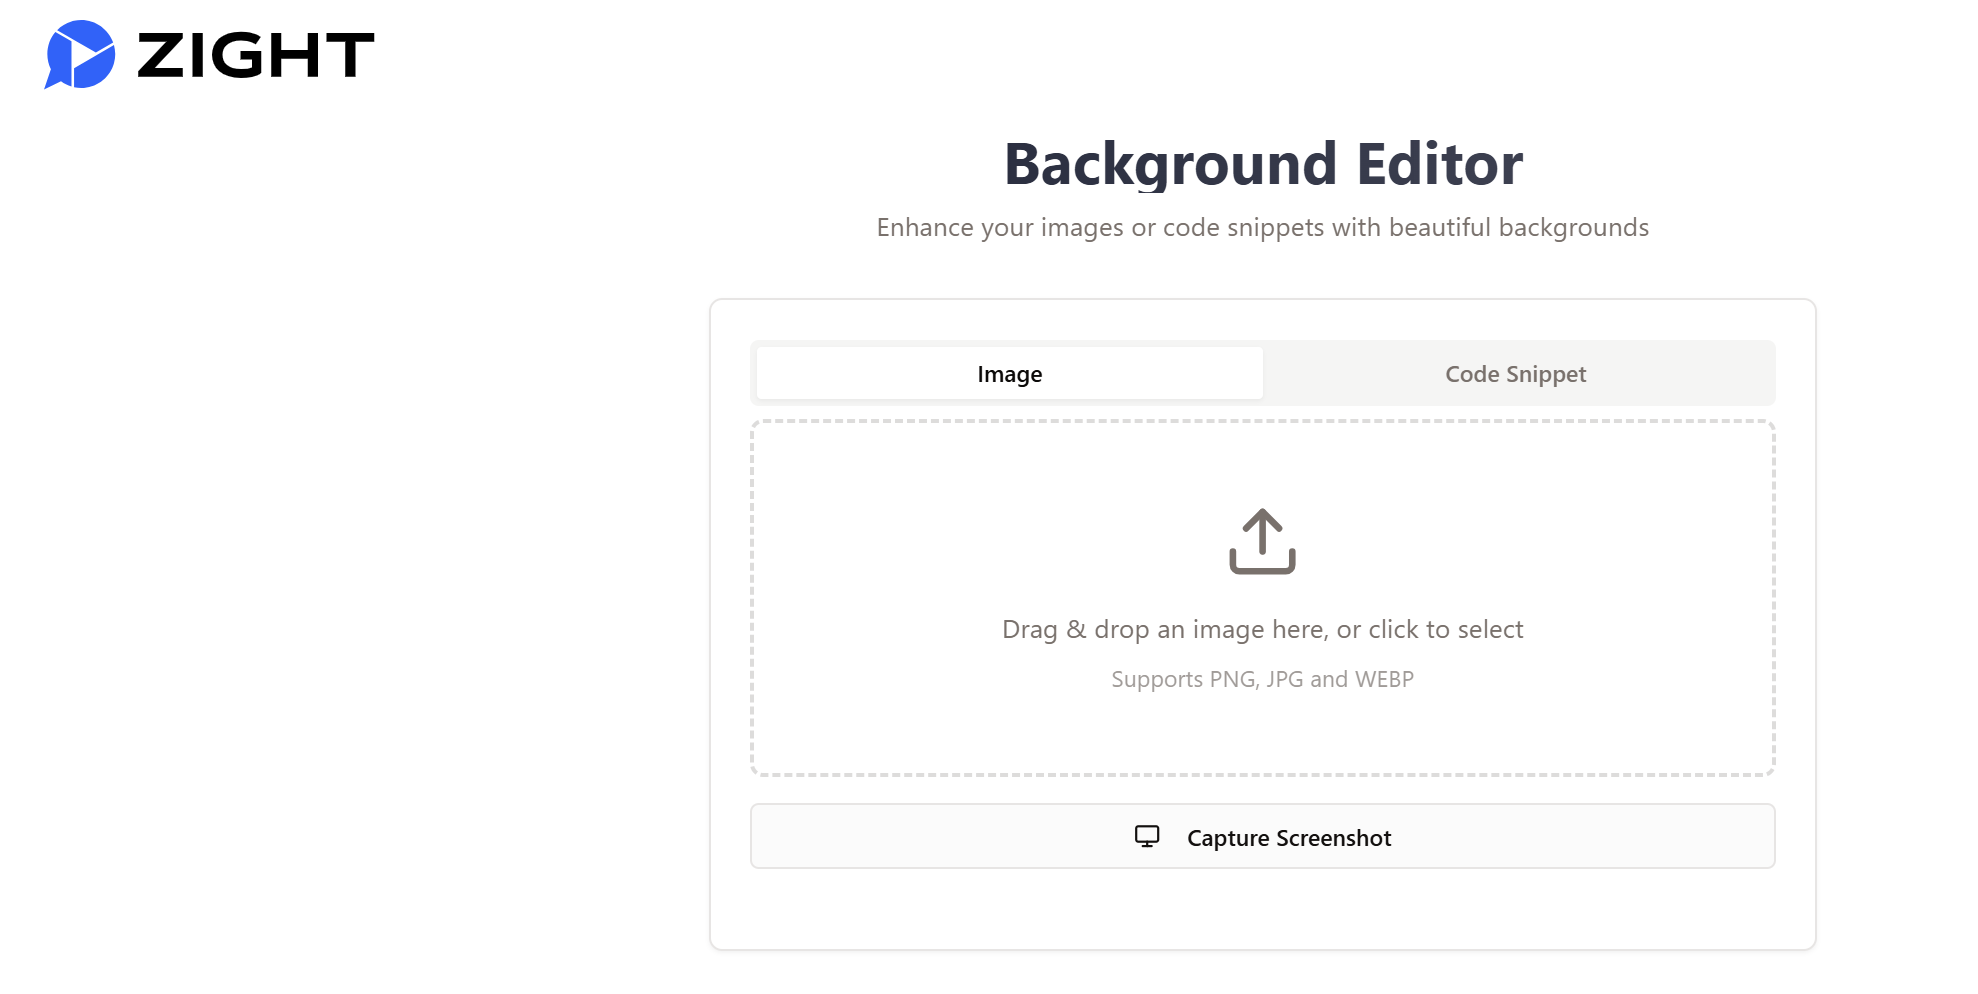
The Zight background editor is a web-based application that allows you to enhance your images and code snippets with custom backgrounds, gradients, and shadows. You can use it when creating technical documentation, sharing progress updates, creating product mock-ups, building educational content, or even preparing visual files for your PowerPoint and Google Slides presentations!
The editor is lightweight and fast. You only need to load an image or code snippet, and you’ll see two sections: a preview pane on the left and customization controls on the right.
Every change you make will appear instantly in the preview pane so you can fine-tune your design in real-time. Once satisfied, download your enhanced visual with a single click – no account required.
How to Use the Image Background Editor

Here are the steps to follow to enhance your image background:
1. Prepare your Image
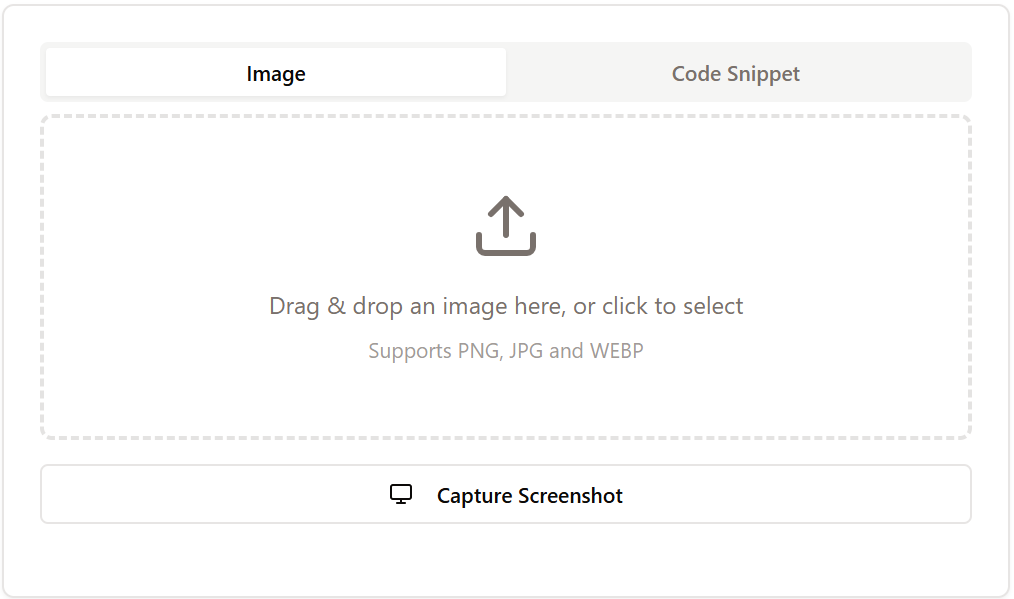
To use the image background remover/editor, you can do one of two things: either upload a photo from your device or take a screenshot.
You can easily upload a photo from your device by dragging and dropping it into the upload area. If you prefer, click the upload area to browse your files. The editor supports standard image formats, including PNG, JPG, and WEBP files.

Alternatively, you can click capture a screenshot, and Zight will capture a Chrome tab, Window, or the entire screen.

After you capture the full page or scrolling screenshot, be sure to annotate it on your Zight dashboard before you proceed to remove or enhance the background effects.
2. Add an Image Title
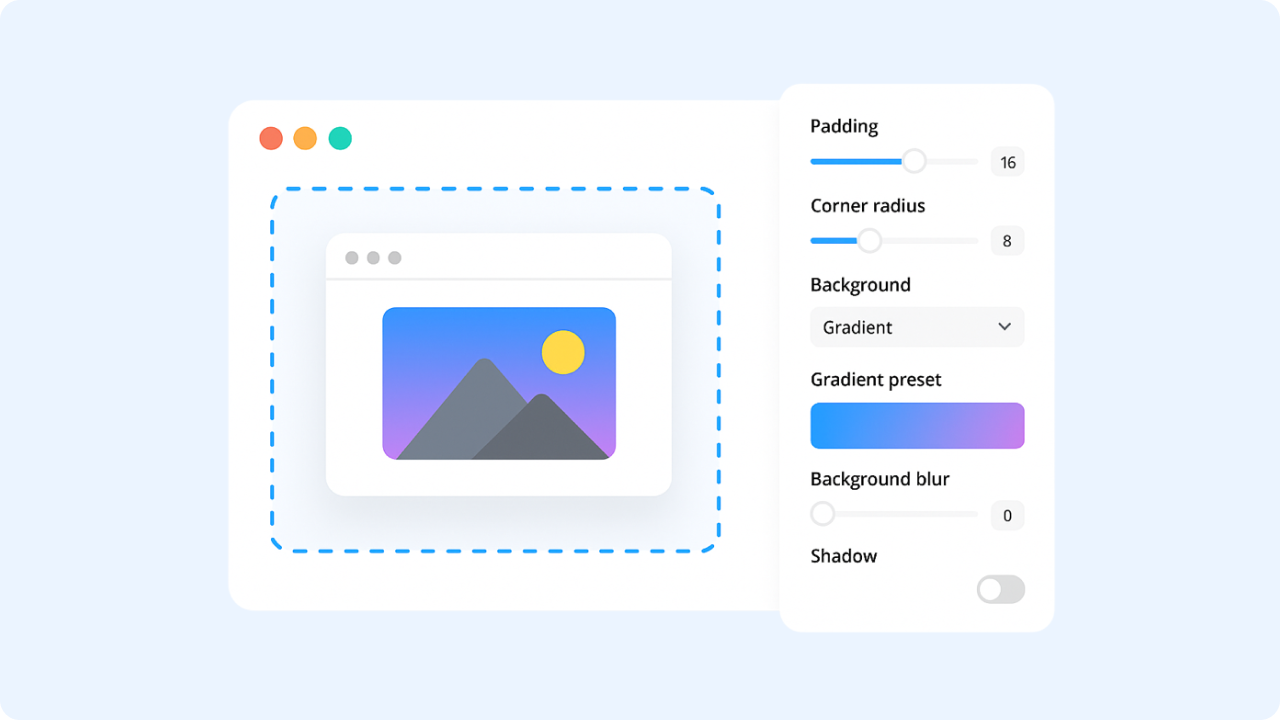
After uploading the image, you’ll see your photo in the preview pane with a default white background:
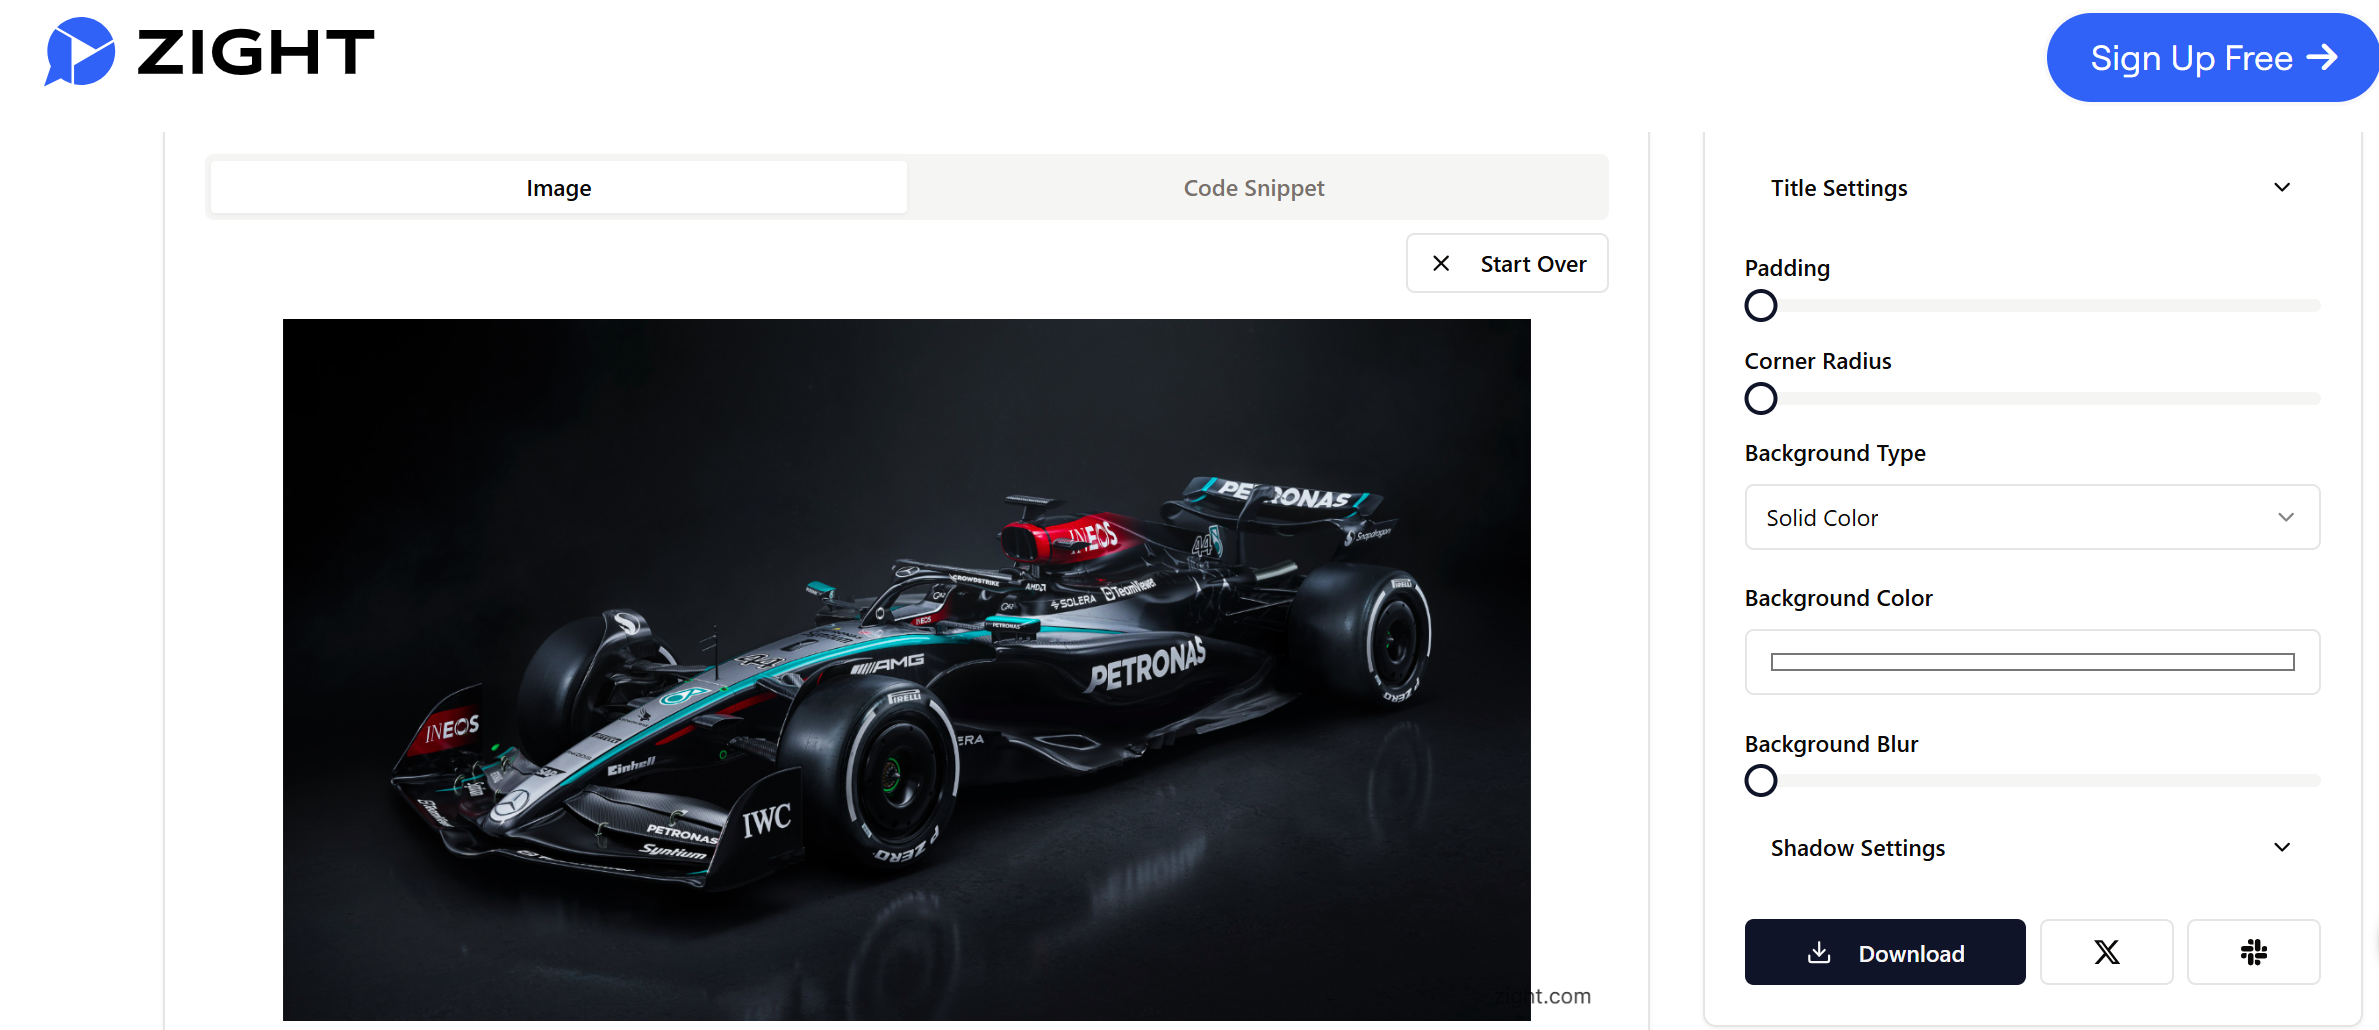
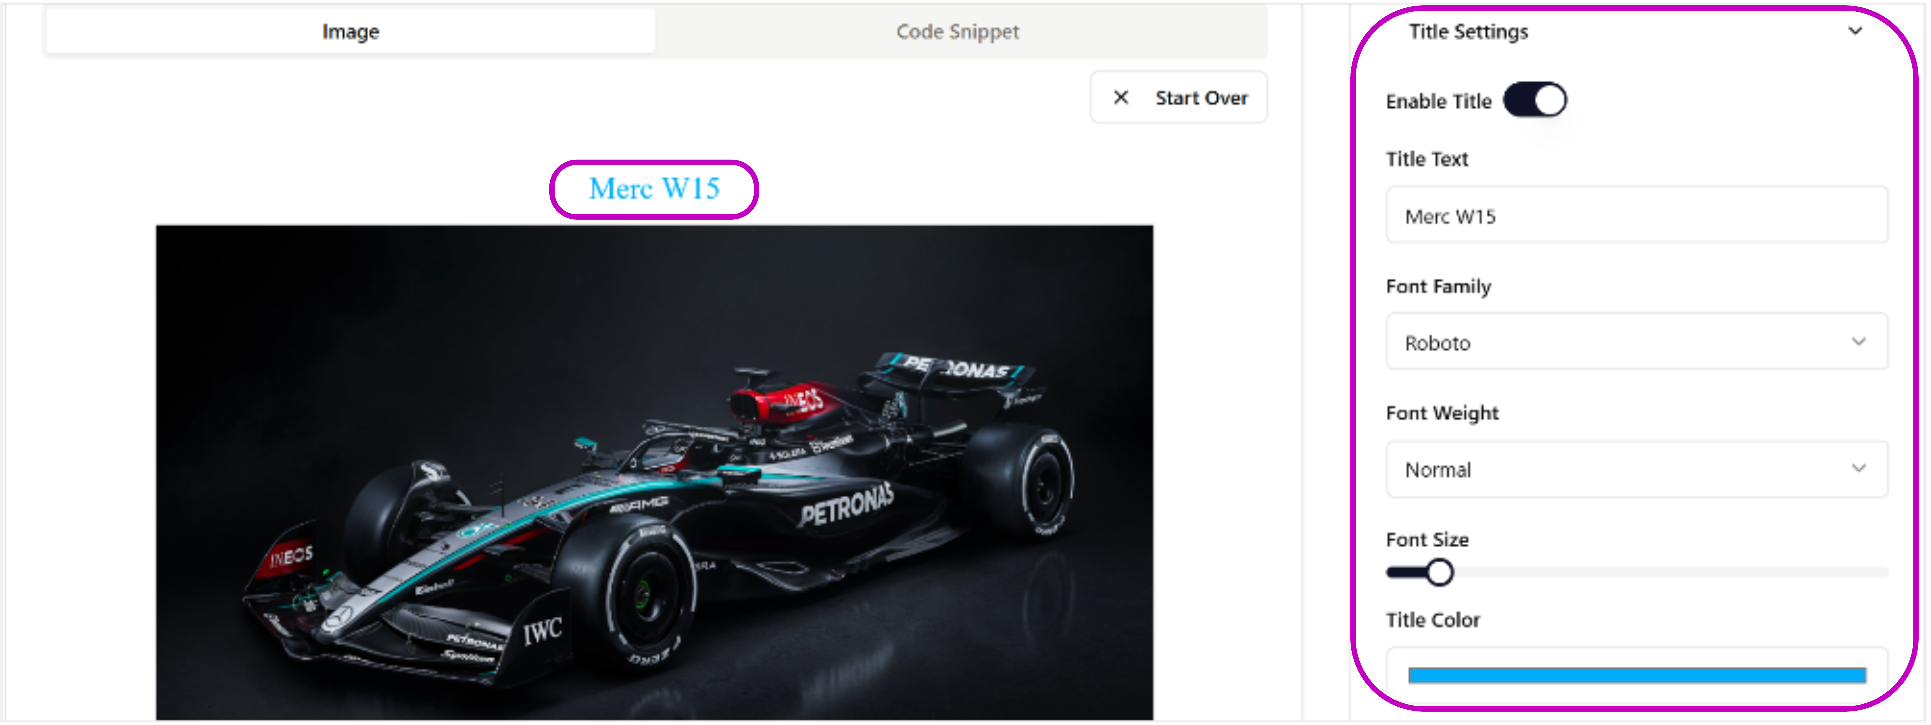
First, decide if you want to add a title. Click the “Title Settings” dropdown and toggle “Enable Title.” You can type your title and customize its appearance using the font selector, weight options, size slider, and color picker.
3. Adjust Image Padding
Next, adjust the padding to give your image proper spacing. The padding slider controls how much space appears between your image and the background edge. Moving it right will increase padding, creating more breathing room around your image. Moving it left will decrease padding for a tighter composition.

4. Adjust the Corner Radius
You’ll find the “Corner Radius” setting right after adjusting the padding. This tool will determine how rounded your image corners will be. A higher radius will create softer, more rounded corners, while a lower radius will keep them sharper. You can move the slider to the right for a more rounded look:

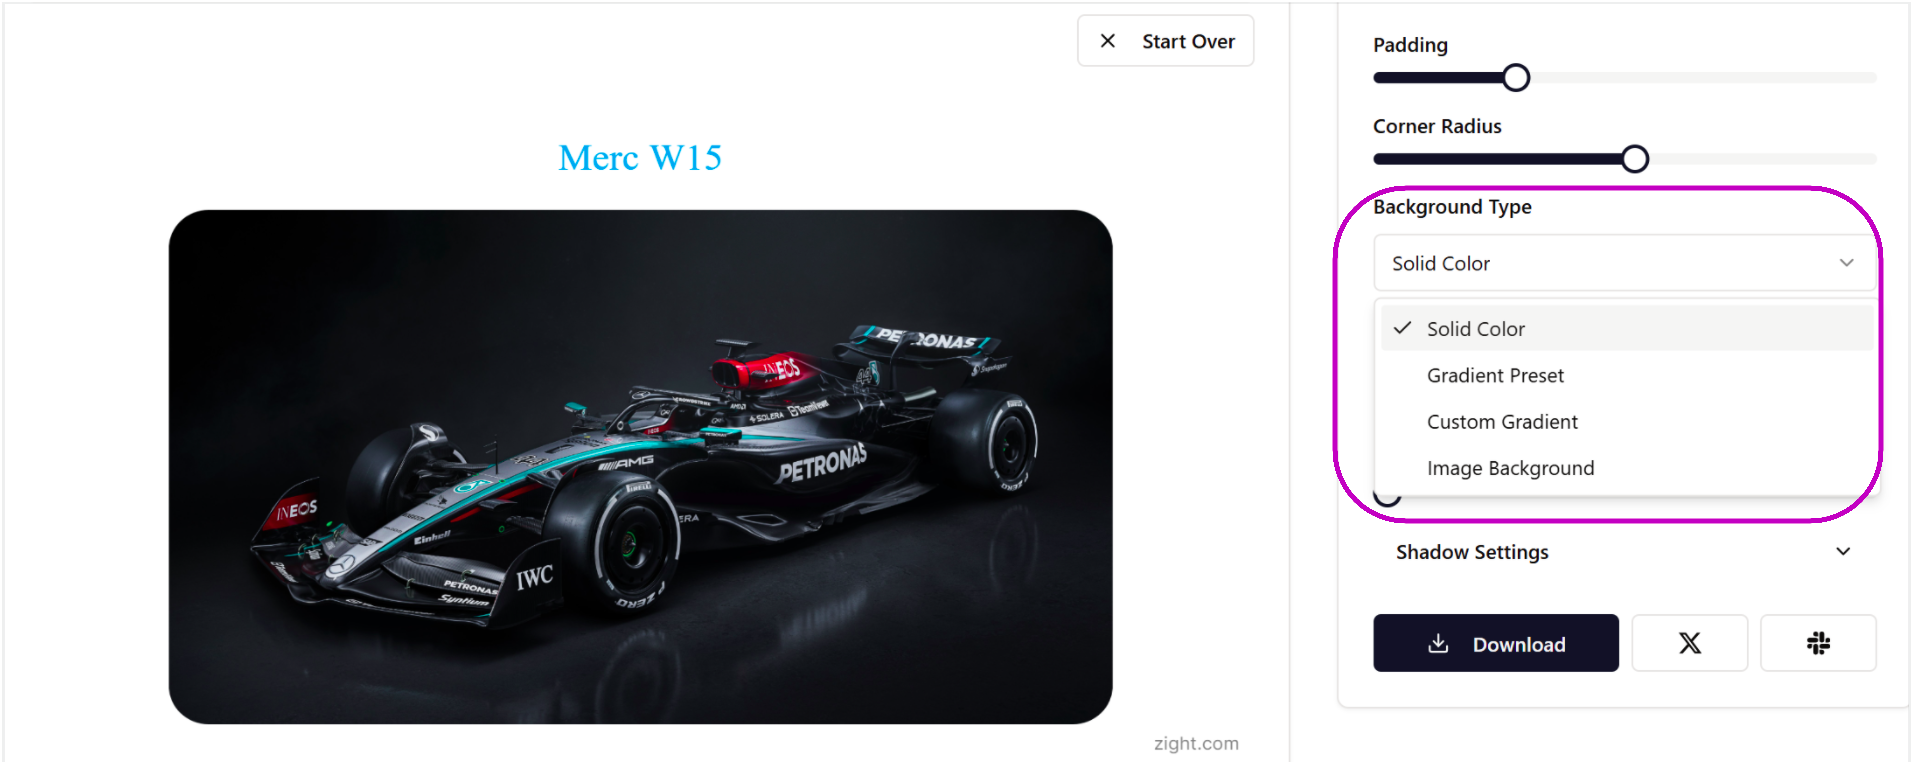
5. Edit the Photo Background
Now, you can start editing the background look. To start, click the “Background Type” dropdown to see four options: Solid Color, Gradient Preset, Custom Gradient, or Image Background.
For a solid color, simply click the color picker below to choose your shade. You can instantly set a new background by selecting from the preset colors or inputting a specific hex code if you’re matching brand colors. Here’s what you can do with just a few clicks:

If you select the “Gradient Preset” background type, you’ll see a collection of pre-designed gradient options:
- Ocean: A calming blend of turquoise and light blue tones
- Sunset: Warm transitions from pink to orange
- Forest: Natural green gradient combinations
- Purple Rain: Rich purple color variations
- Northern Lights: Aurora-inspired blue and green hues
Simply click any preset to apply it to your image background instantly.

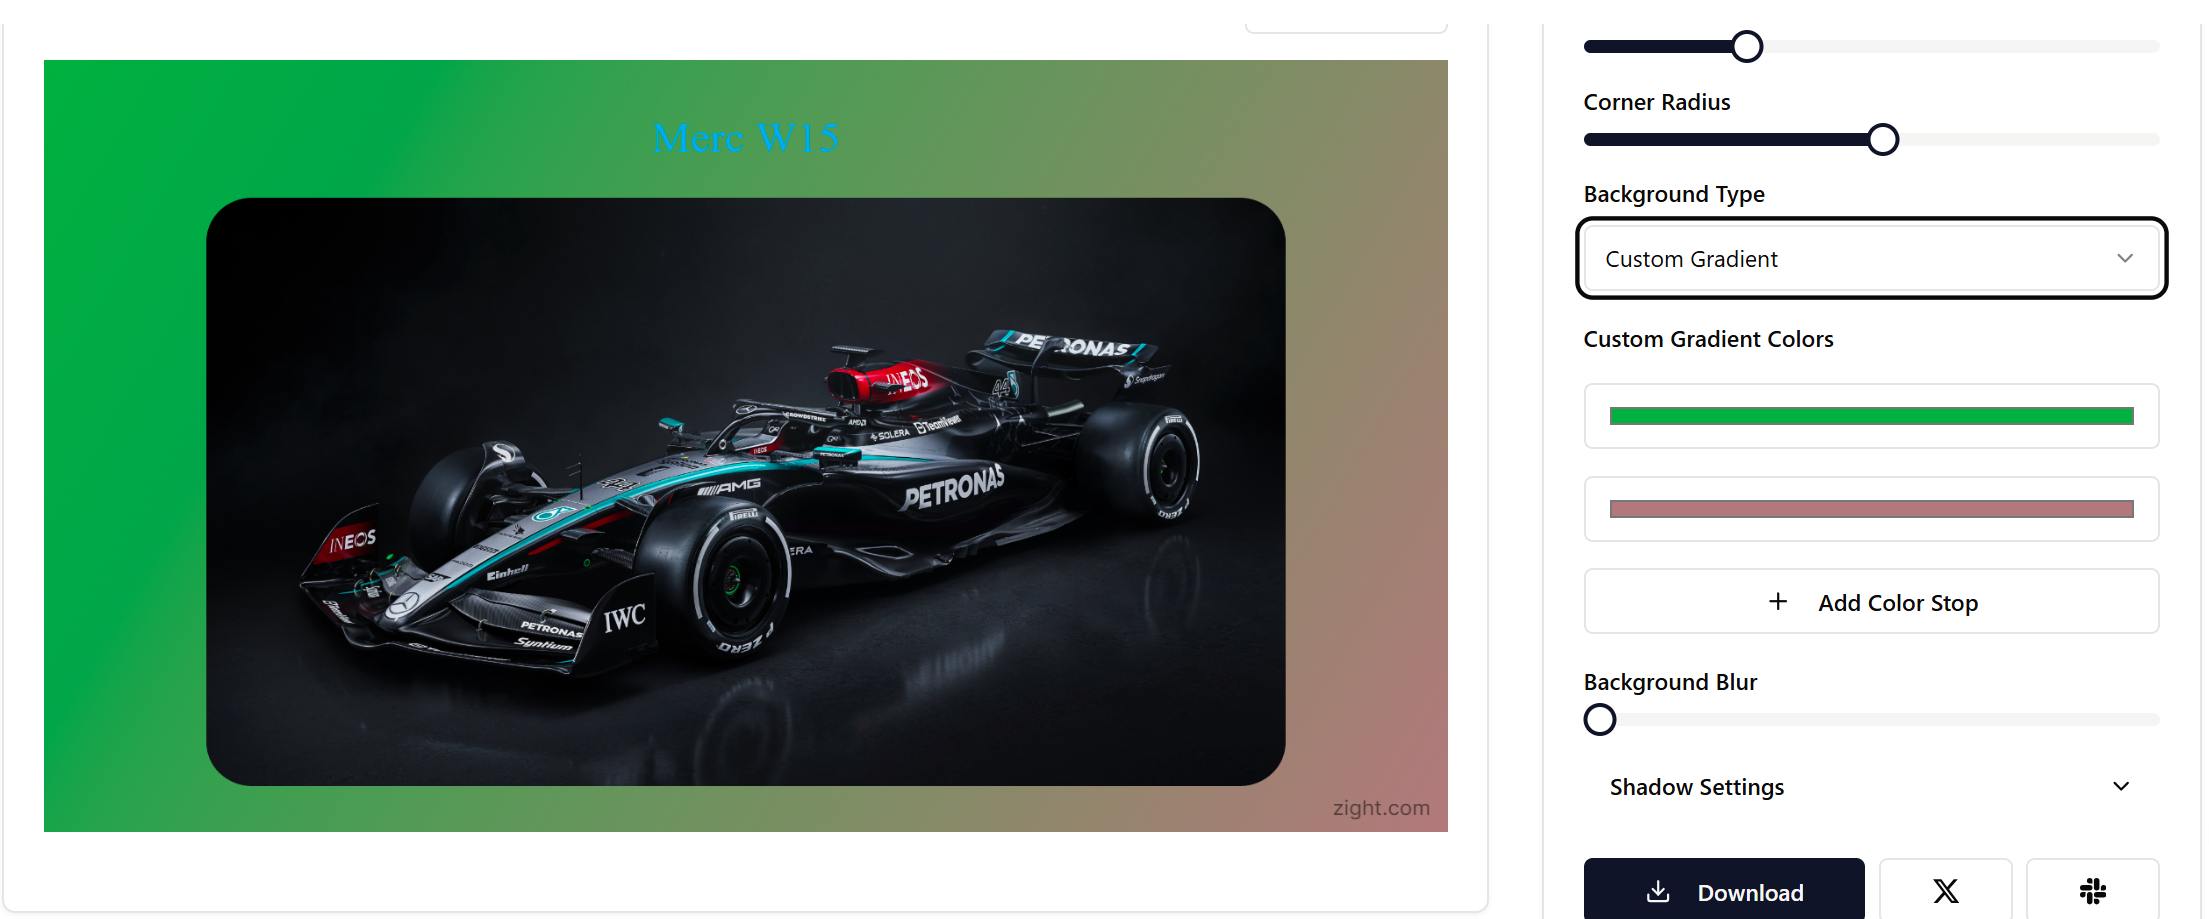
You will also get more photo editing features with the “Custom Gradient” background type. There are two color stops by default, and these determine where your gradient starts and ends. Click each stop to set its color. If you want more complexity, click “Add Color Stop” to add up to three more transition points. Adjust each stop’s position by dragging it along the gradient bar.
If you set your background type as the “Image Background,” you will then need to upload another image that will serve as the background. Ensure you have this image ready on your device and that it will only complement, not distract from, the main image.

You can also blur elements behind your image, if any. Use the “Background Blur” slider to control the intensity – subtle blur works well for professional content, while stronger blur creates more dramatic effects.

6. Adjust the Image Shadow Effects
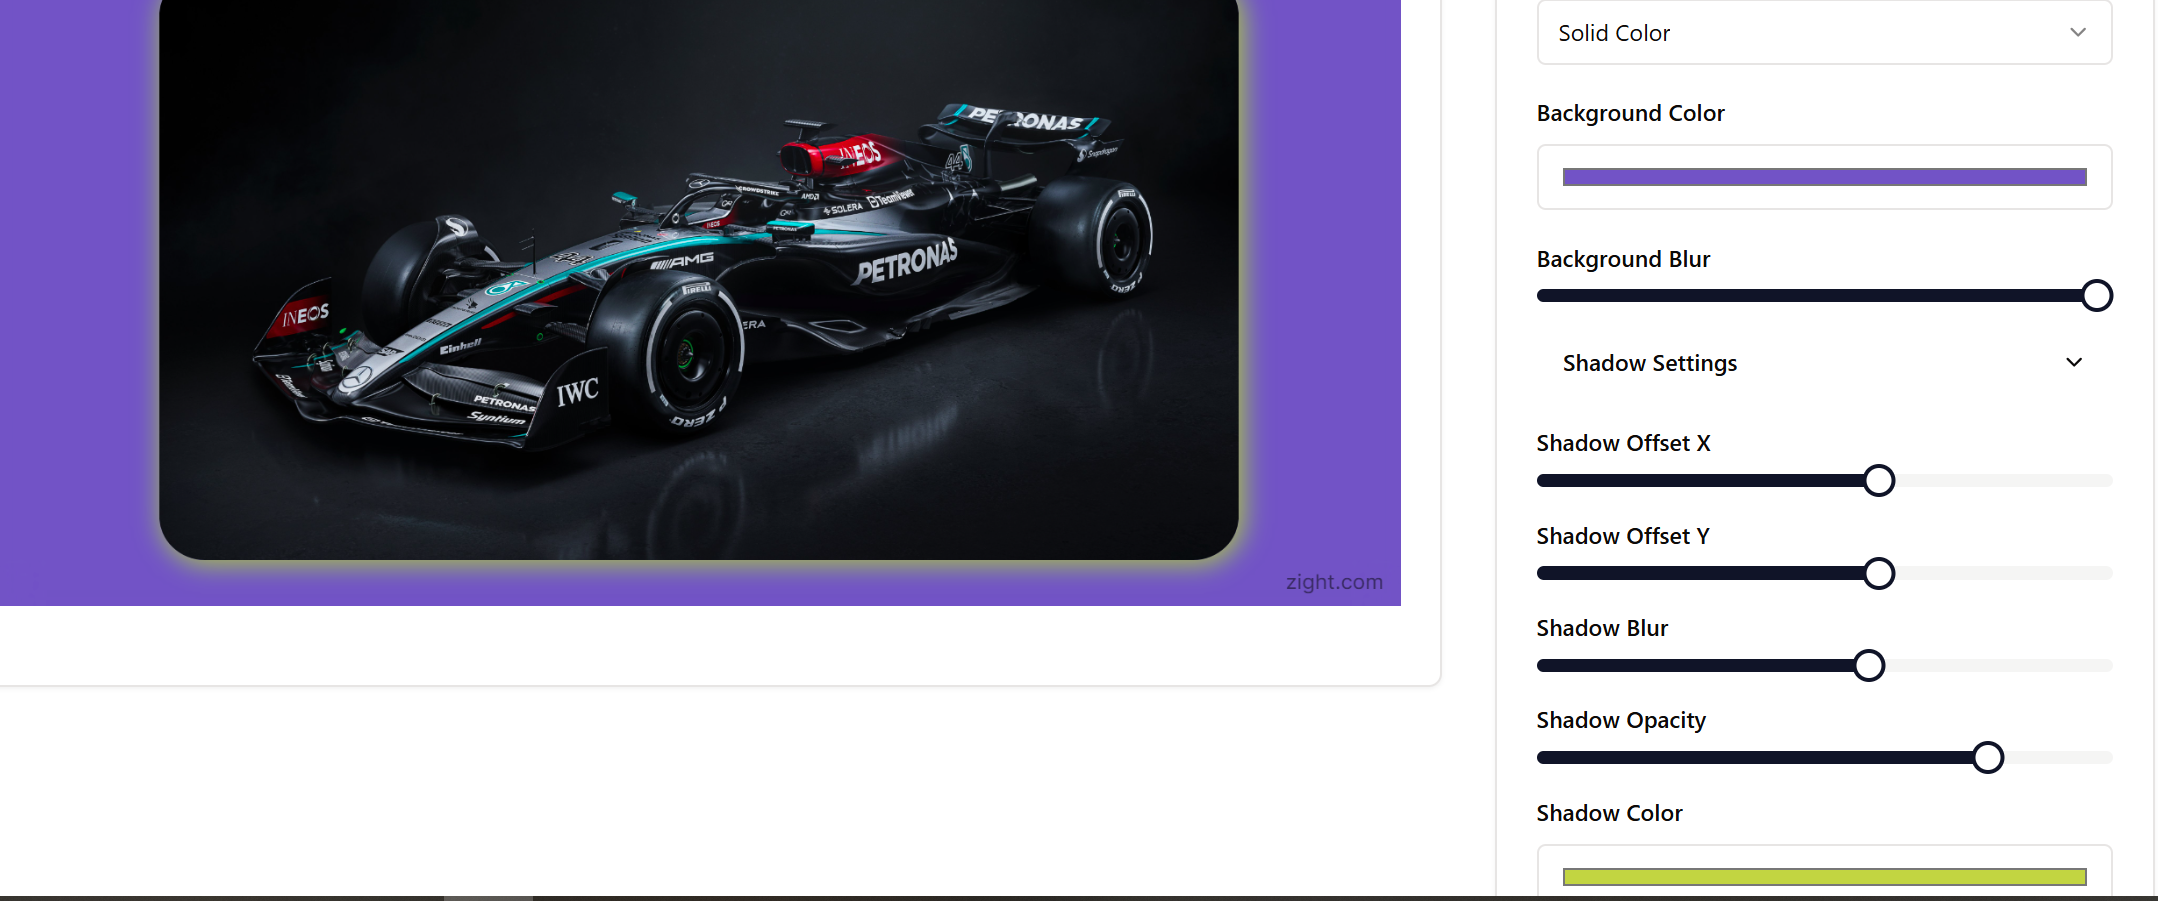
After setting the background, you can now continue to “Shadow Settings.” To start, click the dropdown to reveal controls for adding depth to your image:

You can adjust the shadow’s position using “X and Y offset sliders – moving the X slider will shift the shadow left or right, while the Y slider moves it up or down. Then, control its softness with “Shadow Blur” and set its intensity using Shadow Opacity.” The “Shadow Color” picker will let you choose between dark or colored shadows to match your design.
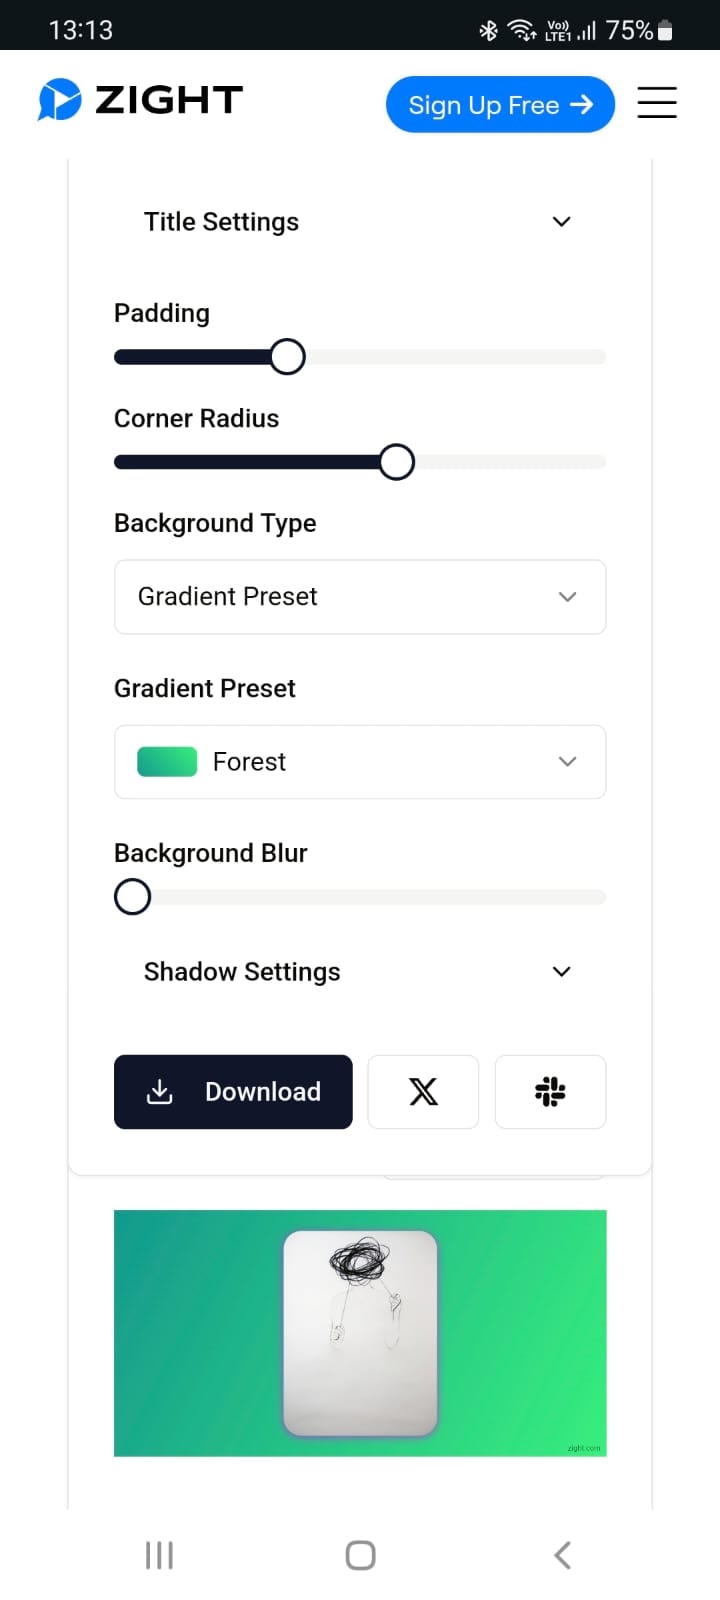
You can follow the smake process on your smartphone, too! Here’s what the interface looks like on the smaller screen:
7. Export Your Image
Now that you have your desired background, click the Download button to save your enhanced image. You’ll also see options to share directly to Twitter (X) or Slack using the icons to the right of the download button.

How to Use the Code Snippet Background Editor
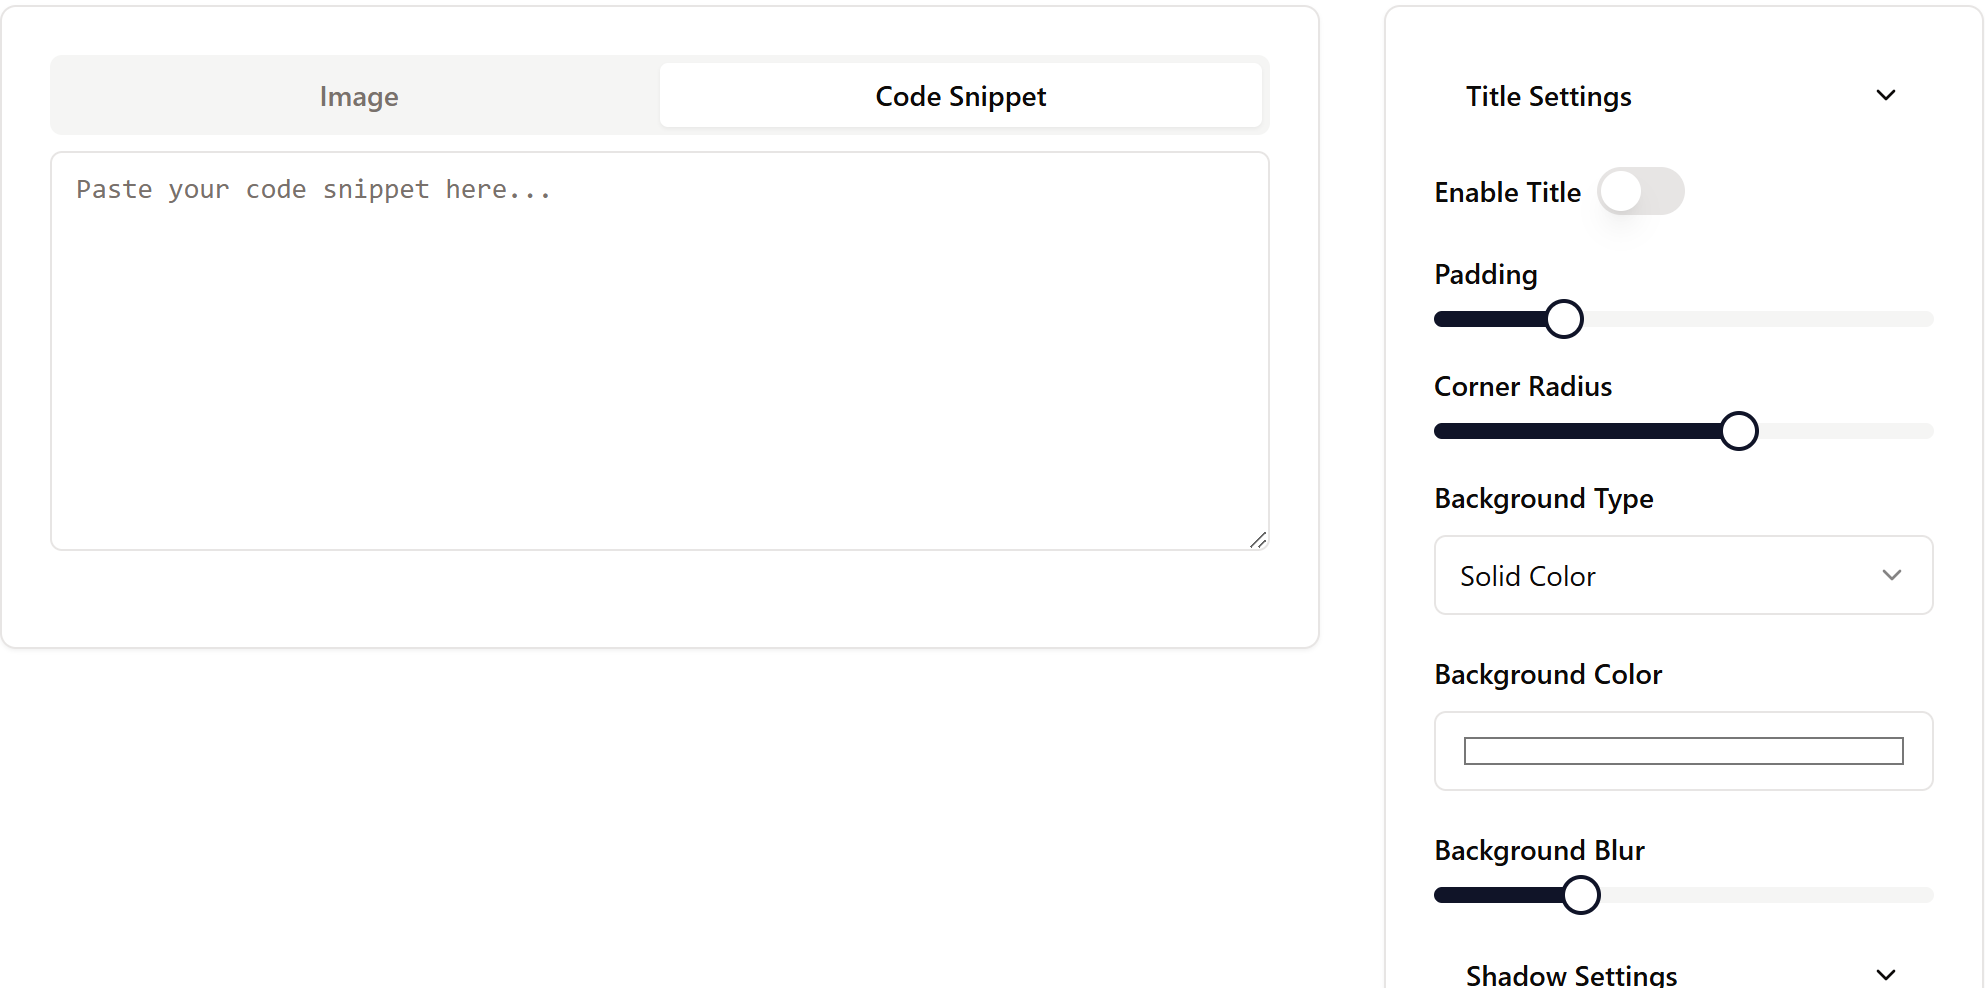
Using the code snippet background editor follows a workflow similar to that of the image background editor. Start by switching to the “Code Snippet” tab in the editor interface. You’ll see a text area where you can write or paste your code.

The editor will automatically preserve your code formatting and indentation, so you don’t need to worry about losing your careful spacing. Just like with images, start by pasting your code into the editor.

The interface will then split into two parts: an upper input area where you paste your code and a lower preview pane that shows how your code will look with the applied background and styling.
1. Set the Code Title
If you consider adding a title to your code snippet, click “Title Settings” and toggle “Enable Title.” You can customize the title’s appearance using several options.

Choose from different font families like Roboto, adjust the weight from regular to bold, control the size with a slider, and pick your title color.
2. Adjust Padding
Next, adjust the padding to frame your code properly. The padding slider controls the space between your code and the background edge.

For code snippets, you typically want enough padding to make the code readable but not so much that it looks sparse.
3. Set the Corner Radius
The Corner Radius setting works just like in the image editor. You might prefer sharper corners to maintain that technical look or a slight radius to soften the edges.

The preview pane shows you exactly how your choices affect the presentation.
4. Set Your New Code Snippet Background
Looking at the background options for code snippets, you’ll find four choices in the dropdown: Solid Color, Gradient Preset, Custom Gradient, and Image Background.
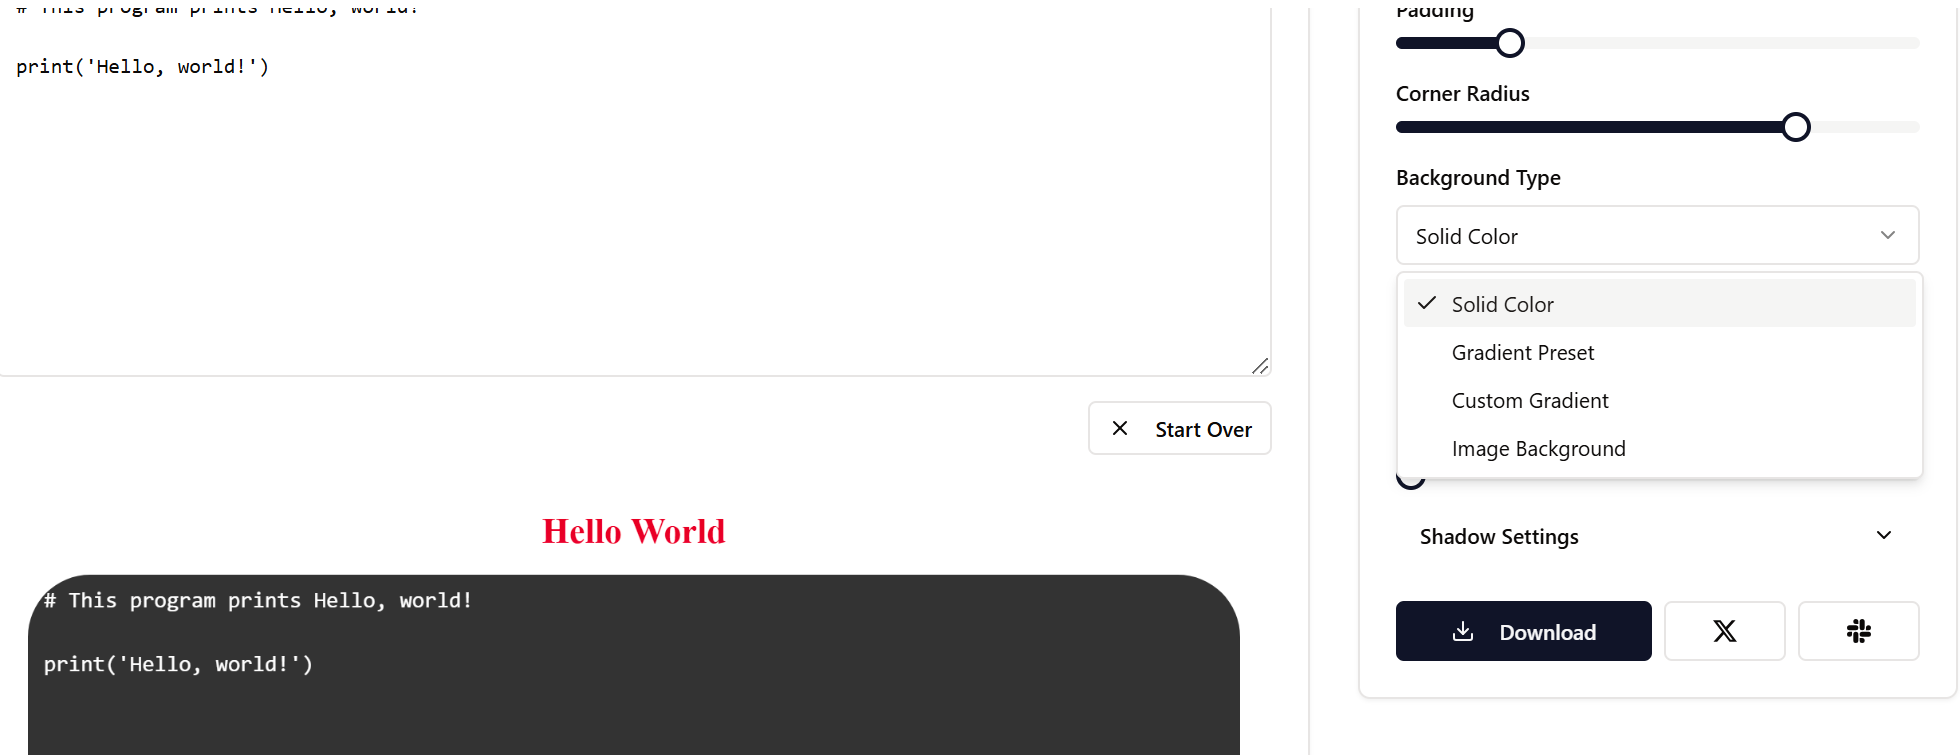
Just like we did for the photo background, here’s how to choose between all four for your code snippet:

The “Image Background” option lets you place your code over a custom image, which can be useful for presentations or documentation covers.
5. Adjust Code Snippet Shadow Settings
Click “Shadow Settings” to reveal the controls that help your code block stand out on the page. As we did above with the photo editor, you can enhance the background as follows:

6. Download or Share
When you’re happy with the styling, click Download to save your enhanced code snippet, or share directly to Twitter (X) or Slack using the share buttons.
Wrapping Up
Ready for your next big visual presentation? You’ve seen how a few simple adjustments to backgrounds, shadows, and spacing can make both images and code snippets stand out.
And yet, these code snippet and photo editing tools are just part of Zight’s broader visual communication toolkit. With the Zight app for Mac or Windows, you can capture your content with screen recording and transcribe it with AI, take screenshots, create GIFs, or record webcam presentations – then enhance them with the background editor for a cohesive, professional look.
Get Zight for free now and utilize all these features!


