Don’t Just Say it, Show it with a Screen Recording
Add context and clarity to your communications by recording and annotating your screen without the time commitment and hassle of scheduling a meeting or another “quick sync.”
Master Screen Recording with Ease
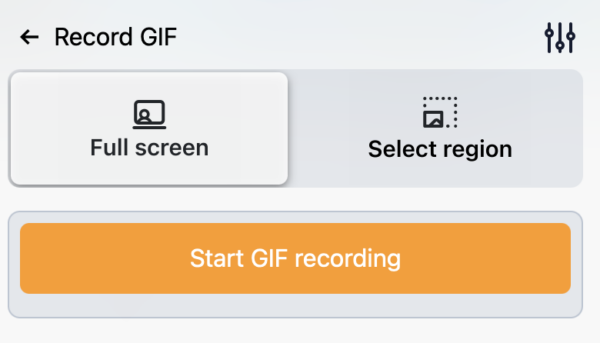
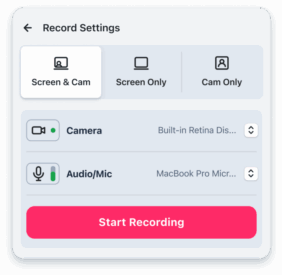
Record full screen or select a region – use cam only, screen only, or screen & cam.
Share Videos with a Click
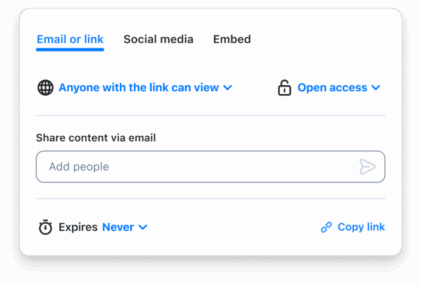
Instantly share a link with your team or embed it anywhere, such as a website.
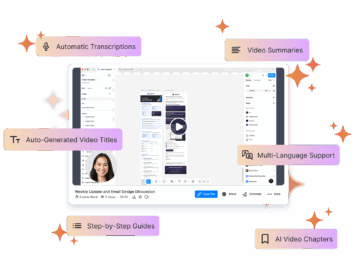
Automate The Pain Out of Making Videos
Enjoy videos with captions and clear transcriptions for accessibility. We support 50+ languages for transcriptions, making it inclusive. Instantly improve video context with our AI-generated titles.
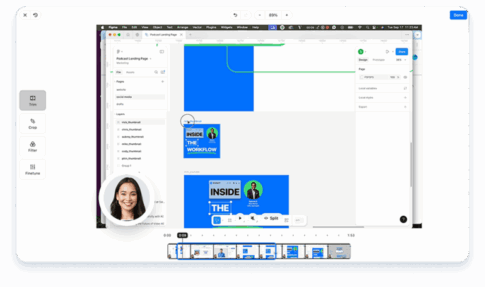
Simplify Your Video Editing Process with Ease
Easily edit videos with trim, crop, split, merge, filters, and more.
How to Record Your Screen with Zight
Zight offers multiple ways to record your screen in a few simple steps.


Record in a Few Simple Steps
From app download to sharing in just six steps.
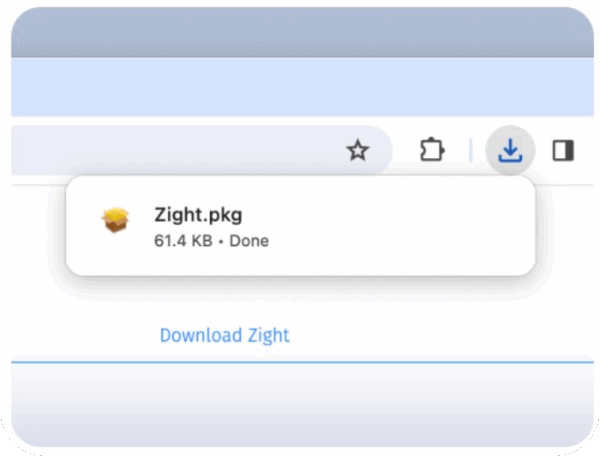
1. Download & Install Zight
If you haven’t already, sign up for Zight (up to 5-minute recordings are FREE) and download the screen recording software application for your Mac, Windows, or iOS device or install the extension for Chrome.
2. Launch Zight
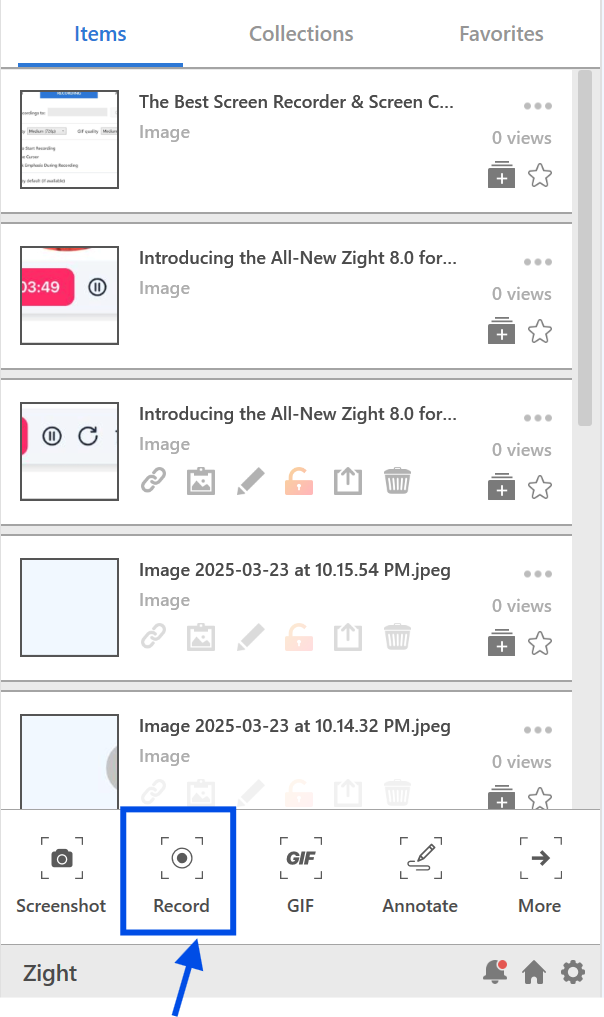
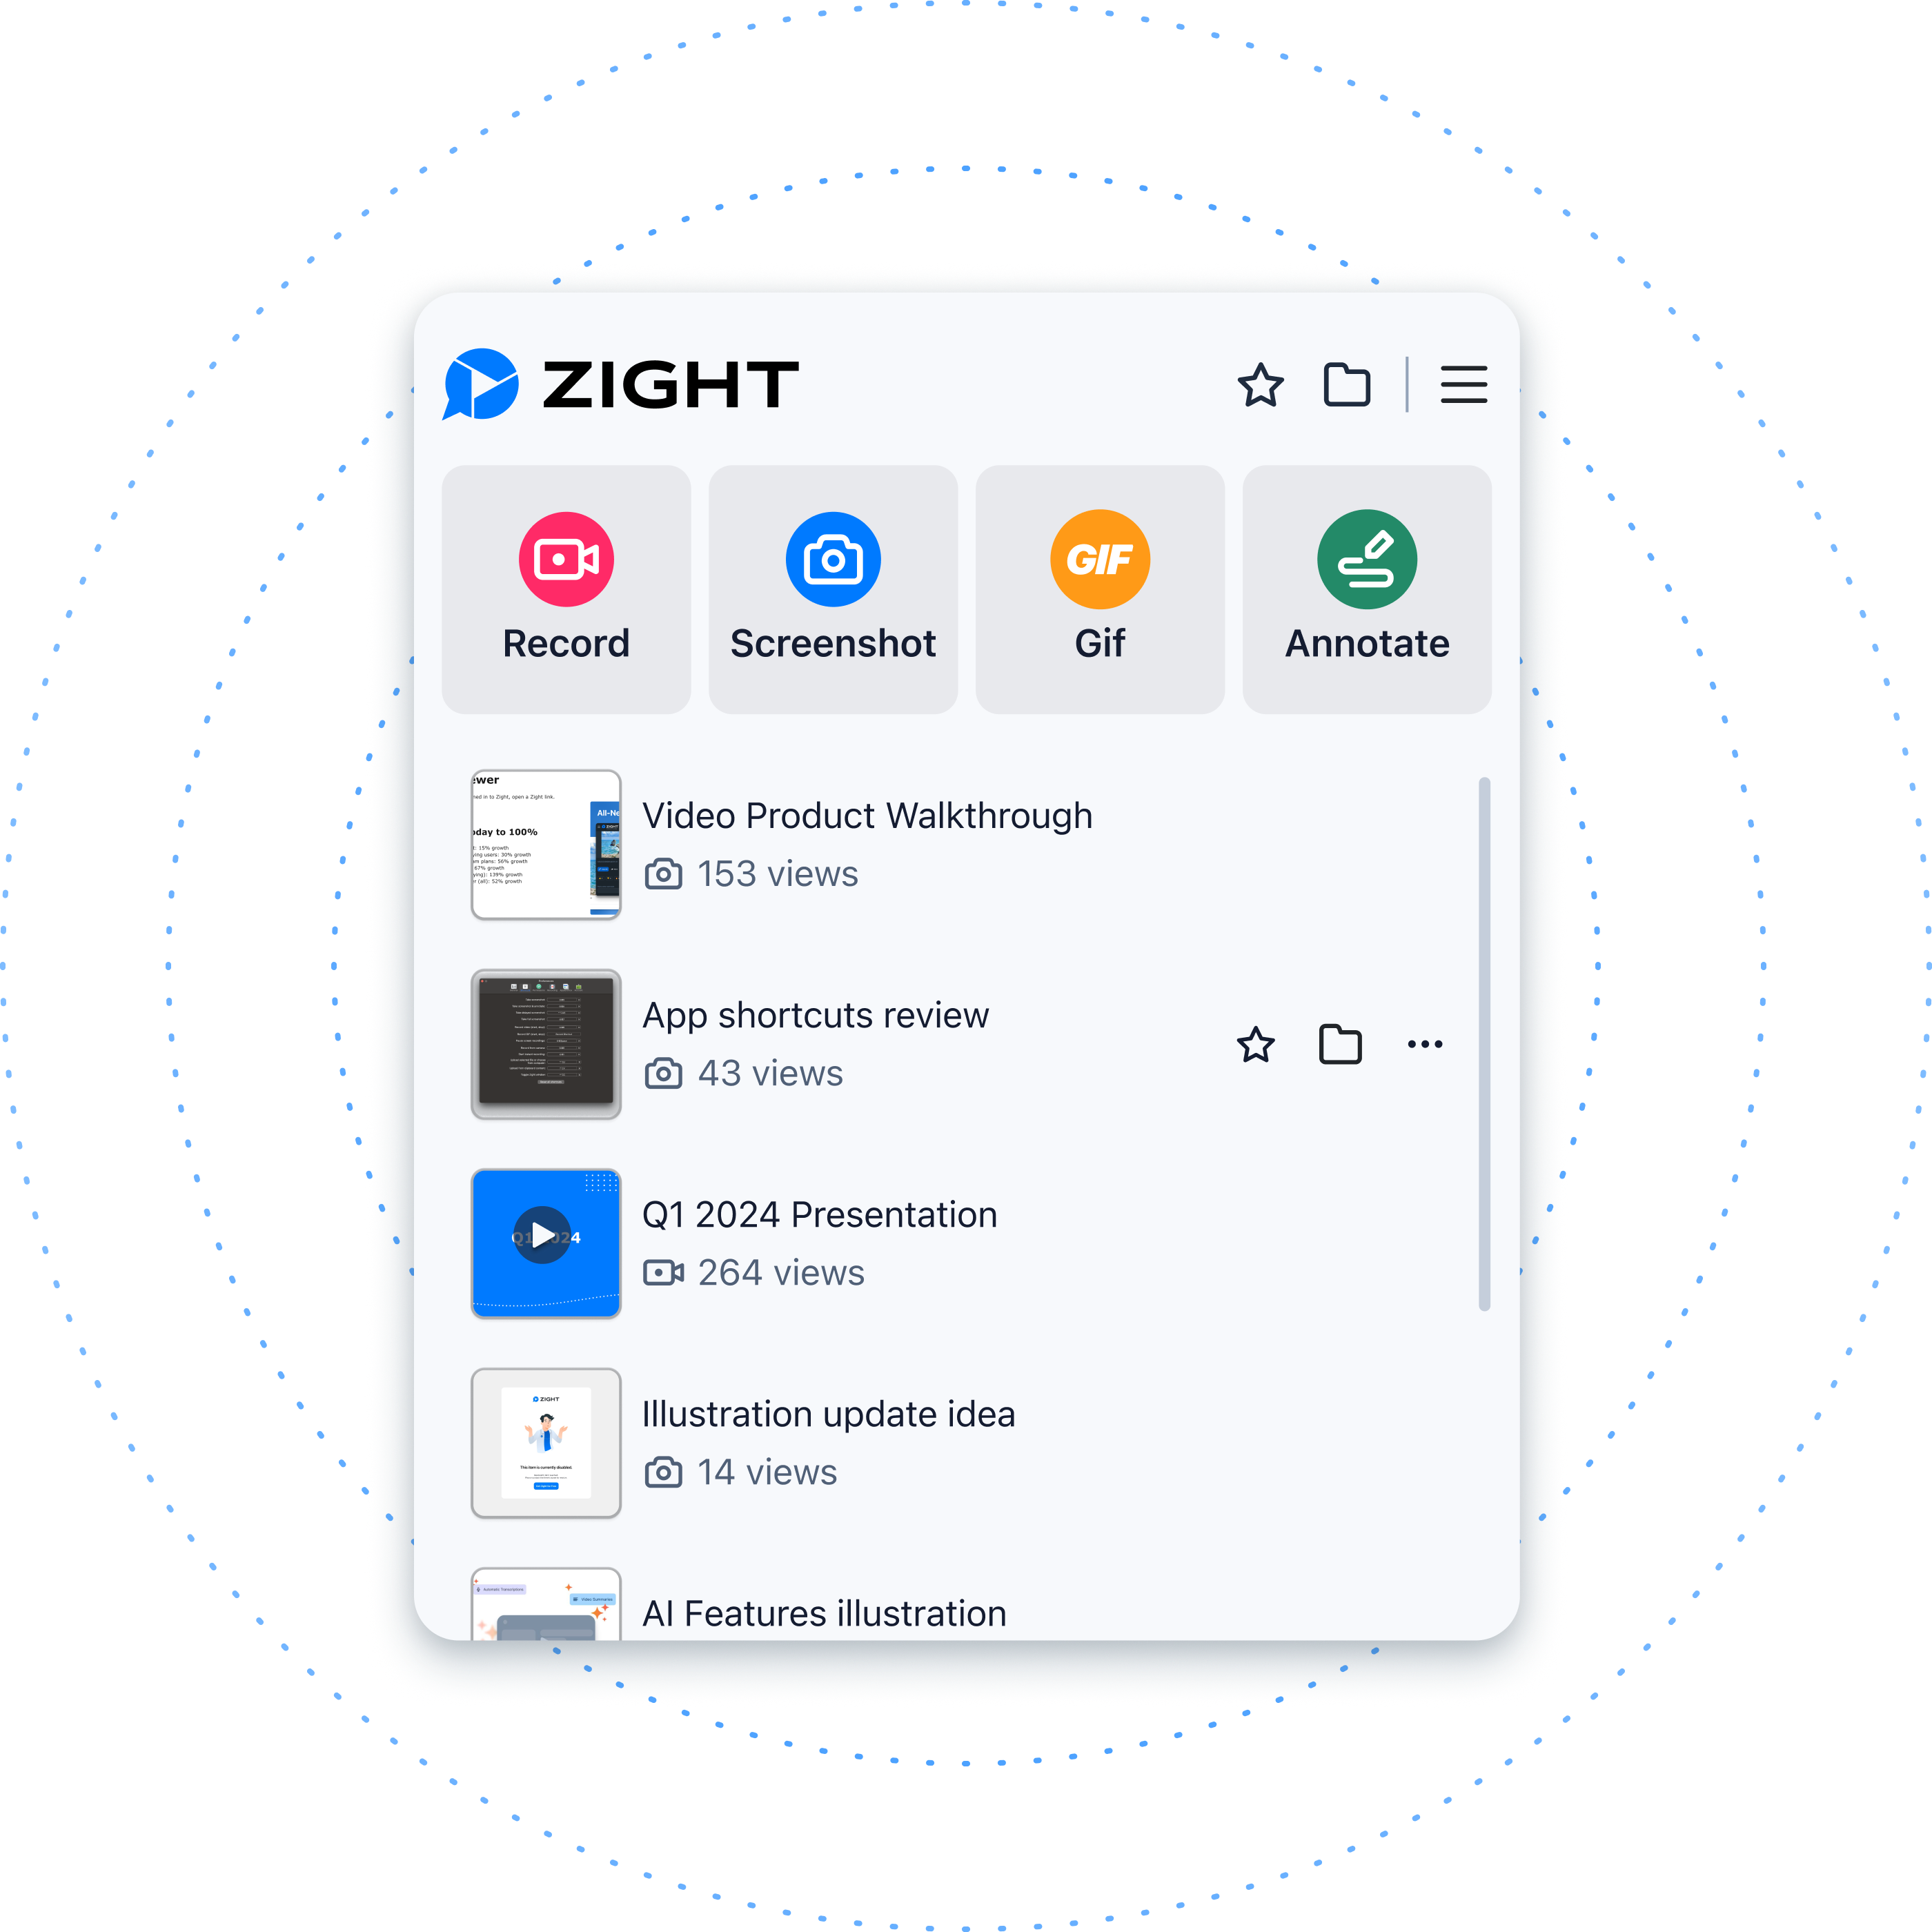
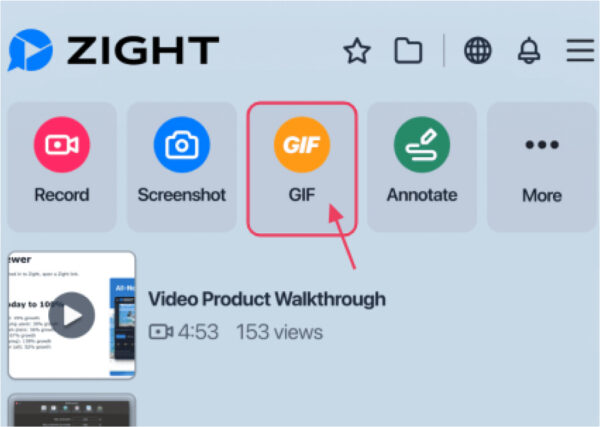
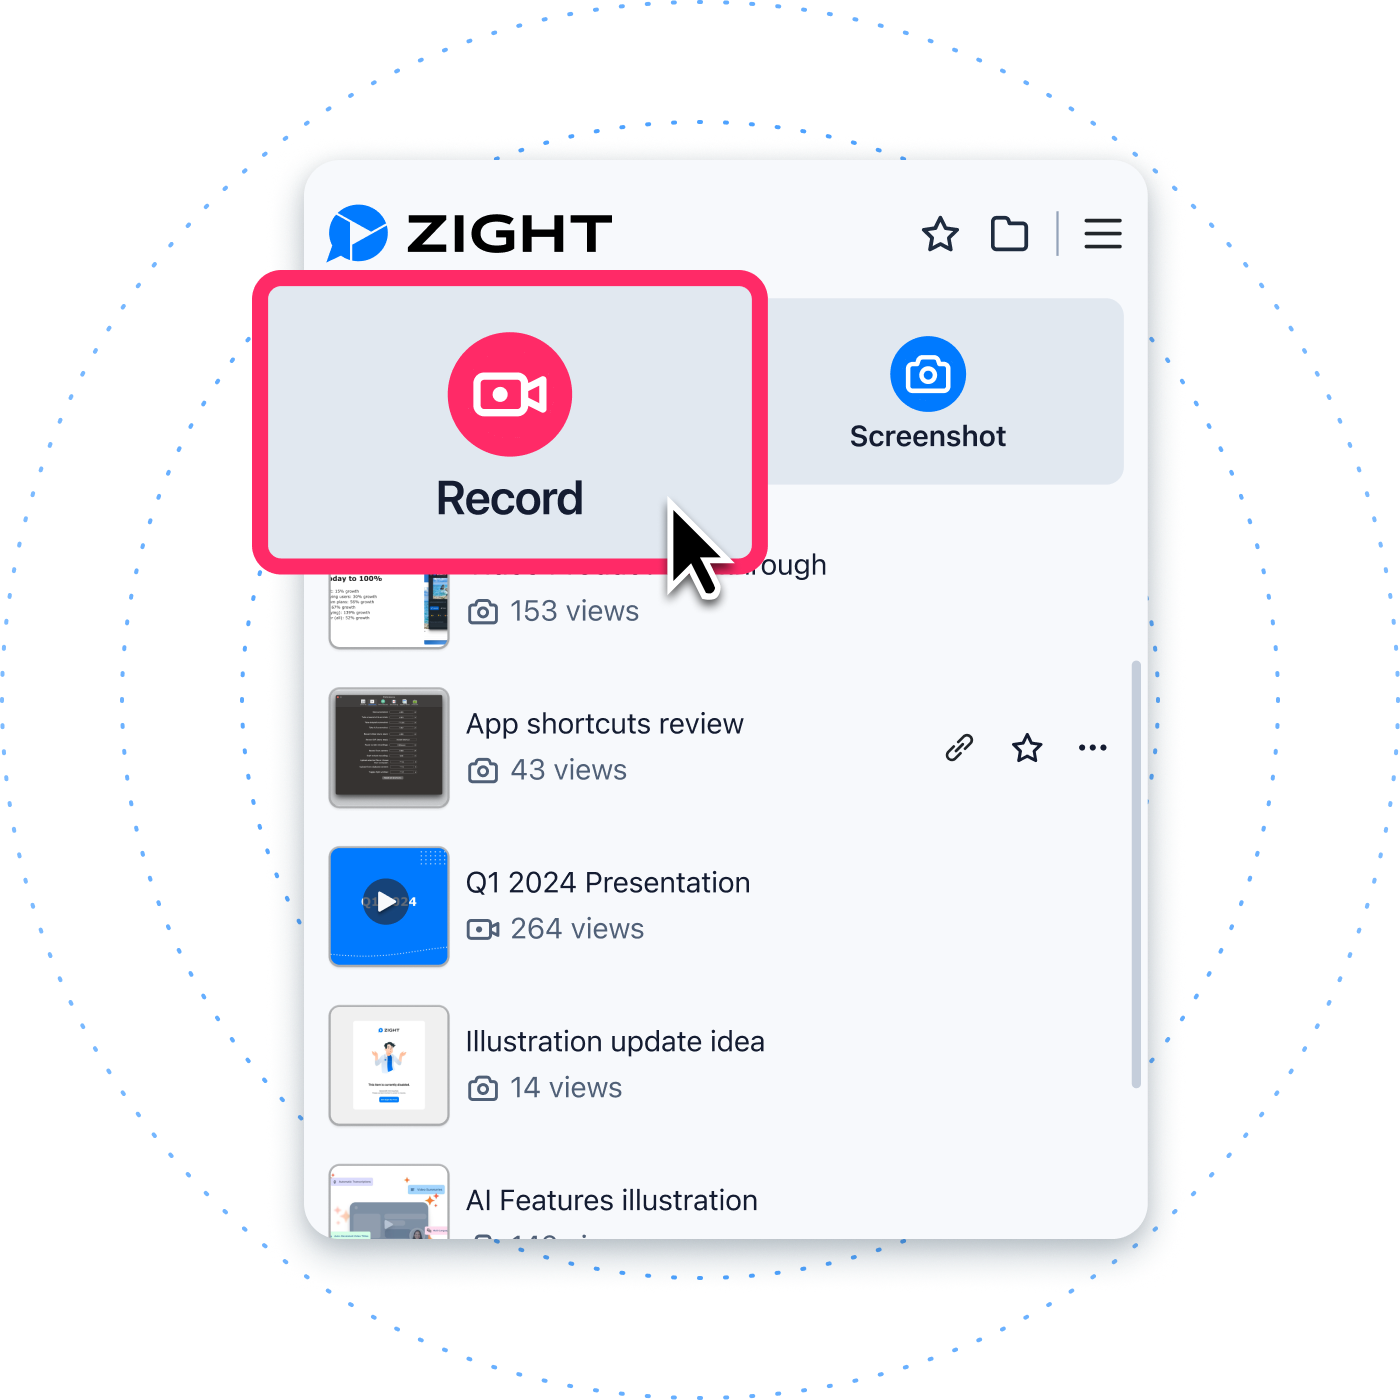
Once you have Zight installed, simply launch the app from your applications or toolbar. Click on the application icon and choose the Record option.
3. Choose Your Screen Recording Options
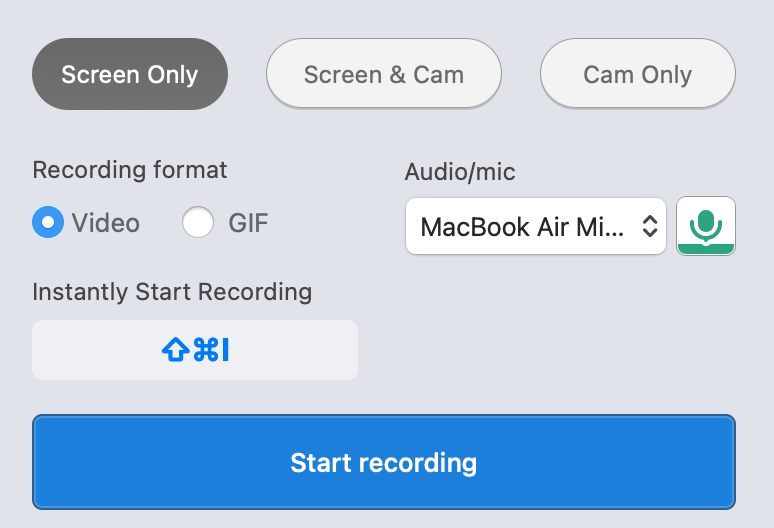
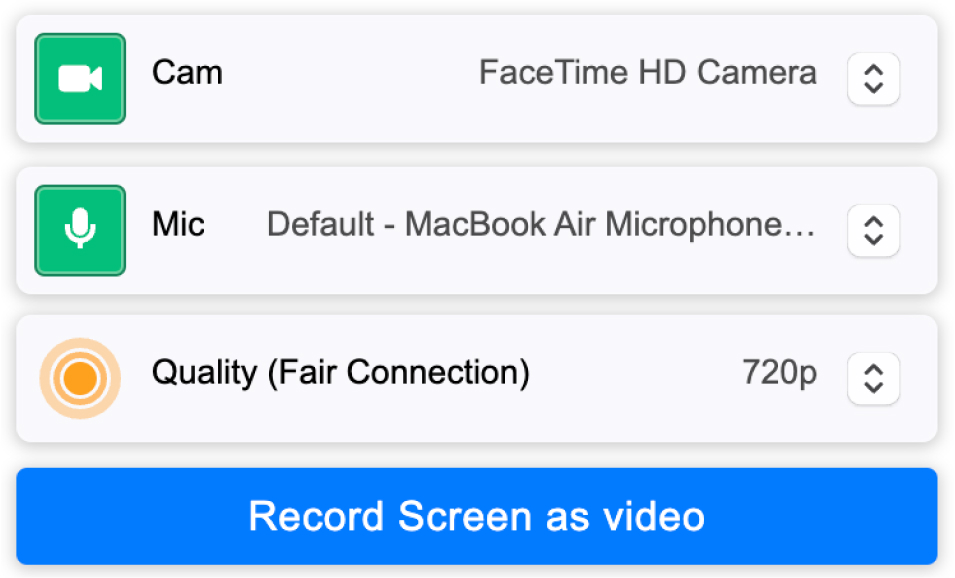
From the Record menu, select your video capture preferences. You can choose to record the full screen, only a part of your screen, or cam only. You can also select your recording format of a video or gif and choose your audio/mic and webcam video preferences
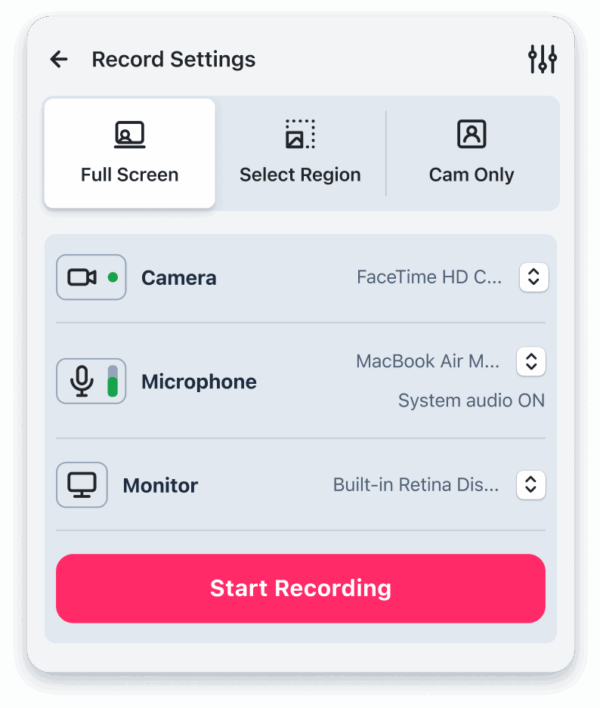
4. Start Recording
After you have chosen your preferences, click the “Start recording” button. A countdown prompt from 3-2-1 will show and then your screen recording will begin. The tool bar will show you a recording timer and provide additional options to annotate, pause or finish your recording.
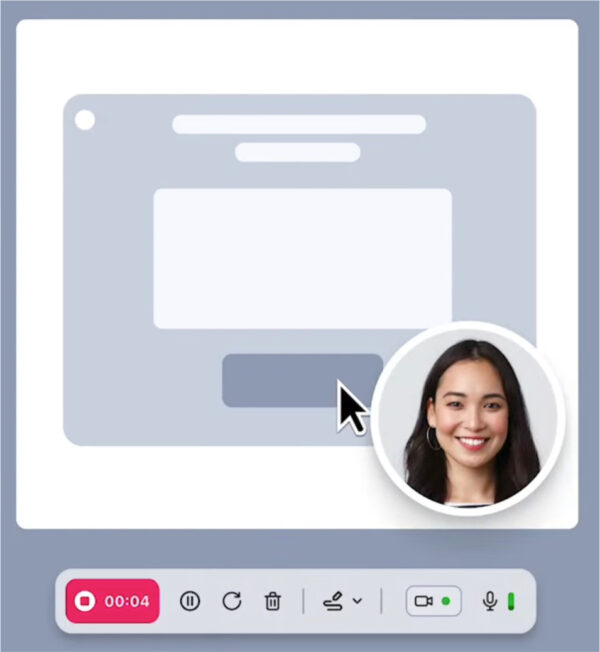
5. Finish & Edit Screen Recording
Once you click the “Finish” button, your recording will automatically process and then you can choose to edit. Our powerful editing features allow you to enhance your video with trim, cut, split, merge, and more.
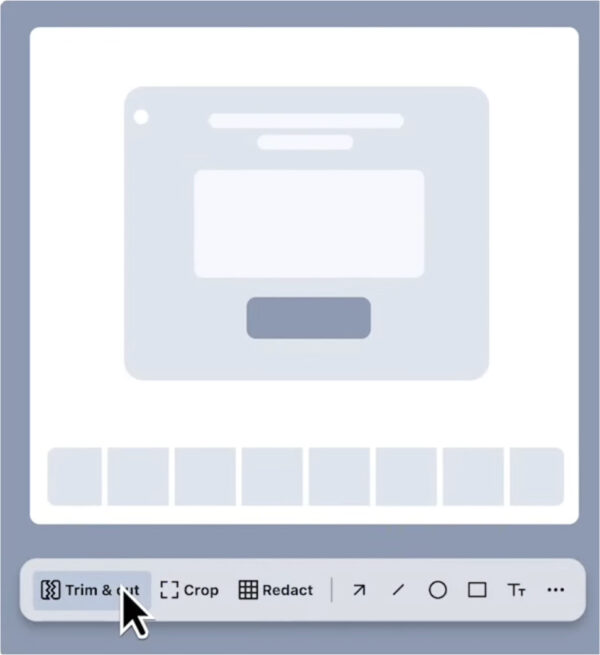
6. Easily Share via URL
Your video recording is now available in your Zight files. You can quickly and easily share it via an auto generated link anywhere you can share a URL. You can also drag and drop your video into emails and other communication channels like Slack and Teams.

See How ![Drift]() Uses Zight Video Solutions
Uses Zight Video Solutions
From challenges to solutions: Drift's success story with Zight.
The Challenge
Drift is the leading conversational marketing platform. Since 2014, they have experienced hyper-growth. To be able to scale and adapt quickly, they use the latest productivity and automation tools. For the Customer Success team, it means using video to communicate faster.
The Zight Solution
Sara Pion, former Customer Advocate and now Marketing, enhances the Drift knowledge base with videos and annotated screenshots. She embeds them directly in HelpDocs or on WordPress when it’s a blog post. She can also answer any customer question directly in the Drift chat with a Zight link. For internal communication, she is addicted to CMD+Shift+A with Mac: she takes a screenshot, annotates it, and pastes it directly into Slack. She also uses other Zight shortcuts to create visuals in only a few clicks.
The Results
It is faster to explain with a video than to type everything down. A video is also more digestible for the reader. It catches their attention and gives clear information.

"Zight helps me show my work with my team and our customers quickly and effectively. I love how easy it is to make sure we’re producing the highest quality work and can draw attention to the things that matter."
Customer Advocate & Marketing - Drift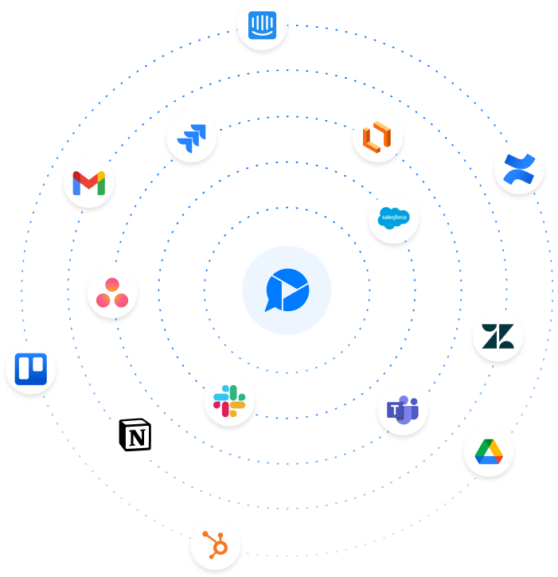
Integrates to Work Where You Work
Zight screenshots can be shared wherever you can share a link and integrates directly with your favorite apps including:
See All IntegrationsExplore Other Zight Features
Explore other Zight features, like screen capture, gif-making and file sharing by clicking the buttons.
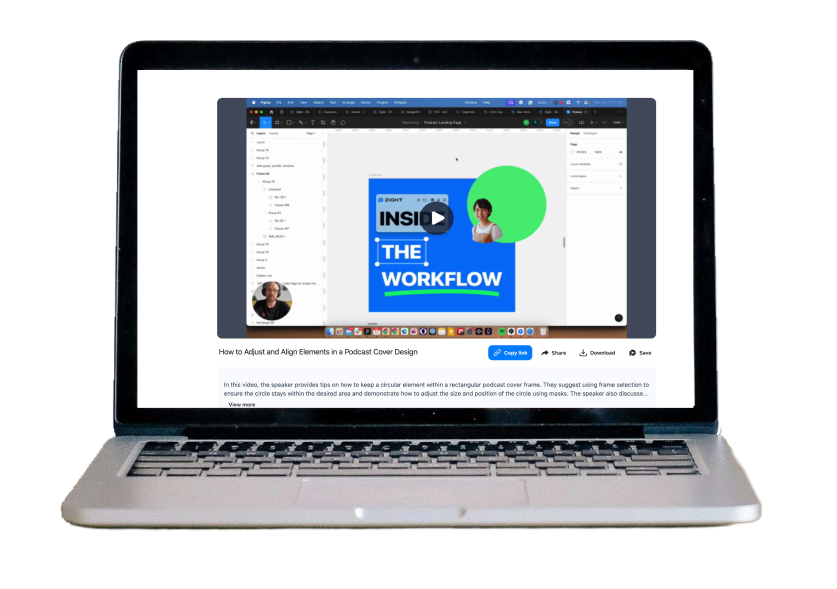
The Ultimate Guide To Screen Recorder Apps For Business
Back-to-back meetings and lengthy emails to explain simple concepts are a drain on your time. If you’re nodding along, there’s a smarter way to communicate.
Screen recording isn’t just for gamers showing off their skills (though it’s great for that too!). It’s for anyone who wants to communicate faster, clearer, and with a whole lot less hassle. With Zight, you get a high-quality recording paired with advanced editing, AI-powered features, and seamless sharing integrations that put an end to repetitive explanations.
Some day-to-day tasks to use screen recording include creating customer onboarding tutorials, PowerPoint presentations, and troubleshooting software issues. This shows that it works in different case scenarios whether you’re a professional content creator, a teacher, or just someone looking to share your screen activities.
Therefore, finding the right screen recorder app can make a big difference. This guide will walk you through everything you need to know about screen recorders, including types, features, top software options, and tips for effective screen recording.
Let’s dive in!
Types of Screen Recorders: Find What’s Right for You
Screen recorders come in various forms, each tailored to specific use cases. Luckily, Zight seamlessly integrates across desktop, browser, and mobile platforms, combining the flexibility of desktop software with the convenience of browser-based tools and mobile apps. Here's a breakdown of the main types to help you choose the right one:
1. Desktop Screen Recorders
- These are software applications installed on your computer. A desktop screen recorder usually offers the most features and flexibility.
- Examples: Zight, OBS Studio, Camtasia, Bandicam

2. Browser-Based Screen Recorders:
These tools work directly within the supported browsers, requiring no installation.
- Examples: the Zight Chrome extension, Loom, Screencastify

3. Mobile Screen Recorders
Apps designed to capture smartphone and tablet screen activity.
- Examples: Zight Mobile App, AZ Screen Recorder, Mobizen

4. Built-in Screen Recorders
Some operating systems come with built-in screen recording capabilities.
- Examples: Zight (Cross Platform), Windows Game Bar, macOS Screen Recording
Key Features to Consider
When choosing a screen recorder, consider the following features:
High-Quality Recording
Look for options to adjust resolution (1080p or higher), frame rate (30 FPS or 60 FPS), and bitrate for crystal-clear video quality.
Audio Flexibility
Ensure the ability to record system audio, microphone input, or both simultaneously. This is vital for creating tutorials, presentations, or gaming content.
Built-In Editing Tools
Save time with basic editing capabilities like trimming, cutting, merging, and adding annotations directly within the app.
Versatile Export Options
Check if the recorder supports popular formats like MP4, GIF, or MOV and allows direct sharing to platforms like YouTube, Slack, or email.
User-Friendly Interface
A simple and intuitive design ensures you can start recording quickly, even if you're not tech-savvy.
Seamless Performance
Choose a screen recording software that runs smoothly without lagging or crashing, even during long recordings or on lower-spec devices.
AI-Powered Features
Modern tools like Zight offer AI-powered features such as automatic video summaries, smart titling, and instant transcription in multiple languages.
Affordable Pricing
Decide between free online screen recorders (great for basic needs) and paid versions that offer more advanced features like unlimited recording time, cloud storage, and enhanced editing options.
How Do I Set up Zight Screen Recording?
From the different types of screen recorders, it is clear that Zight seamlessly integrates across desktop, browser, and mobile platforms, combining the flexibility of desktop software with the convenience of browser-based tools and mobile apps.
Whether you’re recording on Windows, Mac, Chrome, or iOS, Zight offers unmatched ease of use and advanced features like AI-powered transcription and instant sharing. Here is a step-by-step guide for each device:
1. Zight Screen Recorder for Windows
Although Windows has a built-in screen recorder that offers basic screen recording capabilities through the Xbox Game Bar or the snipping tool, choosing a third-party tool like Zight can significantly enhance your recording experience.
Zight’s desktop screen recorder for Windows is a versatile tool designed to capture your screen activities with ease. Whether you’re creating tutorials, recording presentations, or documenting workflows, Zight will give you more control, better quality, and advanced features, making it an excellent screen recording software for your desktop on your Windows.
Here is a step-by-step guide:
Record My Screen and Audio On Windows with Zight
You can record any part of your screen and webcam with sound in Zight. Follow these steps:
Step 1: Visit the Downloads page, and click ‘Download App‘. The Zight installer will automatically start downloading the Zight desktop app.
Step 2: Double-click the Zight desktop icon to begin using Zight
Nb: The Zight Windows app requires the .NET 4.5 Framework
Step 3: Adjust the recording settings, including video quality, max recording length, and desired audio source (choose your computer’s built-in microphone for voice recording).
Step 4: Click on the record button to start capturing your screen and audio. Perform the actions you want to record.
Step 5: Click on the stop button to end the recording. Zight will automatically save the recording; you can then edit, annotate, and share it with others.
Screen recorder Window tips from Zight can help you get started quickly.
- High-Quality Recording: Capture your screen in high definition, ensuring that your recordings are crisp and clear.
- Audio Recording: Record system audio, microphone input, or both, allowing you to add commentary or narration to your recordings.
- Flexible Recording Options: Choose to record the entire screen, a specific application window, or a custom area, giving you the flexibility to capture exactly what you need.
- Annotation Tools: Use built-in tools to annotate your recordings with text, arrows, shapes, and more, making it easy to highlight important information.
- Easy Sharing: Share your recordings directly from the app or save them to your computer for later use.
- Customizable Settings: Adjust recording settings such as frame rate, resolution, and audio sources to suit your needs.
2. Zight Screen Recorder for Mac
If you prefer an alternative to the built-in QuickTime for screen recording on your Mac and are searching for a Mac screen recorder to download, you can use Zight, a screen recorder with a timer. Here’s how:
- Visit the Zight website and sign up for an account if you haven’t already.
- Download and install the Zight desktop application for Mac.
- Launch the Zight application and sign in using your account credentials.
- In the Zight menu bar, click on the Zight icon.
- Select “Record Screen” from the dropdown menu.
- A recording control bar will appear on your screen. Adjust the recording settings as needed.
- Click on the red record button in the control bar to start the screen recording.
- Perform the actions you want to record.
- To stop recording, click on the stop button in the control bar.
- The recording will be automatically uploaded to your Zight account, where you can edit, annotate, and share it.
Can you Screen Record on Mac with Sound?
Yes, if you don’t want the basic free Mac screen recorder, the best way is to screen record on a Mac with sound using Zight.
Luckily, this is a straightforward process since when you start a screen recording using Zight, it captures both your screen and audio by default.
With your system audio enabled, you can record full meetings or clips and let our AI add-on create transcripts, meeting summaries, and action items for you. Go to your app’s preferences or the recording options under the microphone dropdown.
Select “System audio” and accept the permission prompt and the audio from your system will be recorded along with the screen.
Also, with the Zight free screen recorder, there is a great instant video upload feature that is exclusive for Mac users. This cutting-edge functionality accelerates your video processing, making it up to five times faster and providing shareable links almost immediately after recording concludes. It also ensures you can maintain focus on creating great content without the wait.
3. Can I Record my Screen on Google Chrome?
Yes! If you don’t want to use the Zight desktop screen recorder, there is a Zight Chrome extension to record your screen on Google Chrome. Using the Chrome Extension you’re able to capture your screen, record videos, add to collections, and share your content.
Here is a visual demonstration of how to install the Zight Chrome extension from the Chrome Web Store.
Also, if you need a step-by-step guide, we got you covered. Follow these steps:
Step 1: Click on the Zight Chrome extension icon in your Chrome browser toolbar. Open up the installer page for Chrome
Step 2: Click ‘Install Extension’. A new window will open, click ‘Add to Chrome’ and then select ‘Add extension’ in the pop-up window. From here, your web dashboard will open up (if you’re logged in). Pin the Chrome Extension to your taskbar. If you are not logged in, sign in to your Zight account or create a new one if you don’t have an account.
Step 3: Click on the screen recording option in the Zight extension menu. Adjust the recording settings if needed.
Step 4: Click on the record button to start capturing your screen. Perform the actions you want to record.
Step 5: Click on the stop button in the Zight extension to end the recording. The recording will be automatically uploaded to your Zight account, where you can edit, annotate, and share it.
4. Record My Phone Screen Using Zight
Both Androids and iPhones have a built-in screen recording option. With iOS 11 or later versions, you can easily access the screen recording feature from the Control Center and use it to capture your iPhone screen activities.
Additionally, apps like Zight can be downloaded as a free screen recorder on iOS to capture screen recordings and automatically save and share them.
To screen record your phone screen, you can use Zight’s mobile application. Follow these steps:
- Tap the App Store icon. In the bottom-right corner, tap Search. In the search bar, enter Zight. Once your search results appear, tap Zight and then Tap GET
- Open the screen or app you want to record.
- Swipe up from the bottom of the screen (iOS) to access the control center/notification center.
- Tap on the screen recording icon in the control center/notification center (the icon may vary depending on your device).
- Follow the on-screen instructions to start the screen recording.
- Record screen and perform the actions you want.
- Once you’re done, stop the recording by tapping the screen recording icon again.
- The recording will be automatically saved to your Zight account, where you can also share it.
Tips for Effective Screen Recording
Want to create screen recordings that are clear, engaging, and get your message across without losing your audience? Here are 7 pro tips:
Plan Like a Pro (Before You Hit Record!)
Don't just wing it! Outline what you want to show and say before you start recording. This helps you stay focused, clear, and concise.
Declutter Your Digital Workspace
A messy desktop is distracting. Remove any unnecessary icons, close irrelevant apps, and create a clean, professional canvas before you hit record.
Mic Check 1, 2, 3
Don't let poor audio ruin a great recording! Luckily, Zight has a free Web-Mic tool to test your microphone and system audio levels before you start.
Use Shortcuts
Learn the keyboard shortcuts to start, pause, and stop recording. These hotkeys will streamline the process and make you look like a screen recording pro (bonus: they're often customizable in apps like Zight!).
Edit Your Recording
Use the built-in video editor to cut out mistakes, add annotations, and enhance your video. Even basic edits can make a huge difference.
Keep It Concise
Aim for a focused and to-the-point recording to keep your audience engaged.
Test and Review
Before sharing, review your recording to check for errors and ensure it meets your quality standards.
Why Use a Screen Recorder App?
Using a screen recorder in the tech industry offers numerous benefits, such as enhancing communication, training, troubleshooting, and improving productivity. Here are some key reasons why tech professionals should use a screen recorder:
1. Efficient Communication
- Visual Explanations: Replace lengthy confusing emails or documentation with screen recordings of step-by-step visuals of processes that are easy to follow.
- Demo and Tutorials: Create engaging tutorials or product demos that showcase features in action, ensuring your audience understands every detail.
- Feedback and Reviews: Record and annotate feedback directly on software, designs, or code with system audio and webcam for context-rich troubleshooting.
2. Enhanced Training and Onboarding
- Training Videos: Develop training materials that new hires can watch at their own pace, reducing the need for repetitive sessions.
- Knowledge Sharing: Foster a culture of continuous learning by sharing expertise through video tutorials.
- Consistent Training: Standardize training with video content to ensure everyone is on the same page.
3. Simplify Troubleshooting and Support
- Bug Reporting: Record bugs or issues as they happen to give developers visual context for faster fixes.
- Enhanced Support Tickets: Attach screen recordings to support tickets, allowing support teams to see exactly what the user is experiencing and resolve issues more efficiently.
- Remote Assistance: Use screen recordings to guide users through troubleshooting steps making remote support more effective
4. Documentation and Reporting
- Process Documentation: Record workflows to create clear, accessible guides for future reference.
- Progress Reports: Capture and share visual updates or insights on projects with stakeholders for better transparency.
- Audit Trails: Maintain visual records of system configurations, deployments, and changes for auditing and compliance purposes.
5. Collaboration and Teamwork
- Collaborative Development: Share screen recordings to demonstrate code implementations, discuss architecture, and review project progress, fostering better collaboration among team members.
- Cross-Functional Teams: Bridge the gap between technical and non-technical teams by recording your computer screen to explain technical concepts and project statuses.
- Remote Work: Strengthen communication in remote environments with clear, visual updates.
6. Productivity and Efficiency
- Quick Problem Solving: Use screen recordings to eliminate back-and-forth emails by showing solutions visually.
- Time Savings: Create reusable content for recurring tasks like onboarding or training.
- Focus and Clarity: Ensure instructions are clear and reduce misunderstandings.
7. Product and User Experience Testing
- User Testing: Record videos of user interactions with software to analyze usability and identify areas for improvement.
- Product Feedback: Gather visual feedback from beta testers and users for actionable insights.
- Feature Walkthroughs: Demonstrate new features to stakeholders and users in a way that’s easy to understand.
What Teams Can Use a Screen Recording App?
A screen recording app is a versatile tool that can benefit a wide range of teams across various industries. Here are some specific teams that can effectively use screen recorders:
Development Teams
Software Engineers and Developers
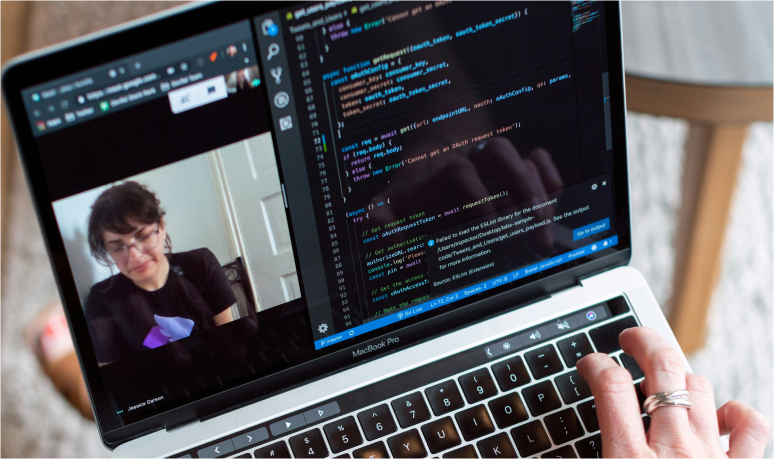
Capture and share code walkthroughs, demonstrate bugs, and document complex development processes.
Quality Assurance (QA)
Screen record test cases, capture bugs in action, and create visual reports for developers.
DevOps
Document deployment processes and server configurations and troubleshoot infrastructure issues.

Customer Support Teams
Technical Support
Record solutions to common problems, provide visual step-by-step guides, and screen capture user issues for better troubleshooting.
Customer Service
Create tutorials for customers, explain product features, and provide personalized customer support through recorded videos.

Product Management Teams
Product Managers
Demonstrate new features to stakeholders, record user feedback sessions, and create product demos for marketing and sales teams.
User Experience (UX) Designers
Capture user testing sessions, share design prototypes, and gather feedback on user interactions.

Marketing Teams
Content Creators
Produce video content for social media, blogs, and websites, including tutorials, product demos, and promotional videos.
Digital Marketers
Create how-to videos, capture live streams, and record webinars for content marketing strategies.
SEO Specialists
Share walkthroughs of analytics tools, demonstrate SEO techniques, and create tutorials for content optimization.

Sales Teams
Sales Representatives
Create personalized video pitches, product demonstrations, and walkthroughs to engage prospects and clients.
Sales Trainers
Develop training videos for new hires, share best practices, and record role-playing scenarios for sales techniques.

Human Resources (HR) Teams
HR Managers
Record onboarding processes, create training materials, and document company policies and procedures.
Recruiters
Share recorded interviews with hiring managers, provide visual explanations of job roles, and create onboarding videos for new employees.

Educational Teams
Teachers and Instructors
Create instructional videos, record lectures, and develop online courses for e-learning platforms.
Academic Researchers
Capture research presentations, document experimental procedures, and share findings with peers.

Design Teams
Graphic Designers
Demonstrate design processes, share critiques and feedback, and create tutorials for design tools.
Web Designers
Record website walkthroughs, capture usability testing sessions, and share design concepts with clients and stakeholders.

Operations Teams
Operations Managers
Document and share standard operating procedures, create training videos for new tools and processes and capture workflow demonstrations.
Facilities Management
Record maintenance procedures, create safety training videos, and document facility inspections.

Finance and Accounting Teams
Accountants
Record tutorials for financial software, demonstrate accounting procedures, and share walkthroughs of financial reports.
Financial Analysts
Capture and explain financial models, document analysis processes, and share insights with stakeholders.

Legal Teams
Legal Advisors
Record explanations of legal procedures, share case study reviews, and create training videos for legal software.
Compliance Officers
Document compliance processes, create instructional videos for regulatory guidelines, and share audit trails.
Why You Should Choose Zight as Your Free Screen Recorder
Compelling reasons to choose Zight as your best screen recorder:
Zight is a versatile screen recording software and screen capture app that offers a unique combination of features tailored for professionals, educators, and teams looking to streamline their communication and enhance productivity.
Here are some compelling reasons to choose Zight as your best screen recorder:
1. Ease of Use ( Anyone Can Use It)
- User-Friendly Interface: Zight’s intuitive design makes it easy to start recording your screen, even if you’re not tech-savvy.
- Quick File Sharing: Instantly share your recordings with a simple video link, making it easy to collaborate and communicate with others.
2. Comprehensive Recording Options
- Screen and Webcam Recording: Capture just your screen, webcam only, or both simultaneously, perfect for tutorials, presentations, and vlogs.
- Audio Recording: Record system audio, microphone input, or both to create comprehensive and engaging videos.
3. Powerful Additional Tools
- In-Video Annotations: Add text, arrows, shapes, and more to highlight important information and make your video recordings more interactive and informative.
- GIF Creation: Record your screen in GIF format, or convert your screen recordings into GIFs for quick, easily digestible content.
- Free Conversion Tools: Convert MOV to MP4, WEBM to MP4, MP4 to MP3, HEIC to JPG, or WebP to JPG instantly.
4. Advanced Editing Capabilities
- Trim and Cut: When editing your video, trim and cut your screen recordings to remove unwanted sections and keep your content concise.
- Blur and Highlight: Blur sensitive information or highlight key areas to direct viewers’ attention where it’s needed most.
5. Cloud Storage and Accessibility
- Cloud Storage: Automatically save your recordings to the cloud, freeing up local storage space and ensuring you can access your files from anywhere.
- Easy Access and Sharing: Share links to your recordings instantly, and access your video recording from any device with an internet connection.
6. Collaboration Features
- Team Workspaces: Create and manage team workspaces to organize and collaborate on recordings efficiently.
- Viewer Analytics: Track who views your recordings and how they interact with your content, providing valuable insights for improving engagement.
7. Security and Privacy
- Secure Sharing: Password-protect your recordings and set expiration dates for shared links to ensure your content is viewed only by intended recipients.
- Data Privacy: Zight prioritizes data security and privacy, ensuring your recordings are safe and secure.
8. Integration with Popular Tools
- Seamless Integrations: Integrate Zight with popular tools like Slack, Trello, Asana, and more to enhance your workflow and productivity.
- API Access: Utilize Zight’s API to integrate screen recording capabilities into your applications and systems.
9. Cross-Platform Compatibility
- Multi-Device Support: Use Zight free online screen recorder on Windows, macOS, and iOS, ensuring you can record and share content no matter what device you’re using.
10. Customer Support
- Responsive Support Team: Access a responsive customer support team that can help you with any issues or questions you may have.
- Comprehensive Resources: Take advantage of extensive documentation, tutorials, and community forums to get the most out of Zight.
- Auto-Generated Titles, Summaries, and Transcripts– Zight saves time by automatically generating searchable transcripts and summaries, making it easy to create tutorials or share key takeaways.
Need more convincing? Here are 18 reasons why screen recording is essential for business.
Zight’s Screen Recorder for Windows
These screen recorder tips for Windows can help you get started quickly.
- High-Quality Recording: Capture your screen in high definition, ensuring that your recordings are crisp and clear.
- Audio Recording: Record system audio, microphone input, or both, allowing you to add commentary or narration to your recordings.
- Flexible Recording Options: Choose to record the entire screen, a specific application window, or a custom region, giving you the flexibility to capture exactly what you need.
- Annotation Tools: Use built-in tools to annotate your recordings with text, arrows, shapes, and more, making it easy to highlight important information.
- Easy Sharing: Share your recordings directly from the app or save them to your computer for later use.
- Customizable Settings: Adjust recording settings such as frame rate, resolution, and audio sources to suit your needs.
Zight’s screen recorder for Windows is a versatile tool designed to capture your screen activities with ease. Whether you’re creating tutorials, recording presentations, or documenting workflows, Zight’s screen recorder offers several key features. Overall, Zight’s screen recorder for Windows is a powerful yet user-friendly tool that helps you create professional-looking screen recordings with ease.
10 Bonus Tips to Look for in a Free Screen Recorder
When selecting a screen recorder, it’s essential to consider features that will best suit your needs and enhance your recording experience. Did we mention already that Zight is free :)? Here are ten bonus tips to look for:
1. High-Quality Recording
- Resolution Options: Ensure the screen recorder supports high-definition (HD) and 4K resolutions for clear, crisp recordings.
- Frame Rate Control: Look for options to adjust the frame rate to capture smooth and high-quality video, especially for dynamic content.
2. Audio Capabilities
- Multiple Audio Sources: Choose a screen recorder that can record system sound, microphone input, and even audio from external devices simultaneously.
- Audio Editing: Look for built-in audio editing features to clean up background noise, adjust volume levels, and enhance sound quality.
3. Flexible Recording Modes
- Full Screen and Region Capture: Ensure the screen recorder can capture the entire screen, specific windows, or custom regions to suit different recording needs.
- Scheduled Recording: Opt for a tool that allows you to schedule recordings, ideal for capturing webinars, live streams, or scheduled presentations.
4. Annotation and Drawing Tools
- Real-Time Annotations: Look for screen recorders that offer real-time annotation tools like text, arrows, shapes, and highlights to enhance live recordings.
- Post-Recording Annotations: Ensure you can add annotations after recording to clarify points and add emphasis.
5. Editing Features
- Built-In Editor: A screen recorder with a built-in editor can save time by allowing you to trim, cut, merge, and edit recordings without needing additional software.
- Advanced Editing: Look for features like transitions, overlays, captions, and effects to create professional-quality videos.
6. File Format and Export Options
- Multiple Formats: Ensure the screen recorder supports various file formats (MP4, AVI, GIF, etc.) to suit different purposes and platforms.
- Direct Upload: Look for options to directly upload recordings to platforms like YouTube, Vimeo, or cloud storage services for easy sharing.
7. Performance and Resource Management
- Low CPU Usage: Choose a screen recorder that efficiently manages system resources to avoid lag and ensure smooth recording, especially for resource-intensive tasks.
- Hardware Acceleration: Look for support for hardware acceleration to enhance performance and recording quality.
8. Security and Privacy
- Data Encryption: Ensure your recordings are securely stored and shared with features like data encryption and secure links.
- Privacy Controls: Look for options to password-protect recordings and manage access permissions to keep your content secure.
9. User-Friendly Interface
- Intuitive Design: An easy-to-navigate interface can significantly enhance the user experience, making it simple to start and manage recordings.
- Quick Access Toolbar: Look for a screen recorder with a quick access toolbar or hotkeys to start, pause, and stop recordings easily.
10. Customer Support and Community
- Responsive Support: Choose a screen recorder that offers robust customer support through multiple channels like chat, email, and phone.
- Active Community: An active user community and extensive documentation, including tutorials and FAQs, can provide valuable assistance and tips.
By considering these additional tips, you can select a screen recorder that not only meets your immediate needs but also offers flexibility and features that can adapt to your evolving requirements.
Why Get a Zight Team Screen Recording License
Why Get a Zight Team Screen Recording License
A Zight team license typically offers a range of features designed to enhance productivity and collaboration for teams. Here are some common features included in a Zight team license:
Unlimited Screen Recording
Record your screen with no limits on duration or number of recordings.
Advanced Editing Tools
Trim, crop, add annotations, and more to your videos and screenshots.
Custom Branding
Customize your content with your company’s logo, colors, and branding.
Team Collaboration
Share content easily within your team, and collaborate on projects seamlessly.
Security and Compliance
Enhanced security features and compliance with industry standards to protect your data.
Analytics and Reporting
Track engagement and performance metrics of your shared content.
Priority Support
Get faster response times and dedicated support from the Zight team.
Integrations
Connect Zight with other tools your team uses, such as Slack, Trello, Jira, and more.
Cloud Storage
Store and manage your content in the cloud with sufficient storage space for your team’s needs.
Custom Domains and URLs
Use your own domain for sharing links and enhancing your brand’s presence.
Enhanced Privacy Controls
Set permissions and access controls to ensure only the right people see your content.
A Zight team license typically offers a range of features designed to enhance productivity and collaboration for teams. These features help teams streamline their workflows, improve communication, and maintain a consistent brand image across all content.
Screenshots, Screen recording, and GIFs – Zight is the All-In-One Collaboration Tool
Ways to effectively utilize these features:
Using Zight for screenshots and screen recordings can significantly enhance your team’s productivity and communication. Here are some ways to effectively utilize these features:
1. Documenting Processes and Workflows
- Create Tutorials: Use screen recordings to create step-by-step tutorials for new employees or team members learning a new process. This is especially useful for onboarding.
- Process Documentation: Capture screenshots and annotate them to document workflows, making it easier for team members to follow standard procedures.
2. Providing Feedback
- Visual Feedback: Instead of lengthy emails, provide visual feedback by recording your screen and explaining your thoughts as you navigate through a document or design.
- Annotations: Use screenshots with annotations to highlight specific areas that need attention or improvement.
3. Reporting Issues
- Bug Reports: Capture screenshots or screen recordings of bugs or issues as they occur. This helps the development team understand and resolve issues more quickly.
- Support Requests: When contacting support, a screen recording of the problem can provide a clear context, leading to faster resolution.
4. Collaborating on Projects
- Design Reviews: Share screen recordings of design walkthroughs or use annotated screenshots to point out specific design elements and get feedback from team members.
- Code Reviews: Developers can use screen recordings to explain code changes and reasoning, making code reviews more comprehensive.
5. Meeting Summaries
- Recap Meetings: Record audio of important meetings or key points and share them with team members who couldn’t attend. This ensures everyone stays informed.
- Action Items: Use screenshots to capture action items or important slides from presentations.
6. Training and Development
- Skill Development: Create a library of training videos using screen recordings for different tools and processes your team uses. This can be a valuable resource for ongoing education.
- Interactive Guides: Combine screenshots and screen recordings to build interactive guides that team members can refer to at their own pace.
7. Marketing and Sales
- Product Demos: Record product demos to showcase features and benefits to potential clients. Annotated screenshots can highlight key functionalities.
- Customer Testimonials: Capture screen recordings of customer testimonials or success stories to share with prospects and on social media.
Best Practices for Using Zight
- Organize Content: Keep your screenshots and recordings organized in folders or use a consistent naming convention for easy retrieval.
- Keep it Concise: Ensure that your recordings are concise and to the point to maintain viewer engagement.
- Use Annotations Wisely: Use annotations to emphasize important points but avoid cluttering the visuals.
- Share Securely: Use Zight’s file-sharing options to securely share your content with team members or external stakeholders.
By leveraging Zight’s screenshots and screen recordings, your team can communicate more effectively, streamline processes, and enhance collaboration.
Conclusion
Zight is a top choice for screen recording thanks to its ease of use, powerful features, and a strong focus on collaboration and security. Although there are native screen recording tools, they aren’t flawless and are prone to system glitches, software issues, etc. Luckily, you can bypass all these problems using Zight from any of your devices.
Whether you’re a professional looking to enhance your workflow, an educator aiming to create engaging tutorials, or a team needing to improve communication, Zight will provide the tools you need to succeed. Lastly, with its robust capabilities and user-friendly interface, Zight makes screen recording and sharing both simple and effective.
Featured Blog Posts
Dive into these essential reads.
7 Best Screen Recorders With Facecam in 2025
If you record your screen a lot for work, you understand how it can sometimes feel robotic. After a few videos, you and your team… Read More Zight | May 05, 20248 Best Screen Recording Tips in 2025
Have you ever spent hours perfecting your screen recordings only to be disappointed by the final video? If yes, you are probably looking for some… Read More Zight | June 06, 202310 Steps to Screen Recording Success Checklist
This checklist is designed to ensure successful video recording with Zight. Follow these steps to optimize your recording setup, minimize distractions, and capture high-quality audio… Read MoreExperience the Power of Zight
Achieve more with innovative solutions from Zight.
Frequently Asked Questions
Communication challenges can hinder anyone. It is common in our daily lives to try to explain an issue, describe a product feature, or convey a complex idea, and finding the right words can be difficult. Using a screen recording can help illustrate your points better. It enables you to show what you mean in addition to being able to explain it verbally.
Additionally, some context or details of explanations may get lost when the message is repeated across multiple people. Screen recordings are effectively used when you need to explain a complex idea and want to illustrate it with visuals or highlight a key point. They are also useful for regular status updates or presentations with someone you may be unable to connect with, to help troubleshoot a technical or support issue with a customer, to enhance documentation and tutorials, and so much more.
Check our use cases page for more ideas on how an online screen recorder can help you become more productive and communicate better.
Yes. Zight free online screen recorder is available for multiple operating systems. We support the following operating systems:
- Mac
- Windows
- Chrome
- iOS
Zight offers a free plan that’s great for the occasional quick project and it allows for recordings of up to 5 minutes.
There are also paid plans that vary based on plan type and number of users. The Pro Plan is available for $9.95 per month, Teams plans are $8.00 per month with a minimum of 3 users, and custom enterprise plan quotes are available. You can speak with someone on our sales team if you would like to learn more about Enterprise pricing Contact Sales here.
Zight is available for Mac, Windows, Chrome and iOS. Zight supports Windows 10 and up as well as MacOS BigSur (11.0) and up.
To record your screen on Google Chrome, you can use the Zight Chrome extension. Follow these steps:
- Install the Zight Chrome extension from the Chrome Web Store.
- Click on the Zight extension icon in your Chrome browser toolbar.
- Sign in to your Zight account or create a new one if you don’t have an account.
- Click on the screen recording option in the Zight extension menu.
- Adjust the recording settings if needed.
- Click on the record button to start capturing your screen.
- Perform the actions you want to record.
- Click on the stop button in the Zight extension to end the recording.
- The recording will be automatically uploaded to your Zight account, where you can edit, annotate, and share it.
Zight includes powerful but easy-to-use editing features. After recording, you can trim, crop, split, merge, add filters, annotations, and more – all without needing additional video editing software.
Generally, screen recordings have a lot of uses. To mention a few, a screen recording is used to capture and record the activities happening on your computer, laptop, or mobile device’s screen. A laptop screen recorder or fast screen recorder is commonly used for creating video tutorials, game recording, creating YouTube videos, demonstrating software features, troubleshooting, and sharing visual content with others.
To record your iPhone screen with sound, you can utilize the built-in screen recording feature of iOS. Follow these steps:
- Open the Control Center on your iPhone by swiping down from the top-right corner on iPhone X or newer, or swiping up from the bottom of the screen on older iPhone models.
- Tap on the screen recording icon, which resembles a circle within a circle.
- If you want to record with sound, long-press or 3D Touch (depending on your device) the screen recording icon.
- Enable the “Microphone Audio” option from the control center options.
- Tap on “Start Recording” and wait for the countdown.
- Perform the actions you want to record.
- To stop the recording, tap on the red status bar at the top of the screen or go back to the Control Center and tap on the screen recording icon again.
- The recorded video with sound will be saved in the Photos app on your iPhone.
To screen record on a Mac, you can use the built-in screen recording feature called “QuickTime Player.” Follow these steps:
- Open the QuickTime Player application on your Mac. You can find it in the “Applications” folder or by using Spotlight search.
- In the menu bar, click on “File” and select “New Screen Recording.”
- A screen recording control bar will appear on your screen.
- Click on the red record button within the control bar to start the screen recording.
- You can choose to record the entire screen by clicking anywhere on the screen or select a specific area to record by clicking and dragging the cursor.
- To capture audio recording during the screen recording, click on the small arrow next to the record button and choose the desired audio input.
- Once you’re ready, click on the record button
Yes, you can screen record on a Mac with sound using Zight. When you start a screen recording using Zight, it captures both video and audio by default. Simply follow the instructions provided earlier for screen recording on Mac using Zight, and the audio from your system will be recorded along with the screen.
Yes. Zight offers a free plan that’s great for the occasional quick project. Our free plan allows for recordings of up to 5 minutes. You can find out more about the features available on our different plans, visit our Plans Page.
The shortcut to record your screen on a laptop may vary depending on the screen recording tool you are using. In the case of Zight, the shortcut to start a screen recording on a laptop is typically the combination of the “Ctrl + Shift + 9” keys. However, it’s essential to check the documentation or settings of the specific screen recording tool you are using for the correct shortcut.
Screen recording is used to capture and record the activities happening on your computer, laptop or mobile device’s screen. A laptop screen recorder or fast screen recorder is commonly used for creating video tutorials, game recording, creating YouTube videos, demonstrating software features, troubleshooting, and sharing visual content with others.
To record your screen on your website, you can embed a screen recording tool like Zight directly into your website. Zight provides an API and widget that you can integrate into your website for seamless screen recording.
By doing so, your website visitors can use the embedded tool to capture and share their screen activities. To set this up, you can visit the Zight website, explore their API documentation, and follow the instructions to integrate the screen recording functionality into your website.
To record your screen in Windows 10, you can use the Zight screen recorder windows free desktop application. Follow these steps:
- Download and install the Zight desktop application for Windows 10.
- Launch the Zight application.
- Adjust the recording settings according to your preferences.
- Click on the record button in the Zight application to start the screen recording.
- Perform the actions you want to record.
- Click on the stop button in the Zight application to end the recording.
- The recording will be automatically saved to your Zight account, where you can edit, annotate, and share it.
 Uses Zight Video Solutions