We’ve all been there: needing to take a screenshot, enhance it, and share it seemlessly, only to be faced with the limitations of the Windows Snipping Tool. While it remains one of the best software to capture screenshots, technology shows it is not the best option for those needing more advanced features and efficiency (see why you don’t want to use native screenshot tools anymore).
It is increasingly vital for you to find a better alternative screenshot tool. Ideally, this will take screenshots fast and allow you to edit and annotate, add features like stickers, crop, redact, and share the file seamlessly. In addition, the best snipping tool alternatives also allow collaboration, perfect for screenshots that need to communicate complex ideas as part of your project. The truth is, a good screenshot can improve your productivity, whether in customer success or other fields!
If you don’t know which tool to get, we have compiled our 10 best Windows Snipping Tool alternatives to make it easier for you to choose. Let’s get started!
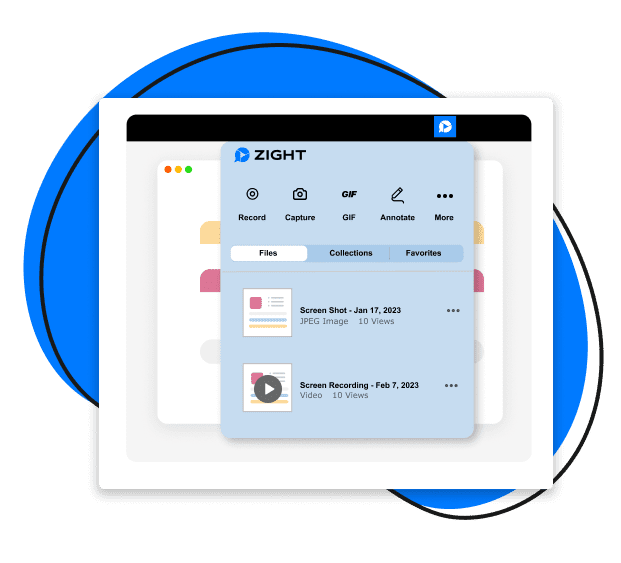
1. Zight (Formerly CloudApp)
Do you need a tool that takes screenshots fast? Are you looking for an alternative that doubles as the best image editor and a seamless file-sharing platform?
If you answered yes, Zight is an excellent place to start.
This software is the best tool for screen capture and advanced editing with superb annotation tools. Compared to the Snipping Tool, we can guarantee you’ll complete your screenshoting process in just a fraction of the time.
Here’s how Zight works:
- You can download the software here. You will need to sign up for a free account, and you can also download the Google Chrome extension that will simplify your workflows.
- After downloading, you can start taking screenshots fast. You can open the app and select Screenshot or use the Zight shortcut for screenshots – Alt+Shift+5. You can take a full-screen screenshot or select the specific area on your screen you want to capture. And if you’re not quite ready to take your screenshot, you can click Ctrl+Alt+Shift+5 for a delayed screenshot – this option lets you select the area you want to capture, and then you get a 5-second timer which allows you to scroll up or down with your mouse to capture your desired content.
- After taking your screenshot, it will automatically upload to your Zight cloud account. The software will copy the link to your clipboard and open it on your default browser. Once the page opens, you can choose to edit and annotate. Zight’s annotation features include adding text, an arrow, a rectangle, a line, an ellipse, a highlighter, and a pen. You can also crop the image, redact sensitive info, and add stickers.
- Ready to share your edited screenshot? It’s easy with Zight! Simply paste the screenshot’s link to your recipients. You can also click Share on the Zight page after you finish editing. The best thing about this sharing is it allows your recipients to see and react to your image for better collaboration. Even better, your recipients don’t have to download the image – they can just view it from their browsers and will forever have access to it as long as it’s saved in the cloud. And, if you’re not collaborating on a project, your recipient doesn’t need a Zight account to view your screen capture!
See, it’s as easy as 1,2,3 to use Zight as the best Windows Snipping Tool alternative. The software requires half the effort to capture, edit, and share your screenshot compared to the Snipping Tool. Besides the ease of use, here are other reasons you want to start using Zight:
I) Integration With Popular Software
Technology is everywhere nowadays, so the odds of having one or more platforms that ease workflows are more common than ever. Whether you are a marketer, digital content creator, engineer, teacher, or designer, you need a screen capture tool. But for it to help you effectively, it’d be better if it integrates with your existiting tech stack.
Zight integrates with most communication software like Asana, Trello, Slack, Jira, Microsoft Teams, Zendesk, and more. This integration means you can easily capture and share screenshots without exiting your workflows. It also makes it very easy to collaborate on projects with your teams.
II) Widespread Adoption and Reliability
Zight is trusted and used by leading companies across various industries. This widespread adoption is a testament to its reliability and effectiveness as a snipping tool and productivity enhancer. The software is used by over 4.5 million users, with Windows users who need a faster and easier-to-use snipping tool making a good number.
2. SnagIt by TechSmith
Snagit is a step up from the native Snipping Tool, offering a suite of features that cater to more complex screenshot needs. Unlike the Snipping Tool, Snagit allows you to capture images and videos, making it ideal for creating detailed tutorials or recording screen activity.
It makes editing screenshots a breeze, and you can annotate with text, arrows, and shapes to enhance clarity and communication. Snagit also offers advanced features like panoramic scrolling capture and the ability to extract text from screenshots, which are particularly useful for professionals in all industries.
Here are the steps to follow when using this Snipping Tool alternative:
- Download and open the Sangit platform on your computer, and select the screenshot mode.
- Choose the area of the screen you want to capture.
- Use the editing tools to annotate or enhance your capture.
- Save or share your capture directly from Snagit.
3. ShareX
ShareX is a comprehensive and free screenshot tool when you need more than the native Snipping Tool offers. It’s open-source and ad-free for a smooth user experience.
With over 15 years of development, the tool provides quick screen capture sharing, easy GIF recording, and supports over 80 destinations. It offers various capture methods like full screen, active window, and region capture, along with advanced options such as screen recording and scrolling capture.
ShareX also includes a customizable workflow system and annotation tools, making it versatile for different user needs, and its lightweight nature adds to its appeal for power users and those seeking advanced screenshot capabilities
To use it:
- Choose a capture method (e.g., full screen, active window, region).
- From the image editor, use annotation tools like arrows, text, shapes, or highlights for detailed marking.
- To share the screenshot, upload to various platforms or copy the URL to your clipboard.
4. Movavi
Movavi Screen Recorder is a superior alternative to the native Snipping Tool, particularly for its ability to capture and annotate screenshots on Windows and macOS. It offers a user-friendly interface ideal for various users, regardless of technical expertise.
The key features include versatile screenshot modes like full-screen capture, selecting specific regions, or capturing individual application windows. Additionally, the software allows you to edit screenshots by adding text, arrows, or frames. It also enables live drawing on screenshots and videos during recording.
The high-resolution screenshots and 4K screen recording capabilities further enhance its utility, hence a strong choice when you need to upgrade your screen capturing experience. Here’s how to use the tool:
- Download and open the software.
- Choose to capture the full screen, a specific region, or an individual application window. Then, initiate the screen capture with a click or a designated hotkey.
- Add annotations, such as text, arrows, or frames, directly to your screenshot.
- Save the edited screenshot to your device or share it using Movavi’s sharing options.
5. Apowersoft Free Screen Capture
Apowersoft Free Screen Capture is a better alternative and advanced tool for screen capturing. The free Snipping Tool alternative is web-based, compatible with Windows and Mac, and does not require Java Applet, though a one-time launcher installation might be needed.
The tool lets you capture any screen area with high-quality results, including application windows, videos, or web pages. It offers smart window detection and simple one-click capturing, making it highly user-friendly. The instant annotation feature and free cloud storage for image hosting enhance its functionality. In addition, you can share screenshots on social media – the tool is ideal if you require versatile and efficient screen capture solutions.
Here is how to use it:
- Go to Apowersoft Free Screen Capture’s webpage and click “Take Screenshot” to start the tool.
- Use the camera icon to select and drag your mouse over the region you want to capture.
- Add annotations like lines, arrows, texts, or shapes to highlight parts of the screenshot.
- Save the screenshot locally, upload it to free cloud storage provided by Apowersoft, or share it directly on social networks.
6. ScreenRec
ScreenRec offers enhanced functionality compared to the traditional Snipping Tool. For instance, its one-click screen capture makes it easy and quick to use, and it allows for annotated screenshots so you can add comments and highlight important parts. In addition, the software ensures privacy and control over content with encrypted files and customizable sharing settings. Here’s how to take a screenshot in a few steps:
- Download the app on your Windows laptop and open it.
- Click the camera icon on the app, then click and drag your mouse to select the area of your computer screen you want to capture.
- After taking the screenshot, you can annotate it using ScreenRec’s annotation tools to add comments or highlight crucial parts of your screenshot.
- Instantly share your screenshot. ScreenRec copies a sharing link to your clipboard for easy distribution. You can also save or embed the file as needed.
7. Droplr
Droplr is an excellent alternative to the native Windows Snipping Tool, offering a more comprehensive set of features for capturing, annotating, and sharing screenshots.
With its user-friendly interface, the software simplifies taking both simple and complex screenshots. It provides advanced annotation capabilities, allowing you to add detailed notes and highlights to your captures.
Its seamless integration with popular platforms enhances workflow efficiency, and the analytics feature offers insights into viewership and engagement with shared content. Finally, Droplr’s cloud storage integration facilitates easy sharing and management of your captures.
Here’s how to use Droplr for screenshots:
- Select and capture a specific area or the entire screen.
- Utilize the annotation tools to add notes, highlights, or other details.
- Easily share your screenshots through Droplr’s cloud storage, generating links for quick distribution.
8. PicPick
PicPick’s comprehensive feature set, including its graphic accessories like a color picker and pixel ruler, makes it an all-in-one solution for screen capturing and image editing and a much better Snipping Tool alternative.
Beyond basic full-screen and region capture, PicPick provides scrolling window capture and more, catering to various screenshot needs. In addition, it is a full-featured image editor; you can enhance screenshots by adding text, shapes, effects, and more, which is a significant step up from the Snipping Tool’s limited editing capabilities.
The software is easy to use with an intuitive interface and integrates with cloud storage services for quick sharing. o capture and share a screenshot using PicPick:
- Select the desired capture mode from the range of options.
- Capture the screenshot and use the editing tools to annotate or modify as needed.
- Share the screenshot directly from PicPick to your preferred storage or platform.
9. Lightshot
This Windows Snipping Tool alternative offers a streamlined and user-friendly experience for screen capturing. With Lightshot, you can capture screenshots fast – with only two clicks and immediately proceed to edit. The editing features, although not as extensive as some other tools, include basic annotation capabilities like adding text, arrows, and highlighting, which surpass the Snipping Tool’s limited functionality.
To use this software:
- Select an area on your screen using your mouse. Lightshot activates with a simple keyboard shortcut.
- Use the basic editing tools to annotate your screenshot directly in the capture interface.
- Instantly upload your capture to the cloud or save it to your device. Lightshot also provides an easy sharing link for quick distribution.
10. Greenshot
Greenshot, as a good alternative to the Windows Snipping Tool, offers a range of features that cater to personal and professional screen capture needs. As an open-source program, it combines efficiency with a lightweight design – an optimal choice for when you need a quick and reliable tool for capturing and editing screenshots.
You can select from capturing a specific region, an entire window, or the full screen, including the ability to capture scrolling web pages; the versatility is a significant step up from the more basic capabilities of the Snipping Tool. You can also easily annotate screenshots, add text, or blur parts to obscure sensitive information. This integrated image editor helps you highlight key aspects of your screenshots for online presentations, documentation, articles, or video training guides.
Finally, you can save screenshots in various formats or send them directly to printers, email, or the clipboard. Greenshot’s integration capabilities with other applications enhance its functionality, allowing for a streamlined workflow. Here’s how you can use the tool for screenshots:
- Download and open the app. Then, choose from various capture options (region, window, full screen).
- After capturing, edit and annotate directly within Greenshot.
- Save the edited screenshot in your desired format or share it using Greenshot’s various output options.
Takeaway
There you have it: our best Windows Snipping Tool alternatives when you need more than just a tool that captures screenshots. Our list above includes tools that let you edit and easily share screenshots. They also integrate with different technology you might be using, and most have no steep learning curves so you can get started immediately.
Not sure which to start with? Here’s why we recommend Zight – from taking screenshots from Chrome to an easier way to capture all screenshots on your Windows computer. Also, Zight works with Mac for screenshots!
Ready to improve your visual communication with screenshots? Get Zight today!


