
Want to snap a quick picture from a video on your computer, like you do on your phone? You totally can! You only need how to learn how you can grab any moment from your desktop while watching a video.
A video screenshot, also called a “screen grab,” is like taking a picture from a video. It’s a frozen picture of a particular moment in the video that you can save as an image. Usually, to take one, you’d have to pause the video at just the right time or snap the picture as you watch. It can be tough and needs to be done quickly, but it becomes a breeze with the right tools and a guide.
Whether a funny scene in a movie or something important in a video, you can capture it all using the best method or the basic ones. Let’s look at the easy ways to capture screenshots.
How to Take Video Screenshots
There are five ways to take video screenshots, and they include:
1. Zight- Dedicated Screenshot Tool

Why is Zight the first tool we have listed to take video screenshots? To start with it is one of the best screenshot software thanks to its easy-to-understand features for taking your screenshot and sharing it, making for an outstanding experience. Also, it allows comes with a free screen recorder and allows easy file sharing.
Here’s how to use it:
Step 1: Install Zight
- Go to the official Zight website
- Search for “Zight” and download the application for your device (available for Windows, macOS, and mobile devices).
- Follow the installation instructions provided by the Zight installer.
- Once installed, launch the Zight application.
Step 2: Open the Video
Locate the video from which you want to capture a screenshot and open it using any compatible video player on your device.
Step 3: Capture the Screenshot
- Pause the video at the specific moment you want to capture as a screenshot.
- Switch to the Zight application window.
- In the Zight interface, you’ll find options for capturing screenshots. Click on the designated screenshot icon (usually labeled “Capture” or represented by a camera icon). You can capture a screenshot of any size, including your entire screen, window, or a specific area on your PC, and manipulate the image using the screenshot editor.
Step 4: Save the Screenshot
After capturing the screenshot, Zight will typically prompt you to choose a location to save the image file.
Select the desired folder or location on your device and click “Save” or “OK” to save the screenshot.
Step 5: Review and Edit (Optional)
Once saved, you can open the screenshot file using any image viewer or editing software.
Optionally, you can make edits such as cropping, resizing, or adding annotations using image editing tools. You can also add text, emojis, arrows, and shapes with the screenshot annotation tool. Also, for sensitive information, you can set a “privacy and expiration” option to control the access and expiration of your screenshots.
Step 6: Share or Use the Screenshot
With the screenshot saved and edited (if necessary), you can now use it for various purposes such as sharing on social media, including in presentations, or embedding in documents. Zight will generate a screenshot link that you can share instantly. For instance, Zight lets you send the screenshot directly to Slack. But you can as easily share your captures in Google Docs, JIRA, Trello, Zendesk, and other online collaboration tools!
Why not start using the best screenshot tool, Zight, by signing up for free today!
2. VLC Player- Media Player
If you prefer not to use Zight, VLC player is another tool you can use to take video screenshots.
Chances are, if you’re a Windows user, you’re familiar with VLC by VideoLAN. It’s a well-known media player that has stood the test of time for good reason. In fact, VLC offers numerous hidden and cost-free features, but the one you should pay attention to in this scenario is its capability take video screenshots.
However, the software doesn’t offer anything else regarding capturing screenshots, so if you are working on complicated projects that need more features, this might not be the best solution for you.
Here’s a detailed explanation of how to take video screenshots using VLC Player:
- If you don’t already have VLC Player installed on your computer, you can download it for free from the official VLC website. Follow the on-screen instructions to install the software.
- Once VLC Player is installed, open the application on your computer.
- Use VLC Player’s interface to navigate to the video file you want to capture a screenshot from. You can do this by clicking on the “Media” menu at the top left corner of the player, then selecting “Open File” and choosing the desired video from your computer’s file system.
- Play the video in VLC Player and pause it when you want to capture it as a screenshot. You can use the player controls at the bottom of the computer screen to pause, play, rewind, or fast-forward the video to find the precise moment you’re looking for.
- Once you’ve paused the video at the desired moment, navigate to the “Video” menu at the top of the VLC Player window. From the dropdown menu, select “Take Snapshot” or simply press the shortcut key “Shift + S” (on Windows) or “Command + Alt + S” (on macOS).
- When you take a snapshot, VLC Player will capture the current frame of the video and save it as a screenshot in your computer’s default Pictures or Screenshots folder. You may also see a brief notification confirming that the snapshot has been taken.
- After capturing the screenshot, you can access it by navigating to your computer’s Pictures or Screenshots folder. The screenshot will be saved in a standard image format, such as JPEG or PNG, depending on your VLC Player settings.
- If desired, you can further edit the captured screenshot using image editing software such as Microsoft Paint, Adobe Photoshop, or any other preferred editing tool. This allows you to crop, resize, annotate, or enhance the screenshot as needed before sharing or saving it.
- If you need to capture screenshots from different moments in the video, simply repeat the process outlined above. You can pause the video at different points and capture multiple screenshots as required.
3. Built-in Tools
Similar to capturing video screenshots on mobile phones, you can utilize shortcut keys on your computer’s keyboard to capture screenshots of videos. Both Windows and Mac systems come equipped with built-in screenshot features that allow you to capture the screen while playing a video.
These features typically involve pressing specific key combinations or using gesture controls to capture whatever is currently displayed on the screen. You can use these built-in features to capture video screenshots while watching the video on your device without additional software.
Windows 10 has a basic screenshot tool, whereas macOS has a better, more advanced one. However, if you often need to take a screenshot in a video, it is best to use a dedicated tool like Zight.
Let’s get into more detail about each built-in tool:
a). Windows Snipping Tool and Shortcuts
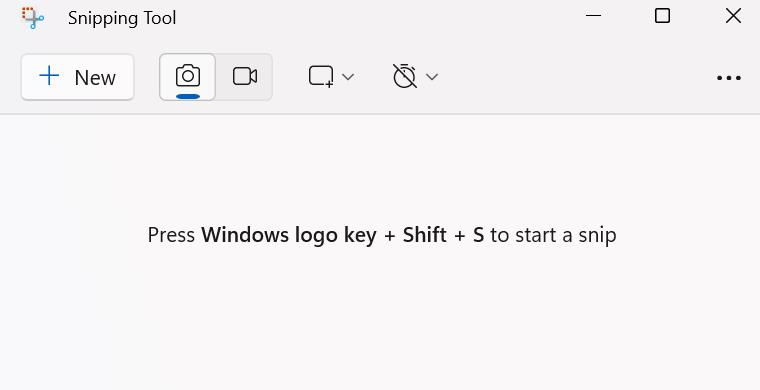
To access the Windows Snipping Tool, click “Start” on your desktop and search for it. Once open, click the “Mode” button to select your preferred snipping mode.
For capturing video screenshots, opt for either the Free-form Snip or Rectangular Snip and position the crosshair over the video frame you wish to capture. Your screenshot will then appear in the Snipping Tool window, allowing you to annotate it as needed. Alternatively, you can utilize Snipping Tool shortcuts for quick screenshot capture on Windows 11 and 10.
Keyboard Shortcuts (Windows)
Windows keyboard shortcuts eliminate the necessity for various video editing software to assist in capturing and editing screenshots for different purposes. The most basic method provided by Windows 10 is using the PrtScn key on the keyboard. However, it’s essential to know several variations to understand different ways of taking a video screenshot on Windows.
- Press PrtScn: Using PrtScn captures a screenshot of the entire screen. You can then save or paste it into basic editing software like Paint or Microsoft Word.
- Press Alt + PrtScn: Another way to capture a video screenshot on PC is by using Alt + PrtScn. This captures the active window and allows you to paste it into another program displaying images.
- Press Windows + Shift + S: This method is a unique way to take a screenshot on your PC. Instead of using PrtScn, this variation dims the screen and changes the mouse pointer shape. You can then select a specific area of the screen to capture, which is saved to the clipboard and can be pasted into any image editing software.
- Press Windows Key + PrtScn: This shortcut is a quicker way to save a video screenshot directly without needing additional software. It saves the image file to the “Pictures” folder on your desktop.
b). Mac System: Screenshot App and Shortcuts
If you use a MacBook, you have two options for capturing video screenshots on Mac: accessing the Screenshot app or utilizing keyboard shortcuts.
QuickTime Player is a good way to take screenshots of your video clips. Although it might take longer than keyboard shortcuts, it allows flexibility on what part of your screen to capture, renaming your file, and where you’d like to save it.
To take a screenshot of your desired video, follow the steps below:
- Open QuickTime Player
- Click File, then New Screen Recording. You can also do this with the keyboard shortcut Shift+Cmd+N
- Choose one of the options for screen-capture that best suits your needs between Capture Entire Screen, Capture Selected Window, or Capture Selected Portion
- Click the Capture button to take your screenshot
- Apply any edits in the preview window
- Fill out the info on the Save dialogue window in your desired file name, location, and format, then click Save.
Keyboard Shortcuts (MAC)
Alternatively, you can use the shortcut keys below to activate the screenshot on your Mac for a quicker video screenshot.
- Shift + Command + 3– Capture the whole Mac screen.
- Shift + Command + 4– Take a screenshot of part of the screen.
- Shift + Command + 4 + Space– Capture a window or a menu on your desktop.
- Shift + Command + 5– Open the Screenshot app and activate the Toolbar
- Shift + Command + 6– Capture the Touch Bar
4. Screen Recording Software
Another method of taking a video screenshot is to use the best screen recording software to screen record the video while it’s playing and then extract screenshots from the recorded video afterward.
Notably, this is not necessary when you have an all-in-one tool like Zight. This is because, apart from Zight being screenshot software, it serves as an all-encompassing solution for seamlessly integrating features such as screen recording, GIF creation, file sharing, annotating screenshots, editing recorded videos, or customizing call-to-action buttons to enhance productivity and streamline workflows.
This method allows for more flexibility in choosing the exact moment for the screenshot but may require additional editing to extract and save the screenshot from the recorded video file.
Here’s how:
- Open the screen recording software on your device.
- Choose between recording your full screen or a selected area.
- Start recording your screen while playing the video with or without a webcam overlay for added clarity.
- Pause and resume recordings as needed
- Use the software’s editing tools to extract a screenshot from the recorded video.
- Edit, trim, and add a call-to-action button after recording.
5. Online Tools
There are several online tools available that allow you to capture screenshots directly from videos hosted online. They are accessible from any device with an internet connection and a web browser, making them a versatile option for users across different platforms. These tools typically work by entering the video’s URL and selecting the moment you want to capture.
This method is particularly useful when the video is available on platforms like YouTube, Vimeo, or other streaming services.
- Visit an online screen capture tool website.
- Paste the URL of the video you want to capture.
- Use the tools provided to select the specific moment in the video you want to capture.
- Follow the instructions to save the screenshot to your computer.
6. Browser Extensions
Browser extensions serve as practical tools for capturing screenshots from videos directly within your web browser. These extensions, available for popular browsers like Chrome, Firefox, and Edge, enhance your browsing experience by providing screenshot functionality tailored to online videos. Here’s how they work:
- Install the desired browser extension from the respective browser’s extension marketplace. Users can easily find and add these extensions to their browser with a simple click.
- Once installed, navigate to the webpage containing the video you wish to capture a screenshot from. This could be a video hosting platform like YouTube, a streaming service, or any website with embedded videos.
- Activate the browser extension by clicking on its icon in its toolbar or using the designated keyboard shortcut associated with the extension. This action prepares the extension for capturing screenshots.
- With the extension activated, you’ll typically have several options for capturing the screenshot. Most extensions offer tools for selecting the specific area of the screen to capture, including the video player window. Users can capture the entire screen, a specific region, or the video player area.
- Once the screenshot is captured, users can save it directly to their computer or share it instantly from the browser extension. Some extensions may provide additional features, such as annotation tools or editing options, before saving or sharing the screenshot.
- Users can customize the settings of the browser extension to suit their preferences. This might include setting default save locations, configuring keyboard shortcuts, or adjusting image quality settings for optimal results.
Conclusion on How to Take Video Screenshots
When you’re trying to snap a moment from a video quickly, the options discussed above should be your go-to solutions. If you just want to capture simple screenshots of a video, it can be simply done using the above keyboard shortcuts available for Windows users. However, if you want to edit your screen capture and amend it for one reason or another, Zight is a good choice.
With Zight, you can grab video shots on your computer quickly, and since it’s an all-in-one platform, it provides all the tools you will need to edit your video screenshot. The best part is that none of these ways add watermarks to your screenshots.


