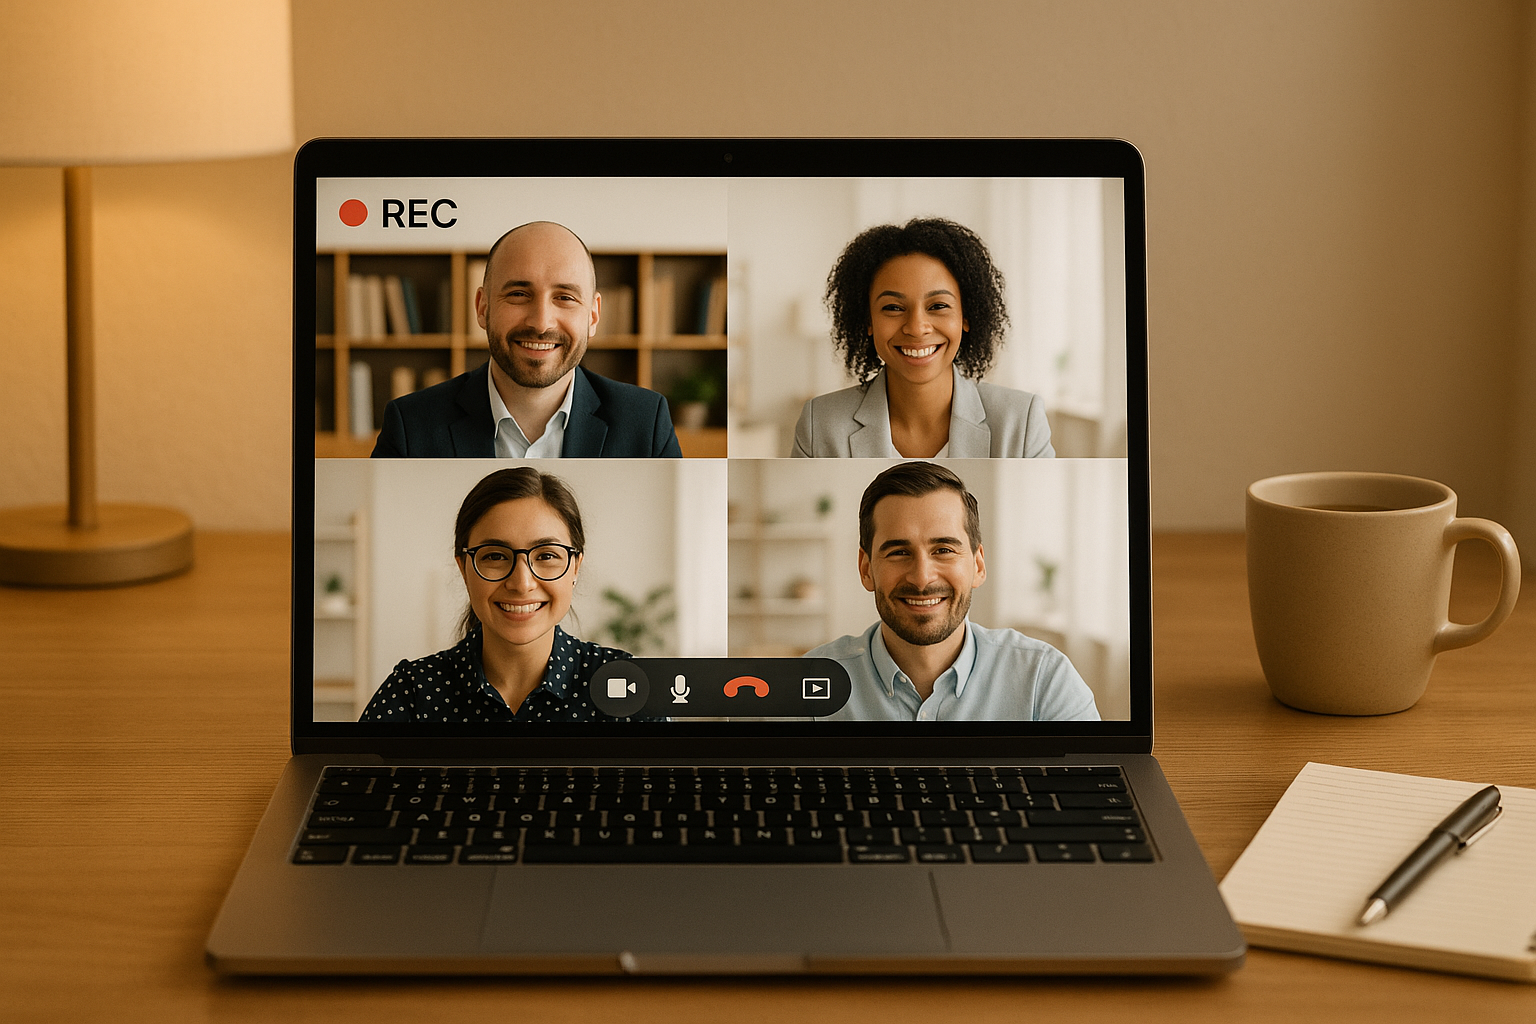
- Why record meetings? To create a reliable record of decisions, share knowledge with absent team members, aid training, and meet compliance requirements.
- When to record? Ideal for team updates, client calls, brainstorming sessions, and performance reviews (with consent).
- How to prepare?
- Use a stable internet connection and a good-quality microphone.
- Test your setup, including audio, video, and storage space.
- Inform participants and obtain permission to record.
- Recording steps: Install software (e.g., Zight), configure settings, and record your meeting. Use pause/resume features if available.
- Post-recording tasks: Edit to remove unnecessary parts, organize files with clear naming conventions, and securely store or share recordings.
Getting Ready to Record Your Meeting
Being well-prepared helps you avoid technical hiccups and ensures you record high-quality content without missing any critical moments.Tools and Setup Essentials
First, make sure your computer can handle running both your meeting platform and recording software at the same time. Most modern laptops can manage this, but having at least 8GB of RAM can keep things running smoothly, especially during high-definition recordings. A stable internet connection is key. A wired connection is ideal, but if you’re using Wi-Fi, sit close to the router and try to avoid times when internet traffic is heavy. For audio, skip the built-in laptop microphone, it tends to pick up too much background noise. Instead, use a USB microphone or a good-quality headset for clear, professional sound. If you’re using Zight, you’ll find it simplifies the process by handling screen and audio capture simultaneously. Plus, its editing tools let you trim content and add annotations right after the meeting, saving you time later. Before any important recording, do a quick test run to make sure your audio and video are being captured properly.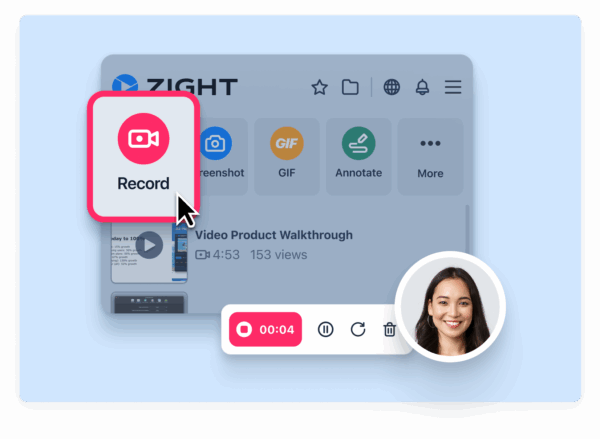
Informing Participants and Getting Permission
Laws around recording vary depending on location, especially in the U.S., where some states require all participants to give consent. To stay on the safe side, always inform attendees before you hit “record.” You can include a note in your meeting invitation to let participants know the session will be recorded. Then, remind them again at the start of the meeting. For sensitive meetings, consider documenting consent in a follow-up email. If you’re dealing with international participants, be aware of privacy regulations like GDPR, which may apply. Once you’ve secured permission, it’s time to fine-tune your recording setup.Optimizing Your Recording Space
With permissions in place and your tools ready, focus on creating the best possible recording environment. Good lighting makes a big difference. Sit facing a light source, whether it’s natural light or a lamp, and avoid bright lights behind you that could create shadows or silhouettes. Reduce background noise by closing doors, turning off fans, and silencing notifications. For crucial recordings, booking a quiet conference room can provide a distraction-free environment. Prepare your computer screen by closing unnecessary apps, clearing desktop clutter, and hiding any sensitive information. Adjust your display and recording settings to avoid pixelation or stretching issues. If you’ll be on camera, position your webcam at eye level for a natural look. An external webcam can offer better angles and video quality compared to your laptop’s built-in camera. Finally, make sure your device has proper ventilation. Long recording sessions can cause overheating, especially when using resource-heavy software, so keep your setup cool and running efficiently.How to Record Virtual Meetings Step by Step
With your setup ready and permissions in place, you’re all set to record your virtual meeting. While the exact steps may differ depending on the platform you’re using, the overall process is fairly consistent.Installing and Configuring Your Recording Software
Getting your recording software ready only takes a few minutes. Start by downloading and installing your preferred tool. For example, Zight supports Mac, Windows, Chrome, and iOS, so you can use it across a range of devices.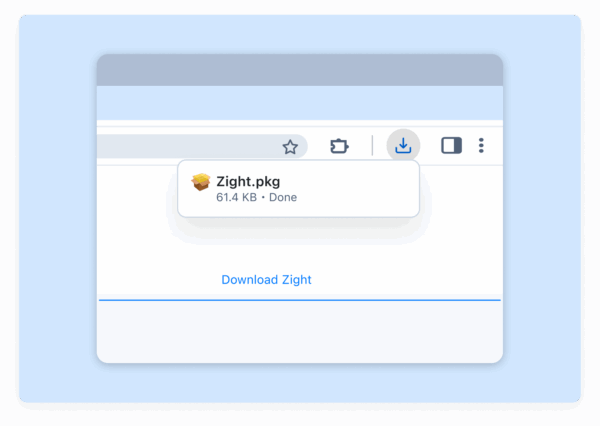 Once installed, open the app and explore its main interface. When prompted, grant the necessary screen capture and microphone permissions. Next, decide whether you want to record your entire screen or just a specific section. For virtual meetings, capturing the full screen is usually the best choice, especially if you need to switch between the meeting window and other applications. Enable system audio to ensure you capture all participants’ voices, and turn on your microphone to include your own input. Run a quick 30-second test recording to confirm everything is working smoothly. Finally, adjust your video quality settings. Higher resolutions like 1080p or 4K deliver sharper visuals but result in larger file sizes. For most business needs, 720p strikes a good balance between clarity and manageable file sizes.
 Recording Your Meeting
Once your software is configured, you’re ready to record. Join your virtual meeting and make sure everything looks and sounds right. Tidy up your screen layout, adjust your webcam, and minimize distractions before hitting record. Starting the recording process depends on your platform. For example:- Zoom: If you’re the host, click the “Record” button. Participants may see a notification or hear an alert. On the Zoom mobile app (with a paid plan), tap “More”, then “Record to the Cloud”, and select “Start Recording”.
- Microsoft Teams: Open the meeting controls, click “More actions” (the three dots), and select “Record and transcribe”.
- Third-party tools like Zight: Simply click “Record” on the tool’s toolbar after confirming your microphone, camera, and screen settings.
 During longer meetings, monitor your device’s storage and battery life. Once the meeting concludes, stop the recording by clicking the same button you used to start. Most platforms will process the file briefly before making it available for download or viewing.
 Saving and Organizing Your Files
After recording, take a moment to organize your files for easy access later. Use a clear naming system that includes the meeting date, topic, and key participants. For example: “09-24-2025_Virtual-Meeting_Team.mp4”. Save the file immediately to a dedicated folder or cloud storage. To keep things tidy, create a folder structure that works for your workflow. Many people organize recordings by month, project, or department. For instance: “Meetings > 2024 > September > Project-Alpha”. This approach ensures your files are easy to locate without cluttering your desktop.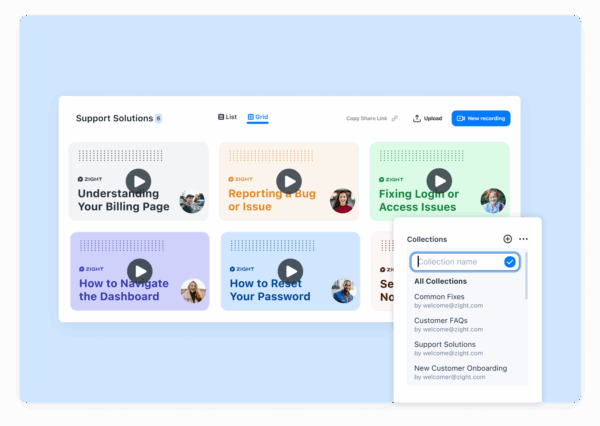 Cloud storage options like Google Drive, Dropbox, or OneDrive are great for collaboration and backups. Just remember, a one-hour meeting can easily exceed 1GB, so check your storage limits and upload speeds. For sensitive recordings, consider local storage with encryption to ensure security. Always follow your organization’s compliance policies when handling such files. Finally, review your recordings regularly to free up space. Delete routine files after 30 to 90 days, depending on your organization’s retention policies. Archive important recordings for long-term use, while clearing out unnecessary ones to keep your storage organized.
 What to Do After Recording
Recording your content is just the beginning. To truly make the most of it, you need to focus on what comes next: editing, sharing, and organizing your files. These steps ensure your recording achieves its purpose and is accessible to the right people.Editing Your Recording
Raw recordings often include moments you don’t need, like waiting for late arrivals, off-topic chatter, or background noise. Editing is your chance to refine the content and make it more engaging. Start by trimming unnecessary sections from the beginning and end. Cut out awkward pauses, post-meeting small talk, or any irrelevant segments, but make sure you maintain the flow and context of the recording.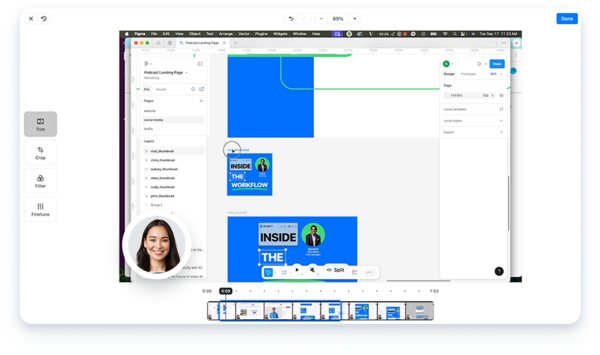 If you’re using Zight’s built-in editing tools, this process becomes even easier. You can trim clips, blur sensitive details (like accidentally shared confidential information), and add text annotations to emphasize key points. For example, you might highlight action items or important decisions with overlays or arrows to help viewers stay focused. Dealing with poor audio? Apply basic noise reduction filters to minimize background hum or keyboard clicks. While these tools can clean up minor issues, severely distorted audio is often beyond repair. Keep your edits minimal and intentional. Over-editing can make the recording feel disjointed and hard to follow. For most business purposes, a light touch – removing distractions and enhancing clarity is all you need. Once your recording is polished, it’s time to share it with your team or audience.
 Sharing Your Recording
Sharing your edited recording promptly ensures its relevance. The best sharing method depends on your audience, the file size, and any security requirements. With Zight, you can generate secure shareable links and control who has access. Adjust permissions based on the content: for internal meetings, allow downloads, but for sensitive client presentations, opt for view-only access with password protection. You can also set expiration dates for links to limit access over time.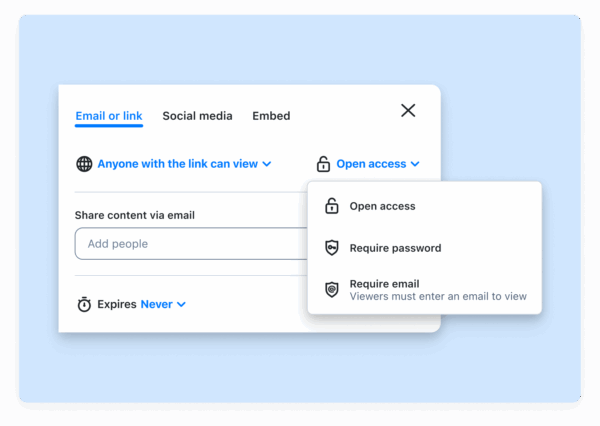 To streamline collaboration, share the recording directly via tools like Slack, Microsoft Teams, or project management platforms like Jira. This keeps everything, discussions, decisions, and documents, organized in one place. If you’re sharing through email, include a quick summary of the recording. Highlight key takeaways or action items so recipients can decide whether to watch the entire video or just specific parts. For large files, consider cloud-based platforms that allow streaming. This way, viewers can start watching right away without needing to download the full file.
 Managing and Storing Files
Proper file management is essential to avoid losing valuable recordings or cluttering your storage. A clear, organized system ensures you can easily find and reference files later. Adopt a consistent naming convention, such asYYYY-MM-DD_MeetingType.mp4, and store files in well-structured folders. For example, you might use folders like “Recordings > Department > Year > Month” or “Recordings > Project Name > Meeting Type.” To prevent data loss, set up automated backups with a cloud storage service. These platforms sync your recordings across devices, but keep an eye on storage costs since video files can eat up space quickly. Establish retention policies to manage storage efficiently. Routine meetings might only need to be kept for 30 days, while training sessions or critical discussions may require longer retention periods. Clearly document these policies so everyone knows what to keep and what to delete. As your library grows, security becomes critical. For sensitive recordings, consider encrypted local storage instead of cloud solutions, especially if your industry has specific compliance requirements. Finally, schedule regular cleanup sessions to stay organized. Review your files monthly to delete outdated recordings, archive important ones, and ensure all files follow your naming conventions. This keeps your storage manageable and your library easy to navigate. Best Practices for Recording Virtual Meetings
Get the most out of your virtual meeting recordings with these practical tips. These strategies will help you capture clear, professional-quality content while steering clear of common technical hiccups.Testing Your Setup Before Meetings
Always take a few minutes, at least 15 before your meeting starts, to run a quick test recording. This small step can save you from audio glitches, storage issues, or unexpected software errors during the actual session. Start by testing your audio. Record a short clip at your usual speaking volume to ensure your external microphone is working properly and delivering clear sound without distortion. Next, check your screen recording setup. Capture a brief clip of your meeting platform to confirm you’re recording the correct window or screen region. Make sure important elements like participant names, chat windows, or shared content are visible. Storage space is another critical factor. A one-hour recording at 1080p typically takes up 1–2 GB of space. Running out of storage mid-meeting could cut your recording short, so double-check your available space beforehand. Don’t forget to verify your internet connection by running a speed test. A poor connection can lead to choppy recordings or mismatched audio and video. If possible, use a wired connection for more stable performance. Tools like Zight’s preview feature can make this process even easier by showing you exactly what will be captured, allowing you to fine-tune your settings before the meeting begins. Once your system is good to go, focus on optimizing the quality of your audio and video.Getting High-Quality Audio and Video
Building on your pre-meeting tests, ensure every part of your setup delivers clear and reliable results. Audio quality is especially important for business meetings, so consider using an external microphone instead of your computer’s built-in mic, which may pick up unwanted background noise. Position yourself about 3–6 feet from the microphone to minimize plosive sounds and ensure your voice comes through crisply. Close any unnecessary applications to free up your computer’s resources. Running too many programs at once can slow down your system, causing laggy recordings or syncing problems. Good lighting is key for clear video. Avoid strong backlighting, like sitting with a window behind you, and instead face a natural light source or use a dedicated light to keep your video well-lit. Keep your internet connection stable throughout the meeting. If your connection is unreliable, consider recording locally to avoid interruptions. For video quality, aim to record at 1080p resolution if your system can handle it. However, consistency matters more than resolution; a smooth 30fps recording at 720p is often better than a choppy 15fps recording at a higher resolution.Checking and Reviewing Your Recordings
During the meeting, monitor your recording status by watching for the recording indicator, like a red dot or timer. Technical issues can sometimes cause recordings to stop unexpectedly, so it’s good to stay aware. After the meeting, review your recordings within 24 hours to catch key decisions and address any technical problems. Use tools like timestamps and annotations to highlight important moments. For example, Zight offers annotation features like text overlays, arrows, and highlights, which make it easier for viewers to locate specific information. To make your recordings more useful, create searchable summaries of key topics, decisions, and participants. This way, you can quickly reference important details without having to rewatch the entire video. Before sharing, scan for sensitive information, such as confidential documents or off-topic discussions, and remove anything that could compromise privacy or professionalism. Lastly, establish a regular schedule to review your recording library. Periodic reviews can help you spot trends in meeting effectiveness, archive outdated content, and keep your recordings organized. This habit not only ensures your recordings stay relevant but also helps refine your overall meeting process. By carefully reviewing and organizing your recordings, you can turn fleeting discussions into valuable resources. Research shows that 72% of meetings are often ineffective, with Forbes reporting that 70% of meetings waste time, adding up to 24 billion hours annually.
 Conclusion
Recording virtual meetings effectively comes down to thorough preparation, using the right tools, and sticking to proven techniques. Testing your setup ahead of time is crucial to ensure a smooth and error-free recording experience. Zight makes this process easier with features like a preview option, AI-powered transcription, and affordable plans starting at $7.95 per month. These plans include unlimited recording and high-resolution 4K output, making it a solid choice for teams aiming for quality and efficiency. By carefully testing your setup, fine-tuning your audio and video settings, and regularly reviewing your recordings, you can turn your meetings into searchable, long-lasting resources. These recordings can serve as an invaluable knowledge base for your team, reinforcing the strategies and techniques discussed earlier. The key isn’t perfection, it’s consistency. Focus on clear audio, sharp visuals, and dependable storage to make your recordings a vital tool for collaboration and training. A well-organized recording setup not only enhances team communication and accountability but also reduces the need for follow-up clarifications. Start with the essentials, test your setup thoroughly, and create recordings that your team can rely on for future projects and discussions.FAQs
What legal factors should I consider when recording virtual meetings with participants from different countries?
When recording virtual meetings with participants from different parts of the world, being aware of local laws about consent is crucial. For instance, in places like Germany or U.S. states such as California, two-party consent laws mandate that everyone involved must explicitly agree to the recording. Similarly, the GDPR in the European Union stresses the importance of transparency. This means participants need to know why the recording is happening and how their information will be used. To stay on the right side of the law, make sure to communicate openly with participants, get their consent before hitting record, and follow the privacy laws relevant to each region. This not only ensures legal compliance but also safeguards the trust and privacy of everyone involved.
How do I get clear audio and video when recording a virtual meeting?
To ensure your virtual meeting recordings look and sound great, start with external microphones and cameras. These tend to deliver much better quality than the built-in options on most computers. Also, pick a quiet space to limit background noise, and if your microphone or software has noise-canceling features, make sure to use them. For video, proper lighting is key – natural light works well, or you can use a soft light source placed in front of you for even illumination. Before the meeting kicks off, take a few minutes to test your setup. Check your camera resolution, frame rate, and microphone settings to make sure everything is functioning as it should. These simple steps can make a big difference in producing professional and polished recordings.
What are the best ways to organize and securely store recorded meeting files?
To keep your meeting recordings both organized and secure, start by setting up a well-defined folder system. You can sort files by meeting type, date, or project, which makes finding what you need a breeze. Use clear, descriptive file names that include essential details like the meeting date or its main purpose. On the security side, take steps like enabling password protection, restricted sharing, and setting expiration dates for any shared links. Encrypt your files while they’re stored to safeguard sensitive information. It’s also a good idea to regularly review who has access to these recordings to ensure only the right people can view them. These practices will help you stay on top of things while keeping your files secure.


