Although the market is full of different computer gadgets, the Microsoft Surface Pro tablet/laptop is among the few that have gained global recognition for its effectiveness. With its impressive performance, detachable keyboard, adjustable kickstand, and best-in-class digital pen, it caters to a wide range of users, including digital artists, students, and professionals seeking portability without sacrificing power.

1. Using Zight- Dedicated Screenshot Tool
Why Zight? The modern app offers a convenient way to capture screenshots on your Surface Pro and some additional features that enhance the process. As an all-in-one tool, you can use it to not only capture your screenshots within seconds but also swiftly edit and share them, facilitating seamless visual communication for you and your team. How do you capture your screenshots? Here’s a step-by-step guide:
- The entire screen
- A specific window
- A desired area
2. Using Hardware Buttons (Without a Keyboard)
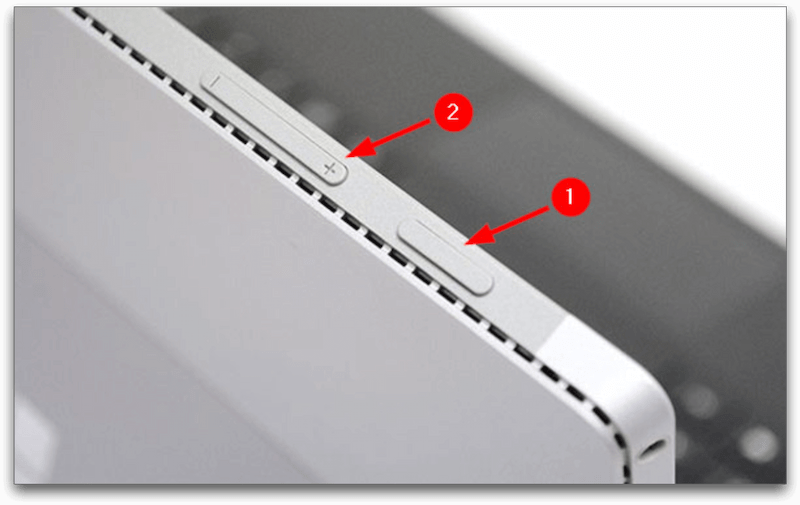
For most 2-in-1 devices, such as the Microsoft Surface, you can take a screenshot using the hardware buttons. This is an excellent method for using your Surface Pro device as a tablet without attaching it to the typing cover. Taking screenshots is slightly different for Surface Pro 4 and later models compared to the Surface Pro 3 and earlier versions. We have listed the different ways depending on the device you won.
- Press and hold the Windows logo key on the front of the device.
- While holding down the Windows logo button, simultaneously press the volume-down button on the side of the device.
- The screen will briefly dim and then return to its normal brightness, indicating a screenshot has been captured successfully.
- Press and hold the power button.
- While holding down the power button, simultaneously press the volume up button on the side of the device.
3. With Keyboard
Surface Type Cover keyboards are suitable for people who want to type extensively on their Surface Pro devices and prefer the feel and feedback of a physical keyboard.
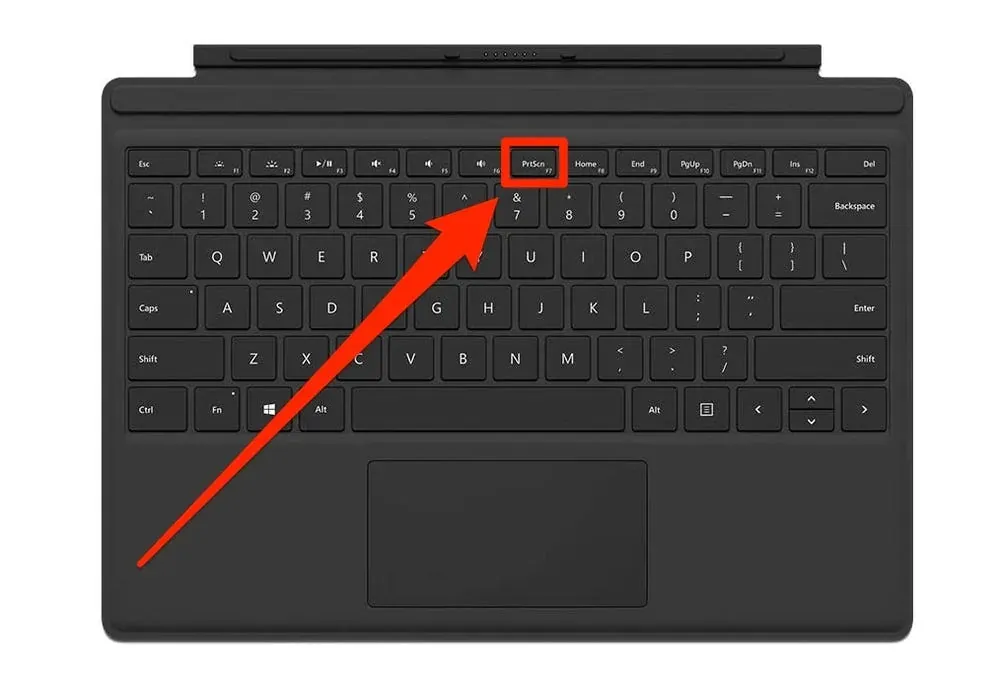
On the Surface Pro 4/(2017) Type Cover, Surface Book/2, and Surface Laptop keyboards
Microsoft has introduced a dedicated PrtSn (Print Screen) key on the keyboard for the Surface Pro 4 and Surface Book models. Similar to the standard keyboard layout, you have two options for capturing a screenshot.
- Press the PrtSn key to take a screenshot.
- Paste to your preferred programs like Paint or Word.
- Press the Alt + PrtSn key to screenshot the active window.
- Paste to your preferred programs like Paint or Word.
For Surface RT/2, Surface Pro/2/3, Surface 3, or newer Type Cover
The following screenshot methods also work on newer models like the Surface Pro 4, Surface Pro (2017), Surface Book, Surface Book 2, and Surface Laptop. Since older Surface Type covers don’t have a dedicated print screen windows key, you can take screenshots using particular key combinations.
4. With Surface Pen
If you don’t have a Surface Pro keyboard but have a Surface pen, you can still capture screenshots easily using a stylus.
- Ensure the Surface Pen is connected to your Surface Pro
- Activate the screen sketch function by double-clicking the eraser button on the top of your Surface Pen.
- On your display, you will see that a screenshot has been taken
- Now, you can edit, crop, and save the screenshot by clicking the “Save as” button at the top right of the screen.
5. Using a Snipping Tool
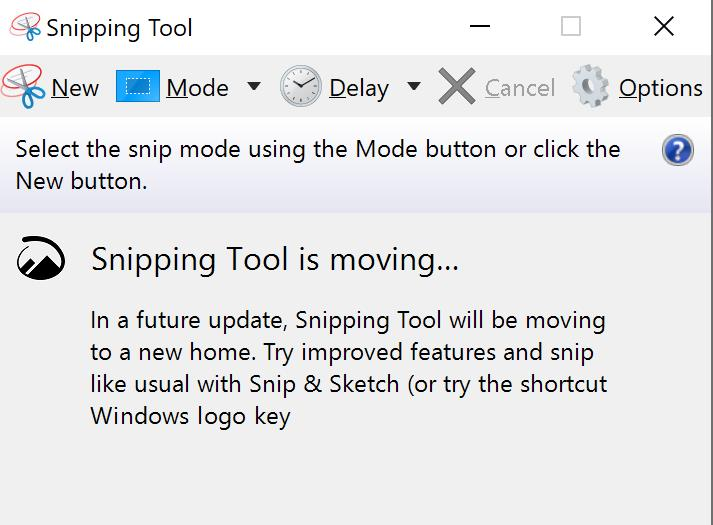
An alternative method for capturing a screenshot on the Surface Pro device is through the Snipping Tool, an integrated screenshot software in Windows that offers better controls, functionalities and features compared to the previously mentioned methods. To use the Microsoft snipping tool, do this:
- Open the Start menu and type “ Snipping Tool. “
- You can also open the Microsoft Snipping tool by opening the Start menu and locating the Snipping Tool under the Windows Accessories folder.
- Once it appears, choose the drop-down menu under New and select Full-Screen Snip (you can also choose Rectangular Snip or Free-Form Snip).
- After you select your desired area to take a screenshot, it will display in a new window. You can draw or highlight screenshots in this window before saving them as JPEG, PNG, GIF, or HTML files.
6. Using the Windows Snip and Sketch Tool
In recent Windows 10 updates, Microsoft has introduced a contemporary tool named Snip & Sketch. This tool lets you quickly annotate screenshots , photos, and other images using your pen, touch, or mouse. You can then save, paste, or share them with other applications. To use this tool for capturing a screenshot, follow these steps:
- Open the Start menu, type “ Snip & Sketch ” directly into the search bar
- Alternatively, you can find the Snip & Sketch app by navigating the Start menu.
- Once the tool is loaded, click “New” and select “ Snip now .” You can then choose from three options- Free form, Full-screen, and Rectangular.
- Choose the area of the screen you want to capture.
- A new Snip & Sketch window will appear with the captured image. Annotate, draw or highlight any elements you desire on the screenshot.
- To save the screenshot as a file, click the “ Save ” icon. Alternatively, click the “ Copy ” icon to transfer the screenshot to the Windows clipboard for pasting into other applications.
Conclusion- What is The Best Method To Take A Screenshot on Your Surface Pro
Here’s how I’d rank the methods to take a screenshot on Surface Pro based on what I use daily:
- The Dedicated Screenshot Tool- Zight
- Snipping Tool
- Windows Snip and Sketch Tool
- Hardware Buttons (Without a Keyboard)
- The Keyboard
- Surface Pen shortcut
Enhancing Communication and Collaboration
In today’s digital age, visual communication is paramount. Screenshots serve as concise visual aids, conveying information quickly and effectively. With a Surface Pro’s versatility, you can capture screenshots of anything from software interfaces and web pages to emails and documents. These screenshots provide clarity by visually illustrating concepts, issues, or instructions, eliminating ambiguity and streamlining communication.