Ready to Boost Your Productivity?
Save time and money while boosting your productivity with Zight — free tools for screen recording, screenshots, GIFs, and webcam capture.
Try Zight for Free🔍 How to Adjust Brightness with Zight
Sometimes a photo turns out to be a bit darker or lighter than you would have liked. The best way to improve its quality is to edit your image using Zight, our online free tool. Here's a simple way to do it.
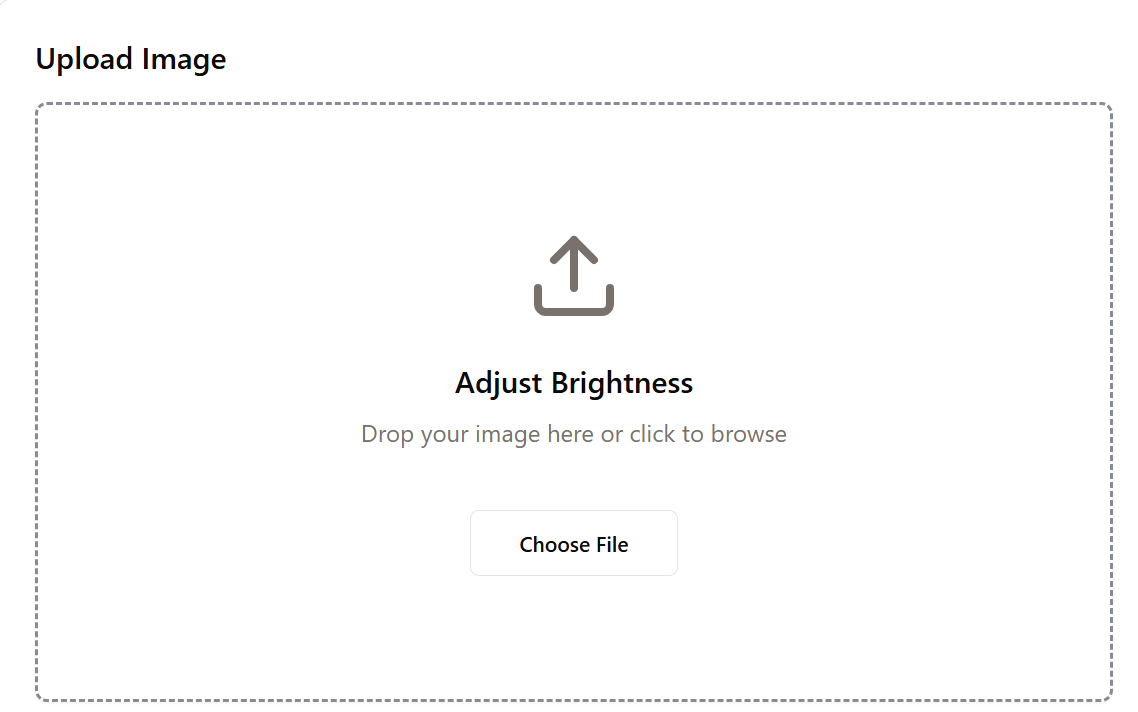
Upload Your Images
Select and upload the image using the drop zone or browse button.
Adjust the Settings
Adjust the brightness with the slider (from -100% to +100%) which is left to dim, and right to brighten. Select the desired output format (PNG or JPG).
Adjust Brightness
Click "Adjust Brightness" to process the image.
Preview and Edit
Click "Continue Editing" to make more adjustments to your image until you are satisfied with the image brightness.
Download Your Result
After achieving optimum brightness for your image, save it on your device in the available file format by clicking on "Download".
Why Zight is the Best Online Tool to Adjust Image Brightness
✔ No limits– There are no restrictions. With Zight, you can process any number of images.
✔ Free and Unlimited– No restrictions! Increase or decrease image brightness for as many images as you need without downloading software.
✔ High-resolution images– Boost clarity, add definition, and brighten images, all with one tool.
✔ Enhanced Image Format Support– Comprehensive support for all popular image formats, including PNG, JPG, WebP, and SVG.
✔ User-Friendly Interface– Designed for beginners and professionals alike with no technical expertise required.
📈 When to Brighten… and When to Dim It Down
☀️ Increase Brightness When:
- Your photo was taken in a dark room or at night
- There’s too much shadow hiding the good stuff
- You want a lighter, airier mood ( handy for lifestyle bloggers)
- Details are lost in a dark image and you need a spotlight
🌑 Decrease Brightness When:
- Your image is washed out (thanks, flash)
- You’re aiming for a moody, dramatic feel
- Night shots are too bright to feel authentic
- You’re highlighting silhouettes or backlighting
Examples of Zight-Adjusted Images
1. Increase Image Brightness

2. Reduce Image Brightness


Use Cases to Adjust Brightness
Adjusting the brightness of a photo is a common task for many purposes. Here’s where it comes in handy:
1. Social Media
Brightening images can make your social media posts on platforms like Instagram and Facebook more appealing. Clear and colorful images attract more attention and engagement. Using the Zight image brightness tool will help your photos stand out, leading to more likes and shares.
2. Everyday Use
Everyone has photos that could benefit from extra brightness. Show personal photos in the best light, making them look vibrant and polished. Whether it is family gatherings, vacations, or daily life moments, brightening these images can enhance your memories. A simple adjustment can bring back the joy and color of your experiences.
3. E-commerce Product Shots
Let your products shine (literally) with perfect lighting. For businesses, product photography is important for marketing. Brightening product images improves clarity and makes them more attractive to potential customers. A well-lit image can showcase the details of a product, which may help increase sales.
🔧 Zight: An All-in-One Solution
Why only adjust brightness? Zight’s full toolbox makes editing fun and functional for all, if not most, of your digital needs.
📹 Screen Recording – Capture high-quality videos for presentations and tutorials.
🎬 GIF Maker– Create and share engaging animated GIFs.
📸 Screenshot Tool – Take quick, annotated screenshots for feedback and collaboration.
🎥 Video Editing Suite– Trim, split, merge, crop, and enhance your images with filters and fine-tuning for professional-quality results on the Zight image editor.
📝 Annotation Tools – Add text, arrows, and highlights to your screen-recorded videos, images, or screenshots.
🤖 AI (Artificial Intelligence) – Generate captions, summaries, and insights from your video content.
🔗URL Shortener – Generate trackable short links for easy sharing.
Unlock More Tools
Expand your toolkit with these additional free tools
Upload your image and adjust the brightness now!
Improve Your Images NowFAQs About Zight’s Image Brightness Tool
To reduce the brightness of your image, use Zight. Simply upload your photo to the free online tool. Then, adjust the brightness slider by moving it to the right or left until you achieve your desired level. After that, download your result.
Yes, the downloaded images can be used for personal and commercial purposes without attributing.
You don’t need to download and install Zight on your device, and it’s not only faster but also more secure. We use your local client-side operation to process the image, so your photos never leave your computer. All the processes are done in the web browser so that no one can access your pictures except you.
All You Need to Know About Adjusting Image Brightness
We see a lot of pictures every day, and a dark image with low brightness and a picture with high brightness will show completely different visual effects.
That said, no one is safe from too dark or overexposed shots. Even professionals do not always manage to get into the exposition accurately, and this is due to inattention, haste, or difficult low-light conditions. Therefore, the question of how to adjust brightness during processing is always relevant.
The main problem with non-professional shots is insufficient or excessive lighting. Hence, various disadvantages arise: unnecessary haze, dull colors, loss of detail in shadows, and overexposure. Luckily, Zight is a free online tool that will help you slightly improve your photo. Why slightly? Because over-enhancement can ruin the photo.
Let’s get into the details.
Understanding Image Brightness
We all know that the concept of “bright” means in everyday life. For instance, if you hear the sun is bright, you know exactly what that means, However. this is not the same as “brightness” in photography.
Image brightness is the overall brightness or darkness of a picture. It is the amount of light emitted or reflected from an image. In image processing, the image brightness can be achieved by adjusting the intensity of the image pixels. The image brightness affects the overall visual effect and influences the color and the visibility of the individual elements in the image.
When you change the brightness of an image, you are mainly affecting the midtones of the image. Compare this to changing exposure, which affects the highlights, midtones, and shadows evenly, and you’ll see that adjusting the brightness of an image can be quite powerful.
Why is Brightness Important for an Image?
Brightness plays a vital role in the quality and style of an image. Why?
- A too-bright or dark photo will not show the picture properly.
- A too bright or dark picture can damage or dilute essential details and features, making it lose its visual appeal.
- More seriously, it can lead to the scrapping of the image.
Therefore, it is essential to adjust the image according to its condition and choose the most suitable brightness level. The correct brightness matches and enhances the style and quality of the image, thus presenting a better visual effect.
Photos with high brightness give a more lively and vivid overall feeling, while photos with low brightness will add some emotions and a mysterious atmosphere to the pictures. Proper brightness can better show individual objects’ details, textures, and colors. It can also highlight the picture’s theme and facilitate people to understand and appreciate it.
How to Increase or Decrease Brightness- Use Zight
Zight free online tool allows you to adjust the brightness of any image. You can make colors, objects, and image details lighter by increasing the brightness, or make all elements of the image darker by decreasing the brightness. We will walk you through the simple process of adjusting brightness:
When you click on the Zight Online Image Brightness page, you will see this interface:

1. Upload your Image
Upload an image using the drop zone or browse button.
a). From Your Computer

b). Drag and Drop

2. Adjust Image Settings
Once your photo has been uploaded, it’s time to now adjust brightness either by increasing or reducing it. Notably, Zight automatically increases the brightness of an image you upload. However, if you aren’t satisfied with the brightness level, there is a slider to easily adjust the brightness value.
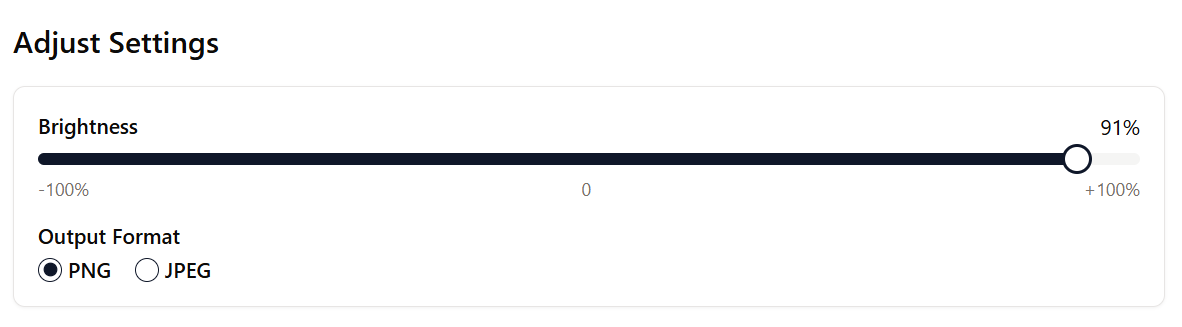
Use the Brightness slider to change the overall brightness or decrease image brightness. The brightness value ranges from -100% which is when you want to reduce image brightness and +100% to add brightness to your image.
In addition, choose your image’s output format between PNG or JPEG.
Then, click the Adjust Brightness icon to see the adjusted image result.

3. Download your Result
Once you are satisfied with the image brightness, it’s time to save your image. Copy to the clipboard and paste it where you need it or click the download button to save your adjusted image to your computer.

That’s it! You have adjusted the brightness of your image in the simple steps.
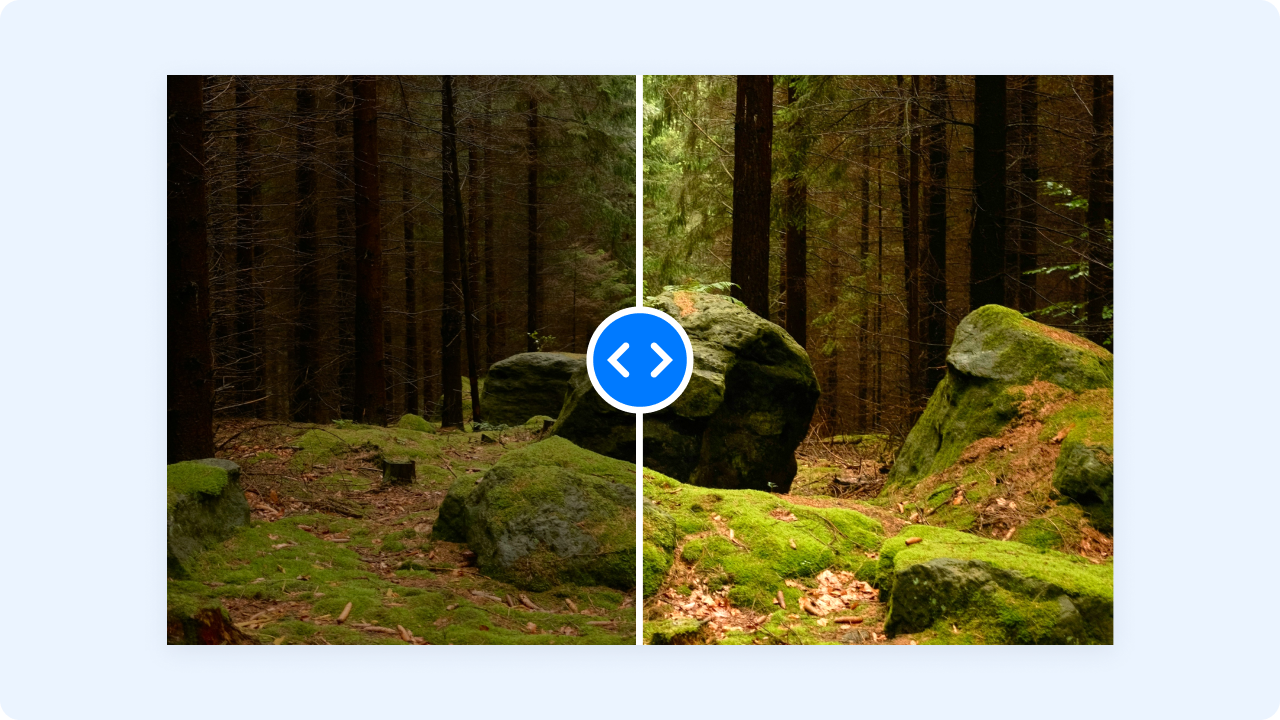
This is the final result from the image we used. We used the Zight Online Merger tool for comparison.

Tips for Adjusting Photo Brightness
Here are some practical tips to help you achieve the best results when increasing or decreasing brightness:
1. Start with Small Changes
Avoid extreme adjustments that wash out details or create unnatural shadows. Instead, use the brightness slider in small increments (5–10% changes). Preview to check skin tones, textures, and backgrounds after each tweak.
2. Understand Your Image’s Context
Consider the purpose of your photo before adjusting brightness:
- Portraits: Aim for balanced brightness to enhance facial features.
- Landscapes: Adjust brightness to highlight natural light or bring out details in shadows and skies.
- Product Photography: Ensure consistent brightness for a polished, professional look
3. Consider Emotional Impact
Brightness adjustments can influence the mood of an image:
- Increasing brightness creates a lively, optimistic feel.
- Decreasing brightness adds drama or mystery
Wrapping Up
Now, we fully understand the impact of brightness on the visual presentation of a photo and how to adjust the brightness when necessary. Although brightness may seem like a small tweak, it makes a big impact.
Whether you’re a content creator, a business owner, or someone trying to salvage a sweet memory, Zight gives you the control to tell your visual story your way.
Are you doubting whether you need to adjust the brightness? Upload your image to Zight’s Image Brightness Tool and tweak it until it feels just right.


