You know that feeling when you stumble upon something online and think, “I have to save this for later?” Or when you want to show your friend exactly how to do something on your computer? Well, that’s where taking a screenshot comes in handy! Screenshots are your go-to whether you’re bookmarking a webpage, giving technical support to a friend, or just capturing a hilarious moment from a video.
But here’s the kicker: how you grab a screenshot depends on your computer and what software it’s running. If you’re using a Lenovo, there are several ways to do it, each with its twist depending on whether you’re using Windows 10 or another version.
Here’s how to screenshot on a Lenovo laptop, starting with the method we recommend the most. After that, you decide which screen capture method you favor the most.
1. Zight – Using a Dedicated Screenshot Tool
When it comes to capturing screenshots on your Lenovo laptop, nothing beats the efficiency and versatility of Zight. Zight is a free screenshot tool that empowers users to share information quickly and effectively. As a top-rated screenshot tool, it enhances communication with annotated screenshots.
Why Zight is the Best Screenshot Tool:
- Speed: Zight is known for its speed and effectiveness in communication.
- Enhanced Communication: With Zight, users can share information quicker and with more context and clarity, making communication more effective in various scenarios.
- Cross-Platform Compatibility: It is available for multiple platforms, including Mac, Windows, Chrome, and iOS, ensuring seamless integration into your workflow regardless of your device.
- Ease of Use: Zight offers an intuitive interface and simple navigation, making it easy for users to capture, edit, and share screenshots with just a few clicks.
- Versatility: In addition to capturing screenshots, Zight allows users to record their screens with audio and webcam, providing a comprehensive solution for visual communication needs.
- Editing Capabilities: Zight provides extensive editing capabilities, allowing users to annotate screenshots with arrows, text, blur, and more to emphasize and clarify their visuals.
Now, let’s dive into the step-by-step guide on how to use Zight to capture screenshots on your Lenovo laptop:
Step 1: Open the Zight App
You have to download and install the Zight application. Once installed on your Lenovo laptop, launch Zight from your Start menu or desktop shortcut.
You will have two options to trigger the screenshot function:
- Click on the dedicated “Screenshot” button within the app.
- Alternatively, you can use the convenient shortcut for quick access: Ctrl + Shift + 5 for Windows and Command + Shift + 5 for Mac.
Step 2: Choose Your Frame – Full Screen or Region

Once you’ve activated the screenshot function, the next step is to decide the frame of your capture:
Select “Full Screen” to capture everything displayed on your device.
Alternatively, you can choose “Select Region” to specify a particular area. When using this feature, click and drag to select your desired region.
Step 3: Enhance Quality with PNG Format

Zight offers the option to save your screenshots in PNG format for users who prioritize image quality. Enable the PNG option for a higher-quality image ensuring crisp and clear visuals for your screenshots.
For users who prioritize image quality, Zight offers the option to save your screenshots in PNG format.
Step 4: Customize with Annotation Feature (Optional)
You can now customize your screenshots further using the Annotation Feature within the Zight application. Add arrows, text, blur, and other annotations to enhance the clarity of your screenshots and emphasize important points.
Step 5: Save your Screenshot
One of Zight’s standout features is its seamless sharing capability. You can share the link with your recipients, and they can view the screenshot directly in their browser without needing a Zight account. For efficient collaboration, you can embed the link in emails, chat forums, Google Docs, Slack, Asana, and more.
2. Using the Print Screen Key
To capture screenshots on a Lenovo laptop, press the Print Screen key on the keyboard. The Print Screen key on a Lenovo laptop may be labeled as ‘PrtSc’ or indicated by a small scissor icon in the keyboard’s top right corner.
Pressing the print screen key captures the screenshot of the entire screen but doesn’t automatically save it. Instead, it’s stored in your clipboard for pasting elsewhere. To save it, you must use programs like Microsoft Word or Paint and manually paste the screenshot.
a). Capture the Entire Screen
- To capture the entire screen, press the Print Screen button.
- Locate the “PrtSc” (Print Screen) key on your keyboard. It’s typically located near the function keys (F1, F2, etc.) in the top row.
- When you press Prtsc, it will take a screenshot of the entire screen and save it to your clipboard.
b). Capture the Active Window
- If you only want to capture the active window instead of the entire screen, use the “Alt + PrtSc” keyboard shortcut.
- First, ensure the window you want to capture is active (i.e., the one currently in focus).
- Then, press and hold the “Alt” key while pressing the “PrtSc” key. This will capture only the active window and save it to your clipboard.
c). Using the Function Key (Fn) and PrtSc
On some Lenovo laptops, you may need to use the “Fn” and “PrtSc” keys to capture screenshots.
Press and hold the “Fn” key (usually located near the bottom left corner of the keyboard) and then press the “PrtSc” key to capture the entire screen.
Similarly, to capture the active window, press and hold “Fn” and then press “Alt + PrtSc.”
d). Using Shift + Ctrl + Show
So, if your laptop doesn’t have the PrtScn button, no need to worry! You can still snap screenshots using a neat little trick: just press Shift + Ctrl + Show. This comes in handy, especially if you’re using a Lenovo Chromebook. Here’s how to do it:
- Ensure you’re on the window or in the image you want to capture.
- Then, just press Shift + Ctrl + Show all at once, and voila!
- You’ve got yourself a screenshot.
Accessing the Screenshot
After capturing your screenshot using any of the above methods, the screenshot is saved to your clipboard.
You can paste the screenshot into various applications such as Paint, Word, or any image editing software by pressing “Ctrl + V.”
Once pasted, you can save the screenshot or edit it as needed.
3. Using a Snipping Tool
Looking for a quick way to capture screenshots on your ThinkPad or Lenovo laptop? No problem! Let’s dive into using the built-in Windows screenshot tool. The snipping tool is a screen capture tool preinstalled on any Lenovo laptop running Windows OS.
However, this feature is exclusive to Windows 10 Lenovo tablets and laptops. If you’re using a different operating system, explore other methods detailed in this guide. Nevertheless, here’s how to take a screenshot on a Lenovo laptop running Windows 10:
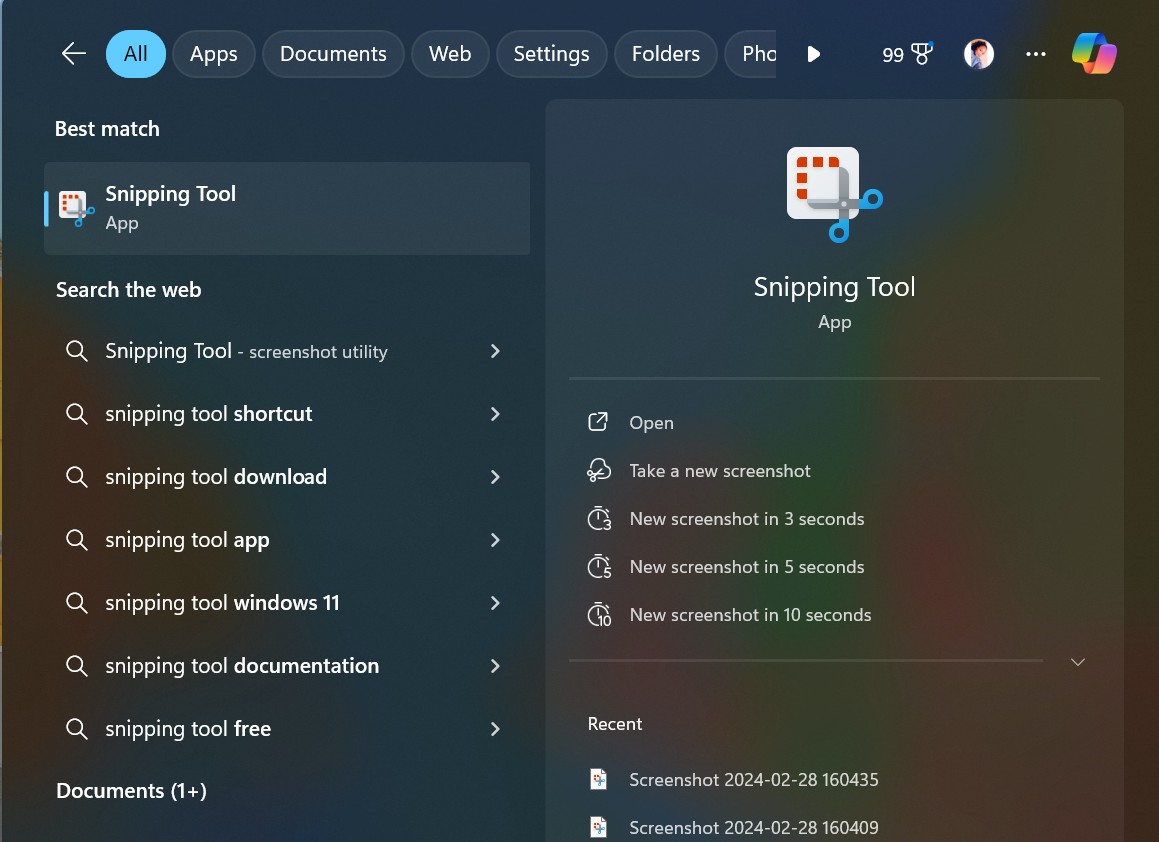
Step 1: Press the Windows key, Shift, and S simultaneously. That’ll pop open the Snip & Sketch tool.
Step 2: Choose how you want to capture your shot:
- Rectangular mode– Create screenshots using the mouse button
- Freeform mode– Use your mouse to select any form from the computer screen.
- Fullscreen mode-Screenshot the entire screen.
- Window mode– Save screenshots of a window
- Delay Mode– You can use the delay mode to capture a screenshot for up to 10 seconds.
Once you’ve picked your style, use your mouse to click and drag over the area you want to capture.
Step 3: Take the screenshot on Lenovo
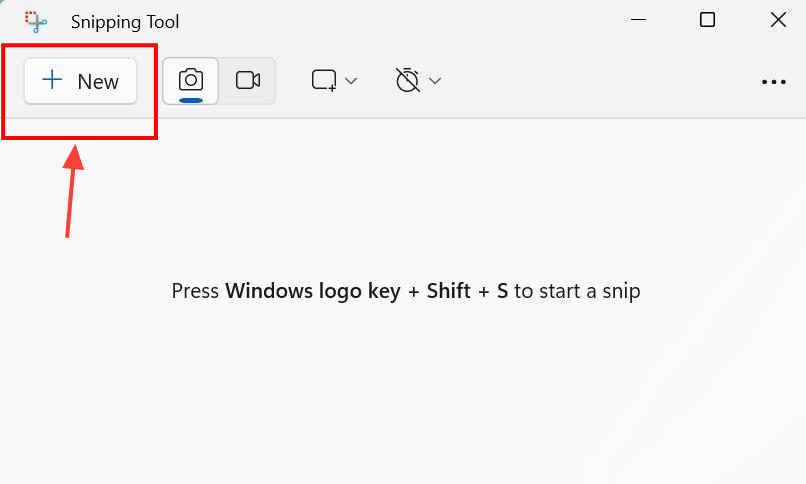
Click on the “New” button to capture your screenshot using the mode you’ve chosen
Step 4: Save your Captured Screenshot
To save your screenshot:
- Hit the Windows logo key, type “paint,” and open Paint.
- Press Ctrl+V to paste your screenshot.
- Save it with Ctrl+S.
Voila! Your screenshot is now saved to your clipboard. To check it out right away, open your notifications. Easy, right?
4. Using the Xbox Game Bar

Using the Xbox Game Bar, you can also capture screenshots on your Lenovo laptop. Like the Snipping Tool, the Xbox Game Bar is already installed on all Lenovo laptops operating on the Windows OS. Although primarily designed to capture video game moments, it can also capture regular screenshots.
Step 1: Press Windows + G to open the Xbox game bar on your keyboard.
Step 2: Once the Game Bar is open, click the camera icon to take a screenshot.
Step 3: Click the camera icon to screenshot your active window under the Capture window. If the Capture Window doesn’t appear on the menu bar, click the webcam icon.
Alternatively, use the Windows key + Alt + Prnt Scrn shortcut key to take a screenshot directly from the Xbox game bar.
Step 4: The screenshot will be saved to your “Videos” folder or a ” Captures” subfolder.
How to Take a Screenshot using a Lenovo Laptop not running Windows 10
What if your Lenovo computer is not running on Windows 10? We have several solutions for you to capture screenshots. Here’s how:
a). Using keyboard shortcuts
- PrtSc Key might be labeled differently, like “PrtScn” or “Print Scr.” to capture the entire screen.
- Fn + PrtSc (or Alt + PrtSc to capture only the active window instead of the entire screen)
b). Using a Third-Party Software
If the built-in methods don’t suit your needs, you can always explore third-party screenshot tools available for your operating system. Our most recommended third-party screenshot application on Lenovo laptops is using Zight.
We have discussed it in detail above, but we prefer it because it is the best screen capture software with features like screen recording, creating GIFs, annotation, and even AI features. Why not choose an all-in-one tool for capturing screenshots and have a tool with other features?
How to Take a Screenshot on Your Lenovo Tablet
If you own a Lenovo tablet and are wondering how to take a screenshot, it’s easy. Go to the app or page you want to screenshot and simultaneously press the Power Switch and Volume Down buttons. A captured image will pop up and move to your tablet’s screen in the lower left corner.
For a detailed guide on how to take a screenshot on your Lenovo tablet, follow the steps:
- Hold your Lenovo tablet with one hand and open the page, app, or window you wish to capture.
- Position your index finger on the Power (ON/OFF) button and your thumb on the Volume Down button.
- Press both buttons simultaneously to capture the screen. Your screenshot will be saved in the Pictures folder within the Screenshots folder.
- If the buttons on your Lenovo tablet are not functioning correctly, access the Notification Center and tap on Screen Snip to take a screenshot.
Conclusion on How to Screenshot on Lenovo
So there you have it. Taking screenshots on your Lenovo laptop should be a breeze once you have the know-how. In addition, if you want to effortlessly capture and share moments on your Lenovo laptop, Zight is the ultimate solution.
With Zight’s intuitive interface and versatile features, including quick access shortcuts, customizable framing options, and high-quality PNG format, Zight efficiently streamlines the screenshot process.
Zight ensures clarity and efficiency every step of the way. So why settle for anything less? Elevate your screenshot game with Zight and experience the difference today!


