
Today’s businesses have a wealth of communication tools at their disposal, from email to instant messaging platforms like Slack and videos made using webcam recording software like Zight.
The most exciting communication method of them all is video. It’s well-documented that video is more engaging than other forms of communication. For instance, viewers retain 95 percent of video content compared with just 10 percent when reading text. Furthermore, 59 percent of executives prefer watching videos to reading articles.
Whether you want to train new employees, troubleshoot a problem with co-workers, create product guides for customers, or engage potential sales leads, video is one of the easiest and most direct ways to communicate with your audience. All you need is a decent webcam recorder and user-friendly webcam software.
If you’re a first-time user, don’t worry: Our webcam recording software guide will get you started in no time without breaking a sweat. We’ll tell you how to use webcam software and which 10 programs you should use on Mac and PC.
Let’s start!
Connecting Your Webcam
Since laptops generally come with built-in webcams, you probably don’t need to worry about installing a camera for your recording needs. Connecting a new webcam is a simple process, no matter your device.
Most webcams will initiate the setup process when you connect them to a computer. All you need to do is plug the camera’s USB cable into your laptop’s USB port and wait for the operating system to detect the camera.
You should receive a pop-up message that your new device is ready to be configured and that you can install it. A few clicks later – agreeing to user terms, creating desktop icons, selecting a file directory, etc. – and you’re ready to start recording.
Setting Up Your Webcam
Depending on how you want to position your webcam, you may need to attach it to your computer monitor. Odds are your webcam came with a clip or latch to mount it to an elevated surface. If you would rather not mount your webcam, you can always place it directly on your desk or workspace.
Whichever way you go, open up your webcam recorder software to double-check that the angle is OK. Ensure there is a clear line of sight with no obstructions.
Also, before recording anything, check that your camera is picking up audio correctly. There’s nothing more frustrating than recording a long video session only to find that none of the audio was captured.
Give your webcam’s settings one last look to check if you need to change anything before you’re ready to record.
1. The Best Webcam Recording Software: Zight (formerly CloudApp)
Even if your laptop has a built-in webcam recorder, it may only offer basic features to record video. So, if you want to record high-quality videos to communicate with your teams, you want an option that provides better features. This is where Zight comes in.
Zight is a powerful and easy-to-use tool that lets you record your screen, audio, and webcam simultaneously. You can use it to create engaging videos for your online courses, presentations, tutorials, demos, and more.
It is fast, convenient, and compatible with your Mac or Windows PC. You can record webcam videos on a free plan – up to 25 free webcam videos, keeping them within 1 minute and 30 seconds. You’ll also enjoy more features, like where to record and edit your recordings. More on this below!
What sets Zight apart from your average free webcam recorder is its commitment to privacy and security. All your Zight webcam videos get stored in the cloud and encrypted with SSL. You can control who can view or download your videos with password protection and expiration dates. You can also manage your videos in your library and organize them by folders, tags, and comments.
Suppose you want the best video quality and you also want to record long videos – say for tutorials or presentations. You can upgrade to affordable Pro plans for unlimited recordings, with individual, team, or enterprise options. Starting at just $9.95 a month, you’ll record webcam videos at 4K resolutions and improve them with advanced video editing and analytics features.
Download Zight today and unlock the full potential of your webcam!
I. Downloading and Installing Zight’s Webcam Recording Software
Assuming your staff is not filled with expert videographers working with the latest video recording software suites, your best option is downloading the most user-friendly and straightforward webcam recording software available: Zight!
- Head to this page to download the Windows or Mac machines app. You can also add the Chrome extension as the app downloads
- Double-click on the downloaded file to launch the setup wizard and begin the installation process
- Run through each required step to complete the installation and launch Zight
- If you’re unsure about any of the questions or steps in this process, simply defer to the suggested prompt
- Once you’ve installed the software, you’ll need to create a Zight account
- Unless you deviated from the suggested installation steps, a Zight icon should now be located on your desktop or in the system tray taskbar
- Click on that icon to bring up the sign-in screen, then click on the new user sign-up link to set up an account
II. Recording Your Webcam Video With Zight
Recording a webcam video with Zight is a breeze:
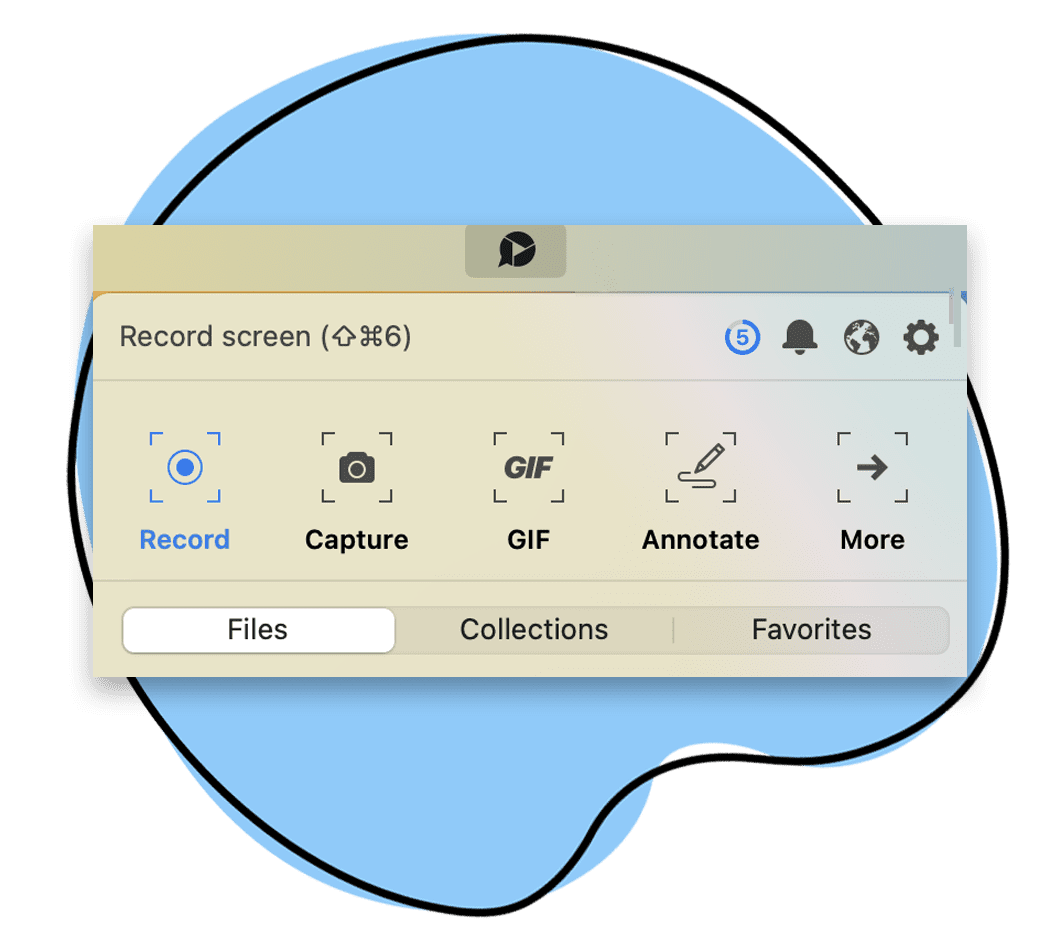
- Open the Zight application on your laptop, then head to the screen recording options (Screenshot, Record, GIF, Annonate, and More). Click the More button, and scroll down to open the Record Camera Only option.
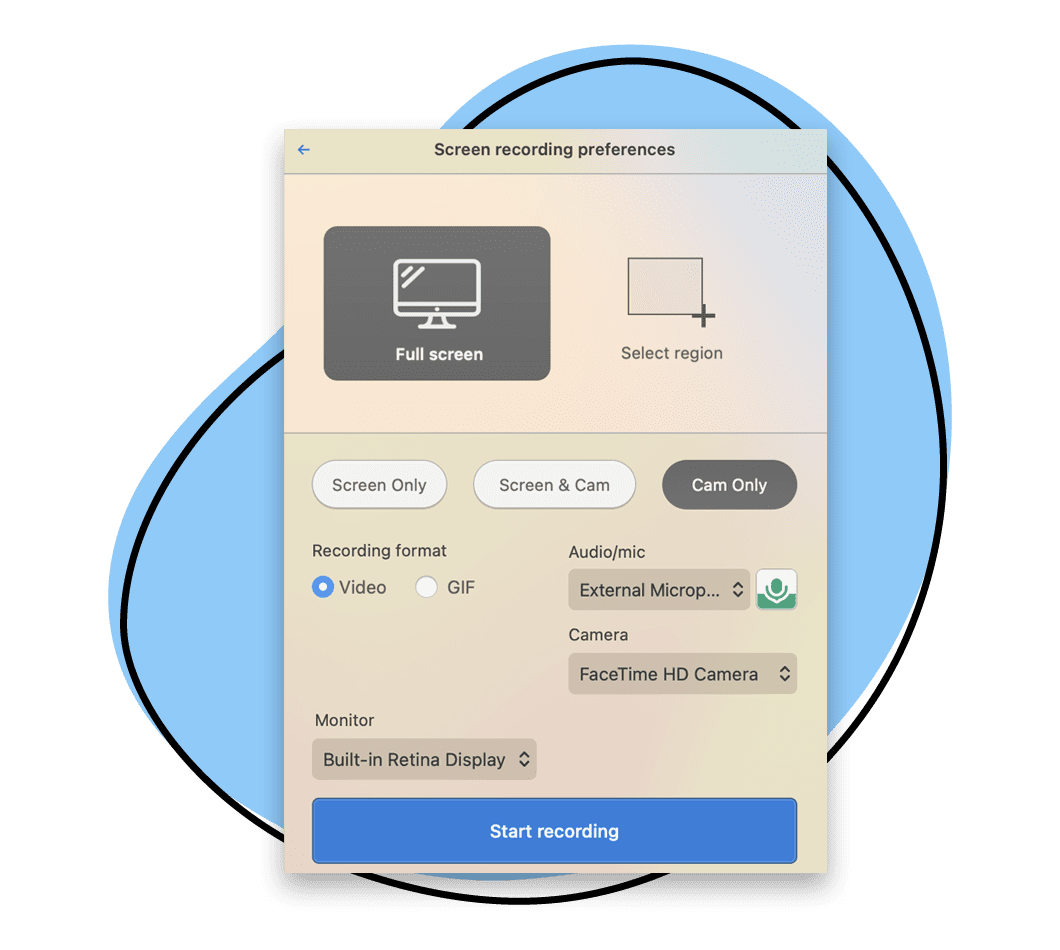
- When you click the Record Camera Only option, Zight will take you to a page with screen recording preferences. Alternatively, if you are using the Chrome extension, click on the Zight icon at the top of your address bar, and choose Record.
- Here, choose whether to record full screen or a region. Also, choose whether to record webcam only (with the Cam Only option) or record webcam videos and your screen (with the Screen & Cam option).
- You can also choose your recording format ( Video or GIF) and set audio and camera settings. Note, if you want to record a GIF, you’ll be unable to use the microphone.
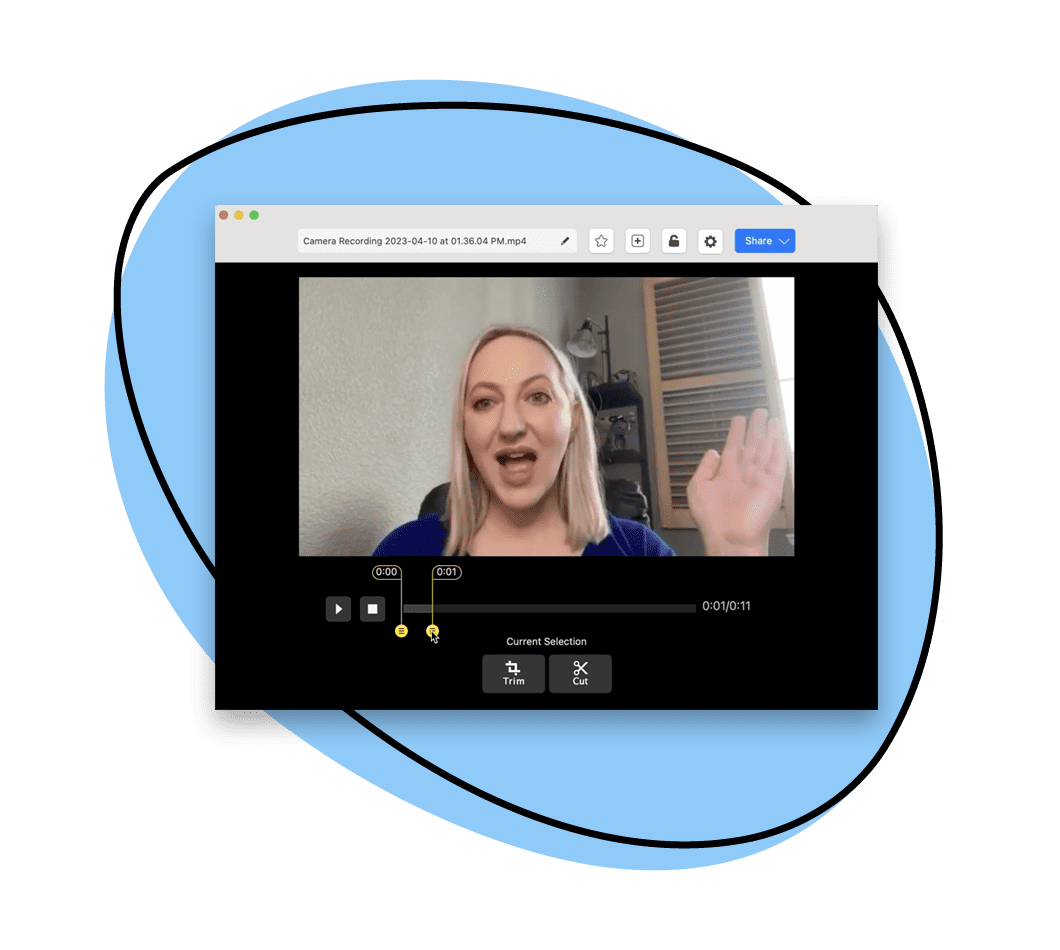
- Once you select all your recording preferences, click the blue Start Recording button, and wait for the 3-second timer to run out before you start speaking or recording your screen. You can pause and resume your webcam recording and adjust the camera and audio settings as necessary.
- When you finish recording, click the green Finish button. You can also cancel and retake the recording if you didn’t capture everything. Once you click the Finish button, Zight will generate a shareable link and copy it to your clipboard for easy sharing.
That’s all there is to it! Simple, right?
Both Mac and Windows users can take advantage of another cool trick to quickly start recording without navigating any dashboards or on-screen prompts:
Use Zight’s hotkeys (command+shift+8 for Mac and alt+shift+8 for Windows) to begin recording without touching your mouse.
III. Tweaking Your Recording Options
Zight gives you total control over what to include in your recording and even lets you create videos and GIFs.
- To get started, click the Zight icon to open the program window. This will be in the lower right-hand corner of your screen in the system tray (or hidden icons) for Windows. For Mac, you can find it in the menu bar at the top of the screen. Next, click Record
- Then, click on one of the two labeled icons situated in the bottom left corner to record either a GIF or Video
- While a full-fledged video will be perfect for more in-depth discussions, GIFs offer a great way to quickly walk through a short process. They also help convey quick bits of information without wading through a minute-long (or more) video. Whatever the task at hand is, Zight has the tools to help you do it quickly, easily, and effectively
- You can also toggle the sound on and off, depending on whether you’d like to include audio with your recording
- If you are using Mac, you can turn your webcam on and off. Just click on the icon that looks like a video camera. You can also adjust the size of your webcam video on the screen
IV. Annotating Your Video

Video is a good communication tool in its own right. But if you want to draw viewers’ attention to specific details on the screen, Zight comes packed with many annotation tools.
Like every other process in the Zight webcam recording platform, annotating your video is straightforward. Here’s how it works:
- Place your cursor over the on-screen image or icon if you wish to add a comment, line, emoji, or other graphic to
- Click on the “Annotate” button to pull up the annotation toolbar
- Select from the various built-in tools to overlay images and text onto the screen
Mac and Windows users can use keyboard shortcuts (command+shift+A and alt+shift+0, respectively) to bring up the annotation toolbar quickly. Zight makes annotating very easy, with clear icons representing each tool, including arrows, lines and shapes, text, crop, and freehand drawing.
There’s even a blurring option that you can use to pixelate any on-screen images, faces, or text you don’t want your viewers to see. It’s a great tool if you wish to create a step-by-step guide for customers but want to avoid divulging sensitive data like financial records or personally identifiable information.
Leverage these tools to tweak your videos and provide more clarity to your message. Mac users also have the option to annotate the GIFs they create in Zight. This adds an extra layer of personalization.
V. Uploading Your Video

One of the great benefits of Zight’s webcam recording software is that there’s no massive video file to email to your clients, product users, or co-workers. Any content you record through the software is automatically uploaded to the cloud for easy access and sharing.
But that’s not all. You can also use Zight to share and send other media files stored on your computer. Simply drag the file you wish to share to the Zight icon and drop it in. The application will take care of the rest.
Another approach is to click on the upload icon in the Zight taskbar and choose “upload from computer.” That will open up your system directory, and you can navigate to the appropriate file.
Recording your own video may seem daunting, but anyone can do it. User-friendly webcam recording software solutions make the entire process as simple as possible. You can start making videos without any training or experience.
Get in front of the competition and improve customer experience with visual communication.
Other Webcam Recording Software Alternatives
Want to experiment with more webcam video recording software? Here are 9 other options to consider.
2. Movavi Screen Recorder
Movavi has some of the best annotation features and allows you to add overlays to your webcam video. These video editing features are beneficial when recording webcam tutorials, presentations, or instructional videos where visual aids play a crucial role. You can trim and cut your recordings to remove unwanted sections, merge multiple clips, apply filters and effects to enhance the visual appearance, and adjust parameters such as brightness, contrast, and saturation.
Another advantage of the Movavi webcam recorder is its user-friendly interface, which makes it accessible to users of all levels of experience. The software is intuitive and straightforward, allowing you to start recording your webcam with just a few clicks. Additionally, you can utilize different output formats when saving your recording. These include MP4, MKV, MOV, and AVI.
Pros
- Clean interface
- Excellent editing features
- Safe file sharing
Cons
- Best features only on paid versions
3. Wondershare DemoCreator

The Wondershare DemoCreator is another of the best software for webcam recordings you can trust, especially on a Windows PC. But that’s not to limit you; you can also use it on a Mac; all you need is to download it online, install it, then launch an account to start using the free version.
You can use the screen recording software to capture and save your high-quality webcam recordings, all in a few clicks. You can capture screen recordings and the webcam simultaneously, making it very easy to record tutorials, presentations, or gaming videos. And after recording, you’ll use the embedded editing tools to annotate, add effects, transitions, or even trim or cut out sections. Then, you can save or export your videos in different formats, including MP4, MOV, and MKV.
You can also record GIFs if you want easier communication. The free trial gives you access to all premium features, including high FPS webcam recordings.
Pros
- Superb free trial
- 4 webcam styles
- Easy to use
- Good editing features
Cons
- Feature-rich pro versions billed annually
4. Loom
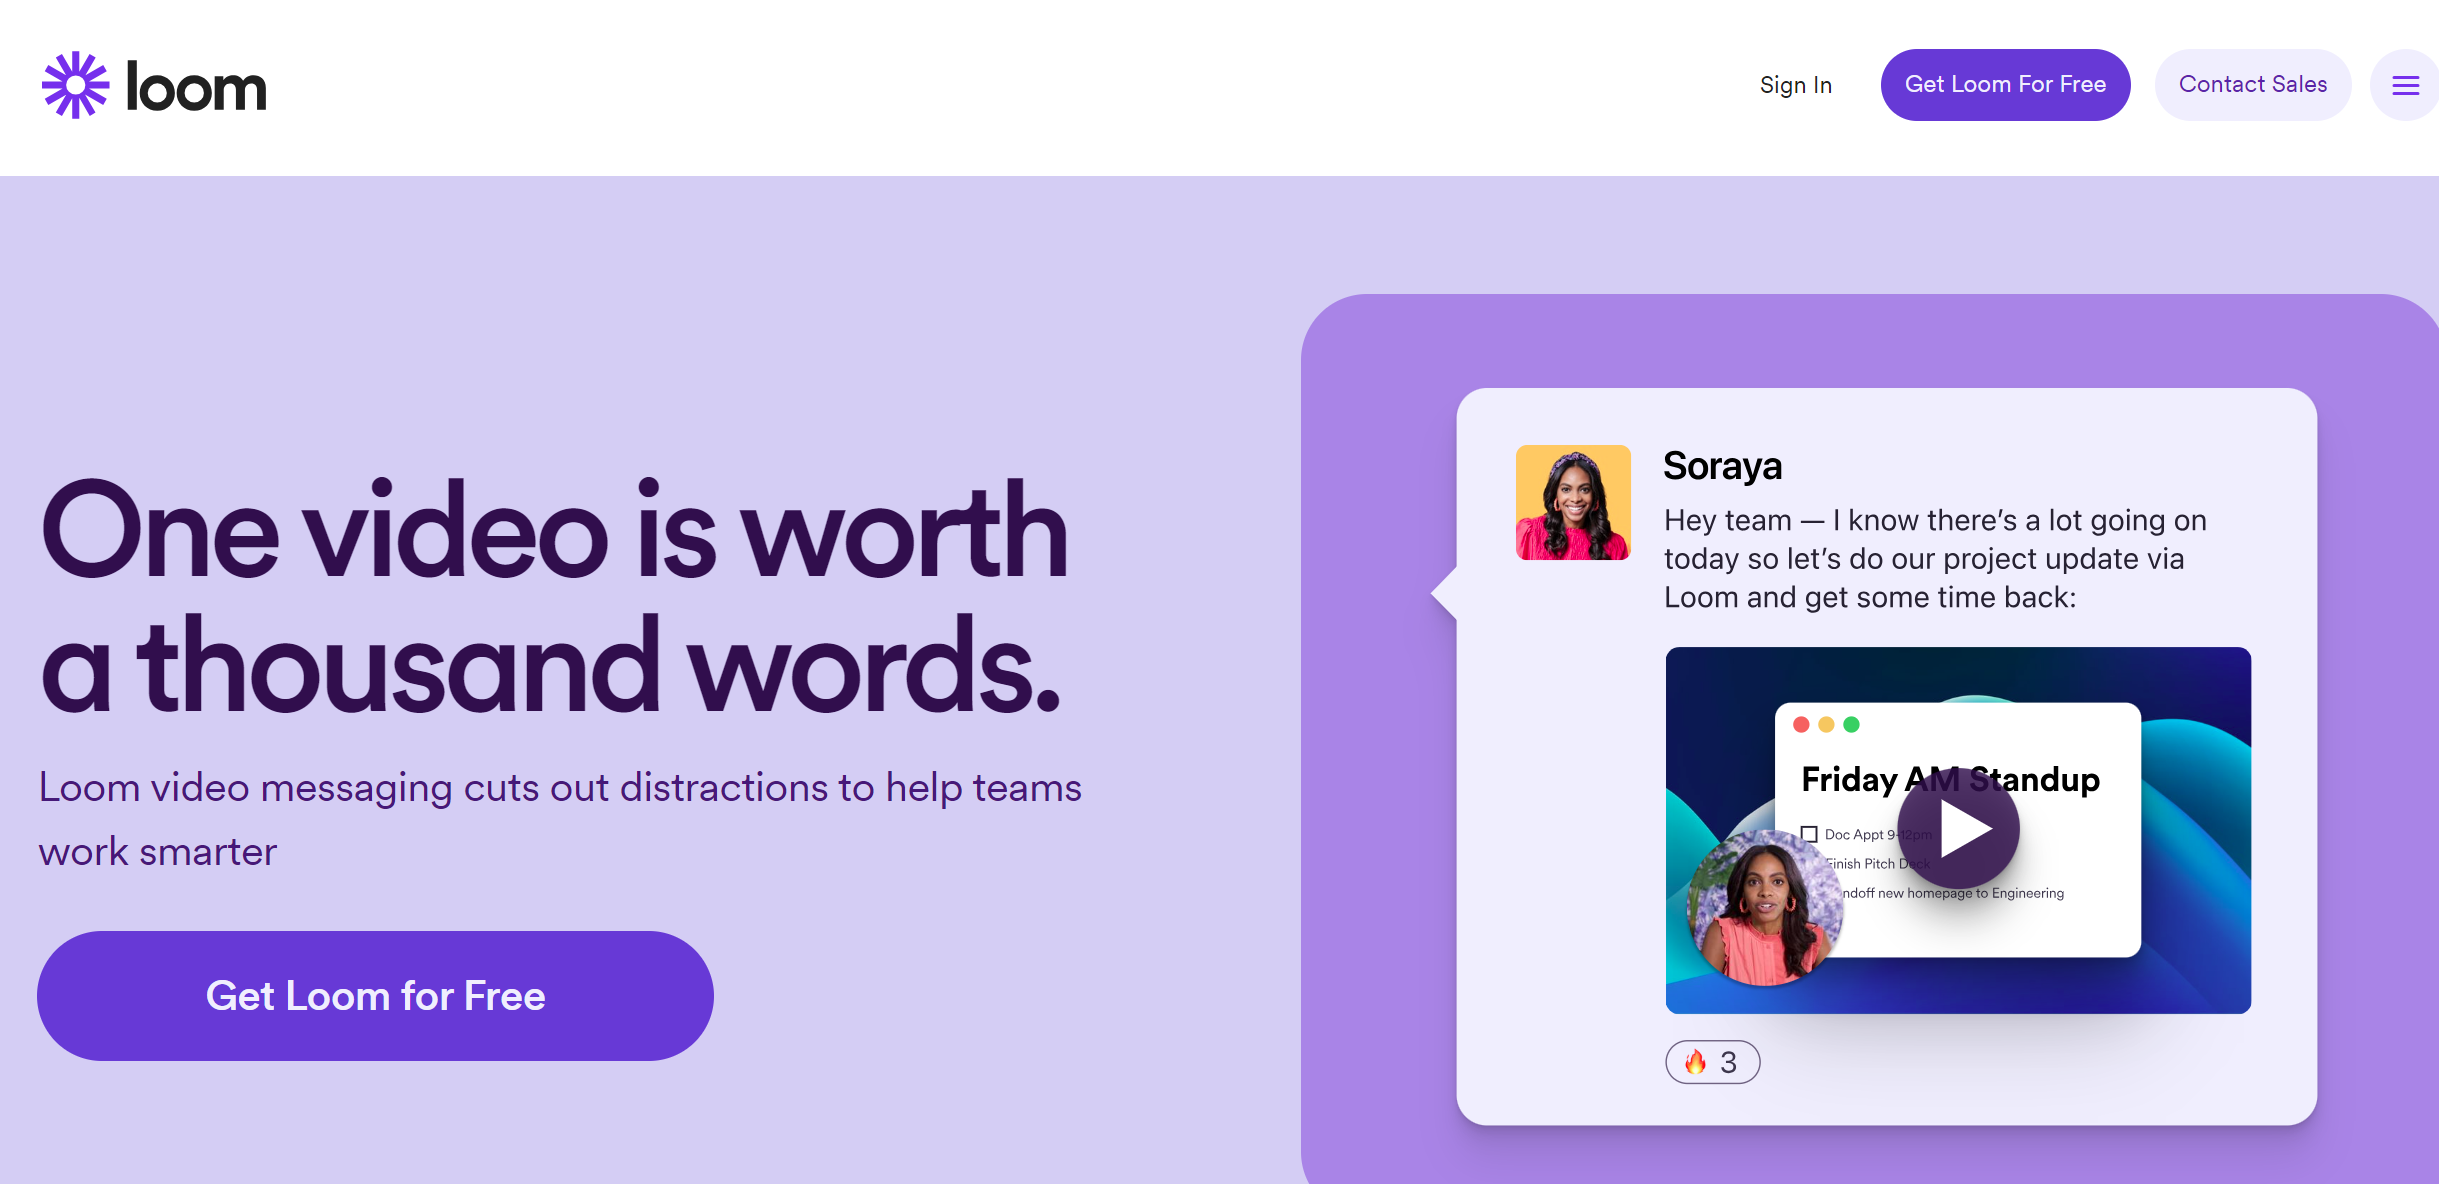
Loom is a user-friendly screen recording software that also allows you to record videos using your webcam easily. You can install Loom as a Chrome extension or a desktop app and start recording with one click. You can also use it on your Android device and choose between screen, cam, or audio mode.
After installing, you can record videos up to 5 minutes long for free and share them instantly with a unique link. You don’t need to wait for uploads or downloads. You can also trim your videos and add calls to action. In addition, you get to choose whether to record full-screen webcams or use the screen and camera button to record your webcam as a bubble you can move around the screen.
A good webcam recorder allows you to edit and share your videos with your team quickly. Loom provides annotation tools, enabling you to add text, drawings, or highlights to your webcam recordings. On top of that, you can also integrate Loom with other work software like Slack, Gmail, Trello, and more.
Pros
- Easy to use
- Superb analytics to track performance
- Compatible with many devices
Cons
- Limited free version
5. CamStudio
Are you looking for the best free webcam software for Windows? If so, check out CamStudio. It is a screen recording software that will capture excellent webcam footage. Besides webcam video recording, CamStudio also records your screen activities, making it suitable for various recording needs.
It is also free and easy to install, and as open-source software, you can access the source code and modify it according to your needs. You can start recording with one click and stop it with another, not to mention also adjust the settings for video quality, cursor effects, audio options, etc.
CamStudio also has advanced video editing tools for screen captions or video annotations. It also allows you to adjust video and audio quality, choose specific areas of the screen or webcam to record, and set frame rates according to your preferences. And when it comes to sharing your recordings, you can use export options like SFW and AVI. Finally, CamStudio comes with its lossless codec that produces clear results with a smaller file size compared to some popular codecs.
Pros
- Good webcam recording and editing features
- Free webcam recorder
- Easy to install and use
Cons
- Not compatible with Mac
6. SplitCam
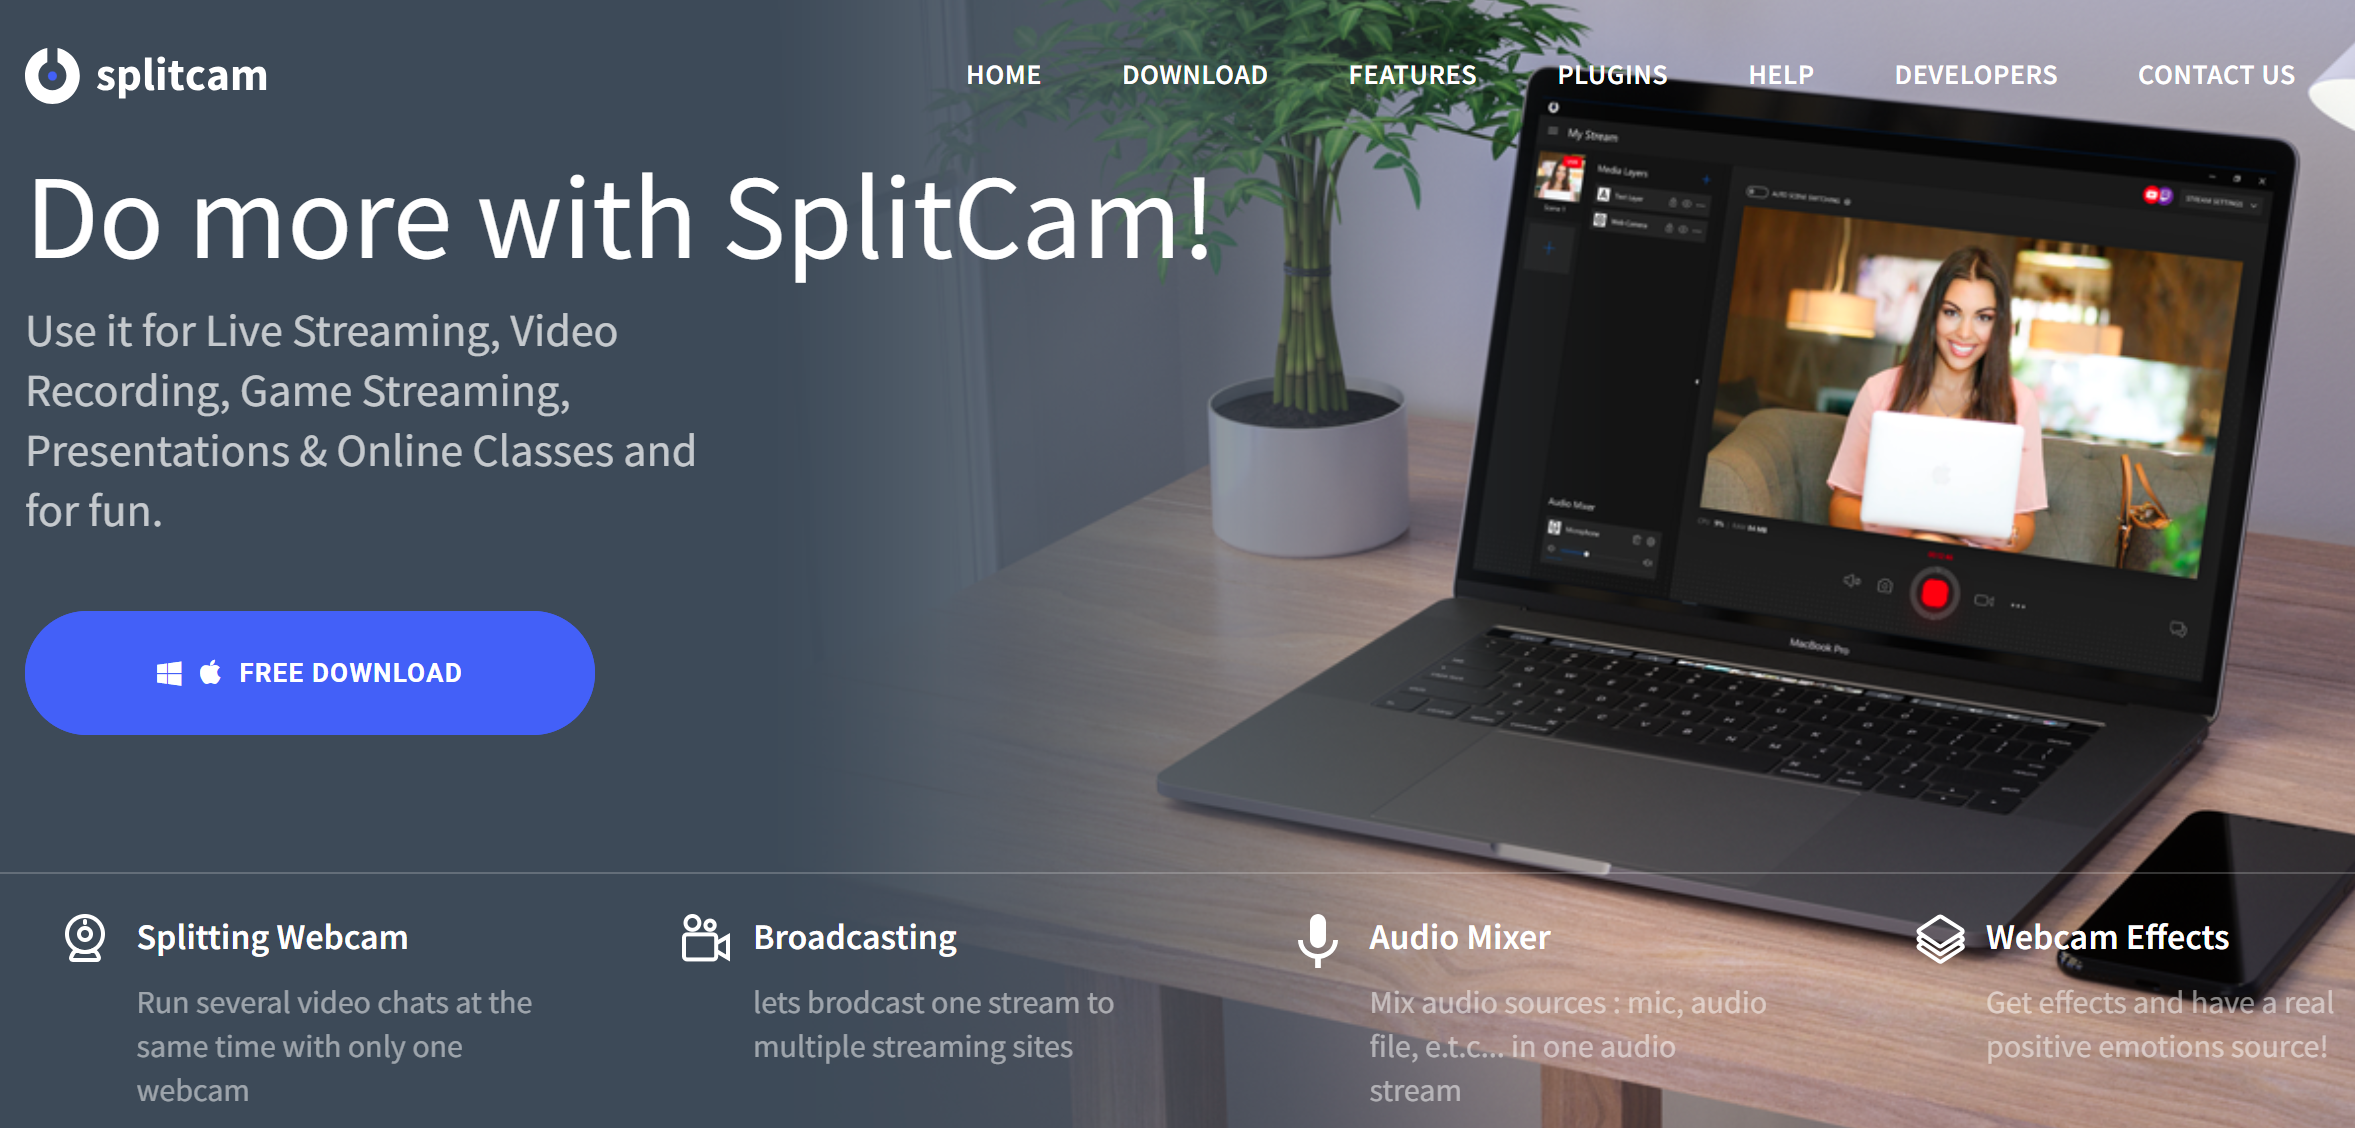
SplitCam is a popular webcam software that offers a range of features and functionalities to enhance your webcam experience. As the name suggests, SplitCam specializes in splitting your webcam feed. This means you can use your webcam simultaneously across multiple applications or platforms.
You can download SplitCam for free and install it on your Windows PC, or Mac with a special version. You can start splitting your webcam with one click and choose which applications you want to use it with. It lets you stream your webcam recording to various platforms and channels with minimum CPU load. You can adjust your webcam’s resolution and frame rate and add effects, filters, backgrounds, and 3D masks.
For instance, you can replace your head with a 3D object, zoom the video as you like, and chat with your friends on different platforms simultaneously without receiving a “webcam busy” error. And for productivity, SplitCam integrates with productivity software like Skype, Gmail, Slack, and more.
Pros
- Flexible and versatile
- High-quality video recordings
- Compatible with Windows and Mac
- Live screen editing
Cons
- A bit of a learning curve to use
7. QuickTime Player
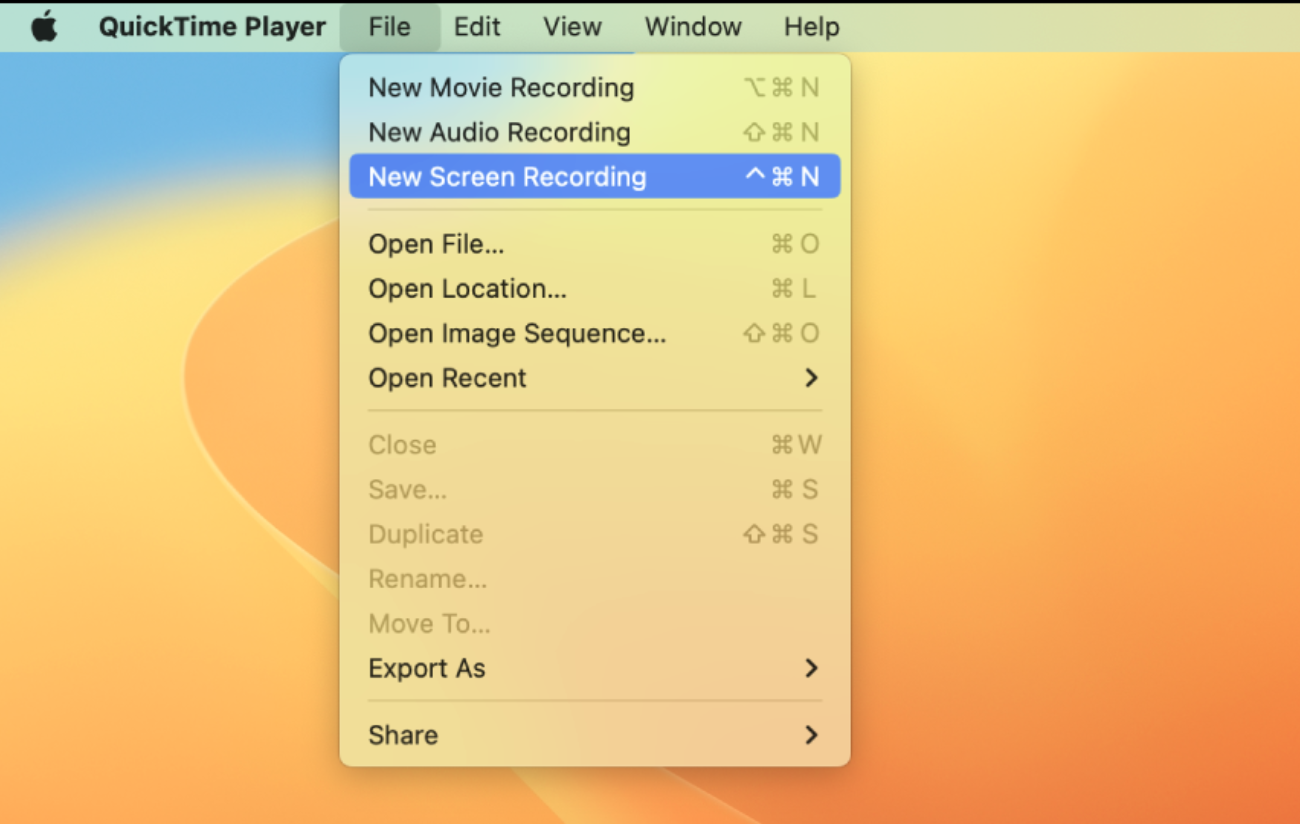
When you have a Mac device, you have an incredible webcam video recording software called QuickTime Player. It is a multimedia player and framework developed by Apple that supports various media formats, including video and audio. As such, you can record webcam footage such as tutorials, presentations, demos, and more.
The best part about QuickTime Player is that you won’t need to download or install it. Just locate the app on your laptop, open File on the menu bar, then click New Movie Recording. You can also use the press Command + Option + N shortcut to open a new recording window and shoot your webcam video.
QuickTime Player provides basic recording features for your webcam footage. You can record videos, capture photos, and adjust settings like video quality, audio input, and playback controls. However, it’s important to note that QuickTime Player’s webcam recording capabilities are relatively limited compared to dedicated webcam software, as it lacks advanced features like effects, annotations, or extensive editing options.
Pros
- Free webcam software
- Easy to use
- Supports many video formats
Cons
- Limited editing features
- Only compatible with Mac
8. VLC
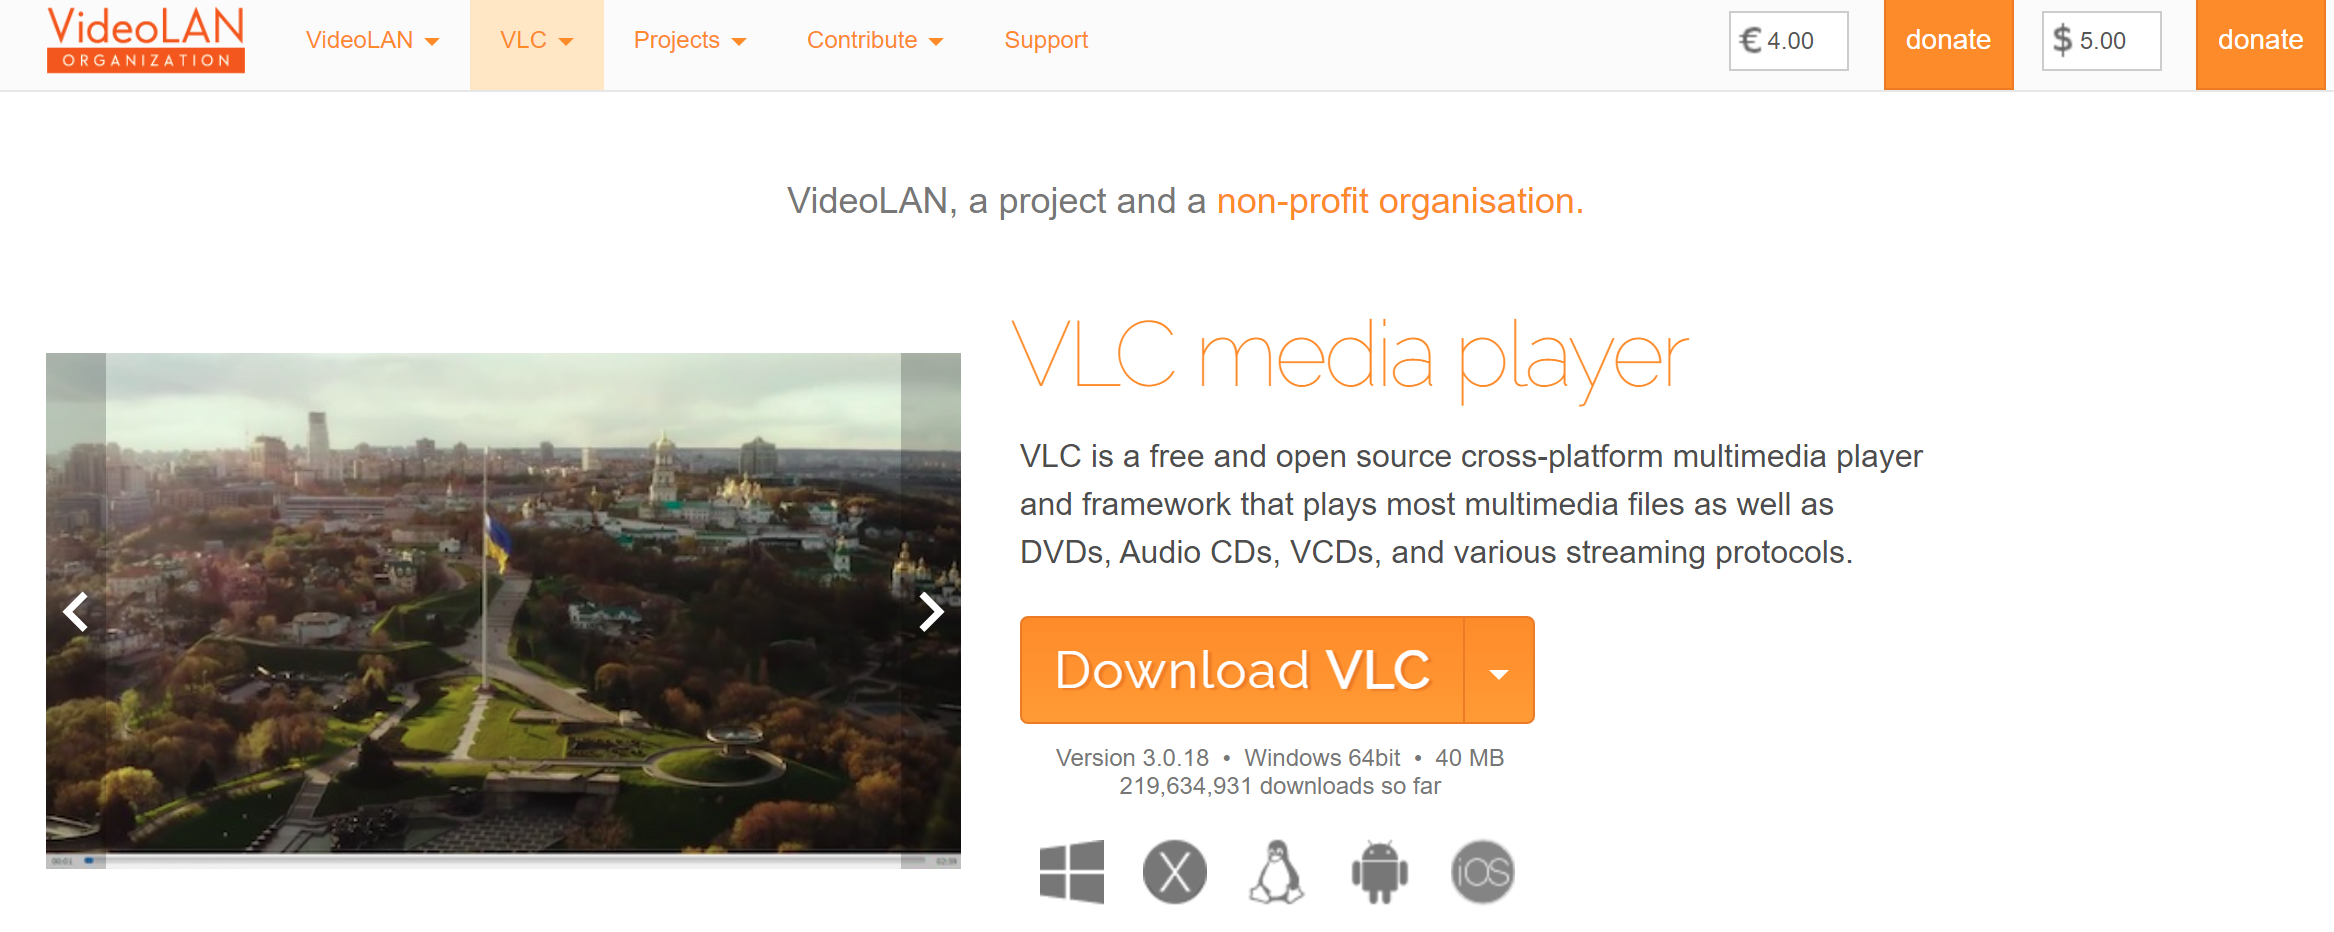
VLC (VideoLAN Client) is a famous open-source multimedia player widely recognized for its ability to play various audio and video formats. On top of that, you can also use it to record a webcam video. VLC is available for multiple operating systems, including Windows, macOS, and Linux. You only need to download it for free online or access the source code to modify it according to your needs.
To use VLC:
- Go to “Media” in the menu bar.
- Select “Open Capture Device” or press Ctrl + C.
- In the “Capture Device” tab, choose your webcam from the “Capture mode” dropdown menu.
- Adjust the desired video and audio settings, such as resolution and frame rate, and click the “Play” button.
VLC will start recording from your webcam. To stop recording, click on the “Stop” button.
When you’ve recorded, you can edit, though with essential features like trimming, rotating, and flipping before saving your file on your computer.
Pros
- Free webcam recorder
- Compatible with most devices
- Easy to use
- Essential editing features
Cons
- No advanced features like annotations
9. Windows Camera
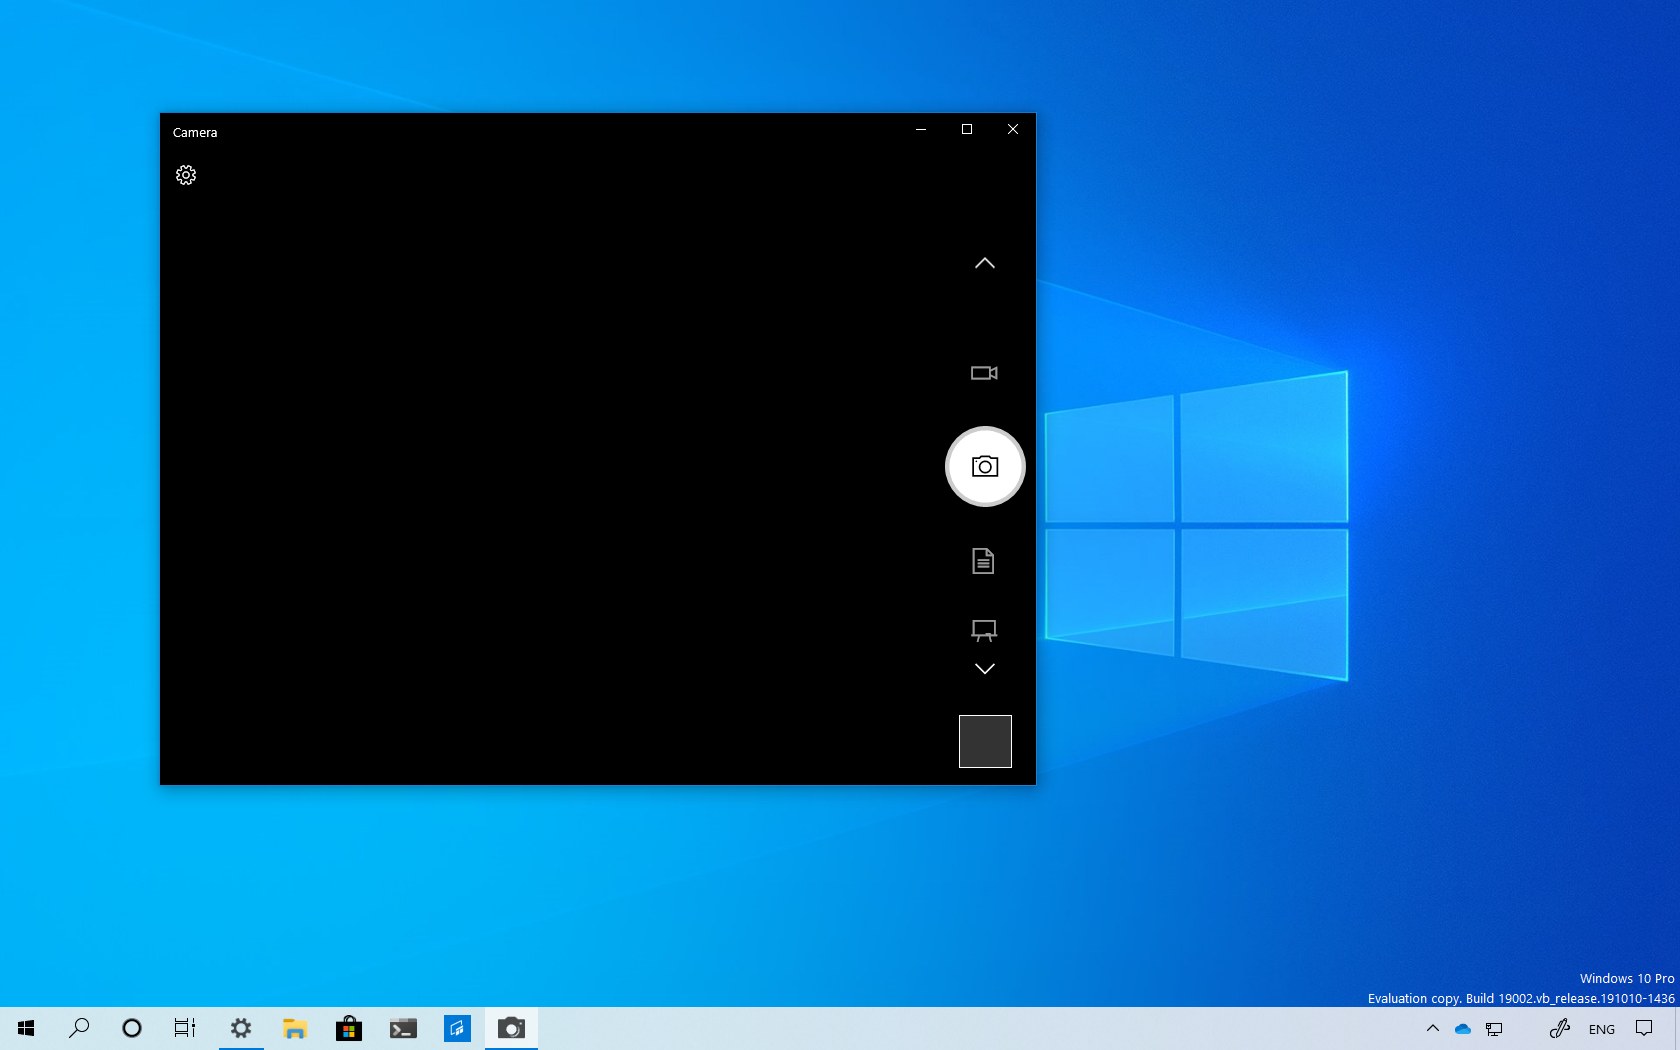
Image Credits: pureinfotech.com
The Windows Camera app is your best option for recording webcams on Windows PCs. It is automatically included in any PC on Windows 10 and newer.
While it does not offer as many editing features as other third-party plugins on our list, Windows Camera will save the day when you don’t have other software. You can record unlimited high-quality videos with it, then trim or merge them for a detailed presentation. In addition, you can pause and resume your recording.
Pros
- Free webcam software for Windows 10 and newer
- Easy to use
- No installation necessary
- High-quality recordings
Cons
- Limited editing tools
- Only for Windows
10. Clipchamp
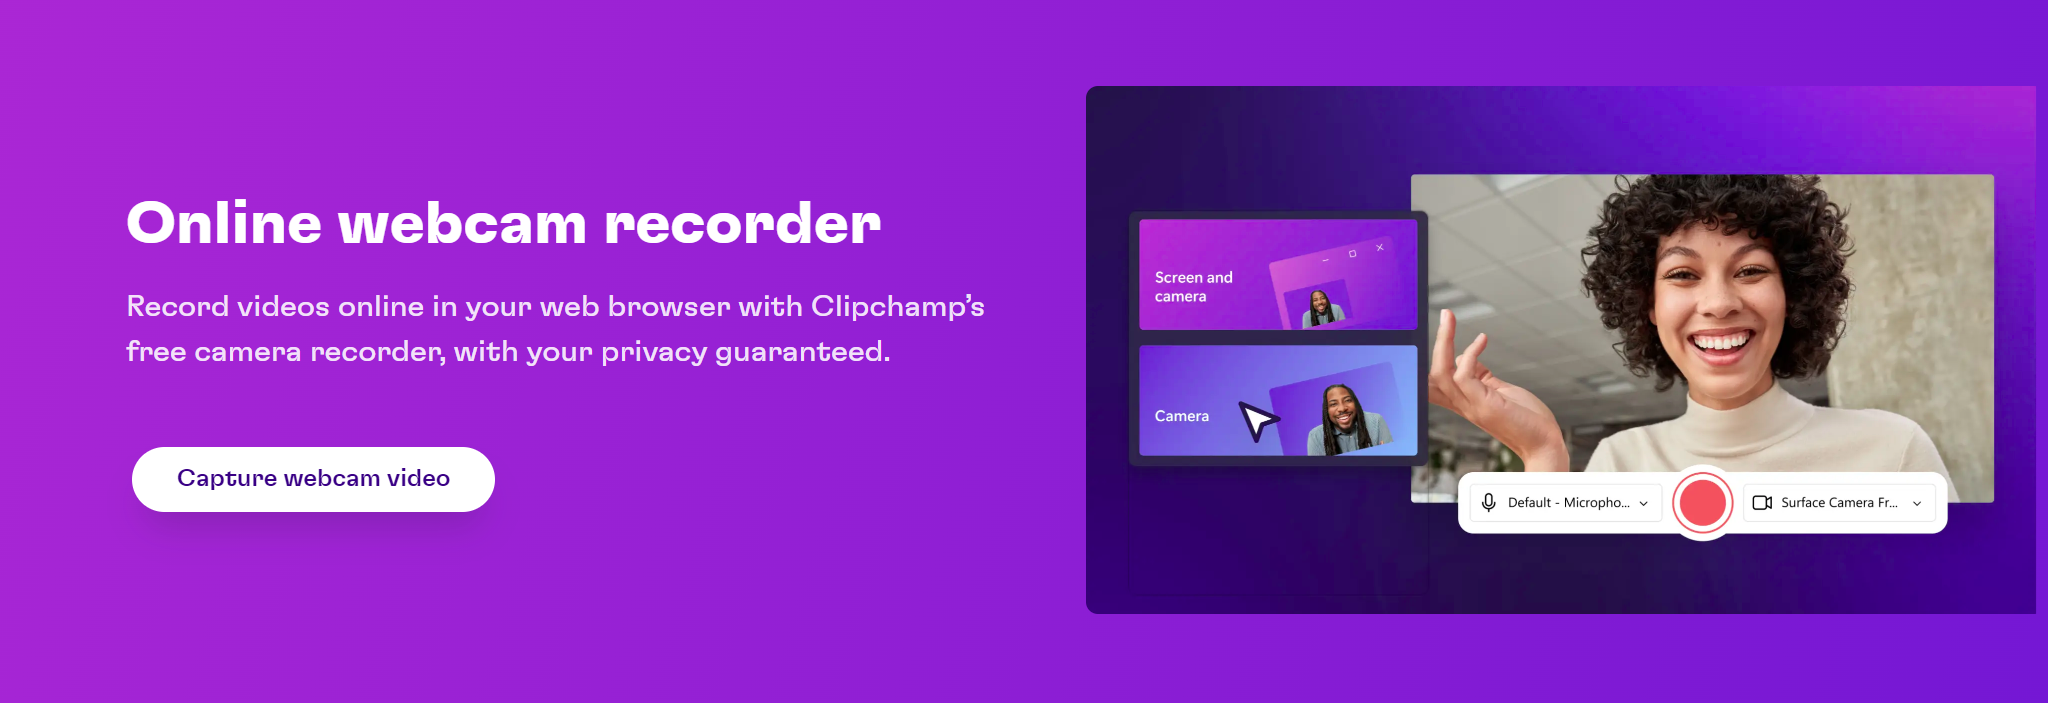
If you want a free online webcam recorder, try Clipchamp. It is a good webcam recorder that offers a user-friendly interface for a seamless webcam recording experience without requiring extensive technical knowledge. You can adjust settings such as resolution, frame rate, and audio input to capture the desired footage.
Clipchamp also provides essential editing tools that enable you to trim, crop, and enhance your webcam recordings within the platform. It provides cloud-based storage for your recordings, allowing you to access them from anywhere and on any device. It also offers easy sharing options, including direct sharing to social media platforms or generating shareable links to send to others.
Pros
- High recording resolutions
- Advanced editing and sharing features
- Superb free version
Cons
- Expensive full version
Webcam recording offers several benefits, particularly in the context of remote work, online education, and content creation. Here are some key advantages:
- Personal Connection:
- Enhanced Communication: Webcam recordings can capture facial expressions, body language, and other non-verbal cues, making communication more effective and personal.
- Human Element: Seeing a person’s face helps build trust and rapport, which is particularly valuable in remote work and online interactions.
- Flexibility and Convenience:
- Asynchronous Communication: Webcam recordings allow messages to be conveyed when it’s convenient for the sender and viewed when it’s convenient for the recipient, ideal for different time zones and busy schedules.
- Ease of Use: Most laptops and mobile devices come with built-in webcams, making it easy to record and share videos without needing additional equipment.
- Clarity and Engagement:
- Visual Demonstrations: Webcam recordings are useful for tutorials, demonstrations, and presentations, providing a clear and engaging way to explain concepts.
- Enhanced Understanding: Seeing the speaker can help viewers better understand the message and stay engaged.
- Efficiency:
- Quick Updates: Recording a quick video message can sometimes be faster and more effective than typing out a long email or document.
- Real-time Feedback: In live recordings, such as during video calls, immediate feedback can be given and received, speeding up decision-making processes.
- Content Creation:
- Vlogging and Streaming: Webcams are essential tools for vloggers, streamers, and content creators who want to engage with their audience directly.
- Interactive Content: Webcam recordings can be used to create interactive and dynamic content, such as Q&A sessions, interviews, and live webinars.
- Training and Onboarding:
- Personalized Training: Webcam recordings can be used to create personalized training videos, helping new employees feel more connected to the team and company culture.
- Consistency: Recorded training sessions ensure that all employees receive the same information and instructions.
- Documentation and Review:
- Record Keeping: Webcam recordings can serve as a record of meetings, presentations, and other important communications, which can be referred back to later.
- Performance Review: Managers and employees can use recorded videos to review performance, provide feedback, and track progress over time.
Integrating webcam recording into your workflow, especially with tools like Zight, can significantly enhance communication, engagement, and productivity in various professional and personal contexts.
How Zight webcam recording can help your business.
Using Zight’s webcam recording capabilities can significantly benefit your business in various ways. Here are some specific advantages:
- Improved Communication:
- Personalized Messages: Send personalized video messages to clients, partners, or team members, enhancing the human connection and building stronger relationships.
- Clear Instructions: Record detailed explanations or instructions that are easier to understand compared to written messages, reducing the chances of miscommunication.
- Enhanced Remote Collaboration:
- Asynchronous Updates: Team members can record updates or presentations at their convenience, which can be viewed by others when they have time, accommodating different time zones and schedules.
- Visual Feedback: Provide visual feedback on projects or documents, making it easier to convey your thoughts and suggestions.
- Effective Training and Onboarding:
- Consistent Training Materials: Create a library of training videos for new hires, ensuring that everyone receives the same information and instructions.
- Engaging Content: Use videos to make onboarding more engaging and interactive, helping new employees feel more connected to the company culture and team.
- Customer Support and Tutorials:
- Personalized Support: Record personalized video responses to customer inquiries, providing clear and helpful solutions.
- Tutorials and Demos: Create video tutorials and product demos to help customers understand how to use your products or services effectively.
- Marketing and Sales:
- Engaging Content: Use webcam recordings for creating engaging marketing content, such as product announcements, testimonials, or behind-the-scenes videos.
- Sales Pitches: Record personalized video pitches for potential clients, making your sales approach more dynamic and memorable.
- Documentation and Record-Keeping:
- Meeting Records: Record important meetings or presentations for future reference, ensuring that nothing is missed and everyone can revisit the discussion if needed.
- Performance Reviews: Use recorded videos to review and assess employee performance over time, providing a visual record of progress and areas for improvement.
- Boosting Productivity:
- Quick Updates: Record and share quick updates or announcements without the need for lengthy emails or documents, saving time and increasing efficiency.
- Task Assignments: Assign tasks with clear video instructions, reducing ambiguity and ensuring that everyone understands their responsibilities.
- Building a Stronger Team Culture:
- Team Building Activities: Use videos to share team-building activities, celebrations, or personal milestones, fostering a sense of community and belonging among remote team members.
- Regular Check-ins: Conduct regular video check-ins with team members to maintain a personal connection and address any concerns promptly.
Integrating Zight’s webcam recording into your business processes can lead to more effective communication, better training, enhanced customer support, and a stronger team culture, ultimately driving productivity and success.
Frequently Asked Questions About Webcam Recording Software
a) What program can I use to record from my webcam?
You can use many webcam software to record free webcam footage. For instance, you rely on built-in webcam software like QuickTime Player or use third-party software like Zight to get more editing features to work with.
Zight allows you to record your free webcam in a few clicks, and you’ll enjoy the best video quality, not to mention annotating and adding effects to improve your communication.
b) How do I record my webcam on Windows 10?
You can use the Windows Camera app to record a webcam on Windows 10. It is free software you won’t need to install, and using it will also be a breeze. You can also use other webcam recorders compatible with Windows 10 PCs, including Zight, which you can access through an extension.
c) Can VLC record a webcam?
The VLC Media Player is also a free webcam recording software alternative. You can record a free webcam video in a few steps; VLC – Media – Open Capture Device – Spature Mode- Webcam – Play.
After the steps above, you can use the software’s basic editing skills before saving the file on your computer for later sharing.
d) How can I record webcam on Mac?
You can use Mac’s free webcam software, QuickTime Player. It comes preinstalled on your Mac device, and you’ll only need to open it to get started. Then, press the Command + Option + N shortcut to create a new movie recording window to get started.
e) How do I record video from my Mac screen and webcam?
Use can use the free webcam recording software to record your screen and webcam. Open the QuickTime Player application on your Mac, click “File,” and select “New Movie Recording” from the dropdown menu. Then, adjust the recording settings by clicking on the small arrow next to the record button, then click the red record button to start recording your webcam video along with the screen.
f) Is there an app to control Mac webcam?
Yes. While your Mac comes with the free webcam software called QuickTime Player, you’ll need another app to enhance the webcam recorder functionality on your device. An app like Zight will help you improve your Mac’s webcam software by allowing you more editing and sharing features. For instance, Zight will help you annotate your recordings, the trim or crop them to improve the native Mac webcam software.


