Lights, camera, action! Creating a captivating video involves more than just hitting the record button. Whether you’re an aspiring filmmaker or a content creator looking to up your game, understanding the factors that influence your video’s quality is key.
Did you know that even your video software’s default video settings and export options can impact the outcome? Every decision counts, big or small, and it’s time to take control of your video production journey.
This comprehensive guide unveils the secrets to making your videos shine. We’ve scrutinized the essential elements that shape your video’s visual appeal, audio clarity, and overall impact. From video resolution to formatting choices, we leave no stone unturned.
But don’t worry, we’ve made it easy to navigate through the wealth of information. This article is packed with valuable insights, so feel free to dive straight into the section that piques your interest the most. No need to scroll endlessly – find what you need and let the learning begin!
Are you ready to start recording videos and sharing them with your team, audience or friends? Explore Zight as the ready made solution for the best results!
Get ready to unlock the potential of your videos and discover the simple yet powerful ways to enhance video quality. It’s time to elevate your video production skills and leave a lasting impression on your audience. Lights, camera, let’s make magic happen!
1. Decide the Right Video Length
Image Credit: tekshapers.com
Here’s the looming question that almost always arises when enhancing video quality: how long should my video be?
Running long or not long enough can present the wrong message. People will lose interest if your video is too long because it goes on too long and becomes monotonous. However, if your video is too short, you risk shortchanging your message or objective because you don’t fully develop it before the video ends.
When deciding on a video duration, you’ll need to take into account the platform your video is being viewed on to know how to enhance video quality. Research shows that short-form videos tend to bring higher engagement and ROI than longer ones. Keeping your videos concise and to the point can maximize audience retention and ensure your content remains impactful.
a) Youtube Videos
There’s a science behind Youtube videos. The shorter, the better – research shows that 51% of people abandon online videos longer than three minutes. Your video shouldn’t run longer than the average YouTube video unless you are doing a deep dive into a technical subject or a step-by-step tutorial. Either way, cut to the chase and edit any filler time that doesn’t move the video forward.
b) Facebook and Twitter
On Facebook and Twitter, videos are set to autoplay in the news feed by default, so you should make the same considerations as you would for a video on Youtube. There are also other posts and media surrounding your video, so a video that is too long will get lost in more consumable content.
c) Blog posts and other Types of Content
For blog posts and other types of content, users must click ‘play’ or go into full-screen mode to watch the video. You will generally have a better video timeline than on YouTube or Facebook because your audience is already engaged in your content.
Try to keep your videos around two minutes in length max. A more general audience is going to feel overwhelmed by longer video content. A viewer should be able to sum up the takeaways from the video in one or two points.
2. Use Longer Videos When Appropriate
After being accustomed to short, flashy videos in recent years, you may not have considered situations where you should make longer videos.
a) Detailed Instructions
Engaged clients may require comprehensive step-by-step instructions. It may seem much more work to make detailed step-by-step instructions, but it doesn’t have to be with good screen recording software.
b) In-Depth Product Reviews
For potential buyers who already understand your product, longer videos providing in-depth reviews can be beneficial. If an enterprise customer already understands the nuanced differences between your product and your competitors, before they “jump on a call, “your sales team will thank you.
c) Mobile Viewing
More and more people are consuming video content via mobile devices. It seems counter-intuitive, but video engagement on a mobile device will be longer than on a more traditional device, like a desktop. Take advantage of this by offering more extensive content that can be consumed on the go or during downtime.
d) TV/Web Series
Think about it. You probably know someone who streams shows or movies over their phone for convenience. Online-only shows on platforms like YouTube or Facebook have gained popularity in recent years. With modern technology, content creators of all sizes can reach a broader audience with their web series.
e) Online Videos
Whether created with an Abode product with high-production value or with a screen recorder with a window-in-window webcam, online videos are more convenient than descriptions written out in long form.
- Tutorial videos and product reviews are videos that teach viewers about something. Because of this, the video content will naturally need to be longer and more in-depth to cover the subject and any crucial details effectively.
- TV/web series are becoming more common on streaming-only platforms. Many companies are debuting online-only shows on YouTube or Facebook, and technology today allows content creators of all sizes of fame and budget to gain viewership
- Live streaming videos are often recorded and reposted later for audiences who couldn’t watch the stream as it occurred. These videos will often be far longer as they are spontaneous and, while sometimes guided, will often go off on tangents or have unexpected interruptions.
3. Consider the File size or Digital Bit Rate
Image Credit: trekview.org
Another factor in producing a video you should at least be aware of is its digital bit rate (or resolution). The digital bit rate is the number of bits per second to transmit an image. Since almost all videos are in color, the bit rate determines how rich the color is.
Think of the bit rate like a car’s speed; the higher the number of bits per second (or resolution) used to represent each pixel in your picture on your screen, the “faster” the bits are traveling and the sharper and better looking your image will be.
A high digital bit rate creates larger files which aren’t ideal because larger files mean longer load times. Since Google’s new emphasis on website load times, video size can be the difference in where your website appears in the rankings. If you don’t want to shorten the length of your video, there are workarounds.
Larger files can be encoded using compression algorithms that shrink the file size of your video with no loss or little loss (“lossy”) in video quality. These algorithms are run by programs called “codecs.” Video codecs are responsible for encoding and decoding bit streams from point A to point B.
4. Enhance the Video Quality
Video quality greatly affects the perceived professionalism of your videos. Consider the following factors to enhance video quality:
a) Use a Video Enhancer Software
Consider utilizing a reliable video enhancer app to enhance the quality of your videos. A video enhancement software tool will offer advanced features to improve video resolution, enhance colors, reduce noise, and optimize overall visual clarity. Explore several of the best video quality enhancers to find the ones that work best for your needs to improve your video’s quality.
Luckily, if you are trying to cut your budget, you will find the best free video enhancer apps that can also help you enhance video quality. Some examples of the best free video enhancer software include iMovie, Clideo, and VideoProc.
Alternatively, you can opt for video quality enhancer software for more advanced video enhancement options. These software programs provide greater control over the enhancement process, allowing you to fine-tune various parameters such as resolution, bit rate, and compression settings.
b) Video resolution
Image Credit: humblebundle.com
Your video resolution is determined when you record your video. Most smartphones today can record video at a minimum of 720p resolution, and many top-of-the-line models can record in ultra-high definition 4K resolution. Higher-quality resolutions require more storage space because they have “faster” digital bit rates.
Opt for a resolution that balances video quality and file size. For example, Zight (formerly CloudApp) ‘s default mode sets records at a 720p resolution because it’s a good compromise between file size and video quality. Unless you have a high-resolution video display, you have a bigger file size with no upside in video quality.
Alternatively, if you wish to enhance the resolution of your recorded videos, consider using a video resolution enhancer app from Google Play Store or the App Store. These video resolution enhancer tools can help you upscale lower-resolution videos to improve their visual clarity and detail.
c) Video Margin
Image Credit: 144hzmonitors.com
The video margin is the total amount of available space on the edges of a video frame, measured inward from the edge of the viewable area. Ideally, your video was recorded using the same ratio or dimensions as your viewing screen. In that situation, you won’t have any video margins.
If the video frame is larger than the viewable area, like in a widescreen display, those extra pixels are wasted and are left black. For example, if you have a 16:9 display with a resolution of 1920×1080 and decide to view 720p content (1280×720) at that resolution, you’ll be left with a black border at the top and bottom edges of the screen.
This happens because the codec will have to resize the content from 1920×1080 to 1280×720, resulting in black bars around the edges of your display. After all, the codec has no other way to fill that space. However, if you view 720p content in full-screen mode, the codec will work backward to fill all the available space. This will result in a lower-quality image but without the wasted space.
Video margin vs low-resolution
Cropped videos are a tradeoff most people have experienced at some point. Using VLC Media Player as an example, your player may have the option to choose the aspect ratio (how the image fills the screen). This setting allows you to decide whether to play all videos 1:1 or scale them to match your computer’s aspect ratio. VLC’s default option is “Scale if offscreen.
This means that if VLC detects that there isn’t enough space to show your video without any margin, it will automatically scale down the video’s resolution until there is enough space for all its pixels. This means you will reduce your video’s quality.
c) Video sound quality
A loud, clean audio track will maximize visual clarity. Nothing is worse than poor sound quality at higher volume levels. If you want to add backing music to fill some of the sound space, you can find great, free, royalty-free music online.
At the time of video recording, ensure that background noise and echo noise (also known as reverb) is at a minimum. One way to do this is to use a directional microphone. Another option is clip-on microphones worn on the speaker’s shirt, dynamic microphones designed to pick up sound directly in front of the microphone, or narrating in a room using sound-dampening materials to deaden natural reverb.
d) File format
Did you know that file format places a role in video quality? Most video processing programs can finish and compress videos of your raw project files into several different formats. The four most popular video formats are AVI, MP4, VOB, and MOV. Here are some pros and cons of each video file format:
i) AVI
Pros
- Very easy to use, you have to drag the file over, and it’s done
- The most common video format used on DVD and Blu-ray discs.
- Widely supported by all modern operating systems and hardware, so you don’t have to worry about compatibility issues. You can play your movie on any PC/laptop/smartphone without any problems!
- Files can contain audio, video or both
- You can also choose between different color depths, such as 8 bits per channel (8bpc) or 16 bits per channel (16bpc)
Cons
- Loading speeds can be slow, especially on older computers or operating systems
- If you’re using Windows XP or Vista, some of your programs may be unable to access the video card (which VLC uses). So if you’re using an older version of Windows, I suggest BG you skip this format.
- Files can be larger, reducing loading speeds and impacting the quality in areas with slower internet connections
ii) VOB
Pros
- Surround audio SRT, SUB (.ssa/.ass) subtitle support
- Can play all DivX, XviD, and MPEG-1/2 video files.
- Can play all AVI, MPEG-1/2, DIVX, and WMV files
- Supports playback of DVD discs containing MP3 audio tracks.
- Supports playback of DVD discs containing MPEG-1 audio tracks.
- Supports playback of DVD discs containing WMA audio tracks.
- Can playback CD tracks in MP3 format.
Cons
- Image and audio quality are reduced compared to other formats
- Random glitch error alerts, often with no known cause
iii) MP4
Pros
- No audio limit
- No video pixelation black level problem (when black areas in the image show up as slightly different, pixelated shades)
Cons
- No subtitle support – This probably won’t be an issue with this file format unless you are creating marketing or instructional videos for an international audience.
- Instances of playback errors, though this may be more due to the playback software than the file format
iv) MOV
Pros
- Very fast, efficient file format
- High image quality
- It can be used to store videos of any length
- It supports the most formats
- Easy to use in different video processing programs, such as Photoshop, After Effects, etc.
- It has an excellent compression ratio (8:1)
Cons
- Only one MOV file can be created from a single source clip at a time.
- It doesn’t run on every version of QuickTime.
- Windows Media Player can play MOV files, but you need to download and install the 3ivx codec software
MP4 and WEBM are browser-compatible video formats. For home viewing recordings, a format with high-quality video with a good chance of being usable in the future is the best bet, such as AVI or VOB.
Open-source file formats are more future-proof than proprietary formats controlled by enterprises. For Windows applications, choose a format compatible with Windows; WMV is a good choice here, as it was developed specifically for Windows Media Player (WMV stands for Windows Media Video), and AVI music playback is supported.

5. Optimize Metadata
Metadata in the video can significantly affect how many people see a video you publish on the web; metadata can include terms relevant to search engines and determines how related your video is to a web search. Content discovery allows users to find what they are looking for on the website without finding the site itself first.
A few things to remember about optimizing metadata are:
a) Clear Titles, Subtitles, and Descriptions
Include descriptive and concise titles, subtitles, and file descriptions that accurately represent the content of your video. These elements should contain relevant keywords related to your video’s topic. However, avoid excessive keyword stuffing and limit the repetition of keywords within these fields to no more than three times.
b) Strategic Tagging for SEO
When producing a video, put some thought into the metadata (aka “tags”) to maximize SEO optimization of the video itself and improve website traffic. When selecting tags (metadata keywords) for your videos, consider your target audience’s specific needs, concerns, and problems to maximize SEO optimization of the video itself and improve website traffic. Choose tags that directly relate to your video content and resonate with your audience.
For instance, if your product focuses on relieving arthritis pain in hands, relevant tags could include “arthritis,” “arthritic hand pain,” or “arthritis pain relief.” By targeting these specific keywords, you can attract viewers actively searching for solutions related to their condition.
c) Engaging Thumbnails and Banner Images
Utilize strategically chosen thumbnails or banner images to increase click-through rates, particularly on platforms like YouTube. These visuals should be eye-catching and provide context about your video’s content.
A compelling thumbnail can pique viewers’ curiosity and encourage them to click and watch. Additionally, a visually appealing thumbnail displayed on YouTube’s search results page can create awareness and interest in your business or product, even for users who may not watch the video.
d) Hyperlink Integration with Plugins
Consider using plugins like FeverBee, which allow you to create hyperlinks within your videos. These hyperlinks can be easily embedded into other online properties, such as blogs and websites.
Incorporating hyperlinks provides a seamless navigation experience for viewers wanting to explore related content or return to your online properties after watching the video.
6. Choose the Right Equipment and Setup
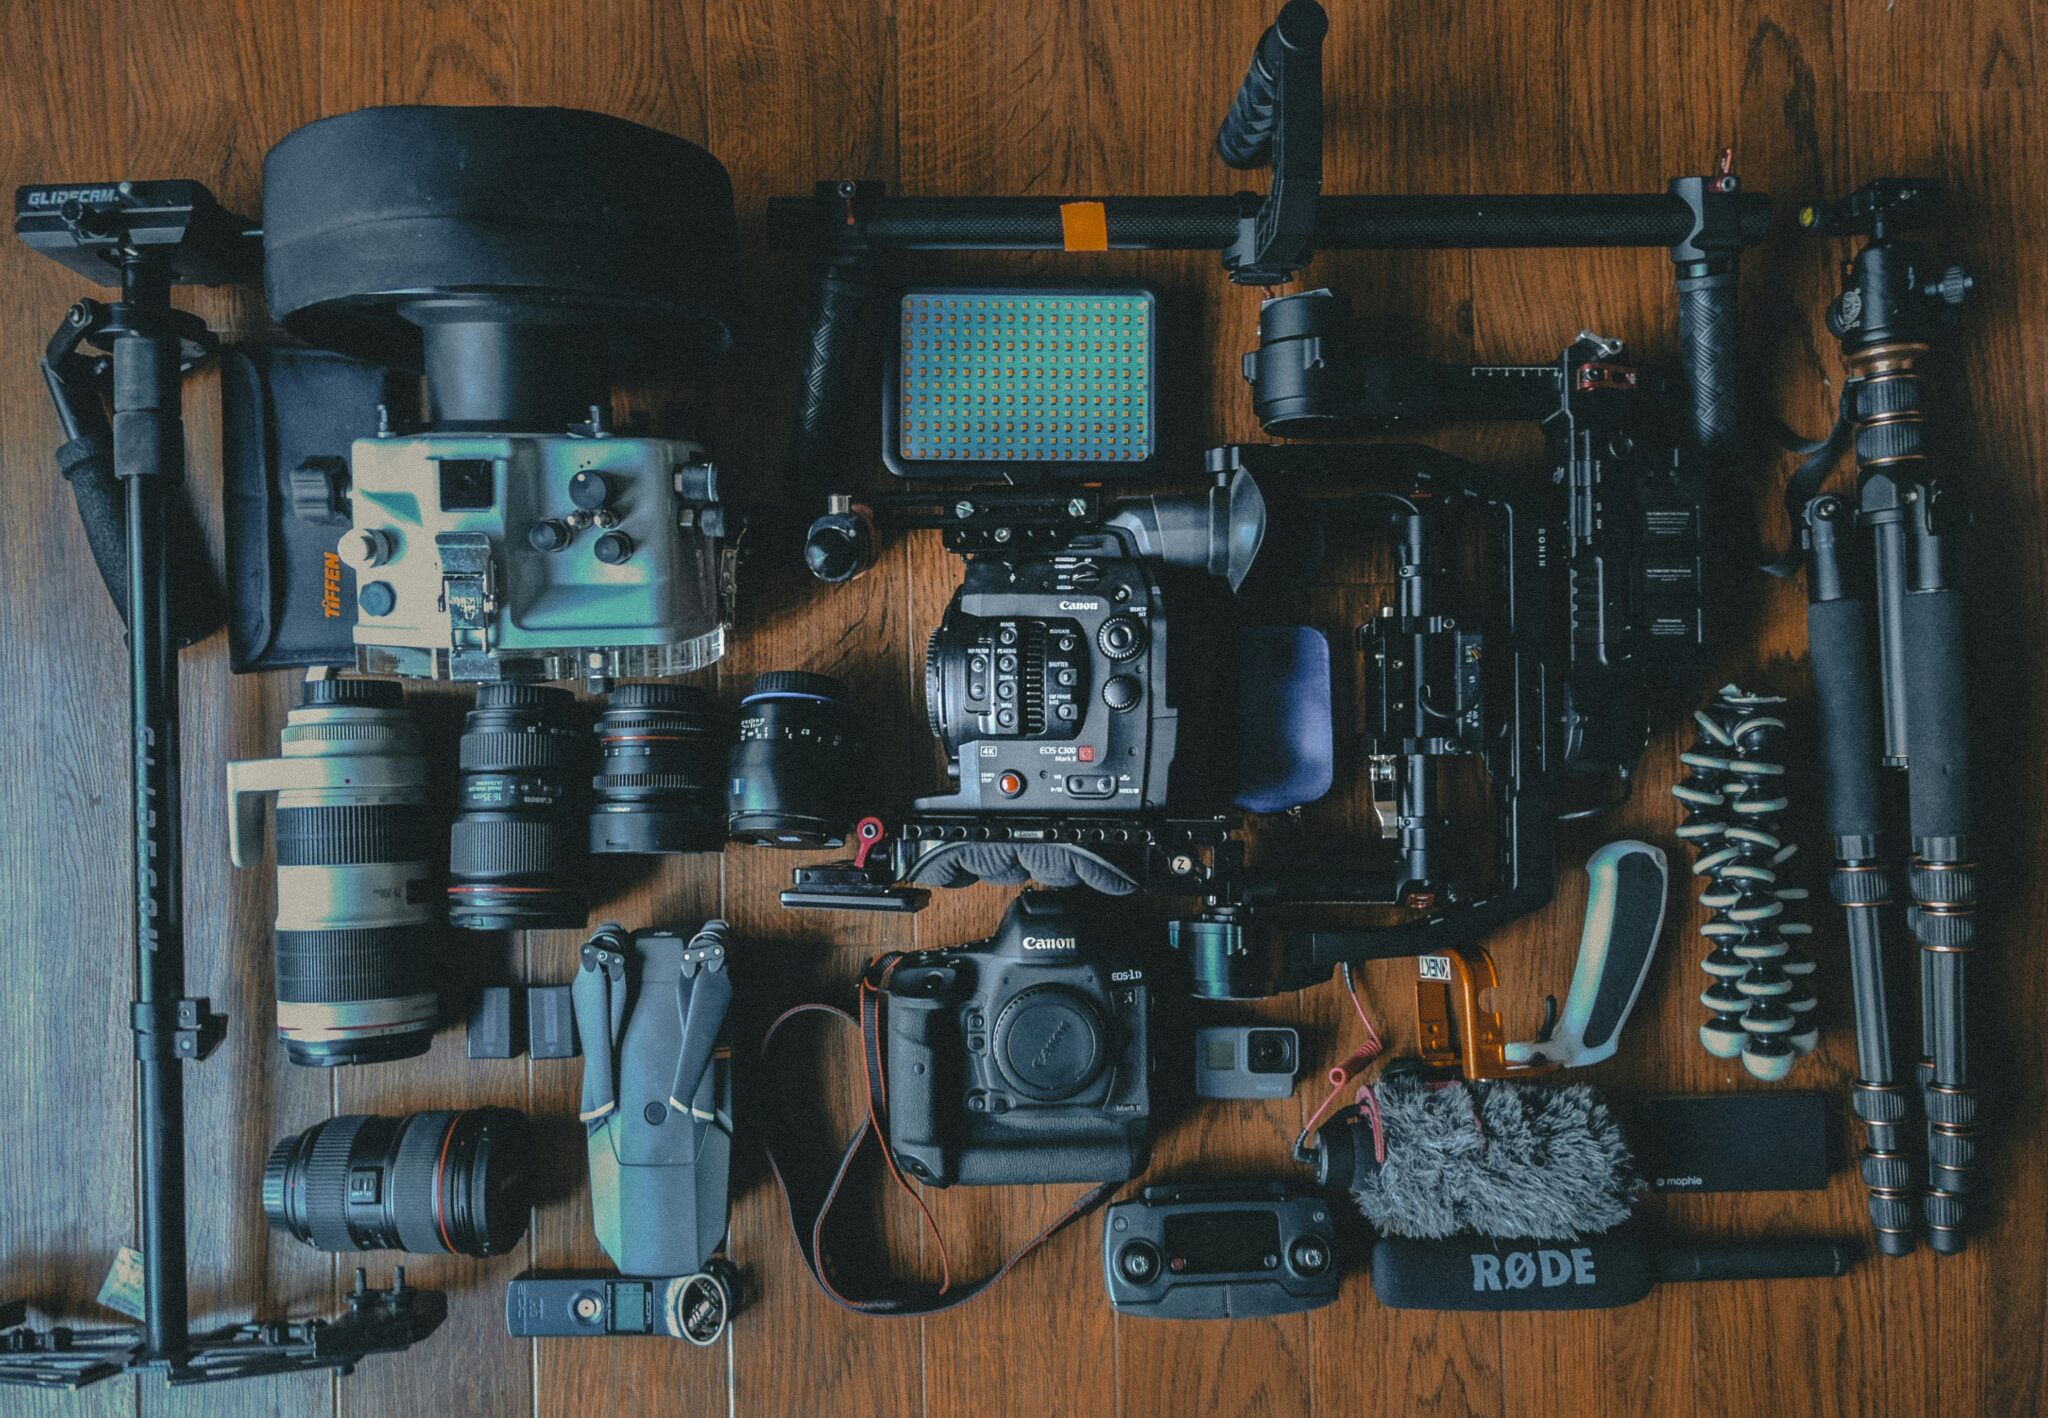
To capture visually stunning and high-quality videos, it’s crucial to invest in the right equipment and set up your filming environment correctly. The equipment that will help you improve video quality includes:
a) Camera
Investing in a good-quality camera is essential for capturing high-resolution videos. Look for cameras with high megapixels, adjustable video settings, and optical image stabilization. These features ensure that your videos are sharp, clear, and free from blurriness.
b) Lighting
Proper lighting is crucial for eliminating shadows and creating a well-lit scene. Whenever possible, utilize natural light as it provides soft and pleasing illumination. If natural light is insufficient, consider investing in affordable lighting equipment such as softboxes or LED panels. These tools allow you to achieve optimal lighting conditions, resulting in visually appealing videos.
c) Tripod or Stabilizer
To stabilize shaky videos and maintain a professional and polished look, it’s important to keep your camera steady and avoid shaky footage. A tripod or stabilizer helps achieve this by providing footage stability and eliminating unwanted camera movements.
d) Microphone
Audio quality is just as important as video quality. Using an external microphone significantly enhances the audio in your videos by reducing background noise and capturing clear and crisp sound. Lavalier or shotgun microphones are excellent options for achieving professional audio quality.
7. Use Proper Framing and Composition
a) Rule of Thirds
When framing your shots, employ the rule of thirds, which contributes to enhanced video quality. By dividing the frame into nine equal parts using two horizontal and two vertical lines, strategically position essential elements along these lines or at their intersections. This approach adds a sense of balance and intrigue to your shots, captivating the viewer’s attention.
b) Headroom and Lead Room
Maintaining appropriate headroom, which refers to the space above the subject’s head, and lead room, which allows freedom in front of a moving subject, is crucial for achieving a well-composed frame. These considerations play a significant role in balancing the visual elements and guiding the viewer’s gaze. Providing ample space within the frame ensures that important features or actions are properly highlighted.
c) Symmetry and Balance
Incorporating symmetry and balance in your composition contributes to a visually pleasing effect, improving video quality. Pay close attention to the arrangement of elements within the frame and strive for a composition that exhibits visual harmony. This deliberate approach produces video that captivates the viewer’s interest and creates a more engaging visual experience.
8. Edit and Enhance Your Videos
To improve video quality and make your videos visually captivating, you can follow these key steps:
a) Use a Video Editing Software
Utilize professional video editing software like Adobe Premiere Pro, Final Cut Pro, or DaVinci Resolve to refine your footage and add a polished touch to your videos. These video quality enhancers offer advanced features and capabilities for enhancing video quality, applying transitions, and incorporating visual effects. They provide various options to improve your videos’ quality and visual appeal.
Adjust the default video quality settings in your video editing app or camera settings to ensure your videos are captured or exported at the highest quality possible. This can help maintain the integrity of your footage and reduce the need for extensive post-processing.
b) Color Correction and Grading
Adjusting the color balance, contrast, and saturation can significantly enhance the overall visual quality of your videos. Through color correction techniques, you can ensure consistency throughout your footage, resulting in a cohesive and visually pleasing video. Additionally, grading techniques allow you to create a specific mood or style that aligns with your video’s narrative, enhancing its impact.
c) Graphics and Effects
Incorporating relevant graphics, text overlays, and effects can elevate the storytelling and engage your audience. Adding visually appealing elements can emphasize key points, provide context, and create a dynamic visual experience. However, using these elements sparingly and purposefully is important to avoid overwhelming the video and distracting viewers from the main content.

9. Gather Feedback
Incorporating constructive feedback and aligning your content with audience preferences allows you to create compelling and impactful videos that captivate and resonate with your viewers. By gathering feedback through peer review and audience interaction, you can continuously leverage external perspectives and insights to improve your videos’ quality.
a) Peer Review
Engage in a peer review by sharing your videos with trusted individuals or fellow creators. Seek their feedback and constructive criticism on various aspects, including pacing, content delivery, and technical issues. Considering their suggestions, you can make necessary improvements and refine your videos to enhance their quality.
b) Audience Feedback
Actively encourage your viewers to share their feedback through comments, likes, or surveys. Analyze their responses to gain valuable insights into their preferences and opinions. By understanding what resonates with your audience and identifying areas for improvement, you can tailor your future videos to meet their expectations better, resulting in higher video quality and increased viewer satisfaction.
10. Continuously Learn and Improve
Finally, to maintain a high video quality standard, staying informed about the latest techniques, tools, and trends in video production is essential. It’s important to analyze performance metrics and remain updated to refine your skills and stay ahead of the competition.
a) Analyze Performance Metrics
Gain valuable insights into the quality of your videos by monitoring performance metrics such as audience engagement, watch time, and viewer retention. By analyzing these metrics, you can understand your audience’s preferences, identify areas for improvement, and optimize future videos to better align with your viewers’ interests.
b) Stay Updated with New Techniques and Trends
To enhance the quality of your videos, it’s crucial to stay informed about the latest techniques, tools, and trends in video production. By keeping up with industry advancements, you can refine your skills, explore innovative approaches, and adapt to changes in the video production landscape. Continuous learning and staying updated enable you to deliver high-quality videos that captivate your audience.
6 Bonus Ways to Improve Your Video Quality.
Bonus 1: Optimize Your Lighting –
Setup Good lighting is crucial for producing high-quality videos. Here are some tips to optimize your lighting setup:
a) Natural Light – Whenever possible, use natural light to your advantage. Position your subject near a window to use soft, diffused daylight. The best times for natural light are during the “golden hours,” shortly after sunrise and before sunset when the light is soft and warm.
b) Three-Point Lighting – A three-point lighting setup is a standard technique to ensure your subject is well-lit and visually appealing. It consists of a key light (the primary light source), a fill light (to soften shadows created by the key light), and a backlight (to separate the subject from the background and add depth).
c) Softbox Lighting – Invest in softbox lights to provide soft, even lighting that reduces harsh shadows and creates a more professional look. Softboxes diffuse light, making it softer and more flattering for your subjects.
d) Ring Lights – Ring lights are excellent for close-up shots and vlogs. They provide even lighting and reduce shadows, making your subject’s face look bright and clear. Ring lights are particularly popular for beauty and tutorial videos.
e) Reflectors – Use reflectors to bounce light onto your subject and fill in shadows. Reflectors are affordable and versatile tools that can significantly improve your lighting setup. They come in various colors (white, silver, gold) to achieve different lighting effects.
Bonus 2: Improve Audio Quality
High-quality audio is essential for keeping your audience engaged. Poor audio can distract viewers and diminish the overall quality of your video.
a) Use External Microphones – Built-in camera or smartphone microphones often produce subpar audio. Invest in external microphones, such as lavalier mics for interviews, shotgun mics for directional sound, or condenser mics for studio recordings.
b) Monitor Audio Levels – Regularly monitor your audio levels to ensure they are not too high (causing distortion) or too low (resulting in inaudible audio). Use headphones to listen to the audio while recording and make adjustments as needed.
c) Minimize Background Noise – Choose a quiet recording environment to minimize background noise. If you’re filming outdoors, be mindful of wind noise and consider using a windscreen on your microphone. Indoors, turn off noisy appliances and close windows to reduce ambient sounds.
d) Use Audio Editing Software – Post-production audio editing can enhance your sound quality. Use software like Audacity, Adobe Audition, or GarageBand to remove background noise, equalize audio levels, and add effects such as reverb or echo.
e) Acoustic Treatment – For indoor recordings, consider acoustic treatment to reduce echo and improve sound quality. Use sound-absorbing materials like foam panels, carpets, and curtains to minimize reflections and create a more controlled audio environment.
Bonus 3: Leverage Professional Editing Techniques – Editing can transform raw footage into a polished and engaging video. Employ professional editing techniques to enhance your video quality.
a) Cut Unnecessary Footage Trim – any unnecessary or repetitive footage to keep your video concise and engaging. Aim for a smooth flow that maintains the viewer’s interest throughout the video.
b) Use Transitions and Effects Incorporate – transitions and effects sparingly to enhance your video’s visual appeal. Simple transitions like cuts, fades, and dissolves can help maintain a seamless flow between scenes. Avoid overusing flashy effects, as they can be distracting.
c) Add B-Roll Footage B-roll – footage adds variety and visual interest to your video. Use B-roll to illustrate points, provide context, and break up long talking-head shots. B-roll can include relevant images, secondary footage, or cutaways.
d) Sync Audio and Video Ensure – your audio and video are perfectly synchronized. Misaligned audio can be jarring and detract from the viewing experience. Use your editing software to sync dialogue, sound effects, and music with the corresponding video frames.
e) Color Grading Color – grading can enhance the mood and aesthetic of your video. Adjust the colors, contrast, and brightness to create a consistent look throughout your footage. Professional editing software like DaVinci Resolve offers advanced color grading tools.
Bonus 4: Enhance Video Stability
Stable footage is essential for maintaining a professional look. Shaky videos can be distracting and reduce the overall quality of your content.
a) Use a Tripod – A tripod provides a stable base for your camera, eliminating shakes and movements. Tripods are essential for static shots, interviews, and time-lapses.
b) Employ a Gimbal – A gimbal stabilizer helps achieve smooth, cinematic shots while moving. Gimbals are ideal for action shots, vlogs, and any situation where the camera needs to move with the subject.
c) Post-Production Stabilization – If your footage is shaky, use post-production stabilization tools available in editing software like Adobe Premiere Pro, Final Cut Pro, or iMovie. These tools can reduce camera shake and create smoother video.
d) Handheld Shooting Techniques – If you must shoot handheld, use techniques to minimize shake. Keep your elbows close to your body, use a wide stance, and move slowly and steadily. Consider using a shoulder rig for added stability.
e) Image Stabilization – Many modern cameras and lenses feature built-in image stabilization (IS). Enable IS to reduce camera shake and produce smoother footage, especially in handheld or low-light situations.
Bonus 5: Master Camera Settings
Understanding and utilizing your camera settings can significantly impact your video quality.
a) Manual Mode – Use manual mode to have full control over your camera settings. Adjusting settings like aperture, shutter speed, and ISO manually can help you achieve the desired exposure and depth of field.
b) White Balance Set – the correct white balance to ensure accurate color representation in your footage. Different lighting conditions (e.g., daylight, tungsten, fluorescent) require different white balance settings. Most cameras have presets and custom white balance options.
c) Frame Rate – Choose the appropriate frame rate for your video. Common frame rates include 24fps (cinematic look), 30fps (standard video), and 60fps (smooth motion). Higher frame rates can be used for slow-motion effects.
d) Focus – Ensure your subject is in sharp focus. Use autofocus for dynamic scenes and manual focus for controlled shots. Many cameras have focus peaking features to assist with manual focusing.
e) Exposure – Proper exposure is crucial for clear and detailed footage. Avoid overexposed or underexposed shots by adjusting your camera’s aperture, shutter speed, and ISO. Use the camera’s histogram to monitor exposure levels.
Bonus 6: Consistent Branding and Style
Maintaining a consistent branding and style helps create a professional and cohesive look for your videos.
a) Branding Elements – Incorporate your brand’s logo, colors, and fonts consistently across all your videos. Use lower-thirds, intros, and outros to reinforce your branding and provide a polished look.
b) Visual Style – Develop a visual style that reflects your brand’s identity. This includes color grading, composition, and overall aesthetic. Consistency in visual style helps build brand recognition and makes your content instantly recognizable.
c) Audio Branding – Use consistent audio elements such as theme music, sound effects, and voiceover style. Audio branding reinforces your visual identity and enhances the viewer’s overall experience.
d) Templates and Presets – Create templates and presets for recurring elements like titles, transitions, and color grading. This saves time and ensures consistency across all your videos.
e) Content Strategy – Develop a content strategy that aligns with your brand’s goals and audience preferences. Consistent content themes, formats, and messaging help establish a strong brand presence and keep your audience engaged.
By implementing these additional techniques, you can further enhance your video quality and create professional, engaging, and visually appealing content that captivates your audience.
What are the Best Practices on How to Make Video Quality Better?
Following the best practices can elevate the quality of your videos, engage your audience, and deliver a compelling visual experience. So in review, here are some takeaways to consider the next time you make a video:
Do:
- Choose an appropriate length for the objective of your video template
- Pick a resolution that fits the platform/device on which your video will be viewed
- Optimize your video and audio quality so that neither is a distraction to the viewer
- Use a file format that best suits your video and how it will be played
- Utilize your metadata in a way that draws in potential viewers
Don’t:
- Focus on one aspect of your video to the detriment of others
- Forget to include metadata in your video
- Over-utilize graphics effects. Some effects can enhance transitions or points; too many or abuse of them are distracting and more likely to drive viewers away
- Focus too much on any one aspect (image quality, audio quality, etc.) and sacrifice the others. A good video incorporates all elements.
Create your Zight account for free today!
Frequently Asked Questions on How to Make Video Quality Better
1. How can I increase the quality of a video?
There are several ways to increase or improve the quality of a video:
- Record in a higher resolution: Use a camera or smartphone that supports higher resolution settings to capture more detail and improve overall sharpness.
- Optimize lighting conditions: Shoot in well-lit environments to avoid grainy or dark footage. Natural lighting or additional lighting equipment can significantly enhance the quality of your video.
- Stabilize your shots: Use a tripod or other stabilization equipment to minimize shaky footage and improve the overall stability of your video.
- Adjust camera settings: Optimize exposure, white balance, and focus settings to ensure accurate colors, brightness, and sharpness.
- Use high-quality video editing software: During the editing process, you can further enhance your video’s quality by adjusting brightness, contrast, saturation and applying filters or color grading techniques.
2. Is there an app to make video quality better?
Yes, there are several apps available that can enhance video quality. A video quality enhancer app is designed to improve your videos’ resolution, visual clarity, and overall quality. These apps utilize advanced algorithms and techniques to optimize video resolution and enhance details, colors, and sharpness. You can find video enhancer apps both for mobile devices and desktop platforms.
Some popular options include video resolution enhancer apps, video quality enhancer software, and video enhancer apps on platforms like the Google Play Store. These apps offer various features and customization options to help you enhance your videos with just a few clicks.
Some popular video quality enhancer apps include PowerDirector, FilmoraGo, and VivaVideo. These apps offer features to adjust various settings, apply filters, stabilize footage, and enhance the overall look of your video clip.
3. Can we convert low-quality video to high-quality?
While converting low-quality video into high-quality footage with perfect clarity is impossible, you can use free video and editing software or apps to upscale videos and enhance their visual appearance.
Adjusting settings such as sharpness, contrast, and color correction can enhance video quality and make it appear better. However, the improvement will be limited by the video’s original quality.
4. How do you fix blurry video quality?
Blurry videos are low-quality videos that can be improved through various techniques:
- Use video stabilization: Video editing software or video quality enhancer apps often have features to stabilize shaky footage and reduce blurriness caused by camera movement.
- Apply sharpening filters: Some video editing tools offer sharpening filters or effects to enhance the clarity of the footage.
- Adjust focus and sharpness: If your camera or editing software allows, refine the focus and sharpness settings to enhance the overall sharpness of the video.
- Use high-quality footage: Sometimes, the blurriness may result from low-resolution or heavily compressed video. Starting with high-quality footage will help minimize blurriness.
5. What causes bad video quality?
Several factors can cause bad video quality:
- Low resolution: Recording or working with low-resolution videos can result in poor image quality and lack of detail.
- Compression artifacts: Highly compressed videos can exhibit blocky or blurry artifacts, reducing overall quality.
- Poor lighting conditions: Insufficient or uneven lighting can result in underexposed or noisy footage.
- Shaky footage: Camera shakes or unstable hands during recording can lead to blurry or jittery videos.
- Incorrect camera settings: Incorrect exposure, white balance, or focus settings can negatively impact video quality.
- Inadequate encoding or exporting settings: Improper settings during the encoding or exporting process can degrade video quality.


