How to Record a Voiceover: The Complete Guide for Screen Recordings, Tutorials, and Presentations
If you’ve ever tried to explain a bug, walk a client through a dashboard, or record a training video, you already know: a silent screen recording only gets you halfway there. Learning how to record a voiceover that’s clear, well-timed, and easy to share is the missing piece that turns a mediocre walkthrough into something people actually watch and understand. Whether you’re a content creator polishing a YouTube tutorial, an educator building asynchronous course material, or a product manager documenting a new feature for your team, voiceover narration is what makes your recordings feel human.
⚡ Quick Answer: How to Record a Voiceover
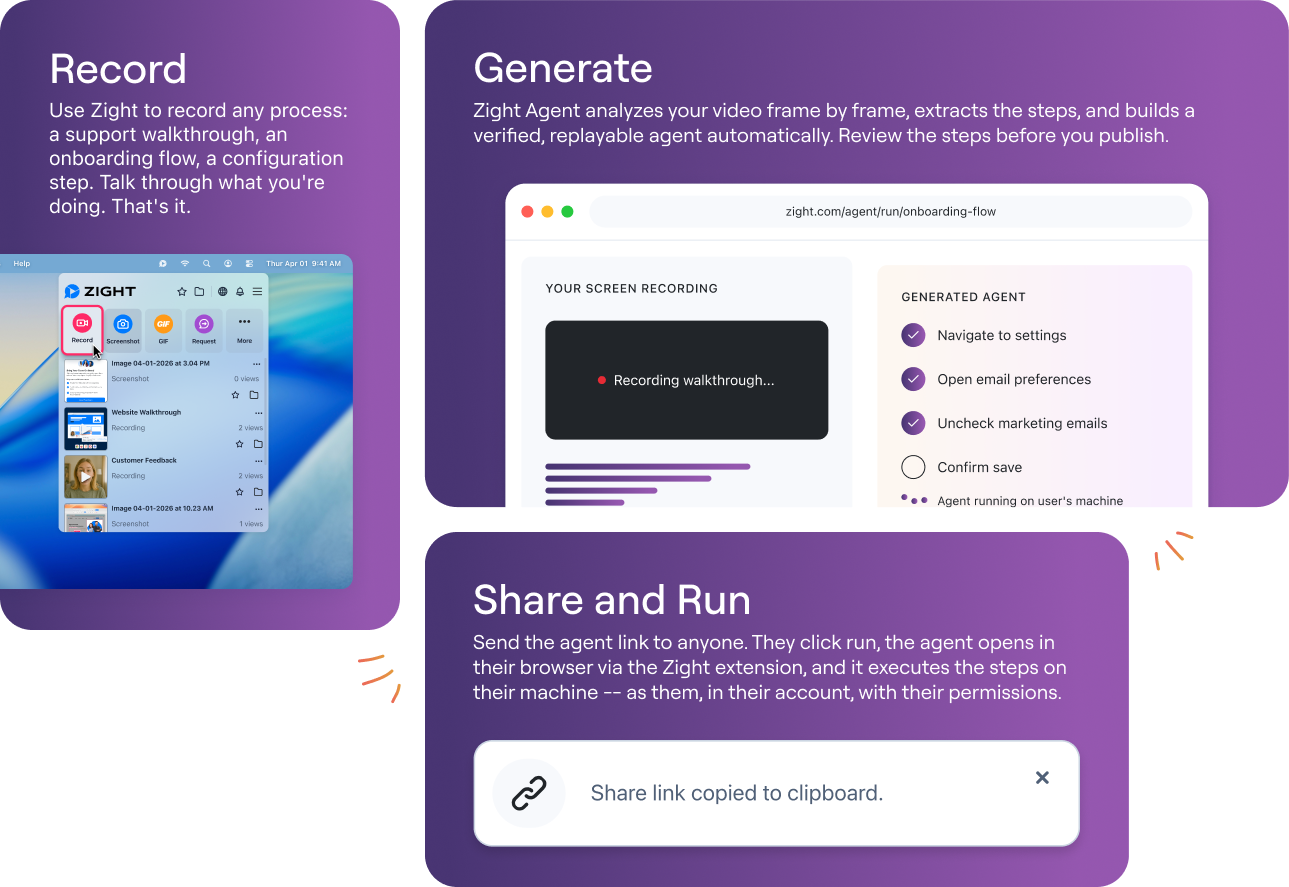
To record a voiceover, you need a microphone (even a built-in one works), a quiet space, and a recording tool that captures both your screen and your audio simultaneously. Zight is a screen recording and async video tool that lets you record your screen, webcam, and microphone audio in one click — then instantly generates a shareable link. Open Zight, select your mic source, choose “Screen + Audio” (or add your webcam), hit record, narrate as you go, and share the link with your team in seconds. No rendering, no uploading to a file host, no waiting.
In this guide, I’ll walk you through every step of the process — from setting up your mic to recording narration over video to sharing your finished voiceover recording — based on the workflow I’ve refined after recording hundreds of walkthroughs, product demos, and training videos with Zight. This isn’t theory; these are the exact steps that work.
Why You Need a Voiceover for Your Screen Recordings
Before we get tactical, let’s address the “why” — because understanding the purpose shapes every decision you’ll make during recording.
A silent screen recording forces the viewer to interpret what they’re seeing. They have to guess why you clicked that button, what that error message means, or which field matters. Adding a voiceover eliminates guesswork. In practice, I’ve found that narrated recordings get watched to completion 3–4× more often than silent ones in internal team contexts. External-facing tutorials with voiceovers consistently outperform text-only documentation for user activation.
Here’s who benefits most from voiceover recordings:
- Product teams — Record feature walkthroughs, bug reports with narrated reproduction steps, and async standups
- Educators and course creators — Build lecture recordings, assignment guides, and feedback videos
- Customer success teams — Answer support tickets with a personalized screen recording instead of a 10-paragraph email
- Content creators — Produce polished YouTube tutorials, software reviews, and how-to content
- Remote workers — Replace meetings that should have been a video with actual videos
What You Need Before You Record a Voiceover
You don’t need a professional studio, but a few minutes of prep make a massive difference in audio quality. Here’s the minimum viable setup:
1. Choose Your Microphone
Your mic is the single biggest factor in voiceover quality. Here’s a quick comparison of common options:
| Mic Type | Quality | Cost | Best For |
|---|---|---|---|
| Built-in laptop mic | Passable (expect room echo) | $0 | Quick internal recordings, bug reports |
| Wired earbuds / AirPods | Good — closer to mouth, less room noise | $20–$50 | Everyday async videos, team walkthroughs |
| USB condenser mic (e.g., Blue Yeti, Audio-Technica AT2020) | Excellent | $50–$150 | Tutorials, course content, external-facing videos |
| Lavalier / lapel mic | Very good — consistent distance | $20–$80 | Webcam recordings, talking-head content |
Pro tip: If you’re using a USB condenser mic, position it 6–8 inches from your mouth and slightly off-axis (angled, not pointed directly at your lips). This reduces plosive “p” and “b” sounds without needing a pop filter. I learned this the hard way after re-recording an entire 20-minute tutorial because every “p” sounded like a small explosion.
2. Prep Your Environment
- Close unnecessary apps — Slack notifications mid-recording are the enemy. On Mac, enable Focus Mode; on Windows, use Focus Assist.
- Reduce background noise — Close windows, turn off fans if possible, and if you have a hard-floor room, a carpet or blanket draped nearby absorbs echo surprisingly well.
- Prep your screen — Open only the tabs and apps you’ll reference. Hide bookmarks bars and desktop clutter. Your viewer shouldn’t be reading your browser bookmarks while you narrate.
- Write a loose outline — Not a word-for-word script (that sounds robotic), but 3–5 bullet points of what you’ll cover. Tape them next to your screen or keep them in a side window.
3. Choose a Voiceover Screen Recording Tool
This is where tool choice matters. You need something that records your screen and microphone audio simultaneously — and ideally lets you add your webcam too, so viewers can see your face when context helps.
macOS has a built-in screen recorder (⌘+Shift+5), but it’s limited: no annotations, no webcam overlay, no instant sharing link, and the editing tools are essentially non-existent. Windows has Xbox Game Bar, which is primarily designed for gaming and lacks microphone source selection in many scenarios.
Zight is a screen recording, screenshot, and async video tool designed specifically for this workflow. It captures your screen, system audio, microphone, and webcam simultaneously — then instantly generates a shareable link the moment you stop recording. No exporting to a file, no uploading to Google Drive, no waiting for a render. It’s available on Mac, Windows, and Chrome, and in my testing, it’s the fastest path from “I need to explain this” to “here’s the link.”
How to Record a Voiceover with Zight: Step-by-Step
Here’s the exact workflow I use. The whole process takes under two minutes for a typical walkthrough, and most of that time is the actual recording.
Step 1: Install Zight and Select Your Recording Mode
Download Zight from zight.com/screen-recorder and install the desktop app (Mac or Windows) or the Chrome extension. Once installed, you’ll see the Zight icon in your menu bar (Mac) or system tray (Windows).
Click the Zight icon and select “Record Screen”. You’ll see options to record:
- Screen Only — Your display with audio
- Screen + Webcam — Your screen with a webcam bubble overlay (great for tutorials and demos)
- Webcam Only — Just your face (useful for personalized messages)
For a voiceover recording, choose Screen Only or Screen + Webcam depending on whether you want your face visible. If you’re creating a product walkthrough or tutorial, Screen + Webcam is highly effective — viewers retain more when they can see the narrator. Zight’s webcam recorder adds a movable, resizable bubble that stays out of the way of your main content.
Step 2: Configure Your Microphone and Audio Sources
Before hitting record, click the microphone dropdown in the Zight recording toolbar. You’ll see every available audio input device — your built-in mic, any connected USB mic, Bluetooth audio, etc.
Select the mic you want to use for your voiceover. If you’re using an external USB mic, make sure it’s selected here — Zight defaults to your system’s default input, which might be your laptop’s built-in mic even if you’ve plugged in something better.
You also have the option to record system audio (the sounds playing on your computer). This is useful if you’re narrating over a video that has its own audio, or if you’re demonstrating an app that has sound effects or music. Toggle system audio on or off depending on your needs.
Pro tip: Do a 5-second test recording before your actual take. Record yourself saying a sentence at your normal speaking volume, play it back, and check two things: (1) Is it the right mic? (2) Is the volume clear without peaking? This single habit has saved me from discovering audio issues 15 minutes into a recording.
Step 3: Select Your Recording Area
Zight lets you record your full screen, a specific application window, or a custom-selected region. For voiceover recordings:
- Full screen — Best for software demos where you’ll switch between apps
- Specific window — Ideal for focused tutorials on a single app (keeps your desktop private)
- Custom region — Perfect for recording just a portion of a dashboard, a specific browser tab, or a design file
If you’re recording a voiceover on Mac, Zight handles the macOS screen recording permission prompt automatically during first setup. On macOS 14 Sonoma and later, you’ll need to grant Screen Recording permission in System Settings → Privacy & Security — Zight will walk you through this if it hasn’t been granted yet.
Step 4: Record Your Voiceover Narration
Hit the Record button (or use the keyboard shortcut — on Mac it’s ⌘+Shift+6 by default). You’ll get a 3-second countdown, then recording begins.
Now, narrate. Here are the techniques I’ve found work best after recording hundreds of voiceovers:
- Narrate your actions, don’t just perform them. Instead of silently clicking through a menu, say “I’m going to click Settings, then navigate to the Integrations tab.” The viewer’s eyes might not be where your cursor is.
- Pause before and after key moments. Give the viewer a beat to process before you move on. A half-second pause after “And that’s where you’ll paste the API key” lets the information land.
- Speak slightly slower than you think you need to. Everyone speeds up when they’re recording. Your “slightly slow” will sound like a natural pace to the listener.
- Don’t restart for small mistakes. A quick “Sorry, let me rephrase that” sounds natural and human. You can always trim it later with Zight’s video editing tools.
- Use annotations while recording. Zight lets you draw on screen, add arrows, and highlight areas during recording. This is particularly powerful for voiceovers — say “notice this field right here” while circling it with your cursor or an annotation.
Pro tip: If you’re recording narration over video — for example, narrating over a pre-existing screen recording or a product demo someone else made — you can play the source video on your screen, record your screen with Zight, and narrate over it live. This is the simplest way to add voiceover to existing video content without needing a separate audio editor.
Step 5: Stop Recording and Quick-Edit
When you’re done, click the Stop button in the Zight toolbar or press your keyboard shortcut again. Zight immediately processes your recording and opens the editing view.
Here’s where Zight saves you serious time compared to traditional workflows. Instead of exporting a raw file and importing it into a video editor, you can:
- Trim the beginning and end — Cut those awkward first seconds where you were reaching for the record button, and the last few seconds after you finished speaking.
- Cut out sections — Remove any mistakes, long pauses, or tangents from the middle of your recording.
- Add a title card or call-to-action — Useful for external-facing content.
To be transparent: Zight’s video editor is designed for fast, lightweight edits — trimming, cutting, and basic adjustments. It’s not a replacement for Adobe Premiere or DaVinci Resolve if you need multi-track audio mixing, color grading, or complex transitions. But for 90% of voiceover recordings (team walkthroughs, async updates, support videos, training content), you’ll never need more than what Zight offers. And the speed advantage is enormous — you go from “done recording” to “link copied” in under 30 seconds.
Step 6: Share Your Voiceover Recording Instantly
This is the step where Zight’s workflow advantage is most dramatic. The moment you finish recording (or finish your quick edit), Zight generates a shareable link and copies it to your clipboard automatically.
Paste the link into Slack, email, Notion, Jira, a support ticket — anywhere you communicate. Your recipient clicks the link and watches instantly in their browser. No downloads, no file attachments hitting email size limits, no “can you upload that to Google Drive so I can watch it?”
You can also:
- Password-protect the link for sensitive content
- Set an expiration date so the recording auto-deletes after a set period
- Download the MP4 file if you need the raw video for further editing or uploading to YouTube
- Embed the recording directly in a website, wiki, or knowledge base
- Track views — Zight shows you who watched your recording and how far they got, which is invaluable for training content and sales follow-ups
How to Record a Voiceover on Mac vs. Windows: Platform-Specific Tips
Zight works on both platforms, but there are a few platform-specific details worth knowing — especially if you want to record voiceover on Mac:
Record Voiceover on Mac
- System audio capture — macOS doesn’t natively allow apps to capture system audio without a driver. Zight handles this automatically with its own audio driver, so you don’t need to install a separate tool like Soundflower or BlackHole (a common gotcha with other screen recorders on Mac).
- macOS permissions — You’ll need to grant Zight access to Screen Recording, Microphone, and Camera (if using webcam) in System Settings → Privacy & Security. macOS 15 Sequoia added even stricter prompts, so approve these upfront.
- Touch Bar Macs — Zight adds recording controls to the Touch Bar on older MacBook Pro models, which is a nice shortcut for starting/stopping recordings.
- Apple Silicon performance — On M1/M2/M3 Macs, Zight uses hardware-accelerated encoding, so recordings are processed almost instantly with minimal CPU impact. I’ve recorded 30+ minute sessions on an M2 MacBook Air without any fan noise or slowdown.
Record Voiceover on Windows
- System audio — Windows makes system audio capture straightforward, and Zight leverages this natively. No extra drivers needed.
- Multiple monitors — If you have a multi-monitor setup, Zight lets you select which screen to record or record across all of them. Keep your notes on the secondary screen, record the primary.
- Windows 11 audio routing — Windows 11 added per-app audio routing. If your mic isn’t being detected in Zight, check Settings → System → Sound → Input and make sure Zight has the correct device assigned.
Voiceover Screen Recording Tool Comparison: Zight vs. Built-In Options vs. Competitors
You have options when choosing a voiceover screen recording tool. Here’s an honest comparison based on my testing:
| Feature | Zight | macOS Built-In (⌘+Shift+5) | Windows Game Bar | Loom | Camtasia |
|---|---|---|---|---|---|
| Screen + mic recording | ✅ | ✅ | ✅ (limited mic selection) | ✅ | ✅ |
| Webcam overlay | ✅ (resizable bubble) | ❌ | ❌ | ✅ | ✅ (post-production) |
| System audio capture | ✅ (built-in driver on Mac) | ❌ (requires 3rd-party driver) | ✅ | ✅ | ✅ |
| Instant shareable link | ✅ (auto-copied to clipboard) | ❌ (saves local file) | ❌ (saves local file) | ✅ | ❌ (must export and upload) |
| In-app trimming/editing | ✅ | ❌ | ❌ | ✅ (basic) | ✅ (advanced) |
| On-screen annotations | ✅ (during recording) | ❌ | ❌ | ✅ (drawing only) | ✅ (post-production) |
| View tracking | ✅ | ❌ | ❌ | ✅ | ❌ |
| GIF + screenshot combo | ✅ | Screenshot only | ❌ | ❌ | ❌ |
| Pricing | Free tier + paid plans | Free | Free | Free tier + paid plans | $179.88/yr |
Where competitors have an edge: If you need multi-track timeline editing with advanced audio controls (noise reduction, equalization, separate audio tracks), Camtasia is genuinely more powerful — it’s a full video editor, not just a recorder. For pure recording-and-sharing workflows, though, Camtasia’s extra complexity and higher price ($179.88/year) are overkill. Loom is the closest direct competitor to Zight for async video, but Zight’s combo of screen recording, screenshots, GIFs, and annotations in a single tool gives it a broader utility for daily team communication.
7 Tips to Record Better Voiceovers Every Time
After years of recording voiceovers for product demos, support responses, and training content, these are the techniques that made the biggest difference:
- Warm up your voice. Seriously. Read a paragraph out loud before hitting record. Your first take will sound stiff; your second will be noticeably better. This takes 30 seconds and the difference is immediate.
- Smile while you talk. It sounds silly, but smiling changes the shape of your vocal tract and makes you sound warmer and more approachable. Listeners can hear the difference even without video.
- Use the “one viewer” technique. Imagine you’re explaining this to one specific person — a teammate, a student, a customer. This prevents the robotic “presenting to an audience” tone that kills engagement.
- Keep recordings under 5 minutes. Attention drops sharply after 5 minutes in async video. If your walkthrough is longer, break it into multiple recordings. We’ve seen teams at Zight use this approach to build entire onboarding libraries with 2–3 minute clips organized by topic.
- Hydrate. Dry mouth creates distracting mouth clicks in audio. Keep water nearby and take a sip if you notice it. This is a tip from voiceover professionals that applies directly to screen recordings.
- Record in a consistent location. Your brain associates specific environments with specific modes. If you always record voiceovers at the same desk, you’ll get into “recording mode” faster.
- Use Zight’s trim feature aggressively. Don’t agonize over getting a perfect take. Record naturally, then cut the first 3 seconds and last 3 seconds (they’re almost always unnecessary). This alone makes recordings feel 50% more polished.
Common Voiceover Recording Problems (and How to Fix Them)
Problem: “My audio sounds echoey or hollow”
Fix: This is almost always a room acoustics issue, not a mic issue. Hard walls, bare desks, and open spaces create reflections. Quick solutions: record in a smaller room, hang a towel or blanket on the wall behind your monitor, or even record in a closet full of clothes (seriously — it’s a professional voiceover trick). Moving your mic closer to your mouth also reduces room noise relative to your voice.
Problem: “I can hear keyboard clicking in my recording”
Fix: If you’re typing during your screen recording, a directional (cardioid) mic helps — it picks up sound from one direction. Point the mic at your mouth, not your keyboard. Alternatively, pause your narration while typing and resume when you’re done. In Zight, you can trim out the typing sections afterward if needed.
Problem: “My recording shows the wrong mic / no audio”
Fix: This happens when your system default mic doesn’t match what you expect. In Zight’s recording toolbar, click the mic dropdown and explicitly select your desired mic before you start recording. On Mac, check System Settings → Sound → Input. On Windows, check Settings → System → Sound → Input. And always do that 5-second test recording.
Problem: “I keep stumbling over my words”
Fix: You’re probably trying to be too polished. Conversational voiceovers outperform scripted ones for screen recordings. Write bullet points (not a script), speak as if you’re talking to a colleague, and embrace small imperfections. The “um” you worry about? Your viewer won’t even notice. And if they do, Zight’s editor lets you cut it out in two clicks.
Frequently Asked Questions
What is the best way to record a voiceover for a screen recording?
The best way is to use a dedicated screen recording tool like Zight that records your screen and microphone audio simultaneously. Connect an external mic (even wired earbuds work well), select your mic source in the app, and narrate as you demonstrate. This “record live” approach produces more natural-sounding voiceovers than recording audio separately and syncing it in post-production, and it’s dramatically faster.
Can I record a voiceover on Mac without installing extra software?
Yes — macOS has a built-in screen recorder (⌘+Shift+5) that can capture microphone audio. However, it can’t record system audio without a third-party audio driver, doesn’t support webcam overlays, has no editing tools, and saves a local file that you’ll need to manually upload and share. For anything beyond a quick personal capture, a tool like Zight that handles recording, editing, and instant sharing in one workflow will save significant time.
How do I record narration over an existing video?
To record narration over video that already exists, play the video on your screen and use Zight to record your screen plus microphone audio. Narrate as the video plays. This is the fastest method and requires no video editing software. For more precise control (like adjusting the original video’s volume), you’d need a timeline editor like Camtasia or DaVinci Resolve — but for walkthroughs and commentary, the screen-recording method works perfectly.
Do I need an expensive microphone to record good voiceovers?
No. A pair of wired earbuds (even the ones that came with your phone) will sound noticeably better than a laptop’s built-in mic because the microphone sits closer to your mouth. For professional-quality results, a USB condenser mic in the $50–$100 range is more than sufficient. Room acoustics and mic distance matter more than mic price in most real-world scenarios.
Can Zight record screen, webcam, and voiceover audio at the same time?
Yes. Zight records all three simultaneously — your screen content, webcam video (shown as a resizable bubble overlay), and microphone audio — in a single recording session. This is ideal for tutorials, product demos, and training content where seeing the presenter’s face adds trust and engagement. You can toggle each source on or off before recording starts.
Start Recording Better Voiceovers Today
Recording a voiceover doesn’t require a studio, an expensive mic, or a complex video editor. It requires a clear mic, a quiet room, and a tool that doesn’t get in your way. Zight is built for exactly this — record your screen, webcam, and voice in one click, trim the result in seconds, and share an instant link with anyone.
Whether you’re building a tutorial series, answering a support ticket with a personalized walkthrough, or replacing a meeting with a 3-minute async video, the workflow is the same: open Zight, hit record, talk through it, share the link.
Try Zight free and record your first voiceover in under 2 minutes →
Based on testing by the Zight team. Last updated June 2025.