Cross-platform recording tools make it easier for teachers to create and share lessons, tutorials, and educational content across various devices like Windows PCs, Macs, Chromebooks, iPads, and Android tablets. These tools ensure compatibility, save time, and help students access materials seamlessly, regardless of their device. Here’s what you need to know:
- Why It Matters: Classrooms today use a mix of devices. Single-platform tools can cause compatibility issues, leading to wasted time and effort. Cross-platform tools solve this by providing a consistent experience across operating systems.
- Key Features: Look for tools that support screen and webcam recording, high-quality audio, cloud-based sharing, and integration with platforms like Google Classroom or Microsoft Teams. Browser-based options are especially useful for Chromebooks.
- Setup Tips: Test your devices, use consistent settings (e.g., 1080p resolution), and organize files with clear naming conventions. Cloud storage simplifies file management and sharing.
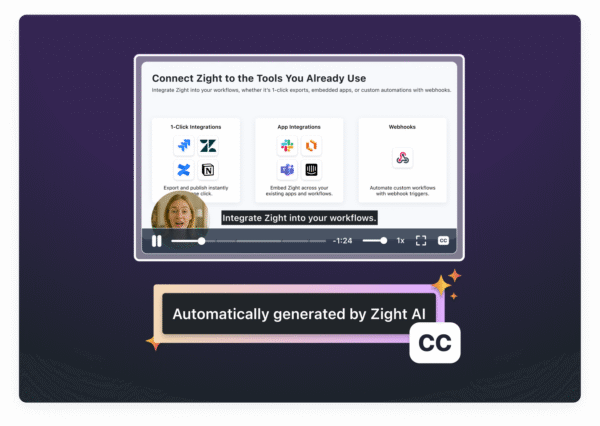
- Advanced Options: AI features like automatic transcription, video summaries, and multi-language support enhance usability. Editing tools help refine recordings with annotations, captions, and trimming.
Cross-platform recording tools streamline lesson creation, reduce technical challenges, and ensure all students can access educational content effortlessly.
Features to Look for in Cross-Platform Recording Tools
Picking the right screen recording tool can dramatically impact your teaching workflow. With so many options out there, it’s crucial to focus on the features that genuinely enhance your ability to create engaging and accessible educational content. Here’s what to prioritize:
Recording Capabilities
A solid recording tool should handle all the essentials. Look for one that supports screen capture, webcam recording, or both simultaneously. High-quality audio is equally important, so ensure the tool can record system audio alongside microphone input. If your lessons involve hands-on demonstrations, like using tablets or whiteboards, the tool should also support recording from external devices via HDMI.
The quality of your recordings matters. Aim for a resolution of 1080p and a frame rate of 30–60 frames per second to ensure clear visuals and smooth motion. For lengthy sessions, such as hour-long tutorials, efficient compression is a must. It helps maintain quality while keeping file sizes manageable.
To make your lessons more dynamic, consider combining screen capture with a webcam overlay for lectures or using dual-recording features with built-in editing tools for technical demonstrations. The right tool will adapt to your teaching needs.
Next, ease of use and accessibility features are just as vital.
User Interface and Accessibility Features
A straightforward, user-friendly interface is non-negotiable, especially for educators who aren’t video production experts. An intuitive design makes it easier to focus on creating great content rather than figuring out complicated software.
Accessibility features are equally important. Tools like closed captioning and real-time annotation or screen drawing ensure that all students, including those who are deaf or hard of hearing, can follow along. AI-powered features, such as automatic transcription, convert spoken words into searchable text, making your content easier to navigate. Multi-language translation capabilities can also help support diverse, multilingual classrooms.
For educators using Chromebooks or switching between devices, browser-based interfaces and mobile apps ensure a consistent experience without requiring extra downloads. Interactive features, like the ability to add feedback directly within a recording, can further increase student engagement.
A well-designed interface works best when paired with strong integrations.
Integration with Educational Platforms
Beyond ease of use, seamless integration with the tools you already rely on can save you time and effort. Look for a recording tool that connects with platforms like Google Classroom for assignments, Microsoft Teams for live or recorded lessons, and learning management systems (LMS) for organizing courses. For example, Zight integrates with tools like Slack, Microsoft Teams, and Jira, making it simple to share recordings and collaborate with colleagues.
Cloud storage integration is another must-have. Tools that let you export directly to Google Drive or upload to YouTube simplify file management and make it easier to share lessons. Sharing links instead of large files also reduces technical barriers for students.
Luisa Zapata García, Strategic Customer Success Manager at Globalization Partners, highlights this advantage:
“The fact that this saves on the cloud and I can share those links directly, both internally and externally is a huge plus.”
Compatibility with industry standards like SCORM and AICC ensures your recordings work across various LMS platforms, while exporting in universal formats like MP4 or HTML5 guarantees smooth playback on any device. These integration features not only streamline your workflow but also let you focus on what matters most: teaching.
Setting Up Cross-Platform Recording Workflows
Creating a smooth workflow for recording across multiple devices can save you time and prevent technical hiccups. Whether you’re using a Windows PC at school, a MacBook at home, or a Chromebook while traveling, a consistent setup ensures your educational content stays professional and accessible.
Preparing Your Devices
First, make sure your devices meet the minimum requirements for your recording software. For Windows, you’ll need Windows 10 or later with at least 4GB of RAM (though 8GB is better for smoother performance). Mac users should have macOS 10.12 or newer. If you’re working with Chromebooks, stick to browser-based tools or Chrome extensions, as most desktop software won’t run on Chrome OS.
Check that your tools work seamlessly across all platforms you plan to use. Testing your microphone and webcam on each device is also a must. Use your recording software’s settings to select the correct input devices. For the best results:
- Position your webcam at eye level with good lighting.
- Use an external microphone placed 6–12 inches from your mouth.
- Set your mic levels to 70–80% of maximum volume to avoid distortion.
- Enable noise reduction features to minimize background sounds.
If you’re recording both your screen and webcam at the same time, make sure the webcam window doesn’t block key parts of your screen. Test the setup on each device to confirm proper camera positioning and resolution.
Edward Wikstrom, Director of Technology at St. Dominic High School, underscores the value of cloud-based solutions for multi-device workflows:
“The main reason I switched to Zight is that it’s completely cloud-based.”
Recording Settings for Educational Content
Once your devices are ready, fine-tune your recording settings to ensure high-quality content. For most educational videos, Encryption>1080p resolution at 30 frames per second strikes a good balance between clarity and manageable file sizes. This setup is ideal for lectures, demos, and instructional videos.
Set your bitrate between 4,000–6,000 kbps for 1080p at 30fps. If students have limited internet bandwidth or you’re optimizing for mobile viewing, consider recording at 720p at 30fps to keep file sizes smaller. For longer videos, compression settings help maintain quality without creating oversized files.
Audio clarity is just as important. Record audio at 128 kbps in stereo for crisp sound without bloating file sizes. If you’re capturing both system audio and microphone input, ensure your software can handle both simultaneously. Tailor your audio settings to your environment: use noise suppression in classrooms to reduce background chatter, and pick a quiet spot at home to minimize ambient noise. For live sessions or webinars, slightly lower bitrates (3,000–4,000 kbps) can help accommodate varying internet speeds.
These settings not only improve the quality of your recordings but also simplify editing and sharing later.
Managing Files and Cloud Storage
After recording, keeping your files organized is key to maintaining an efficient workflow. Create a consistent naming convention for your files, such as “Subject_Topic_Date_v#” (e.g., “Math_Algebra_Basics_12-01-2025_v1”). Organize your folders by subject or course, then break them down into subfolders by unit or topic. Keep your raw recordings separate from edited versions to avoid confusion later.
Cloud storage can make managing and accessing your files a breeze. Tools like Zight automatically upload recordings to the cloud, so you can access them from any device without manual transfers.
Massimo Rigoni Savioli, CEO of SOSidee, highlights the convenience:
“Zight is a lightweight yet surprisingly powerful tool for fast and effective visual communication. It allows you to capture screenshots and record videos with ease, automatically uploading them to the cloud.”
Choose a cloud storage service that works across all your devices. Google Drive is a solid option for Windows, Mac, and Chromebooks, while OneDrive integrates well with Windows and Mac. Set up automatic sync folders on each device so your recordings upload right after they’re finished. For large video files, use selective sync to save space, keep current projects local and archive older ones in the cloud.
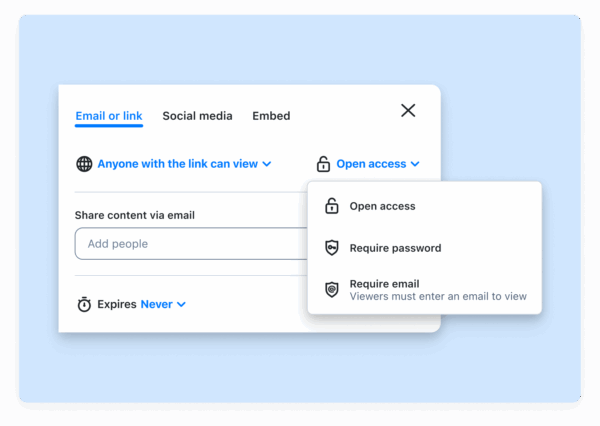
Sharing recordings is easier with cloud-generated links. Instead of sending large files, share links that students and colleagues can access on any device. Adjust sharing permissions to control who can view, comment on, or edit your content.
Charlotte Moore, Owner of MyActiveChild, appreciates the organizational benefits:
“The current options for organizing these elements to easily find them is great.”
Enable version control in your cloud storage to recover earlier file versions if needed. Both Google Drive and OneDrive offer this feature. For added security, back up your files monthly on an external hard drive to protect against accidental deletions or cloud outages.
If you’re juggling files across personal and institutional accounts, document your workflow. A quick-reference guide explaining which tools to use, where files are stored, and how to access them can be invaluable for troubleshooting or training new team members.
Advanced Recording and Editing Techniques
Once you’ve streamlined your workflow, it’s time to take your recordings to the next level. By refining your approach for various teaching scenarios and using advanced editing tools, you can create professional, engaging content that resonates with your audience.
Recording for Different Teaching Situations
Different teaching formats demand different recording strategies. For live lectures, you’ll need to juggle multiple input sources, screen sharing, webcam, and system audio. To ensure clarity, record at 1080p resolution with 30fps. This strikes a balance between quality and file size.
Pre-recorded lessons, on the other hand, offer more flexibility. You can record in smaller segments, pause and restart as needed, and perfect your delivery without the pressure of real-time performance. This approach helps maintain energy and precision, making your content more engaging.
For tutorials and instructional guides, focus on screen clarity and cursor visibility. If you’re demonstrating detailed or fast-paced actions, bump up the frame rate to 60fps to capture smoother cursor movements and transitions. This ensures your audience can follow along without missing crucial details.
Dual recordings, capturing both your screen and webcam, add a personal touch. Position your webcam feed in the bottom-right corner to keep important screen content visible. Begin with a full-screen webcam introduction to establish a connection, transition to screen-focused content for instruction, and return to a full webcam view for wrapping up.
Once your recording is complete, editing becomes the key to turning raw footage into polished, professional content.
Editing Tools and Video Enhancements
Editing is where your recordings truly come to life. Use timeline controls to trim unnecessary parts, smooth out pacing, and reorganize content for better flow. Remove awkward pauses, false starts, or any technical glitches to create a seamless final product.
Annotations and callouts are excellent for directing attention to specific areas of the screen. Stick to a consistent color scheme for clarity: red for warnings, green for correct actions, and yellow for definitions or key terms. To avoid overwhelming your viewers, limit callouts to two or three per minute. For step-by-step guides, reveal each step one at a time with highlights or arrows, rather than showing everything all at once.
Luisa Zapata García, Strategic Customer Success Manager at Globalization Partners, highlights the value of annotation tools:
“It’s so easy to edit the picture, and add arrows and squares to really make your point stand. A huge plus I haven’t found in other apps is that you can ‘pixel’ all the sensitive information perhaps you don’t want to share.”
AI tools are transforming video editing, especially for educational content. Features like auto-captioning improve accessibility for students with hearing impairments, non-native speakers, or those in sound-sensitive environments. With Zight, you can access AI-driven capabilities like automatic video summaries, smart titling, and instant transcription in over 50 languages, making your content more inclusive.
AI-generated chapters are another game-changer, breaking longer lessons into digestible sections. Fred Pike, Managing Director at Northwoods, shares his enthusiasm:
“I’ve had the AI add-on for about a month now and the video transcriptions, the chapters in the video, and the summary data – wow, it’s great! I wasn’t sure it’d be worth it, but it absolutely is – I love those features!”
For quick references, consider creating loopable GIFs from your recordings. These are perfect for simple concepts or brief instructions that students can revisit without watching an entire video. When dealing with sensitive content, use redaction tools to blur or pixelate confidential information before sharing.
Exporting and Sharing Videos
After editing, exporting and sharing your videos efficiently ensures they reach your audience without hassle. Save your videos as MP4 files, which offer a universal format compatible with most devices, browsers, and learning management systems (LMS). Optimize the settings for quality and upload speed to balance performance and accessibility.
Cloud-based platforms simplify distribution. Zight, for instance, automatically uploads your recordings to the cloud and provides shareable links, removing the need for manual file transfers. When sharing cloud links, configure permissions wisely. For classroom use, you might allow students to view-only, while giving teaching assistants permission to comment.
If your LMS supports direct embedding, such as in Canvas or Blackboard, use that feature for seamless integration. Otherwise, ensure your videos are exported in a compatible format like SCORM or AICC. For better discoverability, include metadata – such as titles, descriptions, and keywords – when exporting. This not only helps students locate content within your course library but also boosts search rankings on platforms like YouTube.
Lastly, adjust video formats as needed for different platforms. Tools that convert files from WEBM to MP4 or MOV to MP4 make it easy to ensure compatibility. Shorten long URLs for easier sharing in emails or documents, students are more likely to click a clean, concise link. And for diverse classrooms, AI translation tools can provide captions and transcripts in multiple languages, making your lessons accessible to everyone without the need for separate versions.
Troubleshooting Common Recording Problems
No matter how well you prepare, technical hiccups can disrupt your recording sessions. Knowing how to quickly identify and fix these issues can save you a lot of time and frustration. Most recording problems fall into three main categories: synchronization errors, file compatibility issues, and performance slowdowns.
Fixing Audio and Video Sync Issues
One common problem is when audio and video fall out of sync, creating a frustrating disconnect between what viewers see and hear.
The main cause? Frame rate mismatches. For instance, if your screen recording is set to 30fps but your webcam records at 60fps, the two files won’t align properly during editing. Similarly, using multiple input sources, like a microphone, system audio, and screen audio, can lead to timing delays if your software doesn’t sync them in real time.
To avoid this, set all your input sources to the same frame rate. Tools like Zight automatically handle this by syncing system audio and microphone input during recording, reducing the chance of sync drift from the start.
If you still encounter sync issues, you can manually adjust the audio track in your editing timeline. Some platforms, like Zight, offer AI-powered alignment tools to make this process easier. Zight’s built-in editing features also allow you to trim, crop, split, and merge clips directly, so you don’t have to juggle multiple software programs.
When exporting your final video, ensure that all files use consistent frame rates and codecs. This step helps prevent new sync problems when sharing or uploading your content.
Now, let’s tackle file compatibility challenges that can arise when moving recordings between devices.
Solving File Compatibility Problems
Switching between devices for recording, editing, or sharing can lead to compatibility headaches. Different systems and software often support varying video codecs and file types, making smooth transitions tricky.
The best way to avoid this? Export your recordings in MP4 format using H.264 for video and AAC for audio. This combination works seamlessly across Windows, macOS, iOS, and Android devices, and is accepted by most learning management systems (LMS).
Platforms like Zight simplify file sharing by handling compatibility issues for you. Since your recordings are stored in the cloud, you can access them from any device without worrying about file formats.
If you need to convert files, Zight’s Digital Toolkit offers quick format conversions, saving you the trouble of downloading separate software. For platform-specific sharing, check the requirements in advance. For example:
- YouTube supports MP4, MOV, AVI, and WMV.
- Google Drive works best with MP4.
- Most LMS platforms, like Canvas, Blackboard, and Moodle, prefer MP4 or WebM.
Always keep a high-quality master copy of your recording as a backup. Frequent file conversions can degrade quality, so it’s smart to preserve the original for future use.
Finally, let’s look at how to optimize your device’s performance for smooth recording sessions.
Improving Recording Performance
Even with the right setup, your device’s performance can cause issues like lag or dropped frames. These problems often indicate that your system is overburdened.
Recording a one-hour video in 1080p requires 3–5 GB of storage, while 4K recordings need 10–15 GB per hour. To avoid performance issues, ensure you have at least 10–15% of your storage space free.
Keep an eye on your CPU and RAM usage during recording. If either exceeds 80%, close unnecessary apps or reduce your recording resolution. For example, switching from 1080p to 720p can cut file sizes in half and ease the load on your system.
Cloud-based tools like Zight reduce the strain on your local device by uploading recordings directly to the cloud. This is especially helpful for older machines or less powerful devices like Chromebooks.
For longer sessions, consider breaking your content into smaller segments instead of recording everything in one go. This approach reduces the strain on your system and simplifies the editing process. If you’re experiencing stuttering, lowering the frame rate from 60fps to 30fps can also help while maintaining good quality.
To boost performance further, record to your internal SSD rather than an external USB drive, as internal drives are faster. After recording, you can transfer files to external storage. Also, close unused browser tabs and extensions, as these can compete for system resources.
Lastly, protect your work by enabling auto-save or recovery features in your recording software. If a crash occurs, check the temporary or cache folder – many tools save partial recordings there. Cloud-based platforms like Zight automatically save your work during recording, so you don’t have to worry about losing footage.
For critical recordings, back up your files to cloud storage immediately after finishing. This ensures your content is safe, even if your device fails.
Conclusion
Cross-platform recording has become a game-changer for educators, transforming how lessons are created and shared. The trick is finding tools that work smoothly across your devices while meeting your teaching style and comfort with technology.
Start by thinking about the kinds of recordings you’ll need most often. If you’re making quick tutorial clips, focus on tools that let you share instantly. For more detailed lessons, choose platforms that combine easy recording with simple editing options. The goal? Streamline your teaching process without adding unnecessary steps.
AI-powered features like automatic transcription and video summarization can save time and ensure students have access to well-organized, high-quality lessons. Cloud-based management makes it even easier, with recordings automatically uploaded and ready to share via links, no more worrying about compatibility headaches.
By following earlier tips on setup and troubleshooting, you can create a smooth workflow across all your devices. Effective recording doesn’t require fancy gear or advanced skills. Look for tools that capture both screen and audio, offer flexible recording options, and include annotation features to emphasize key points. Often, these basics will serve you better than overly complex features you may rarely use.
Finally, make it a habit to test your setup with short practice videos before diving into important content. This simple step helps you catch any issues early and adjust your approach to fit your teaching needs. With the right tools, cross-platform recording can become a seamless part of your teaching routine.
FAQs
How do cross-platform recording tools make educational content more accessible for students on different devices?
Cross-platform recording tools make learning more accessible by ensuring educational content works seamlessly across different devices, be it a Mac, Windows PC, or a smartphone. This means educators can create materials that cater to all students, no matter what technology they prefer.
Many of these tools also support various file formats and integrate with cloud-based sharing platforms. This makes it easier for students to access lessons whenever and wherever they need. Plus, features like transcription and translation help meet diverse learning needs and language preferences, making education more inclusive for everyone.
What advanced features can cross-platform recording tools offer to improve teaching and learning?
Advanced recording tools designed for cross-platform use can transform teaching and learning by offering features like trimming, cropping, and merging clips to produce polished, professional videos. These tools also allow educators to include annotations, captions, and visual highlights, making lessons more interactive and easier to understand.
Some platforms, such as Zight, go a step further by incorporating AI-powered features like transcription, summaries, and translations. These capabilities not only make content more accessible to a wide range of learners but also save educators valuable time, enabling them to create high-quality materials with ease.
What’s the best way for teachers to organize and access their recordings in the cloud?
With Zight, your recordings are instantly saved to the cloud, making them simple to access, organize, and share whenever needed. This ensures your content stays neatly arranged and ready for lesson planning, student projects, or future reference. It’s a hassle-free way to keep everything in one secure, convenient location, helping you stay organized and efficient.


