
Maybe you’re bursting with excitement to capture the moment your parents find out they’re going to be grandparents. It could even be that you’re in a brainstorming session with colleagues and don’t want any brilliant ideas slipping away due to forgetfulness or messy note-taking.
Whatever the reason, there are countless scenarios where recording a Skype call comes in handy—and now you can do it using the best screen recorder app or the basic built-in screen recording software that alerts everyone.
Generally, call recording is like having a backup for your brain. Here are more scenarios why Skype call recording can be helpful:
- Video Conferencing: Catch every detail of a brainstorming session or presentation without scrambling to write everything down.
- Webinars: Focus on absorbing the knowledge instead of furiously jotting things in your notebook. Review the recording later to solidify those key points.
- Interviews: Capture the entire conversation, allowing you to revisit specific parts later for a more in-depth analysis.
Basically, a Skype call recording lets you be fully present in the moment while ensuring you don’t miss anything important. No more sacrificing participation for note-taking! Here’s how to record Skype calls:
1. How to Record a Skype Call Secretly on Windows
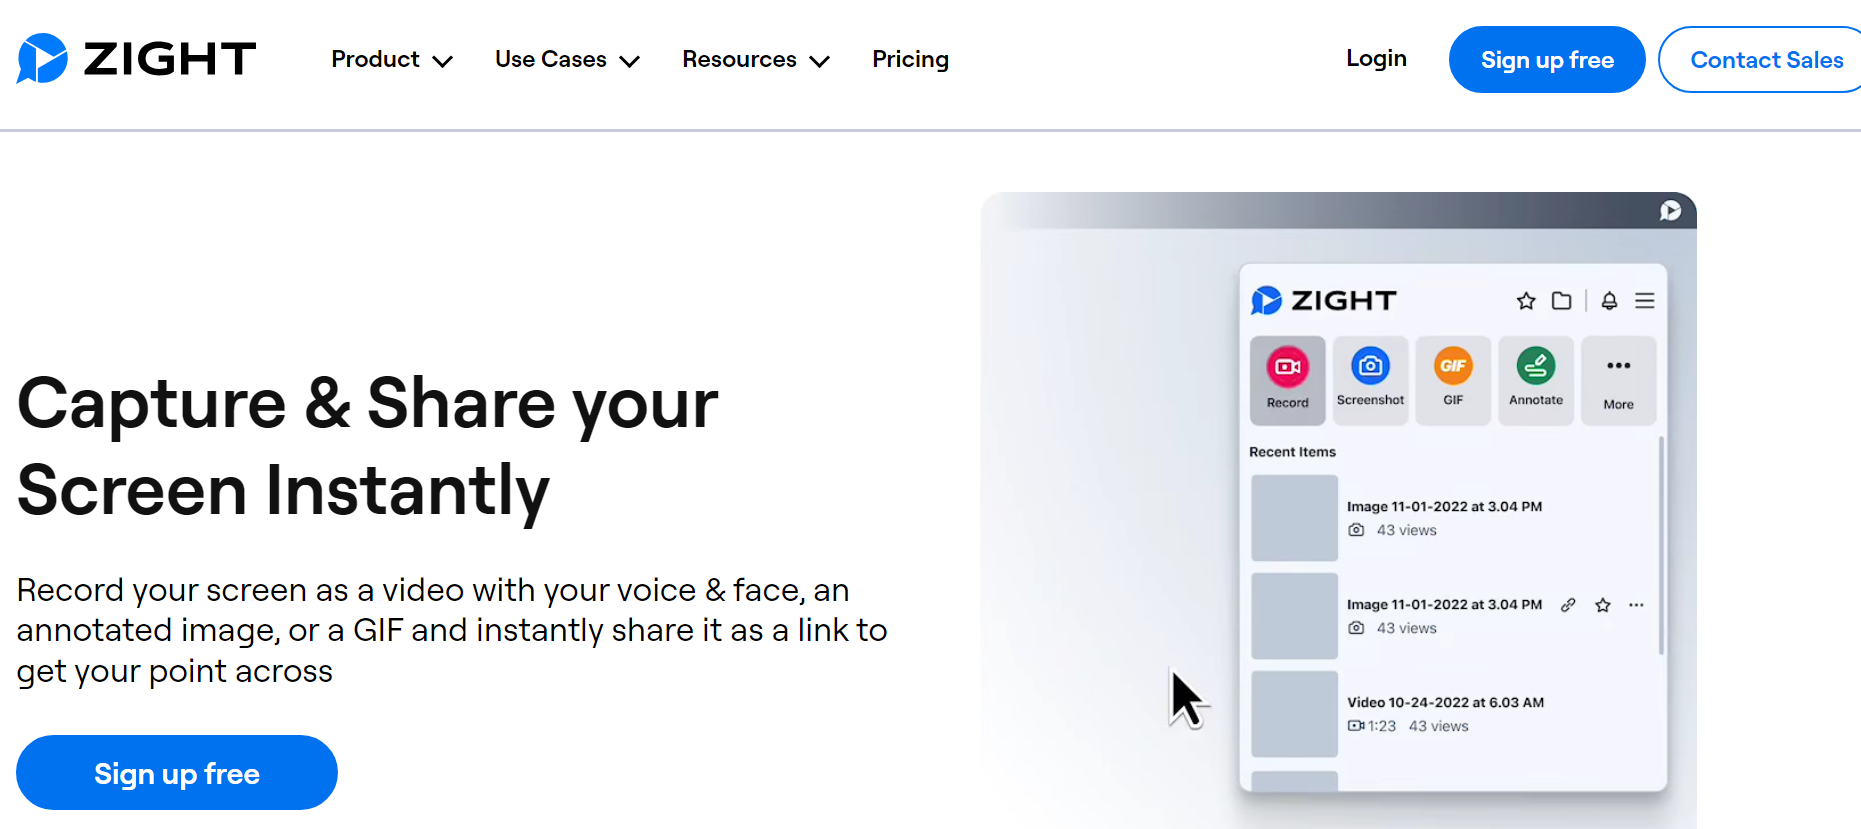
You must want to record Skype calls without letting everyone know, right? Then let’s start with the method that allows you to secretly record Skype calls on Windows without letting the other participants know- Zight.
Step 1: Download and Install Zight
First things first, get Zight recording software on your computer. Go to the Zight website, click “Sign Up Free,” and create your account. Then, download the app for your device. Easy peasy!
Step 2: Start Your Skype Call
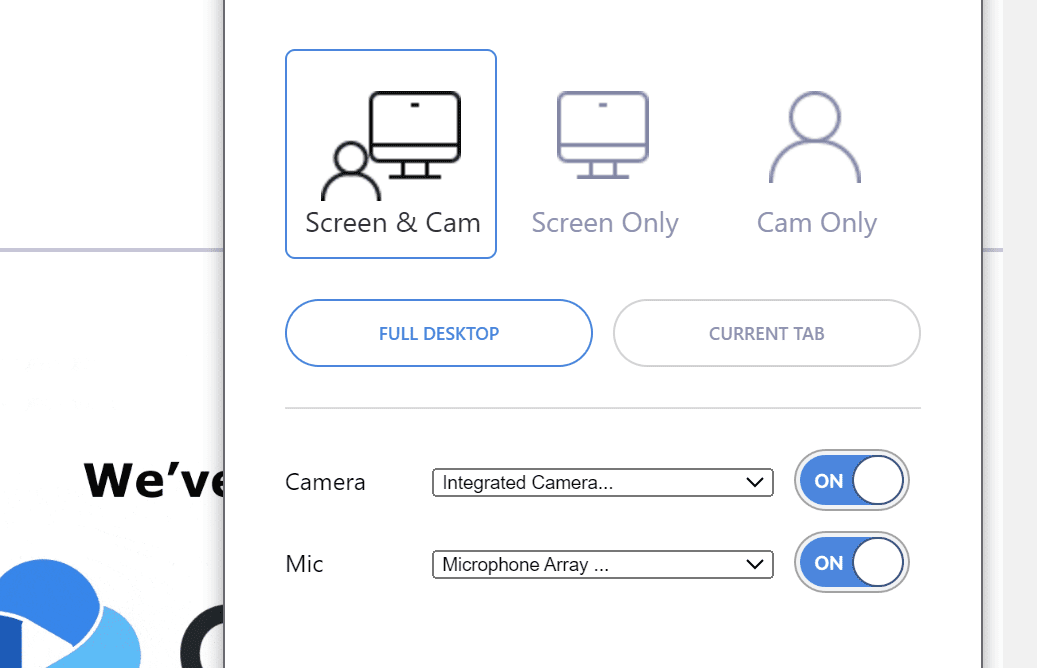
Start-up or join your Skype call meeting. Open up Zight and hit “Record.” You can also use the handy shortcut Alt + Shift + 6 on Windows. This will open up a new Zight page where you can set your recording preferences. For a Skype call, choose Full-Screen recording and Screen only. Make sure to turn on the audio/mic option to capture the conversation.
Step 3: Start Recording your Skype Call
Click the “Start Recording” button. Zight gives you a three-second countdown before it starts capturing everything.
Step 4: Annotate During the Skype Call
If you need to highlight important points during the call, you can pause the recording to add annotations. Zight offers tools like arrows, lines, ellipses, rectangles, pens, and highlighters. Customize these with timers and colors to make them pop in your final recording.
Step 5: Complete and Upload
When the video call is over, press “Stop Recording.” Zight will then automatically upload the recording to the cloud. Once it’s done, a shareable link to the video call will be copied to your clipboard and opened in your default browser.
Step 7: Edit and Share
In your browser, you can further edit your video call by trimming, splitting, merging sections, cropping, and more. Once you’re satisfied and the video file is ready for sharing, use Ctrl + V to paste the Zight link and share it with your team.
2. How to Record a Skype Call Secretly on Mac
Zight is also compatible with Mac computers and it’s easy to record Skype calls using the app. It makes it incredibly easy to record Skype calls discreetly with its user-friendly setup and powerful recording options. Here’s how to record Skype calls secretly:
Step 1: Install and Set Up Zight for Mac
Download and install the Zight app on your device, then create your account.
Step 2: Start Recording
Locate the Zight icon on your menu bar. Click on the Record button and choose your recording preferences. You can opt to record your entire screen with:
- Full-Screen option
- Specific area using the Select Region button. For Select Region, simply click and drag with your mouse to define the area you want to record.
Alternatively, use the shortcut Cmd+Shift+6 to open Record.
Step 3: Configure Settings
You can decide between Screen Only or Screen & Cam options for your video call. For recording Skype calls, you should choose Screen & Cam to capture everything. Ensure to adjust the microphone settings based on whether you need audio. You can also set a maximum recording length for your video file and even when the Skype meeting runs long, you can record and then share the large video file with ease.
Step 4: Start your Recording
Click the blue button to start recording your screen. Zight will discreetly capture everything as per your settings.
Step 5: Finish and Edit
When you’re done, click the red “Finish” button to stop the recording. You can then proceed to edit and annotate your recording before sharing it with your team.
3. How to Record Calls with Skype for Web in Google Chrome
Skype for Web provides the same great experience without downloading or installing the app. While it’s available on many browsers, you can only make calls using Google Chrome or Microsoft Edge.
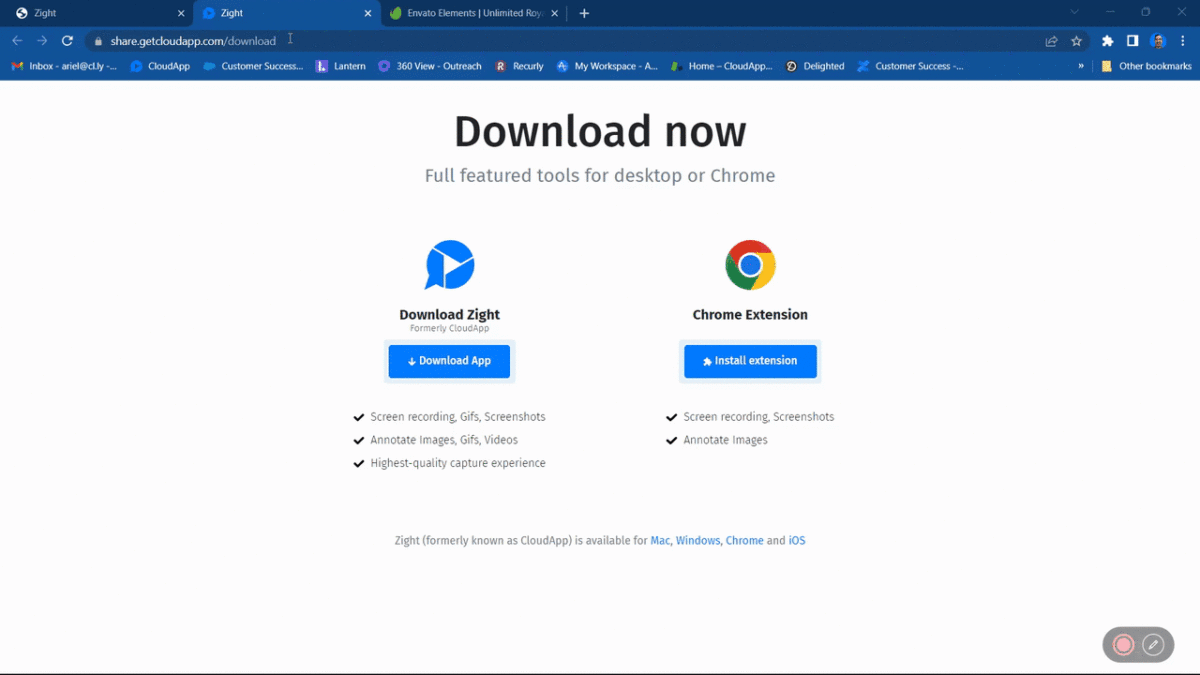
Step 1: Install Zight
If you haven’t already, sign up for Zight (you can enjoy up to 90-second recordings for free).
- Then, find Zight on the Chrome web store
- Click ‘Add to Chrome’ and then ‘Install Extension’.
- A new window will open; click ‘Add to Chrome’ and then ‘Add Extension’ in the pop-up window.
- Your web dashboard will open up (if you’re logged in).
- For quick access, you might want to pin the Zight extension to your taskbar.
Step 2: Launch Zight
- Open the web dashboard, you’ll see “New Recording” on the right side. Click on “New Recording” and select “Record Screen”.
- Ensure your permissions are enabled if the Zight extension isn’t recording, you may need to enable permissions for your microphone and camera. To do this, open your Chrome settings by clicking the three dots in the upper right-hand corner. Navigate to ‘Privacy and Security’ > ‘Cookies and site permissions’ > ‘Camera’. Select the arrow next to Zight and allow permissions.
Step 3: Choose Your Screen Recording Options
Navigate to the Record menu and set your preferences. Choose to record your entire screen or a specific part of it. For your Skype audio settings, Zight will ask for permission to capture audio. Select your desired audio source:
- “Tab Audio” to capture audio from the current tab.
- “Microphone” to capture audio from your device’s microphone.
- “No Audio” if you don’t need sound.
Step 4: Start Recording
After setting your preferences, click the “Start Recording” button. A 3-2-1 countdown will appear before your screen recording begins. You can monitor the recording timer in the toolbar, which also has options to annotate, pause, or finish the recording.
Step 5: Finish & Edit Your Recording
When you’re done with your Skype recording, click “Finish” to stop the recording. Zight will automatically process and save your video. A preview of the recorded video will appear in the Zight popup window.
Step 6: Easily Share via URL
Click the “Save” button in the Zight popup to save your video. Name your file and choose the destination folder. Share your video by clicking the “Share” button, copying the autogenerated link, or dragging and dropping it into emails and chat apps.
You can also share your video directly on platforms like Trello, Asana, and Slack, or embed it in an email.
Reasons Why You Should Use Zight to Record Your Skype Calls

Still interested in other reasons why you should use Zight? Here it goes:
- Zight offers a user-friendly interface, making it easy for even beginners to navigate and start recording their Skype calls without any hassle.
- With Zight, you can expect top-notch audio and video quality in your recordings. It ensures that every word spoken and every visual detail is captured crisply and clearly, allowing you to preserve the essence of your conversations accurately.
- Zight isn’t just limited to Skype calls. It provides the flexibility to record various types of screen and audio activities, making it a versatile tool for capturing a wide range of content. You can capture a screenshot, screen record videos, record using the webcam, and create GIFs. Whether you capture a moment in time or record dynamic screen activities, conduct interviews, host webinars, or demonstrate software solutions, Zight has you covered.
- One of Zight’s standout features is its built-in editing capabilities. After recording your Skype calls, you can easily edit your recordings according to your preferences within the Zight interface, eliminating the need for additional editing software. From trimming and merging clips to adding captions and annotations, Zight provides all the tools you need to polish your content to perfection.
- Zight prioritizes the privacy and security of your recordings. It ensures that your data remains protected throughout the recording and editing process, giving you peace of mind knowing that your sensitive information is safeguarded.
- Zight boasts of a reputation for reliability and excellent customer support. Should you encounter any issues or have any questions about the software, Zight’s dedicated support team is readily available to assist you, ensuring a smooth and seamless experience.
4. Record Skype Calls Using its Built-in Recorder
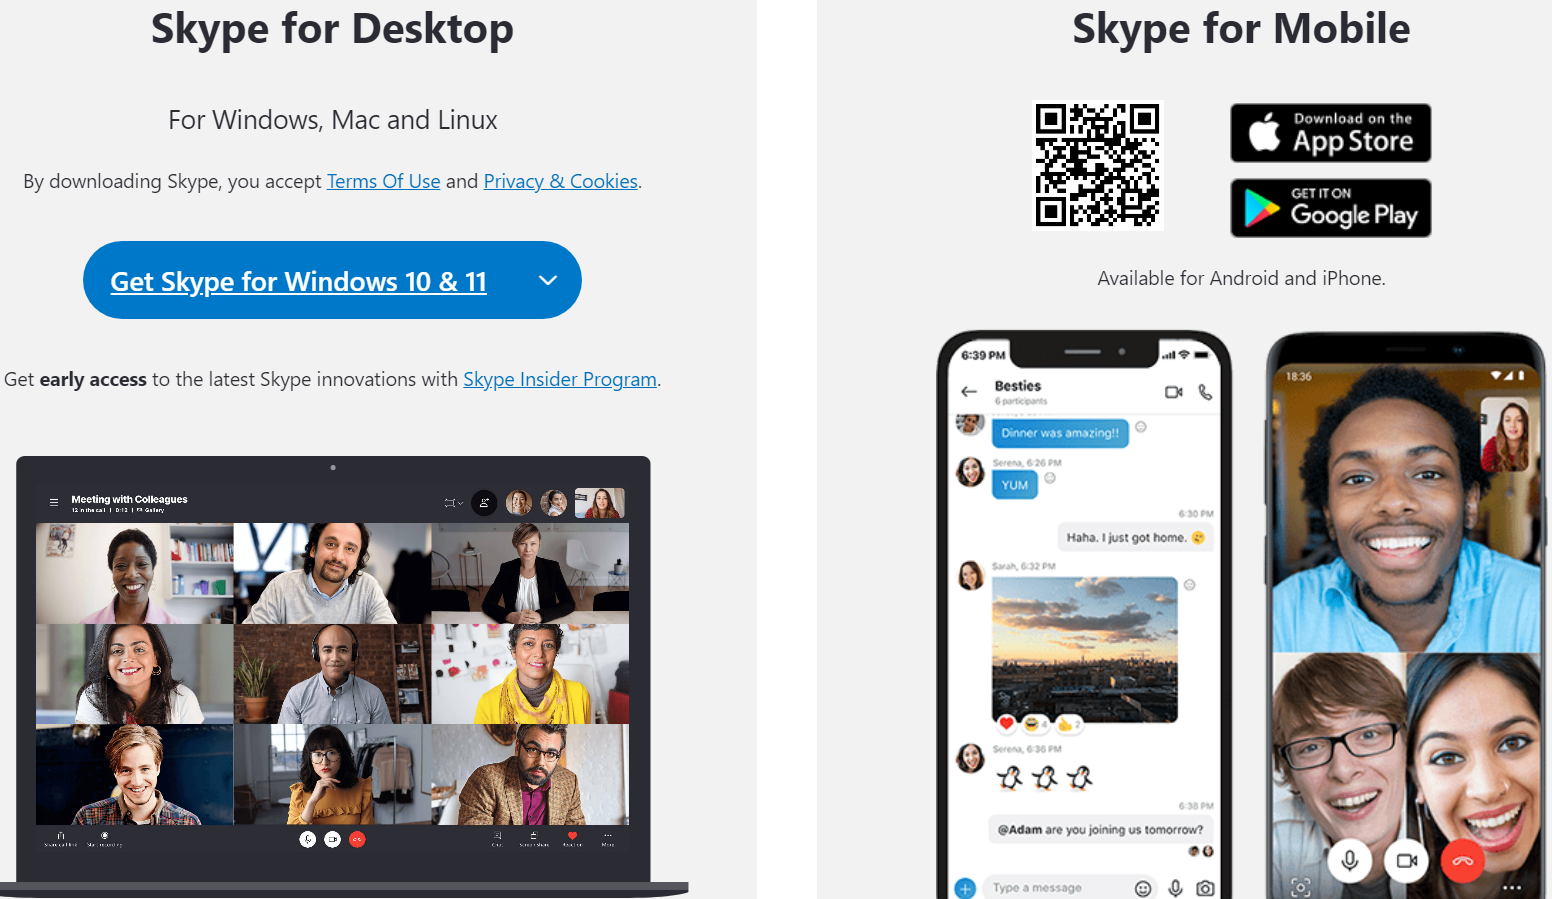
Skype has a built-in recorder with the ability to record calls, but it’s important to note that all the participants will be informed that the Skype call is being recorded. Although it’s easy to use, it doesn’t produce the best quality and also doesn’t have editing features.
In addition, Skype has to have an internet connection and doesn’t record locally meaning you will lose quality and your content if your service is interrupted. This goes to show that if you want studio quality on your Skype video calls, it is not the best option.
However, if the above doesn’t bother you, we have come up with a step-by-step guide on how to record a Skype call.
Step 1: Start the Call
Launch a Skype call on your mobile device or computer using the Skype app. Download the Skype application from your app store, sign into your account, and then initiate the call when you’re ready to connect.
Step 2: Start Recording
Before you start recording Skype calls, you first need to ensure your microphone and webcam are working correctly. Ensure all the other participants can clearly hear your voice and see your face.
Now you’re ready to record the call. You can start recording from the onset of the call or at any point during the conversation but it’s better to start your Skype call recording at the beginning to avoid getting distracted from your conversation.
On your computer or laptop, simply click the “More” button located at the bottom right of your screen during the call. From the menu that appears, select “Start recording.”
If you’re using your mobile device, keep an eye out for the “Start recording” option on your phone screen. It’s conveniently placed at the bottom of your mobile screen. Just tap on it to start the recording.
A notification banner will appear on both your computer and mobile screens to let all participants know that the call is being recorded.
Step 3: Stop the Skype Recording
Once your Skype call wraps up, you have the option to click on “Stop recording.” Alternatively, if you end the call, the Skype call recording will automatically cease as well.
Step 4: Save and Share your Recording
The call recording will be posted to your Skype chat and it will be there for 30 days or you can also share it with any of your contacts within the period. The good news is, that everyone on the call can save and share the recording too, as long as they do it within 30 days.
Sharing is easy! Just click the “…” button again and choose “Forward tab.” from the More Options button. You’ll see a list of your contacts to pick from who you can share your call recording with.
It’s even easier on a mobile device! Just tap and hold the call recording, then tap “Forward” and choose the contacts you wish to share the recording with. Hit “Send” at the top of your screen when you’re ready.
Step 5. Save to Downloads Folder
One way to save your Skype video call is by downloading it either on your desktop, laptop, or mobile device. To save your call recording on your computer, go to your chat. Click the More Options tab and Choose the Save to Downloads option and it will be saved to your Downloads folder.
On your Desktop:
- Click the “More Options” tab and choose “Save to Downloads” if you like things quick and easy. This puts it right in your Downloads folder.
- Feeling more organized? Click “Save As” instead. Then you can pick the perfect folder to store it in. Just remember, that the recording is saved as an MP4 file.
On Mobile Devices:
- Super simple! Go back to your chat, tap and hold the recording, and then tap “Save.” That’s it! The recording will be downloaded and saved as an MP4 file in your gallery, ready for whenever you need it.
5. How to Record a Skype Call Secretly on an iPhone
You don’t need to download any extra apps to record Skype video calls on your iPhone or iPad. If you’re using iOS 11 or a later version, there’s a built-in screen recording feature that makes this super easy.
Before you start to record a Skype video call on your iOS device, make sure the “Screen Recording” feature is enabled. Here’s how:
- Open your iPhone or iPad and go to “Settings” > “Control Center.”
- Check if “Screen Recording” is already included in the controls. If it is, you’re all set. If not, find “Screen Recording” in “More Controls” and tap the “+” to add it.
Now let’s get to the step-by-step guide on how to record Skype Calls on Your iPhone/iPad
Step 1: Open the Control Center and tap the Recording icon to start recording.
Step 2: Join your Skype call. Your call will be recorded automatically.
Step 3: To stop recording, return to the Control Center and tap the Recording icon again.
Step 4: Your recorded Skype call will be saved in the Photos app.
6. How to Record a Skype Call Secretly on Android
If you have Android 11 or a later version, you can use your phone’s built-in screen recorder to capture Skype calls and other screen activities without needing any extra apps. For those using Android 10 or earlier versions, you’ll need to download a screen recorder app to record your Skype meetings.
Step 1: Choose a reliable app by going to the Google Play Store and searching for a mobile reputable screen recording app like “AZ Screen Recorder” or “Mobizen Screen Recorder.” Download and install the screen recording app on your Android device.
Step 2: Open the installed screen recording app. Follow the on-screen prompts to grant necessary permissions for screen recording the start the Skype Call.
Step 3: Open the screen recording app you installed earlier. Start a new recording session by tapping the appropriate button or option within the app. Join the Skype call that you wish to record.
Step 4: Once the Skype call is complete, stop the screen recording by following the instructions provided by the screen recording app.
Step 5: Find the recorded Skype call in the designated folder within the screen recording app. Open the recorded file to review the Skype call. Share the recording as needed via messaging apps, email, or cloud storage services.
Conclusion on How to Record Skype Calls
No matter your reasons for recording your Skype calls, it is essential that you do it accurately. The video, as well as the audio files, should be maintained properly. For this, it is crucial to have the best equipment. Your camera should have a good resolution, and also, be sure you use the best audio equipment there is. Along with these hardware specifications, your screen recording software must be accurate, which is why we suggest you try Zight.
With Zight, you can not only effortlessly capture both your screen and audio during calls but also edit your recordings afterward without having to hassle with downloading extra editing software. Whether you’re leaning towards using Skype’s handy built-in recording feature or thinking about trying out a third-party Skype recorder, you’ll find step-by-step guides right here to assist you. Why not start recording your Skype calls secretly with Zight?