Creating GIFs from screenshots can be a powerful way to convey information, share step-by-step tutorials, or add a bit of fun to your content.
Imagine you’re working on a project and need to show a series of steps or actions quickly. Static images don’t quite capture the flow, and a video might be overkill. The GIF is the perfect middle ground, combining multiple images into a dynamic, easily shareable format.
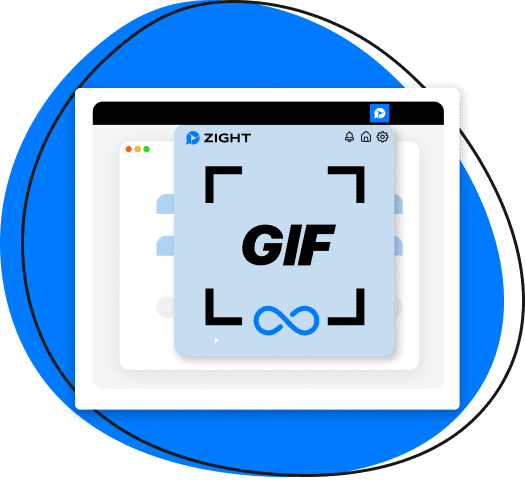
In this article, you’ll learn how to create animated GIF files from screenshots using Zight‘s GIF maker app. It’s a versatile tool that simplifies the process of capturing and creating GIFs. By the end, you’ll be equipped to turn your screenshots into engaging animated GIFs effortlessly.
Why Use Animated GIFs?
Animated GIFs are highly effective for various purposes:
- Quick tutorials: Show each step in a process without overwhelming your audience with lengthy videos. For example, demonstrating how to use a software feature is more digestible when broken down into small, animated chunks.
- Presentations: Add some motion to your slides to keep your audience engaged. Instead of static images, animated GIFs can illustrate points dynamically, which helps maintain your audience’s interest and reinforce your message.
- Customer Support: Quickly illustrate solutions to common problems. A GIF showing how to reset a password or navigate a website can be much clearer than written instructions alone.
- Social Media: Share eye-catching content that stands out in the feed. GIFs are perfect for quick, looping animations that grab attention and encourage sharing.
How to Capture Screenshots with Zight
Before you can create a GIF, you need to capture the screenshots.
Step 1: Download and Install Zight:
- Visit the Zight website and download the application.
- Follow the installation instructions for your operating system (Windows or macOS).
Step 2: Set Up Your Capture Preferences
- Open Zight and navigate to the settings menu.
- Customize your screenshot preferences, such as the default save location and file format (PNG or JPG). PNG is recommended for higher quality, while JPG can help save space.
Step 3: Capture Screenshots
- Launch the application or webpage you want to capture. Ensure everything you want to include in your screenshots is visible and properly arranged.
- Use the Zight capture tool to select the area of the screen you want to capture. It can be the entire screen or a region of it.
- You can use keyboard shortcuts for quick access:
- Click and drag to select the area. Release the mouse button to capture the screenshot.
- Repeat this process for each step you want to include in your GIF. Make sure each screenshot clearly shows the necessary actions or information for your GIF.
How to Create Animated GIFs with Zight

Once you have your screenshots, you can turn them into animated GIFs.
Step 1: Open the GIF Maker Tool
- Navigate to the Zight GIF Maker.
- Click on “Create GIF” to start. This will open the GIF creation interface where you can start building your animated GIF.
Step 2: Upload Your Screenshots
- Click the “Upload” button. A file selector window will open.
- Select the screenshots you want to use for your GIF. You can select multiple images at once by holding the Ctrl key (Windows) or the Cmd key (macOS). Ensure you select the screenshots in the order they should appear in your GIF.
Step 3: Arrange Your Screenshots
- Drag and drop the uploaded screenshots to arrange them in the order you want them to appear in the GIF. This step is crucial for ensuring the flow of your GIF makes sense.
- Adjust the animation speed for each screenshot. This can be done by clicking on the image and setting the display time. Typical durations range from 0.5 to 2 seconds per frame, depending on the complexity of the actions being shown.
Step 4: Customize Your GIF
- Add text, animated stickers, or effects if desired. Zight offers various customization options to enhance your GIF. For example, you can add captions to explain each step or use arrows to draw attention to specific parts of the screenshots.
- Adjust the size and frame rate of the GIF to optimize for your needs. Smaller sizes and lower frame rates can reduce the file size, making it easier to share. However, ensure that the quality remains high enough to clearly convey the information.
Step 5: Preview and Save
- Click the “Preview” button to see your GIF in action. This allows you to check the timing and flow before finalizing your creation.
- If everything looks good, click “Save” to download your animated GIF format. Zight will save the file to your specified location, ready for sharing or embedding.
Tips for Creating Effective Animated GIFs
Creating an engaging GIF from screenshots involves more than just combining images. Here are some tips to ensure your GIFs are effective and appealing:
- Keep It Short and Sweet: GIFs are meant to be quick and easy to digest. Aim for a duration of a few seconds to keep viewers engaged without overwhelming them. A good rule of thumb is to keep your GIF under 15 seconds.
- Focus on Key Actions: Highlight the most important steps or actions in your process. Too much detail can clutter your GIF and dilute its impact. Focus on the key moments that best illustrate the process or concept you’re demonstrating.
- Use Annotations Sparingly: Annotations like text and arrows can be helpful, but too many can make your GIF look busy. Use them to clarify crucial points without overloading the viewer. Make sure annotations are clear and concise.
- Optimize File Size: Large GIFs can be slow to load and share. Adjusting the frame rate and dimensions can help reduce the file size without compromising quality. Aim for a balance between file size and visual clarity.
Best Tools for GIF Creation
While Zight is a fantastic tool for creating animated GIFs from screenshots, there are other GIF tools available. Here are some of the best tools for GIF creation:
- GIPHY: GIPHY is one of the most popular platforms for creating and sharing GIFs. It offers a user-friendly interface and a vast library of pre-made GIFs. GIPHY’s GIF maker is easy to use and great for quick, fun GIFs.
- Adobe Photoshop: For those with more advanced needs, Adobe Photoshop provides robust GIF creation and editing tools. It’s perfect for detailed and professional projects. With Photoshop, you can control every aspect of your GIF, from timing to transitions.
- EZGIF: EZGIF is a free online tool for quick and simple GIF creation. It offers basic editing features and doesn’t require software installation, making it perfect for users who need to create GIFs on the go.
- LICEcap: LICEcap is a lightweight application that captures your screen and saves it directly as a GIF. It’s straightforward and easy to use for basic needs, making it ideal for capturing quick tutorials and demonstrations.
Integrating GIFs into Your Workflow
Creating GIFs is just the beginning. Integrating them effectively into your workflow can enhance communication and productivity. Here’s how:
- In Email: GIF images can make your emails more engaging and visually appealing. Use them to demonstrate processes or add a touch of personality to your messages. For example, a GIF can quickly show how to complete a form or use a feature, making your instructions clearer.
- In Presentations: Spice up your presentations by including animated GIFs. They can help illustrate points more dynamically than static images. A GIF can show a step-by-step process or highlight changes over time, making your presentation more engaging.
- On Social Media: Animated GIFs are perfect for social media. They capture attention quickly and can convey information in an easily digestible format. Use GIFs to showcase products, share tips, or engage your audience with fun and interactive content.
- In Documentation: Enhance your documentation by incorporating GIFs to show step-by-step instructions. This can make your guides more accessible and user-friendly. For example, a GIF can show users how to navigate a new feature or complete a common task.
In Conclusion
Creating animated GIFs from screenshots is a valuable skill that can enhance your ability to communicate information clearly and effectively.
With Zight, the process is streamlined and accessible, allowing you to produce high-quality GIFs with ease. By following the steps outlined in this guide, you’ll be able to turn your screenshots into engaging animated GIFs that can be used in various contexts.
Start using Zight to unlock the full potential of animated GIFs in your projects!