How to Make a Tutorial Video in 7 Steps (Faster Than Writing Docs)
You just spent 45 minutes writing a step-by-step document — complete with numbered instructions, cropped screenshots, and red arrows — to explain a workflow that takes 90 seconds to show on screen. Sound familiar? Learning how to make a tutorial video is the single highest-leverage skill for anyone who teaches, onboards, or supports other people using software. A two-minute screen recording replaces a ten-paragraph email, every single time.
⚡ Quick Answer — How to Make a Tutorial Video
To make a tutorial video: plan a focused outline (one topic per video), record your screen with a tool like Zight, add annotations or a webcam overlay for context, trim any dead air, and share via an instant link. Zight is an async screen recording and screenshot tool for Mac, Windows, and Chrome that lets you record, annotate, and share tutorial videos in under five minutes — no video editing experience required. Most tutorial videos perform best between 2–5 minutes in length.
Whether you’re a product manager recording a feature walkthrough, a customer success lead answering a tricky support question, or an educator building a course module, this guide walks you through the complete process — from planning to sharing. I’ve recorded hundreds of screen recording tutorial videos over the past three years using Zight, and the workflow below is what I come back to every time.
Why Tutorial Videos Beat Written Documentation
Before we dive into the how, let’s address the why — because understanding the payoff changes how seriously you invest in this skill.
- 7× faster to create: In our testing, a 3-minute screen recording takes about 5 minutes total (including a quick trim). The equivalent written doc with screenshots? 30–45 minutes.
- Higher comprehension: Forrester Research found that viewers retain 95% of a message when they watch it in video, compared to 10% when reading text. For software walkthroughs — where the sequence of clicks matters — the gap is even wider.
- Fewer follow-up questions: When I switched from written onboarding docs to short tutorial videos at a previous company, support tickets on “how do I set up X?” dropped by roughly 60% in the first month.
- Async-friendly: The recipient watches on their own time, pauses, replays — no calendar invite required. This is especially critical for distributed teams across time zones.
- Searchable and reusable: A well-titled tutorial video in your knowledge base becomes a permanent resource. New hires find it six months later without anyone lifting a finger.
The bottom line: if you’re explaining anything that involves a screen, a tutorial video is almost always the better format. Now let’s make one.
How to Make a Tutorial Video: 7 Steps From Plan to Publish
Step 1 — Define Your Audience and One Clear Goal
The number-one mistake I see in tutorial videos is scope creep. A video titled “How to Use Our Analytics Dashboard” tries to cover 14 features and ends up helping no one. Instead, narrow it down:
- Who is watching? A brand-new user? A power user upgrading? A colleague in a different department?
- What is the single outcome? “After this video, the viewer will be able to create a custom report and export it as a PDF.”
Write that outcome at the top of a sticky note, a Notion doc, or literally on a Post-it next to your monitor. Every recording decision flows from it.
Pro tip: If your goal sentence includes the word “and” more than once, you probably need two separate videos. Short, focused tutorials outperform long omnibus recordings in both engagement and searchability.
Step 2 — Write a Lightweight Script or Outline
You don’t need a word-for-word script — in fact, scripted tutorial videos often sound robotic. What you need is a bullet-point outline that keeps you on track. Here’s the template I use for every software tutorial video:
- Hook (10 seconds): State the problem. “Ever tried to export a report and gotten a blank PDF? Here’s the fix.”
- Context (15 seconds): Where you are in the app, any prerequisites. “You’ll need admin access and at least one saved report.”
- Walkthrough (1–3 minutes): Step-by-step actions on screen. Narrate what you’re clicking and why.
- Result (10 seconds): Show the successful outcome — the exported PDF, the sent notification, the deployed feature.
- Wrap-up (10 seconds): Quick recap and where to go for help.
That framework keeps most tutorials between 2 and 5 minutes — the sweet spot where completion rates stay above 70%, according to Wistia’s video engagement data.
Pro tip: Do a single dry-run walkthrough of the steps before you hit record. This catches unexpected pop-ups, loading spinners, or permission screens that would force you to restart. It takes 60 seconds and saves you from multiple re-records.
Step 3 — Prepare Your Screen and Environment
Nothing undermines a tutorial faster than a Slack notification popping up mid-recording or a cluttered desktop distracting the viewer. Here’s the prep checklist I run through before every session:
- Close unnecessary tabs and apps. If a browser tab isn’t part of the tutorial, close it. Viewers notice when your tab bar shows “Netflix” or an embarrassing search query.
- Enable Do Not Disturb. On macOS: Control Center → Focus → Do Not Disturb. On Windows 11: Settings → System → Notifications → Do Not Disturb.
- Set your display to 1920×1080. This is the standard for screen recordings — text is readable, and the file size stays manageable. If you’re on a Retina Mac, go to System Settings → Displays and choose a scaled resolution that gives you an effective 1920×1080.
- Use a clean wallpaper. If any desktop space will be visible, a solid-color or simple gradient wallpaper looks more professional than a vacation photo.
- Test your microphone. Record a 10-second test clip, play it back, and listen for echo, background hum, or low volume. In Zight, you can select your audio input source before recording starts — choose your external mic over the built-in laptop mic whenever possible.
Pro tip: If you’re recording a web app, zoom your browser to 110–125% (⌘/Ctrl + Plus). This makes buttons and text larger and easier to follow on screen, especially for viewers watching on smaller devices.
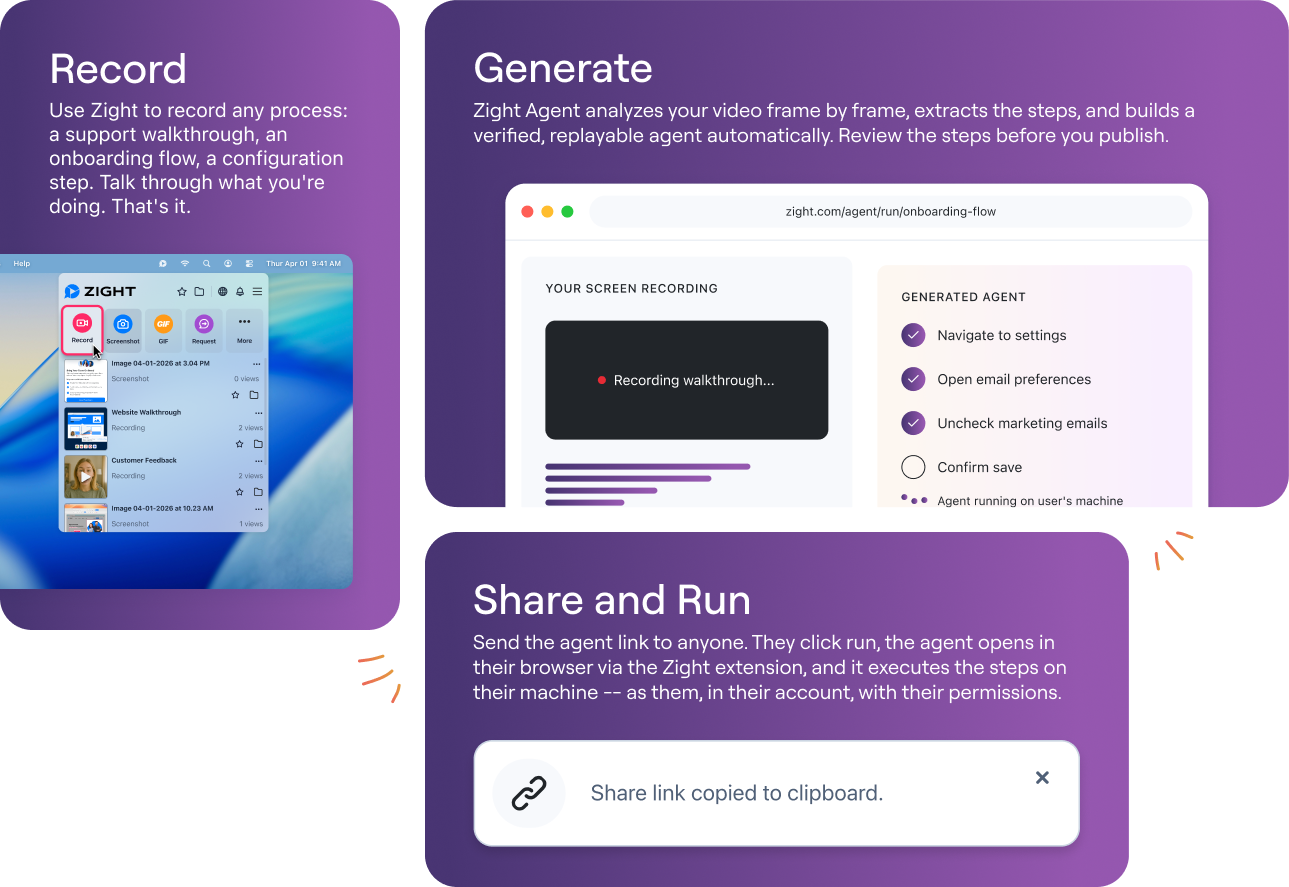
Step 4 — Record Your Screen (with Zight)
This is where most people overthink it. You don’t need a $300 editing suite or a Hollywood lighting rig. You need a tool that makes recording fast, so you actually do it instead of procrastinating. Here’s the exact workflow I use with Zight’s screen recorder:
- Open Zight from the menu bar (macOS) or system tray (Windows). You can also use the Chrome extension if you’re recording a browser-based workflow.
- Click “Record Screen” or use the keyboard shortcut (customizable in Zight preferences — I set mine to ⌘+Shift+6 on Mac).
- Choose your recording area: full screen, a specific app window, or a custom-drawn region. For most software tutorials, recording just the app window keeps the focus tight.
- Select your audio source: pick your microphone from the dropdown. Zight shows input levels so you can confirm the mic is active.
- Toggle webcam overlay (optional): Zight’s webcam recorder adds a small circular face-cam bubble in the corner of your recording. I enable this for customer-facing tutorials — it adds a human element and builds trust. For internal quick-fixes, I usually skip it.
- Hit “Start Recording” and walk through your outline. Narrate naturally — talk as if you’re sitting next to the viewer showing them your screen.
- Click “Stop” when you’re done (or use the keyboard shortcut). Zight automatically uploads the video and copies a shareable link to your clipboard.
The entire process from clicking “Record” to having a shareable link typically takes less time than the tutorial itself. When I tested this against macOS’s built-in ⌘+Shift+5 recorder, the difference was stark: Apple’s tool records a .mov file that sits on your desktop, requires you to open a separate app to trim, and then you still need to upload it somewhere and generate a link. Zight collapses all of that into one step.
Pro tip: If you stumble over a sentence, don’t restart the entire recording. Just pause for two seconds, then re-say the line cleanly. You’ll trim the mistake out in the next step, and nobody will know.
Step 5 — Annotate and Trim
This is the step that separates a “recording” from a “tutorial.” Raw, unedited screen recordings are fine for quick Slack messages, but if you’re creating something that will live in a knowledge base or onboarding sequence, a few minutes of polish make a huge difference.
In Zight’s built-in editor:
- Trim the beginning and end. Almost every recording has 2–5 seconds of dead air at the start (you clicking “Record” and switching windows) and at the end (you reaching for the Stop button). Cut these. Zight’s one-click trim makes this a drag-and-drop operation — no timeline scrubbing.
- Add arrows and text annotations. Draw attention to the exact button or menu item you’re clicking. This is critical for complex UIs where the viewer might lose track of your cursor.
- Blur sensitive data. If your recording captures customer names, email addresses, API keys, or pricing data that shouldn’t be shared, use the blur tool before publishing.
- Add a title and custom thumbnail. This helps when you’re building a library of tutorials — viewers can scan titles without clicking into every video.
A common question I get: “Should I add background music?” For software tutorials, the answer is almost always no. Music competes with your narration and makes the video feel like a marketing piece rather than a helpful walkthrough. Save music for product promos and demo reels.
Pro tip: If you need to highlight a multi-step sequence (like navigating Settings → Integrations → API Keys), use numbered annotations (1, 2, 3) placed directly on the screen at each click point. This gives the viewer a visual breadcrumb trail they can follow even without audio.
Step 6 — Share via Instant Link
Here’s where Zight’s async workflow really shines. The moment you finish recording (or finish trimming), Zight copies a shareable link to your clipboard. No exporting a file, no uploading to YouTube, no waiting for rendering. You paste the link and the recipient clicks to watch — instantly.
Where to share your tutorial video:
- Slack or Microsoft Teams: Paste the link directly into a channel or DM. Zight links unfurl with a preview thumbnail, so your team can see what the video is about before clicking.
- Email: Replace that 10-paragraph explanation with a single line: “Here’s a 2-minute walkthrough: [Zight link].”
- Knowledge base (Notion, Confluence, GitBook): Embed the video directly into your documentation. Zight provides embed codes for popular platforms.
- Support tickets (Zendesk, Intercom, Freshdesk): Customer success teams can drop a tutorial link into a ticket reply instead of writing custom instructions for the hundredth time.
- LMS or onboarding platform: Embed tutorials into your Lessonly, Trainual, or custom onboarding flow.
Zight also gives you viewer analytics — you can see who watched your video, how much of it they watched, and when. This is invaluable for onboarding sequences: if a new hire skipped the “How to Submit Expenses” video, you know to follow up before they miss a reimbursement cycle.
Pro tip: For tutorials you share publicly (help center, community forums), set an expiration on sensitive recordings and use password protection for internal-only content. Both options are available in Zight’s sharing settings.
Step 7 — Organize and Repurpose
One tutorial video is useful. A searchable library of tutorial videos is a competitive advantage. After publishing, take 30 seconds to organize:
- Tag by category: “Onboarding,” “Feature Walkthroughs,” “Bug Fixes,” “Customer-Facing.” Zight’s dashboard supports folders and collections for exactly this.
- Name consistently: Use a naming convention like “[Product Area] — [Specific Task] — [Date].” Example: “Billing — Update Payment Method — 2025-01.”
- Repurpose the content: A 3-minute tutorial can become a GIF highlight for a changelog, a screenshot with annotations for a help article, or a short clip for social media. Zight supports GIF creation from screen recordings, so you can extract the key 10-second moment without a separate tool.
We’ve seen teams at Zight build libraries of 200+ tutorial videos over 6–12 months, and the compounding effect is real: new hires onboard faster, support volume decreases, and tribal knowledge stops living only in senior employees’ heads.
Tutorial Video Use Cases: Who Makes These (and Why)
Tutorial videos aren’t just for training departments. Here are the use cases where we’ve seen the biggest impact:
Product Managers and Developers
- Bug reports with video evidence. Instead of writing “the dropdown doesn’t work on the settings page,” record a 30-second clip showing the exact behavior. Engineers fix bugs faster when they can see the issue.
- Feature walkthroughs for stakeholders. Record a 3-minute demo of a new feature for the weekly product update instead of scheduling a 30-minute meeting with 8 people.
- Sprint demo recordings. Not everyone can attend the live demo. A recorded walkthrough ensures the whole team — including remote and async colleagues — stays informed.
Customer Success and Support Teams
- Personalized troubleshooting videos. Record a 90-second walkthrough specific to a customer’s issue. This feels dramatically more helpful than a generic help article link.
- Scalable onboarding. Build a library of “Getting Started” tutorials that new customers can watch during their first week. Reduces the need for repetitive 1:1 onboarding calls.
- Feature adoption nudges. “I noticed you haven’t tried [Feature X] yet — here’s a 2-minute video showing how it works.” These personalized tutorials drive adoption more effectively than any email copy.
Educators and Course Creators
- Lecture supplements. Record a walkthrough of an assignment, a software tool used in the course, or a complex concept that benefits from visual demonstration.
- Student feedback. Instead of writing “your CSS layout has a margin issue on line 42,” record your screen reviewing their code and pointing out the fix. Students consistently rate video feedback as more helpful and easier to act on.
- Micro-course modules. Build a series of 3–5 minute tutorials that collectively form a self-paced course. Each video covers one concept, and students progress at their own speed.
Tutorial Video Tool Comparison: Zight vs. Popular Alternatives (2025)
If you’re evaluating tools to record tutorial videos, here’s an honest comparison based on our hands-on testing. Every tool below has legitimate strengths — the best choice depends on your specific use case and budget.
| Feature | Zight | Loom | OBS Studio | macOS Built-In (⌘+Shift+5) |
|---|---|---|---|---|
| Price (2025) | Free plan available; Pro from $9.95/mo | Free (25 videos, 5 min limit); Business $15/user/mo | Free, open source | Free (included with macOS) |
| Platforms | Mac, Windows, Chrome | Mac, Windows, Chrome, iOS | Mac, Windows, Linux | macOS only |
| Screen recording | ✅ Full screen, window, or custom region | ✅ Full screen, window, or custom region | ✅ Highly configurable | ✅ Full screen or region |
| Webcam overlay | ✅ Circle or rectangle, resizable | ✅ Circle bubble | ✅ (requires scene setup) | ❌ No |
| Built-in trimming | ✅ One-click drag trim | ✅ Basic trim | ❌ (requires separate editor) | ✅ Basic trim in QuickTime |
| Annotations (arrows, text, blur) | ✅ During and after recording | ⚠️ Drawing only during recording | ❌ No | ❌ No |
| Instant shareable link | ✅ Auto-uploaded, link copied to clipboard | ✅ Auto-uploaded | ❌ (local file only — must upload manually) | ❌ (local file only) |
| GIF creation | ✅ Built-in | ❌ No | ❌ No | ❌ No |
| Screenshots + annotation | ✅ Full screenshot workflow | ❌ No | ❌ No | ✅ Basic (Preview.app) |
| Viewer analytics | ✅ Views, watch time, viewer identity | ✅ Views and engagement | ❌ No | ❌ No |
| Learning curve | Low — 2-minute setup | Low | High — requires scene/source configuration | Very low |
| Best for | Async tutorials, team collaboration, support | Async video messages | Livestreaming, advanced recording | Quick one-off recordings |
Where competitors win: OBS Studio offers unmatched customization for complex multi-source recordings and live streaming — if that’s your primary use case, Zight isn’t the right tool. Loom has a strong iOS app for mobile screen recording, which Zight doesn’t currently offer. And macOS’s built-in recorder requires zero installation, which is convenient for truly one-off, throwaway recordings.
Where Zight wins: The combination of screen recording, annotation, GIF creation, screenshots, and instant link sharing in a single tool eliminates the need to juggle 3–4 separate apps. For teams that create tutorial videos regularly — not just occasionally — this consolidation saves significant time. Zight’s annotation layer (arrows, text, blur) available after recording is a notable advantage over Loom, which only allows drawing during the live recording.
Audio Tips for Better Tutorial Videos
After testing dozens of recording setups, here’s what I’ve learned: viewers will tolerate mediocre video quality, but they won’t tolerate bad audio. A 1080p screen recording with clear narration always outperforms a 4K recording with echo-y, quiet, or muffled voice-over.
- Use an external microphone. Even a $30 USB mic (like the Fifine K669 or a basic headset mic) dramatically outperforms your laptop’s built-in microphone. The difference is night-and-day.
- Record in a quiet room. Close the window, turn off the fan, put your phone on silent. Background noise is amplified in recordings in ways you don’t notice during playback on your own speakers.
- Speak at a consistent distance. Keep your mouth 6–8 inches from the mic. Moving closer or farther creates volume spikes and drops that are distracting.
- Narrate your actions in real-time. Don’t click silently and narrate after the fact — say “I’m clicking Settings in the top-right corner” as you do it. This synchronizes visual and audio cues and makes the tutorial dramatically easier to follow.
- Slow down. When you know a workflow well, you tend to click through it at expert speed. Consciously slow down by about 25% from your natural pace. What feels uncomfortably slow to you will feel perfectly clear to the viewer.
Pro tip: If you’re recording multiple tutorials in one sitting, keep a glass of water nearby and take a sip between recordings. A dry mouth creates mouth clicks and smacking sounds that are extremely noticeable in quiet screen recordings.
Common Tutorial Video Mistakes (and How to Avoid Them)
After reviewing hundreds of tutorial videos — both our own and those created by Zight users — these are the patterns that separate good tutorials from ones that get skipped:
| Mistake | Why It Hurts | Fix |
|---|---|---|
| No hook — jumping straight into clicks | Viewer doesn’t know if this video is relevant to them | Start with a 10-second problem statement |
| Covering too many topics in one video | Viewer can’t find the specific answer they need | One topic = one video. Use a playlist for related topics |
| Not trimming dead air | The first 5 seconds of silence signal “amateur” | Use Zight’s trim tool — takes 10 seconds |
| Tiny cursor / no annotations | Viewer loses track of where you’re clicking | Zoom in, use annotation arrows, or enable cursor highlighting |
| Recording at native Retina resolution | UI text is unreadably small on non-Retina screens | Scale display to effective 1920×1080 before recording |
| No narration (silent screen recordings) | Viewer has to guess why you’re clicking things | Always narrate — even a quick explanation adds massive clarity |
| Leaving notifications visible | Distracting and potentially embarrassing | Enable Do Not Disturb before every recording session |
How to Make a Software Tutorial: Platform-Specific Tips
Recording a software tutorial has a few nuances that general tutorial advice misses:
For Web Apps
- Record just the browser window, not the full screen. This hides your dock/taskbar and keeps the focus on the app.
- Zoom the browser to 110–125% for readability.
- Use a demo account with sanitized data — never record customer PII in a tutorial video.
- If the app has a sandbox or staging environment, record there. This prevents accidental changes to production data.
For Desktop Applications
- Record the app window specifically — Zight lets you select individual application windows as the recording source.
- If the tutorial involves switching between apps (e.g., coding in VS Code and viewing output in Chrome), record the full screen and use annotations to guide the viewer’s attention during app switches.
- Mention keyboard shortcuts as you use them: “I’m pressing ⌘+S to save” — this teaches power-user habits alongside the core workflow.
For Mobile App Tutorials
- Use your phone’s built-in screen recorder, then upload the file to Zight for annotation and sharing.
- Alternatively, mirror your device screen to your desktop (QuickTime on macOS, scrcpy on Windows) and record the mirror with Zight.
- Keep tutorial videos in portrait orientation if the app is portrait-only — forcing landscape creates awkward black bars.
How to Record a Tutorial Video for Free
Budget shouldn’t be a barrier to creating tutorial videos. Here’s how to record tutorial videos free with professional results:
- Sign up for Zight’s free plan. You get screen recording, webcam recording, GIF creation, screenshots, and shareable links — no credit card required.
- Use the headset or earbuds you already own. Built-in mics on AirPods, gaming headsets, or USB earbuds are significantly better than laptop mics and cost you $0 extra.
- Follow the 7-step process above. The process is identical whether you’re on a free or paid plan — paid plans add features like custom branding, longer recording limits, and team workspaces.
If you outgrow the free tier, Zight Pro starts at $9.95/month — significantly less than Camtasia ($300 one-time), ScreenFlow ($175 one-time), or Loom Business ($15/user/month). But for most individual creators and small teams, the free plan covers everything you need to start building a tutorial video library.
Tutorial Video Checklist (Copy and Use Before Every Recording)
Here’s the pre-recording checklist I keep pinned in my Notes app. Feel free to copy it:
- ☐ One clear goal defined (single sentence)
- ☐ Bullet-point outline written (hook → context → walkthrough → result → wrap-up)
- ☐ Dry run completed — no surprises in the workflow
- ☐ Unnecessary tabs/apps closed
- ☐ Do Not Disturb enabled
- ☐ Display set to 1920×1080
- ☐ Microphone selected and tested in Zight
- ☐ Webcam overlay decision: on or off?
- ☐ Demo/sandbox account loaded with clean sample data
- ☐ Water within reach
Frequently Asked Questions
What is the best tool to record a tutorial video for free?
Zight offers a free plan that includes screen recording, webcam recording, screenshots, and GIF creation for Mac, Windows, and Chrome. It lets you record, annotate, trim, and share tutorial videos via an instant link — no video editing software required. Other free options include OBS Studio (powerful but steep learning curve) and Loom’s free tier (limited to 25 videos of 5 minutes each as of 2025).
How long should a tutorial video be?
Aim for 2–5 minutes. Wistia’s engagement data shows that completion rates stay above 70% for videos under 5 minutes and drop sharply after 10 minutes. If your topic genuinely requires more time, split it into a series of focused videos rather than creating one long recording. Each video should cover exactly one task or concept.
Do I need a professional microphone to make a tutorial video?
No, but audio quality matters more than video quality for tutorials. A $30–$60 USB microphone (like the Fifine K669 or Audio-Technica ATR2100x) dramatically improves clarity over a built-in laptop mic. At minimum, use a headset with a built-in mic and record in a quiet room.
Can I add a webcam overlay to my screen recording tutorial?
Yes. Zight’s webcam recorder lets you add a circular or rectangular webcam bubble to any screen recording. This face-cam overlay increases viewer trust and engagement — particularly for customer-facing or educational content. You can toggle the webcam on or off before or during recording.
How do I make a software tutorial with no editing experience?
Use a tool like Zight that includes a built-in trimmer and annotation layer. Record your screen while narrating the steps, trim the first and last few seconds of dead air, add arrows or text callouts to highlight key clicks, and share the instant link. No timeline editing, no export settings, no rendering — the entire process takes under 5 minutes for a typical 3-minute tutorial. Zight’s video editor is not a replacement for Premiere or Final Cut, but for screen recording tutorials, you don’t need those tools.
What screen resolution should I record tutorials in?
Record at 1920×1080 (1080p) for the best balance of clarity and file size. If you’re on a Retina/HiDPI display, set your display scaling to an effective resolution of 1920×1080 so UI elements appear at a readable size. Recording at 4K produces unnecessarily large files for software tutorials and doesn’t improve the viewer experience on most screens.
Should I use Zight or Loom for tutorial videos?
Both are strong tools. Zight’s key advantages for tutorials are post-recording annotations (arrows, text, blur), built-in GIF creation, and a combined screenshot + recording workflow. Loom’s advantages include a mobile iOS app and a larger existing user base for video messaging. If your primary need is annotated software tutorials for teams, Zight is the better fit. If you mainly send quick face-to-camera video messages, Loom works well too. See the comparison table above for a full feature breakdown.
Start Making Tutorial Videos Today
The best tutorial video is the one you actually record. Most people overthink the production quality, the script, the lighting — and end up writing another 45-minute document instead. Here’s the reality: a “good enough” 3-minute screen recording with clear audio and basic annotations is infinitely more helpful than a polished document that takes an hour to write and 15 minutes to read.
Download Zight for free, record your first tutorial using the 7-step process above, and share the link. You’ll wonder why you ever wrote another how-to email again.
Written by the Zight team, based on testing across Mac, Windows, and Chrome. Last updated January 2025.


