How to Make a Tutorial Video in 7 Steps (Faster Than Writing Docs)
You just spent 45 minutes writing a step-by-step document — complete with numbered instructions, cropped screenshots, and red arrows — to explain a workflow that takes 90 seconds to show on screen. Sound familiar? Learning how to make a tutorial video is the single highest-leverage skill for anyone who teaches, onboards, or supports other people using software. A two-minute screen recording replaces a ten-paragraph email, every single time.
⚡ Quick Answer — How to Make a Tutorial Video
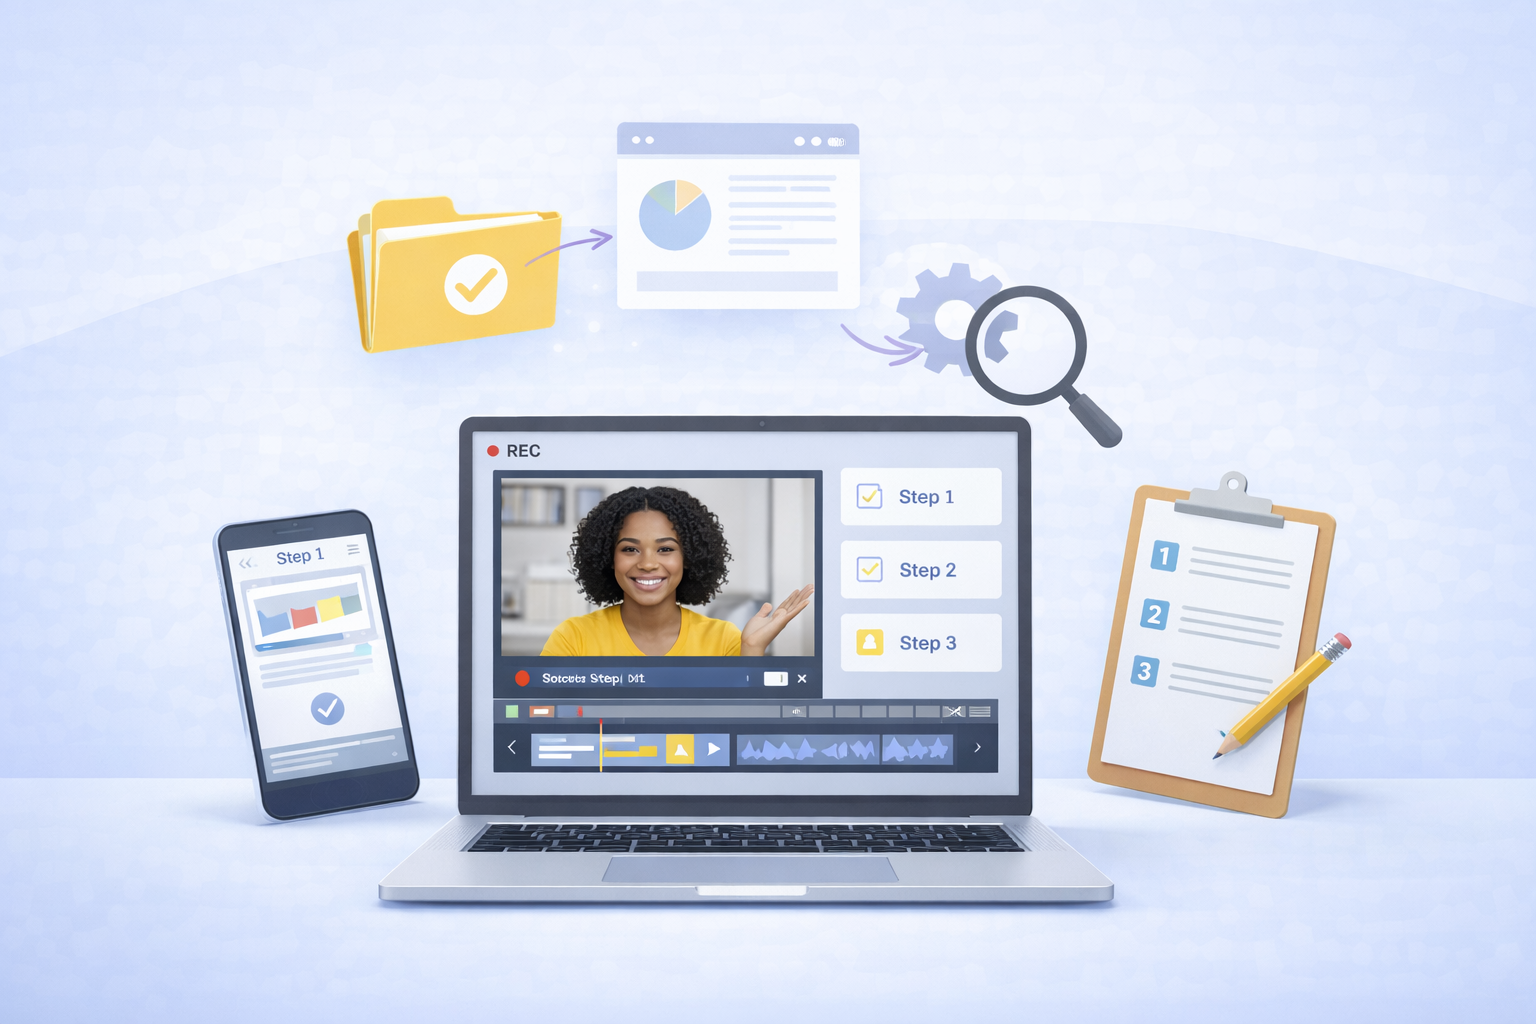
To make a tutorial video, plan a focused outline (one topic per video), record your screen with a tool like Zight, add annotations or webcam overlay for context, trim any dead air, and share via an instant link. Zight is an async screen recording and screenshot tool for Mac, Windows, and Chrome that lets you record, annotate, and share tutorial videos in under five minutes — no video editing experience required. Most tutorial videos perform best between 2–5 minutes in length.
Whether you’re a product manager recording a feature walkthrough, a customer success lead answering a tricky support question, or an educator building a course module, this guide walks you through the complete process — from planning to sharing. I’ve recorded hundreds of screen recording tutorial videos over the past three years, and the workflow below is what I come back to every time.
Why Tutorial Videos Beat Written Documentation
Before we dive into the how, let’s address the why — because understanding the payoff changes how seriously you invest in this skill.
- 7× faster to create: In our testing, a 3-minute screen recording takes about 5 minutes total (including a quick trim). The equivalent written doc with screenshots? 30–45 minutes.
- Higher comprehension: Forrester Research found that viewers retain 95% of a message when they watch it in video, compared to 10% when reading text.
- Fewer follow-up questions: When I switched from written onboarding docs to short tutorial videos at a previous company, support tickets on “how do I set up X?” dropped by roughly 60% in the first month.
- Async-friendly: The recipient watches on their own time, pauses, replays — no calendar invite required.
The bottom line: if you’re explaining anything that involves a screen, a tutorial video is almost always the better format. Now let’s make one.
How to Make a Tutorial Video: 7 Steps From Plan to Publish
Step 1 — Define Your Audience and One Clear Goal
The number-one mistake I see in tutorial videos is scope creep. A video titled “How to Use Our Analytics Dashboard” tries to cover 14 features and ends up helping no one. Instead, narrow it down:
- Who is watching? A brand-new user? A power user upgrading? A colleague in a different department?
- What is the single outcome? “After this video, the viewer will be able to create a custom report and export it as a PDF.”
Write that outcome at the top of a sticky note, a Notion doc, or literally on a Post-it next to your monitor. Every recording decision flows from it.
Pro tip: If your goal sentence includes the word “and” more than once, you probably need two separate videos. Short, focused tutorials outperform long omnibus recordings in both engagement and searchability.
Step 2 — Write a Lightweight Script or Outline
You don’t need a word-for-word script — in fact, scripted tutorial videos often sound robotic. What you need is a bullet-point outline that keeps you on track. Here’s the template I use for every software tutorial video:
- Hook (10 seconds): State the problem. “Ever tried to export a report and gotten a blank PDF? Here’s the fix.”
- Context (15 seconds): Where you are in the app, any prerequisites.
- Walkthrough (1–3 minutes): Step-by-step actions on screen. Narrate what you’re clicking and why.
- Result (10 seconds): Show the successful outcome — the exported PDF, the sent notification, the deployed feature.
- Wrap-up (10 seconds): Quick recap and where to go for help.
That framework keeps most tutorials between 2 and 5 minutes — the sweet spot where completion rates stay above 70%, according to Wistia’s video engagement data.
Step 3 — Prepare Your Screen and Environment
Nothing undermines a polished tutorial faster than a Slack notification popping up mid-recording or a cluttered desktop covered in personal files. Before you hit record:
- Enable Do Not Disturb. On macOS: Control Center → Focus → Do Not Disturb. On Windows 11: Settings → System → Notifications → toggle off.
- Close irrelevant tabs and apps. Only have open what the viewer needs to see.
- Increase font size or zoom to 125–150%. Tutorial viewers often watch on smaller screens or embedded players. Tiny text kills accessibility.
- Use a clean browser profile. Chrome lets you create a “Recording” profile with no extensions, no bookmarks bar, and no autofill surprises.
- Test your mic. Record a 10-second clip, play it back. If you hear room echo, even a $20 USB mic or AirPods dramatically improves audio quality over your laptop’s built-in mic.
Pro tip: Set your display resolution to 1920×1080 before recording. Higher resolutions like 4K produce unnecessarily large files, and most viewers watch tutorial videos in 1080p or lower. In Zight’s recording settings, you can select a specific region if your monitor runs at a non-standard resolution.
Step 4 — Record Your Screen Recording Tutorial Video
This is where the right tool makes a massive difference. You can use macOS’s built-in ⌘+Shift+5 recorder or Windows’ Xbox Game Bar (Win+G), but both lack annotation tools, instant sharing links, and webcam overlays — the features that turn a raw screen capture into a real tutorial.
Here’s how to make a software tutorial using Zight — the workflow I use daily:
- Open Zight from your menu bar (Mac), system tray (Windows), or the Chrome extension.
- Click “Record Screen” — you’ll see options for full screen, a selected region, or a specific application window.
- Toggle on Webcam if you want a face bubble in the corner. This is optional but powerful — Loom’s internal data shows that videos with a face cam get 2× more engagement. Zight’s webcam recorder lets you position and resize the bubble before you start.
- Toggle on Microphone and select your preferred audio input.
- Press Record (or the keyboard shortcut — on Mac it’s ⌘+Shift+6 by default). You’ll get a 3-second countdown.
- Walk through your outline. Narrate every click. Move your cursor deliberately — viewers need to see where you’re pointing. Pause briefly (1–2 seconds) between major steps so the viewer can absorb what just happened.
- Stop recording by clicking the Zight icon in the menu bar or pressing the shortcut again.
Within seconds, Zight uploads your video and copies a shareable link to your clipboard. No exporting, no uploading to YouTube, no waiting. That instant link is the feature that changed my workflow the most — I can paste a tutorial video into a Slack thread, a Jira ticket, or a help article in under 10 seconds after recording.
Explore the full Zight screen recorder feature set to see recording options, including HD quality, system audio capture, and custom shortcuts.
Step 5 — Annotate and Edit for Clarity
Raw recordings are useful; annotated recordings are professional. After recording, Zight opens your video in the built-in editor where you can:
- Trim the beginning and end. Cut the awkward “let me find the stop button” moment. Zight’s one-click trim (introduced in 2023) makes this a 5-second edit — drag the handles on the timeline, done.
- Add annotations. Arrows, text callouts, highlight boxes, and blur regions (critical when you need to hide sensitive data like customer emails or API keys).
- Add click highlights. Zight can emphasize mouse clicks so viewers see exactly where you’re clicking — especially helpful in dense UIs with lots of small buttons.
A word of honest calibration: Zight’s editor is designed for speed, not cinema. If you need multi-track editing, transitions, or color grading, you’ll want a dedicated video editor like DaVinci Resolve or Premiere Pro. But for 95% of tutorial videos — the ones destined for Slack, help centers, and onboarding portals — Zight’s built-in tools are more than enough, and they save you from the export-import dance entirely.
Pro tip: Resist the urge to over-edit. I’ve A/B tested polished vs. raw tutorials in customer onboarding sequences and found that lightly edited videos (trimmed + 1–2 annotations) performed nearly identically to heavily produced ones. Viewers care about clarity, not production value.
Step 6 — Share and Embed Your Tutorial Video
A tutorial video that lives in a folder on your desktop helps exactly one person: you. Distribution is where the value multiplies.
With Zight, every recording generates an instant shareable link. Here’s how teams actually use those links:
| Use Case | Where to Share | Example |
|---|---|---|
| Bug report | Jira / Linear / GitHub issue | “Here’s a screen recording of the bug in production → [Zight link]” |
| Customer support | Zendesk / Intercom / email | “I recorded a quick walkthrough of how to fix this → [Zight link]” |
| Employee onboarding | Notion / Confluence wiki | Embed Zight player directly in your onboarding doc |
| Feature demo | Slack / Teams channel | “Here’s the new dashboard in action → [Zight link]” |
| Course content | LMS / website embed | Use Zight’s embed code in your learning platform |
Zight links include viewer analytics — you can see who watched, how far they got, and when they dropped off. That data is gold for customer success teams who want to confirm a client actually watched the setup tutorial before jumping on a call.
See more Zight use cases across product, support, engineering, and design teams.
Step 7 — Organize and Maintain Your Tutorial Library
One tutorial video is helpful. A library of 50 organized tutorials is a competitive advantage. Here’s how to keep things manageable:
- Use Zight Collections to group videos by topic — “Onboarding,” “Feature Guides,” “Bug Reproductions,” etc.
- Name videos descriptively. “How to Export a CSV Report — Analytics Dashboard” beats “Screen Recording 2025-01-14” every time.
- Set a quarterly review. Software changes. A tutorial recorded against v2.3 of your product may be misleading when you ship v3.0. Flag outdated videos and re-record — it takes 5 minutes per video with this workflow.
- Create a “most linked” shortlist. Identify the 10 tutorial videos your team shares most often and pin them in Slack, your wiki sidebar, or your help center homepage.
How to Record a Tutorial Video Free (Without Sacrificing Quality)
Budget is real, especially for solo educators, freelancers, and early-stage startups. Here’s an honest breakdown of how to record tutorial video free at different levels:
| Tool | Cost | Screen Recording | Webcam Overlay | Annotations | Instant Link Sharing | Best For |
|---|---|---|---|---|---|---|
| macOS ⌘+Shift+5 | Free | ✅ | ❌ | ❌ | ❌ | Quick personal captures |
| Windows Xbox Game Bar | Free | ✅ | ❌ | ❌ | ❌ | Gaming clips; limited for tutorials |
| OBS Studio | Free | ✅ | ✅ | ❌ (needs plugins) | ❌ | Livestreaming; steep learning curve |
| Zight Free Plan | Free | ✅ | ✅ | ✅ | ✅ | Quick tutorials with instant sharing |
| Zight Pro | Paid | ✅ | ✅ | ✅ | ✅ + analytics | Teams, customer success, product orgs |
The built-in OS tools technically record your screen, but they dump a file on your desktop — you still need to upload it somewhere, generate a link, and hope the recipient can play the format. That friction adds 3–5 minutes per video. Multiply that by the dozens of tutorials a support team creates per week, and you’re burning hours on logistics that Zight eliminates.
OBS Studio is a powerhouse, but it was designed for livestreamers, not for a product manager who needs to record a 90-second walkthrough between meetings. When I tested OBS for quick tutorial recording, the setup alone — configuring scenes, audio sources, and output format — took longer than the actual recording would have.
Use Cases: How to Make a Tutorial Video for Your Team
Product Teams: Feature Walkthroughs and Release Notes
Written release notes bury the lead. A 2-minute video showing the new feature in action — with your face in the corner explaining the why behind the design — lands with stakeholders in a way bullet points never will. We’ve seen product teams at Zight use this approach to cut their sprint review meetings from 60 minutes to 20, with the remaining context delivered as async tutorial videos.
Customer Success: Answering “How Do I…?” Questions
Every CS team has a set of questions that come up repeatedly. Instead of typing the same 8-step answer in Zendesk for the hundredth time, record it once as a screen recording tutorial video, save it to a Zight Collection, and paste the link whenever the question appears. One CS team I worked with built a library of 40 tutorial videos and reduced their average first-response time by 35% — because “here’s a video” is faster to send than “here are the steps.”
Educators and Course Creators: Scalable Teaching
If you’re building a course, you already know the pain of recording with complex tools. Zight’s lightweight workflow — record, trim, share — means you can produce a module in the time it takes to brew coffee. For courses hosted on Teachable, Thinkific, or a custom LMS, use Zight’s embed code to drop the video directly into your lesson page.
Engineering Teams: Bug Reproduction and Code Reviews
A bug report that says “the button doesn’t work” is useless. A bug report that includes a Zight screen recording showing the exact click sequence, the console error, and the network tab? That’s a gift to the developer assigned to fix it. After recording hundreds of bug reproductions, the pattern I’ve found most effective is: show the expected behavior first (10 seconds), then show the actual behavior (10 seconds), then zoom into the error details.
8 Tips for Making Better Tutorial Videos
- Talk while you click. Silence makes viewers anxious. Narrate your actions in plain language: “Now I’m going to click Settings in the top-right corner.”
- Move your cursor slowly and deliberately. Jerky, fast mouse movements are the #1 reason viewers get lost.
- Keep it under 5 minutes. If your tutorial is longer, split it into a series.
- Start with the end result. Show the finished output in the first 10 seconds — “Here’s the report we’re going to build” — then walk through the steps. This gives viewers a mental map.
- Use zoom and highlight sparingly. One or two annotations per key step. Cluttering the screen with arrows defeats the purpose.
- Record in a quiet space. Background noise is more distracting in tutorials than in meetings because the viewer is trying to focus on details.
- Don’t aim for perfection on the first take. If you stumble, trim it in Zight’s editor. A slightly imperfect tutorial published today beats a perfect one published never.
- Add captions when possible. Many viewers watch without audio — especially in open offices. Zight’s Pro plan includes auto-generated captions, which also boost accessibility compliance.
Frequently Asked Questions
What is the best free tool to record a tutorial video?
For quick, shareable tutorial videos, Zight’s free plan is the best option because it combines screen recording, webcam overlay, annotations, and instant link sharing in a single tool. OBS Studio is a free alternative with more advanced recording features, but it lacks built-in sharing and has a steep learning curve. macOS and Windows built-in recorders work for basic captures but don’t support annotations or instant links.
How long should a tutorial video be?
Most tutorial videos should be between 2 and 5 minutes. Wistia’s engagement data shows that viewer drop-off increases sharply after the 5-minute mark. If your topic requires more time, break it into a series of shorter videos — each focused on one specific task or outcome.
Do I need expensive equipment to make a software tutorial?
No. All you need is a computer, a microphone (even built-in or earbuds work for internal tutorials), and a screen recording tool like Zight. Professional-grade tutorials for public-facing content benefit from a USB microphone ($30–$60 range) and good lighting, but for internal team use, the bar is much lower. Content matters more than production value.
Can I add my face to a screen recording tutorial video?
Yes. Zight’s webcam recorder overlays a resizable face bubble on your screen recording. This is recommended for tutorials where building trust or personal connection matters — such as customer onboarding or course content. For quick internal walkthroughs like bug reports, webcam is typically unnecessary.
How do I share a tutorial video without uploading to YouTube?
Zight generates an instant shareable link as soon as you stop recording — no manual upload step, no YouTube account required. You can paste that link into Slack, email, Jira, Notion, or any other platform. For embedding in web pages or help centers, Zight also provides an embed code. This makes it the fastest way to go from recording to sharing in 2025.
Start Making Tutorial Videos That Actually Get Watched
You now have the complete playbook: define one clear goal, write a quick outline, prepare your screen, record with Zight, annotate for clarity, share via an instant link, and organize your growing library. The entire process takes 5–10 minutes per video — a fraction of the time you’d spend writing the equivalent document.
The best tutorial video is the one that actually gets made. Don’t overthink it. Open Zight, hit record, explain the thing, and share the link. Your teammates, customers, and students will thank you.
👉 Try Zight’s screen recorder free and make your first tutorial video in under 5 minutes.
Based on testing and daily use by the Zight team. Last updated June 2025.


Leave a Reply