Step-by-Step Guide for Updating a Podcast Image in Figma
Need to remove a background from an image and drop it into your Figma design? This step-by-step guide shows you how to quickly take a photo, like one from LinkedIn, remove its background using Adobe Express, and replace it in Figma.
1. Open Adobe Express
- Navigate to Adobe Express for photo editing.
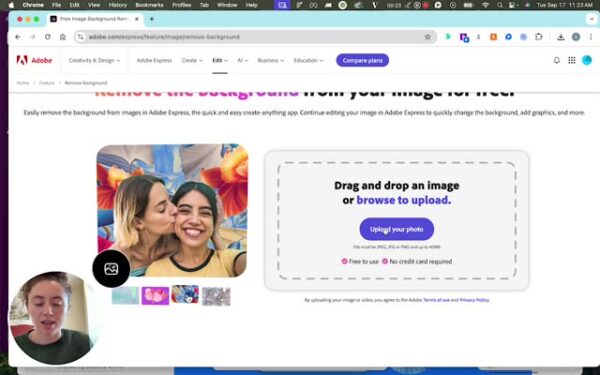
2. Find a Picture on LinkedIn and Remove the Background in Adobe Express
- Locate a suitable picture on LinkedIn.
- Use Adobe Express to remove the background from this picture.
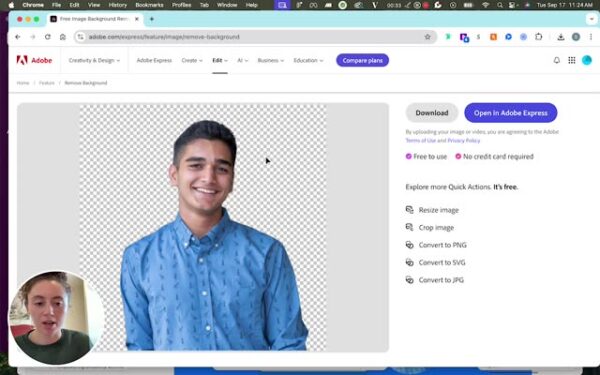
3. Download and Return to Figma to Replace the Image
- Download the edited picture and return to Figma.
- Click on the image in Figma, and upload the new one from your computer.
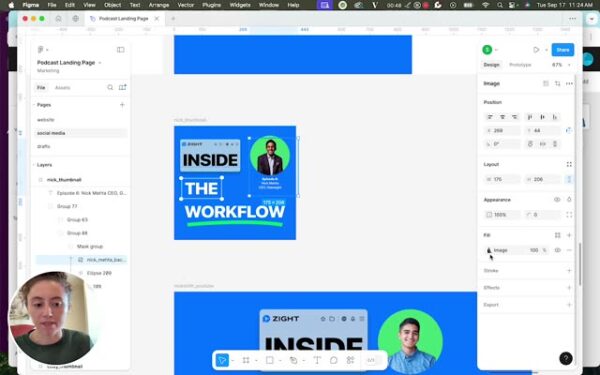
4. Select the New File from Adobe Express
- Choose the file you just edited with Adobe Express.

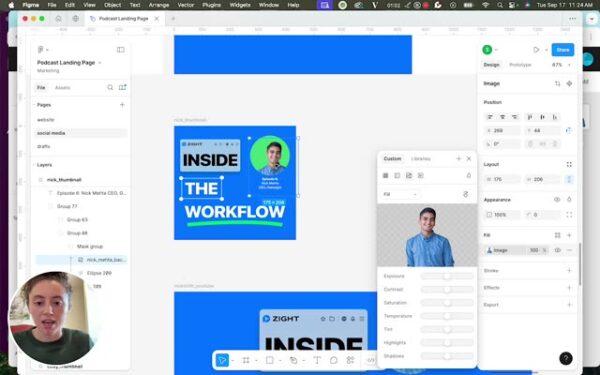
5. Resize and Adjust the Image
- Resize and reposition the image until it fits well.
6. Export the Updated Design
- Go to the export option, select the file type, and hit save.
The Ultimate Guide to Updating a Podcast Image in Figma
Refreshing your podcast image can make a big difference in how your brand is perceived online. Whether you’re creating a new look or refining your existing design, updating visuals in Figma is simple once you know the process. By combining tools like Adobe Express for background removal and Figma’s design flexibility, you can create clean, professional podcast artwork that stands out on every platform.
This guide walks you through how to replace an image in Figma using an updated version edited in Adobe Express. It’s perfect for marketers, designers, and creators who want to maintain consistency across their digital content.
Why updating your podcast image matters
Your podcast image is often the first thing new listeners see. It represents your brand’s personality, tone, and professionalism. A well-designed, up-to-date image builds credibility and helps your show stand out in crowded directories like Spotify, Apple Podcasts, or YouTube.
If your existing artwork looks dated or doesn’t align with your current style, updating it is an easy way to refresh your visual identity. Even small improvements like a cleaner background, sharper colors, or a more balanced layout can make a big impact.
Preparing your image for Figma
Before replacing an image in Figma, it’s helpful to prep your visual assets. Many creators use Adobe Express to remove backgrounds or enhance photos before uploading them to their design project.
Start by selecting a high-quality image, ideally from a professional source such as LinkedIn or your media library. Using Adobe Express, you can quickly remove any distracting background elements to create a polished, transparent image that fits seamlessly into your design.
Once your image is ready, download it as a PNG file. PNG format preserves transparency, which ensures your new image blends perfectly into the background of your Figma layout.
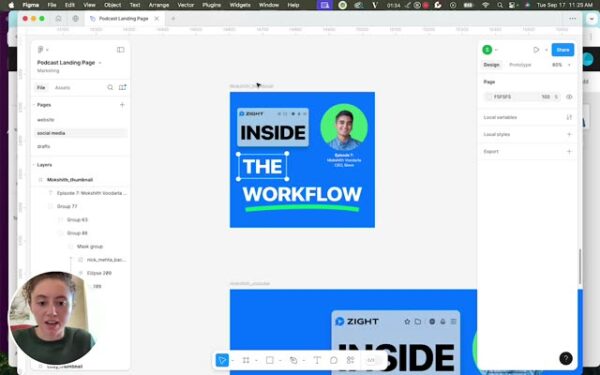
Replacing the image in Figma
After editing your image, open your Figma project and locate the frame or component where your podcast image is placed. Click on the existing image to select it, then upload your newly edited photo from Adobe Express.
Figma makes replacing images straightforward. You can either drag and drop your file directly into the canvas or use the “Replace Image” option in the right-hand menu. Once uploaded, your new image will automatically replace the old one while keeping the same layout and proportions.
Take a moment to review how the image fits with surrounding elements like text, background color, or logo placement. This is your chance to refine spacing and make sure everything looks cohesive.
Adjusting and refining the image
Once the new image is in place, you may need to adjust its size or position for the best visual balance. Figma’s resizing tools make this easy. Simply drag the corner handles to scale the image proportionally, or use the alignment tools to center it within the frame.
If your image still looks slightly off, consider adjusting the opacity, adding a shadow, or tweaking its border radius for smoother edges. These small refinements help your design look professional and intentional.
For teams working collaboratively, it’s helpful to leave comments in Figma so others can review the changes. Collaboration ensures everyone is aligned before exporting the final version.
Exporting and saving your updated design
When you’re happy with the new image, export the updated design in your preferred format. Most podcast platforms accept JPEG or PNG files, though you can also export as SVG if you need a scalable vector version.
Go to the export panel in Figma, choose your format, and adjust the resolution if needed. High-resolution images look sharper on streaming platforms and promotional materials. Save your file with a clear name, such as “Podcast_Cover_2025,” to stay organized for future updates.
You can then upload your new design to your podcast hosting platform or share it on social media. The polished result will instantly elevate your brand and attract more attention from potential listeners.
Tips for maintaining visual consistency
Updating your podcast image is a great opportunity to ensure brand consistency. Here are a few quick tips:
-
Use your brand’s color palette to keep your design recognizable.
-
Keep typography and spacing consistent with your website or promotional graphics.
-
Save your design components in Figma so you can reuse them for future projects.
-
Create a shared Figma file for all podcast-related assets so your team can easily collaborate and make updates.
Maintaining a unified design language across all your visuals helps build trust and makes your content more memorable.
Conclusion
Updating your podcast image in Figma is a quick and effective way to refresh your brand’s look. By combining the precision of Adobe Express for image editing with Figma’s collaborative design tools, you can create professional visuals that reflect your podcast’s personality and purpose.
Whether you’re preparing for a rebrand or simply refining your existing cover art, this process ensures your design stays current and polished. And if you want to document or share your creative workflow, Zight can help you capture every step effortlessly.
A great podcast deserves great visuals — and with Figma, achieving that look is easier than ever.
Frequently Asked Questions
Yes, there are other tools like Canva, Remove.bg, or Photoshop, but Adobe Express is a fast and reliable option for quick edits.
PNG is recommended for transparent backgrounds, while JPEG works best for full-color images without transparency.
Use the alignment tools and grid guides to center your image and maintain consistent spacing across your layout.
Figma offers basic editing like cropping and scaling, but for advanced edits such as background removal or retouching, use tools like Adobe Express first.
For most platforms, 3000×3000 pixels is ideal, ensuring your artwork looks sharp even on high-resolution displays.
You can invite team members to your Figma project using shared links. They can view, comment, or edit depending on permissions.
Preview your design in Figma using presentation mode, or export a sample and view it in context on your podcast platform.
Yes, Zight makes it easy to record your screen while updating your podcast image, which is great for tutorials, training, or creative showcases.


