How to Record Screen on Mac: The Complete Step-by-Step Guide (2026)
To record your screen on Mac, press ⌘ + Shift + 5 to open the built-in Screenshot toolbar, choose “Record Entire Screen” or “Record Selected Portion,” click Record, then click Stop in the menu bar when you’re done. Your recording saves as a .mov file — but the built-in tool stops there. If you need instant shareable links, annotations, webcam overlay, or GIF export, Zight is a faster, more complete workflow that picks up where macOS leaves off. This guide walks through both methods step-by-step, plus QuickTime Player for older Macs, so you can choose the right approach for your exact use case.
⚡ Quick Answer
Press ⌘ + Shift + 5 on any Mac running macOS Mojave or later. Choose your recording mode, click Record, and click Stop when finished. The file saves as a .mov to your Desktop. For a workflow with instant sharing links, annotations, webcam overlay, and GIF creation, use Zight — a screen recording and async video tool that copies a shareable URL to your clipboard the moment you stop recording, with no manual file upload or compression.
What’s in This Guide
- Why screen recording on Mac matters in 2026
- Method 1: Built-in Screenshot Toolbar (⌘+Shift+5)
- Method 2: QuickTime Player (for older macOS versions)
- Method 3: Zight — screen record with instant sharing & annotations
- Feature comparison table: Built-in vs. QuickTime vs. Zight
- How to record screen on Mac with audio
- How to record screen on Mac with your face (webcam)
- Pro tips for better Mac screen recordings
- Troubleshooting common issues
- FAQ
Why You Need to Screen Record on Mac
Screen recordings have replaced the long, awkward “let me describe what I’m seeing” emails that slow teams down. Instead of writing ten paragraphs to explain a UI bug, you record a 30-second clip and drop a link in Slack. Instead of scheduling a live call to onboard a new hire, you record a walkthrough they replay on their own time.
After recording hundreds of screen sessions across different tools and macOS versions, I can tell you the biggest bottleneck is never the recording itself — it’s what happens after you hit Stop. Finding the file, compressing it, uploading it to Google Drive, pasting the link — that post-recording friction is where most people waste 3–5 minutes per clip. Multiply that by five or ten recordings a day and you’re losing nearly an hour.
Here are the most common use cases for screen capture Mac workflows in 2026:
- Bug reporting — Show developers exactly what happened, step by step, instead of writing reproduction steps they’ll misinterpret.
- Async feedback — Record design or code review comments without scheduling a meeting. A two-minute video replaces a 20-minute call.
- Customer support — Send a personalized walkthrough instead of a generic help article. We’ve seen customer success teams at Zight cut ticket resolution time by 30%+ this way.
- Internal documentation & SOPs — Record processes that new team members can follow at their own pace, pause, and rewind.
- Product demos & sales — Create polished clips for sales decks, landing pages, or social posts without a full video production setup.
- Education & training — Walk students or trainees through software, spreadsheets, or code line by line.
The question isn’t whether you should record your screen — it’s which method gets the job done fastest. Let’s start with the tool you already have.
Method 1: How to Record Screen on Mac with the Built-In Screenshot Toolbar (⌘ + Shift + 5)
Every Mac running macOS Mojave (10.14) or later — including macOS Sonoma and macOS Sequoia — includes a native screen recording tool accessible through the Screenshot toolbar. It’s simple, free, and requires zero downloads. Here’s exactly how to use it.
Step 1: Open the Screenshot Toolbar
Press ⌘ + Shift + 5 on your keyboard. A floating toolbar will appear at the bottom of your screen with several icons — three for screenshots on the left, and two for screen recording on the right.
Step 2: Choose Your Recording Mode
You’ll see two recording options in the toolbar:
- Record Entire Screen (solid rectangle icon) — Captures everything on your display, including the Dock and menu bar.
- Record Selected Portion (dashed rectangle icon) — Lets you drag to select a specific region of your screen. This is ideal when you only want to capture one app window or a portion of a page.
Click the option you want. If you chose “Record Selected Portion,” drag the handles of the selection box to frame exactly the area you want to capture. You can also reposition the entire selection box by clicking and dragging inside it.
Step 3: Configure Recording Options
Click Options in the toolbar to customize your recording before you start:
- Save to: Choose Desktop, Documents, Clipboard, Mail, Messages, Preview, or a custom folder.
- Timer: Set a 5-second or 10-second countdown delay before recording starts. Useful when you need to navigate to a specific screen first.
- Microphone: Select your microphone to record voiceover narration. By default, this is set to “None” — you must explicitly enable it if you want audio (see the recording with audio section below).
- Show Mouse Clicks: When enabled, a dark circle appears around your cursor each time you click. This is extremely helpful for tutorials and walkthroughs.
- Show Floating Thumbnail: Toggles the post-recording thumbnail preview in the bottom-right corner.
⚠️ Important: The built-in macOS recorder captures microphone audio only — it does not record internal system audio (sounds from apps, browser tabs, video calls, etc.). If you need to capture what’s playing on your Mac, you’ll need a third-party tool. More on this in the audio section.
Step 4: Start Recording
Click the Record button in the toolbar. If you selected “Record Entire Screen,” you may need to click anywhere on the screen to begin. A small Stop icon (⏹) will appear in your Mac’s menu bar to indicate recording is active.
Step 5: Stop Recording
When you’re finished, stop the recording using one of these methods:
- Click the Stop button (⏹) in the menu bar.
- Press ⌘ + Control + Esc.
- Press ⌘ + Shift + 5 again and click the Stop button in the toolbar.
A thumbnail preview appears in the bottom-right corner of your screen (if you left “Show Floating Thumbnail” enabled). Click it to open a quick editor where you can trim the beginning or end of the clip before saving. If you don’t click it, the file saves automatically to your chosen location.
Step 6: Find and Share Your Recording
Your recording saves as a .mov file (H.264 codec) at your display’s native resolution. On a MacBook Pro with Retina display, expect roughly 100–150 MB per minute of recording at full resolution. The file will be at the location you specified in Options — by default, that’s your Desktop.
From here, sharing requires manual steps: upload to Google Drive, Dropbox, or Slack, wait for the upload, then copy and paste the link. This is exactly where the built-in workflow becomes a bottleneck — and where tools like Zight eliminate friction entirely.
Method 2: How to Screen Record on MacBook Using QuickTime Player
If you’re on a Mac running macOS High Sierra (10.13) or earlier, or if you simply prefer a standalone app, QuickTime Player offers a screen recording option that predates the ⌘+Shift+5 toolbar.
- Open QuickTime Player from Applications or Spotlight (⌘ + Space, type “QuickTime”).
- In the menu bar, click File → New Screen Recording.
- On macOS Mojave or later, this opens the same ⌘+Shift+5 toolbar. On older macOS versions, a small recording window appears.
- Click the dropdown arrow next to the Record button to choose your microphone and toggle “Show Mouse Clicks in Recording.”
- Click the red Record button. Click anywhere to record the full screen, or drag to select a portion.
- Click the Stop button in the menu bar when finished.
- QuickTime opens your recording for preview. Go to File → Save (or File → Export As) to save the .mov file.
QuickTime also allows basic trimming (Edit → Trim) before saving, which is handy for cutting dead air at the start or end of your recording. However, it shares the same limitations as the Screenshot toolbar: no system audio capture, no annotations, no webcam overlay, and no automatic sharing.
Pro tip: On macOS Sequoia (15.x) and later, QuickTime Player can also capture your iPhone or iPad screen over a USB connection. Plug in your device, open QuickTime, choose File → New Screen Recording, then select your iPhone from the dropdown. Useful for recording mobile app demos without a separate iOS screen recording tool.
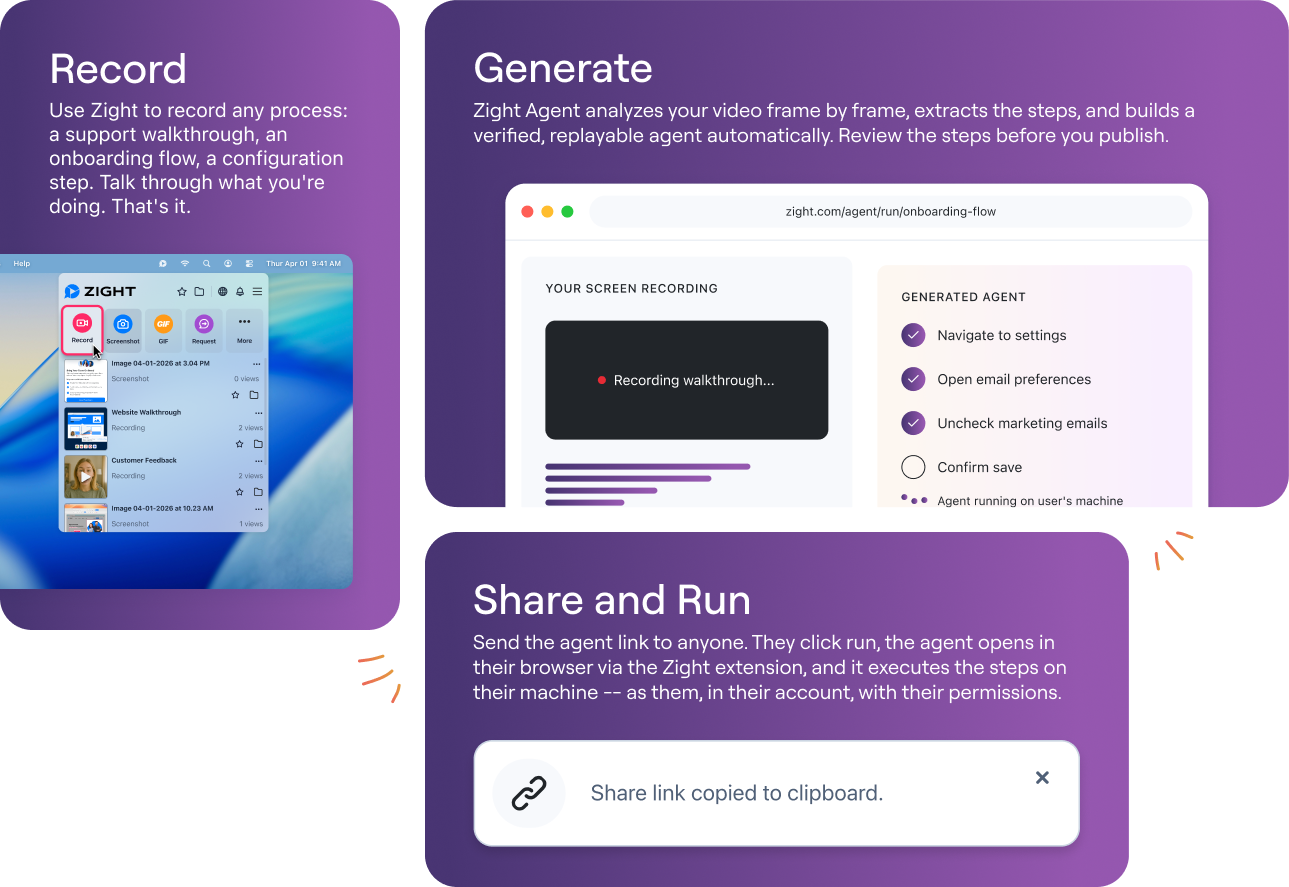
Method 3: How to Record Screen on Mac with Zight (Instant Sharing, Annotations, GIFs)
The built-in macOS tools handle the recording part well enough, but they fall short the moment you need to actually do something with that recording — share it instantly, annotate it, add a webcam overlay, or convert it to a GIF. That’s where Zight for Mac fills the gap.
Zight is a screen recording, screenshot, GIF maker, and async video tool designed for teams that communicate visually. It lives in your Mac menu bar and replaces the record → save → upload → share workflow with a single step: record → link copied. Here’s how it works.
Step 1: Install Zight
Download Zight for Mac or install the Chrome extension if you primarily work in the browser. The Mac app installs in under 60 seconds and adds an icon to your menu bar. Create a free account during setup.
Step 2: Start a Screen Recording
Click the Zight icon in the menu bar and select Record Screen, or use the keyboard shortcut (the default is ⌘ + Shift + 6, fully customizable in Preferences). You’ll see options to:
- Record your full screen, a selected region, or a specific app window
- Enable or disable microphone audio
- Enable or disable system audio (yes — Zight captures internal audio natively, no extra software needed)
- Toggle webcam overlay — a circular bubble showing your face in the corner of the recording
- Choose to record as video (.mp4) or GIF
Step 3: Record and Stop
Click Start Recording. Zight shows a countdown (configurable) and then captures everything within your selected frame. When you’re done, click the Zight menu bar icon and hit Stop, or press your keyboard shortcut again.
Step 4: Instant Shareable Link
Here’s the key difference: the moment you stop recording, Zight uploads your clip to the cloud and copies a shareable link to your clipboard. No file hunting, no manual upload, no waiting for Google Drive to process. You just paste the link into Slack, Jira, Notion, email — wherever.
When I tested this head-to-head against the native macOS workflow, the difference was stark. A 90-second screen recording took me about 4 minutes to share using the built-in tool (save → find file → upload to Drive → copy link → paste). With Zight, the link was in my clipboard in under 10 seconds after stopping the recording.
Step 5: Annotate, Trim, and Customize
Before or after sharing, you can open your recording in Zight’s built-in editor to:
- Trim the start and end of the clip (one-click trim — introduced in Zight 3.x)
- Add annotations: arrows, text labels, shapes, and highlights directly on the video
- Set a custom thumbnail for the link preview
- Add a call-to-action button (useful for sales and marketing recordings)
- Protect the link with a password or set an expiration date
The annotation layer is what really sets Zight apart for bug reports and design feedback. macOS Sonoma (14.x) and Sequoia (15.x) have improved their built-in screenshot markup tools, but they still offer zero annotation capabilities for video recordings. With Zight, you can circle the exact button that’s broken and add a text label — your developer sees the problem in seconds.
To learn more about the full Mac experience, read our detailed Zight Screen Recorder for Mac guide.
Mac Screen Recording Methods Compared: Built-In vs. QuickTime vs. Zight
Here’s an honest, feature-by-feature comparison of all three methods so you can decide which is right for your workflow:
| Feature | Screenshot Toolbar (⌘+Shift+5) | QuickTime Player | Zight |
|---|---|---|---|
| Price | Free (built in) | Free (built in) | Free plan available; Pro from $9.95/mo |
| macOS version required | Mojave (10.14)+ | Any (all macOS versions) | Catalina (10.15)+ |
| Record full screen | ✅ | ✅ | ✅ |
| Record selected portion | ✅ | ✅ | ✅ |
| Record specific window | ❌ | ❌ | ✅ |
| Microphone audio | ✅ | ✅ | ✅ |
| System / internal audio | ❌ | ❌ | ✅ |
| Webcam overlay | ❌ | ❌ | ✅ |
| Annotations on video | ❌ | ❌ | ✅ (arrows, text, shapes) |
| Trim / basic editing | ✅ (start/end only) | ✅ (start/end only) | ✅ (one-click trim) |
| GIF export | ❌ | ❌ | ✅ (record directly as GIF) |
| Auto-upload & share link | ❌ (manual file sharing) | ❌ (manual file sharing) | ✅ (link copied instantly) |
| Cloud storage | ❌ (local .mov only) | ❌ (local .mov only) | ✅ (hosted on Zight CDN) |
| Password protection | ❌ | ❌ | ✅ |
| Link expiration | ❌ | ❌ | ✅ |
| View tracking & analytics | ❌ | ❌ | ✅ |
| Output format | .mov | .mov | .mp4, .gif, .mov |
| Avg. file size (1 min, 1080p) | ~120 MB | ~120 MB | ~15–25 MB (compressed .mp4) |
Bottom line: The built-in Screenshot toolbar is great for quick, local recordings where you don’t need to share the file. QuickTime is a fallback for older macOS versions. Zight is the right choice when screen recording is a regular part of your communication workflow — when you need the recording to go somewhere the moment it’s done.
How to Record Screen on Mac with Audio
This is the #1 question people ask after their first Mac screen recording comes out silent. Here’s the complete breakdown.
Recording Microphone Audio (Your Voice)
Both the built-in Screenshot toolbar and QuickTime support microphone recording, but it’s off by default. Here’s how to enable it:
- Press ⌘ + Shift + 5 to open the toolbar.
- Click Options.
- Under Microphone, select your mic (e.g., “MacBook Pro Microphone,” “AirPods,” or an external USB mic).
- Start recording as normal.
Your voiceover will be captured alongside the video. This setting persists — you only need to set it once unless you want to switch microphones.
Recording System Audio (App Sounds, Browser Audio, Music)
This is the big gap in macOS’s native screen recording. Apple does not provide a built-in way to capture system audio during a screen recording. If you’re recording a video call, a YouTube tutorial, or a product demo with in-app sounds, the built-in tools will produce a silent video (or only capture your mic).
To record system audio, you need a third-party solution:
- Zight — Captures both microphone and system audio natively. Toggle “System Audio” on in the recording options and you’re done. No extra virtual audio drivers, no configuration headaches.
- BlackHole or Loopback — Free and paid virtual audio drivers that route system audio to a virtual input device. These work but require setup: install the driver, configure an Aggregate Device in Audio MIDI Setup, then select it as your mic in the Screenshot toolbar. When I tested BlackHole, the initial setup took about 15 minutes and occasionally caused audio routing issues with other apps.
In practice, if you need system audio more than once or twice, Zight’s one-toggle approach saves significant time and frustration compared to configuring virtual audio drivers.
How to Record Screen on Mac with Your Face (Webcam Overlay)
Adding a webcam bubble to your screen recording makes tutorials, product demos, and async updates feel personal. Research consistently shows that videos with a face visible get higher engagement and watch-through rates.
The built-in macOS screen recorder does not support webcam overlay. You could technically open Photo Booth alongside your recording, but it’s clunky, takes up screen real estate, and the Photo Booth window would be captured as part of your recording rather than as a clean overlay.
With Zight, webcam overlay is a built-in option:
- Click the Zight menu bar icon → Record Screen.
- Toggle “Camera” on in the recording controls.
- Choose your webcam and the overlay position (bottom-left, bottom-right, etc.).
- Start recording. Your face appears in a circular bubble in the corner.
You can resize and reposition the webcam bubble during recording. This is particularly useful for product walkthroughs where you want to explain your reasoning as you navigate — the viewer sees your screen and your expressions simultaneously.
Pro Tips for Better Mac Screen Recordings
After recording hundreds of screen sessions for bug reports, onboarding docs, and customer support, here are the patterns that consistently produce better recordings:
1. Clean Up Before You Record
Close unnecessary tabs, hide your Dock (⌘ + Option + D), disable notification banners (turn on Focus/Do Not Disturb), and remove any sensitive information from the screen. Nothing derails a professional recording like a Slack notification popping up with someone’s private message.
Pro tip: On macOS Sonoma and later, set up a custom Focus mode called “Recording” that silences all notifications and hides notification badges. You can activate it with a single click in Control Center before every session.
2. Use “Record Selected Portion” Instead of Full Screen
Unless you need to show multiple windows, record only the relevant portion of your screen. This reduces file size, focuses the viewer’s attention, and avoids accidentally capturing sensitive browser tabs or desktop files.
3. Script the First 10 Seconds
Don’t wing it. Write one sentence that frames the recording: “I’m going to show you how to reproduce the checkout bug on Safari.” This gives your viewer immediate context and keeps your recording focused. The rest can be conversational.
4. Keep It Under 2 Minutes
We’ve seen engagement data across Zight recordings, and the drop-off pattern is clear: viewer retention plummets after the 2-minute mark. If your explanation takes longer, break it into multiple clips or use Zight’s chapter markers (available on Pro plans) to let viewers jump to the relevant section.
5. Use GIFs for Quick Interactions
If you’re showing a quick UI interaction — a hover state, a dropdown menu, a drag-and-drop action — a GIF is better than a video. It loops automatically, plays inline in Slack and GitHub, and loads faster. Zight lets you record directly to GIF format, no conversion step needed.
6. Enable “Show Mouse Clicks” for Tutorials
This small detail dramatically improves comprehension for step-by-step tutorials. Viewers can clearly see where you’re clicking, even if the click target is a small button or menu item. Enable it in Options (built-in) or in Zight’s recording preferences.
Troubleshooting Common Mac Screen Recording Issues
Screen Recording Has No Sound
This is the most common issue. Open the Screenshot toolbar (⌘+Shift+5), click Options, and make sure a microphone is selected — not “None.” If you need system audio, use Zight or a virtual audio driver like BlackHole.
“Screen Recording” Permission Denied
macOS requires apps to be explicitly granted screen recording permission. Go to System Settings → Privacy & Security → Screen Recording and make sure the app you’re using (Zight, Chrome, etc.) is toggled on. You may need to quit and reopen the app after granting permission.
Recording File Is Too Large to Share
Native .mov files from macOS are uncompressed and enormous — often 100+ MB per minute on a Retina display. Options:
- Compress with Handbrake (free) — Convert .mov to .mp4 and reduce file size by 80%+.
- Use Zight — Recordings are automatically compressed and cloud-hosted. A 1-minute recording that’s 120 MB as a native .mov is typically 15–25 MB when recorded through Zight.
- Record a smaller area — Full-screen Retina recordings are 2x the pixels of 1080p. If you don’t need the full resolution, use “Record Selected Portion” at a smaller frame.
⌘+Shift+5 Not Working
This shortcut requires macOS Mojave (10.14) or later. If you’re on an older version, use QuickTime Player instead (File → New Screen Recording). If you’re on a supported version and the shortcut still doesn’t work, check System Settings → Keyboard → Keyboard Shortcuts → Screenshots to make sure the shortcut hasn’t been reassigned.
Black Screen in Recording
Some apps — especially streaming services (Netflix, Hulu) and DRM-protected content players — use hardware DRM that blacks out screen recordings on purpose. This is by design and can’t be bypassed. If you’re recording a browser-based app and getting a black screen, try using a different browser (Safari is more restrictive than Chrome in some cases).
When to Use the Built-In Tool vs. Zight
I’ll be honest: the built-in macOS screen recorder is perfectly fine for occasional personal use. If you record your screen once a month to save a clip for yourself, you don’t need anything else.
But if any of these describe you, Zight will pay for itself in time saved within the first week:
- You record 3+ screen captures per day and share them with teammates or clients.
- You need to record system audio without setting up virtual audio drivers.
- You want a webcam overlay for async updates, product demos, or tutorials.
- You need to annotate recordings with arrows, labels, or highlights.
- You want GIF recording for quick UI interactions shared in Slack or GitHub.
- You want a shareable link instantly — no upload step, no file management.
- You need to password-protect recordings, set expiration dates, or track who viewed them.
Zight’s video editor isn’t a replacement for Premiere or Final Cut — it’s not designed to be. It’s a communication tool, not a production tool. The editing is just enough to trim, annotate, and share. That’s the whole point: speed over polish.
Frequently Asked Questions
How do I record my screen on a Mac with sound?
Press ⌘+Shift+5, click Options, and select your microphone. This records your voice. For internal system audio (app sounds, browser audio), macOS doesn’t offer a native solution — use Zight, which captures both mic and system audio with a single toggle.
Where do Mac screen recordings save?
By default, recordings save as .mov files on your Desktop. You can change the save location by clicking Options in the Screenshot toolbar and selecting Documents, Clipboard, Mail, Messages, or a custom folder.
Can I screen record on Mac without downloading anything?
Yes. Every Mac running macOS Mojave (10.14) or later has a built-in screen recorder — press ⌘+Shift+5 to access it. For macOS High Sierra and earlier, use QuickTime Player (File → New Screen Recording). No downloads required for either method.
How do I record a selected portion of my Mac screen?
Press ⌘+Shift+5, then click the “Record Selected Portion” icon (dashed rectangle). Drag the handles to frame the exact area you want, then click Record. You can also drag the entire selection box to reposition it before recording starts.
Is there a time limit on Mac screen recording?
The built-in macOS screen recorder has no hard time limit, but long recordings create very large files — roughly 100–150 MB per minute at Retina resolution. A 30-minute recording could easily be 3–4 GB. Make sure you have enough free disk space before starting a long session. Zight stores recordings in the cloud, so local disk space isn’t a concern.
What is the best screen recorder for Mac?
For basic, occasional recording: the built-in ⌘+Shift+5 toolbar. For professional workflows requiring instant sharing, system audio capture, webcam overlay, annotations, and GIF export: Zight. For video production and advanced editing: OBS Studio (free, open-source) or ScreenFlow (paid).
How do I record my screen on Mac with my face (webcam)?
The native macOS screen recorder does not support webcam overlay. Use Zight: click the menu bar icon → Record Screen → toggle Camera on. A circular webcam bubble appears in the corner of your recording, showing your face alongside the screen content.
How do I convert a Mac screen recording to GIF?
macOS doesn’t offer a native .mov-to-GIF converter. You can use a free tool like Gifski or EZGIF.com, but the quality and file size trade-offs require manual tuning. With Zight, you can record directly as a GIF — no conversion step needed. Select “GIF” as the output format before you start recording.
Does screen recording on Mac capture both monitors?
When you press ⌘+Shift+5 with multiple displays connected, macOS lets you choose which screen to record — you’ll see a “Record” prompt on each display. The built-in tool records one screen at a time, not both simultaneously. If you need to capture both monitors, use OBS Studio or record each monitor separately.
Start Recording Your Mac Screen in Seconds
You now know three ways to record your screen on Mac: the built-in Screenshot toolbar for quick local recordings, QuickTime Player for older macOS versions, and Zight for a complete workflow that goes from recording to shared link in under 10 seconds.
If screen recording is an occasional thing, the built-in tool is all you need. If it’s part of how your team communicates — bug reports, async updates, customer support, onboarding — the time you save with Zight’s instant sharing, annotations, and cloud hosting compounds fast. We’ve seen teams save 5–10 hours per week by eliminating the record → export → upload → share friction entirely.
Try Zight free → No credit card required. Install in 60 seconds, record your first clip, and paste the link. You’ll feel the difference immediately.


