How to Record Screen on Mac: The Complete Step-by-Step Guide (2026)
Knowing how to record screen on Mac is one of those skills that saves you hours every week — whether you’re filing a bug report, walking a teammate through a workflow, or creating a quick tutorial for a client. Every Mac ships with a free built-in screen recorder, but the moment you need to share that recording, annotate it, or convert it to a GIF, the built-in tools fall short. This guide covers both methods: the native macOS approach and a faster, more shareable workflow using Zight.
⚡ Quick Answer
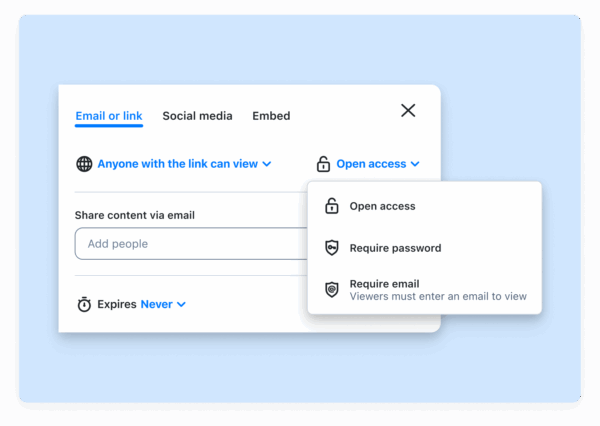
To record your screen on Mac, press ⌘ + Shift + 5 to open the built-in Screenshot toolbar, choose “Record Entire Screen” or “Record Selected Portion,” click Record, and then click the Stop button in the menu bar when finished. Your recording saves as a .mov file on your desktop. For a faster workflow with instant sharing links, annotations, and GIF creation, use Zight — a screen recording, screenshot, and async video tool that generates a shareable link the moment you stop recording, no file uploads or compression needed.
Why You Need to Screen Record on Mac
Screen recordings have replaced the long, awkward “let me describe what I’m seeing” emails that slow teams down. Instead of writing ten paragraphs to explain a UI bug, you can record a 30-second clip and drop a link in Slack. Instead of scheduling a live call to onboard a new hire, you can record a walkthrough they replay on their own time.
Here are the most common use cases for screen capture Mac workflows in 2026:
- Bug reporting — Show developers exactly what happened, step by step.
- Async feedback — Record design or code review comments without scheduling a meeting.
- Customer support — Send a personalized walkthrough instead of a generic help article.
- Internal documentation — Record SOPs that new team members can follow at their own pace.
- Product demos — Create polished clips for sales decks, landing pages, or social media.
The question isn’t whether you should record your screen — it’s which method gets the job done fastest. Let’s start with the tool you already have.
Method 1: How to Record Screen on Mac with the Built-In Screenshot Toolbar
Every Mac running macOS Mojave (10.14) or later includes a native screen recording tool accessible through the Screenshot toolbar. It’s simple, free, and requires zero downloads. Here’s exactly how to use it.
Step 1: Open the Screenshot Toolbar
Press ⌘ + Shift + 5 on your keyboard. A floating toolbar will appear at the bottom of your screen with several icons for screenshots and screen recording.
Step 2: Choose Your Recording Mode/h3>
You’ll see two recording options in the toolbar:
- Record Entire Screen (icon with a solid rectangle) — Captures everything on your display.
- Record Selected Portion (icon with a dashed rectangle) — Lets you drag to select a specific area of your screen.
Click the option you want. If you chose “Record Selected Portion,” drag the handles of the selection box to frame the area you want to capture.
Step 3: Configure Recording Options
Click Options in the toolbar to customize your recording:
- Save to: Choose Desktop, Documents, Clipboard, or a custom location.
- Timer: Set a 5- or 10-second delay before recording starts.
- Microphone: Select your microphone to include voiceover audio, or choose “None” for silent recording.
- Show Mouse Clicks: Enable this to display a circle around your cursor each time you click — helpful for tutorials.
Step 4: Start Recording
Click the Record button in the toolbar. If you selected “Record Entire Screen,” recording begins immediately when you click anywhere on the screen. The toolbar disappears, and a small Stop icon (⏹) appears in the menu bar at the top-right corner of your screen.
Step 5: Stop and Save the Recording
Click the Stop button in the menu bar, or press ⌘ + Control + Esc. A thumbnail preview appears in the bottom-right corner of your screen. Click it to trim, share, or delete the recording. If you do nothing, the .mov file saves automatically to your chosen location.
Limitations of the Built-In Mac Screen Recorder
The native tool gets the basic job done, but here’s where it hits a wall for professional use:
- No instant sharing link. You get a .mov file. To share it, you need to upload it to Google Drive, Slack, or email — and large files often get rejected or compressed.
- No annotations. You can’t add arrows, text, highlights, or callouts to point out what matters.
- No GIF creation. If you want a GIF for a Slack message, a GitHub issue, or documentation, you need a separate converter tool.
- No webcam overlay. The native tool doesn’t support picture-in-picture webcam recording, which is essential for personalized async video messages.
- No cloud organization. Recordings pile up on your desktop with auto-generated filenames. There’s no searchable library, no collections, and no way to track who viewed your recording.
If any of those limitations sound familiar, the next method solves all of them.
Method 2: How to Screen Record on MacBook with Zight (Faster Sharing, Annotations & GIFs)
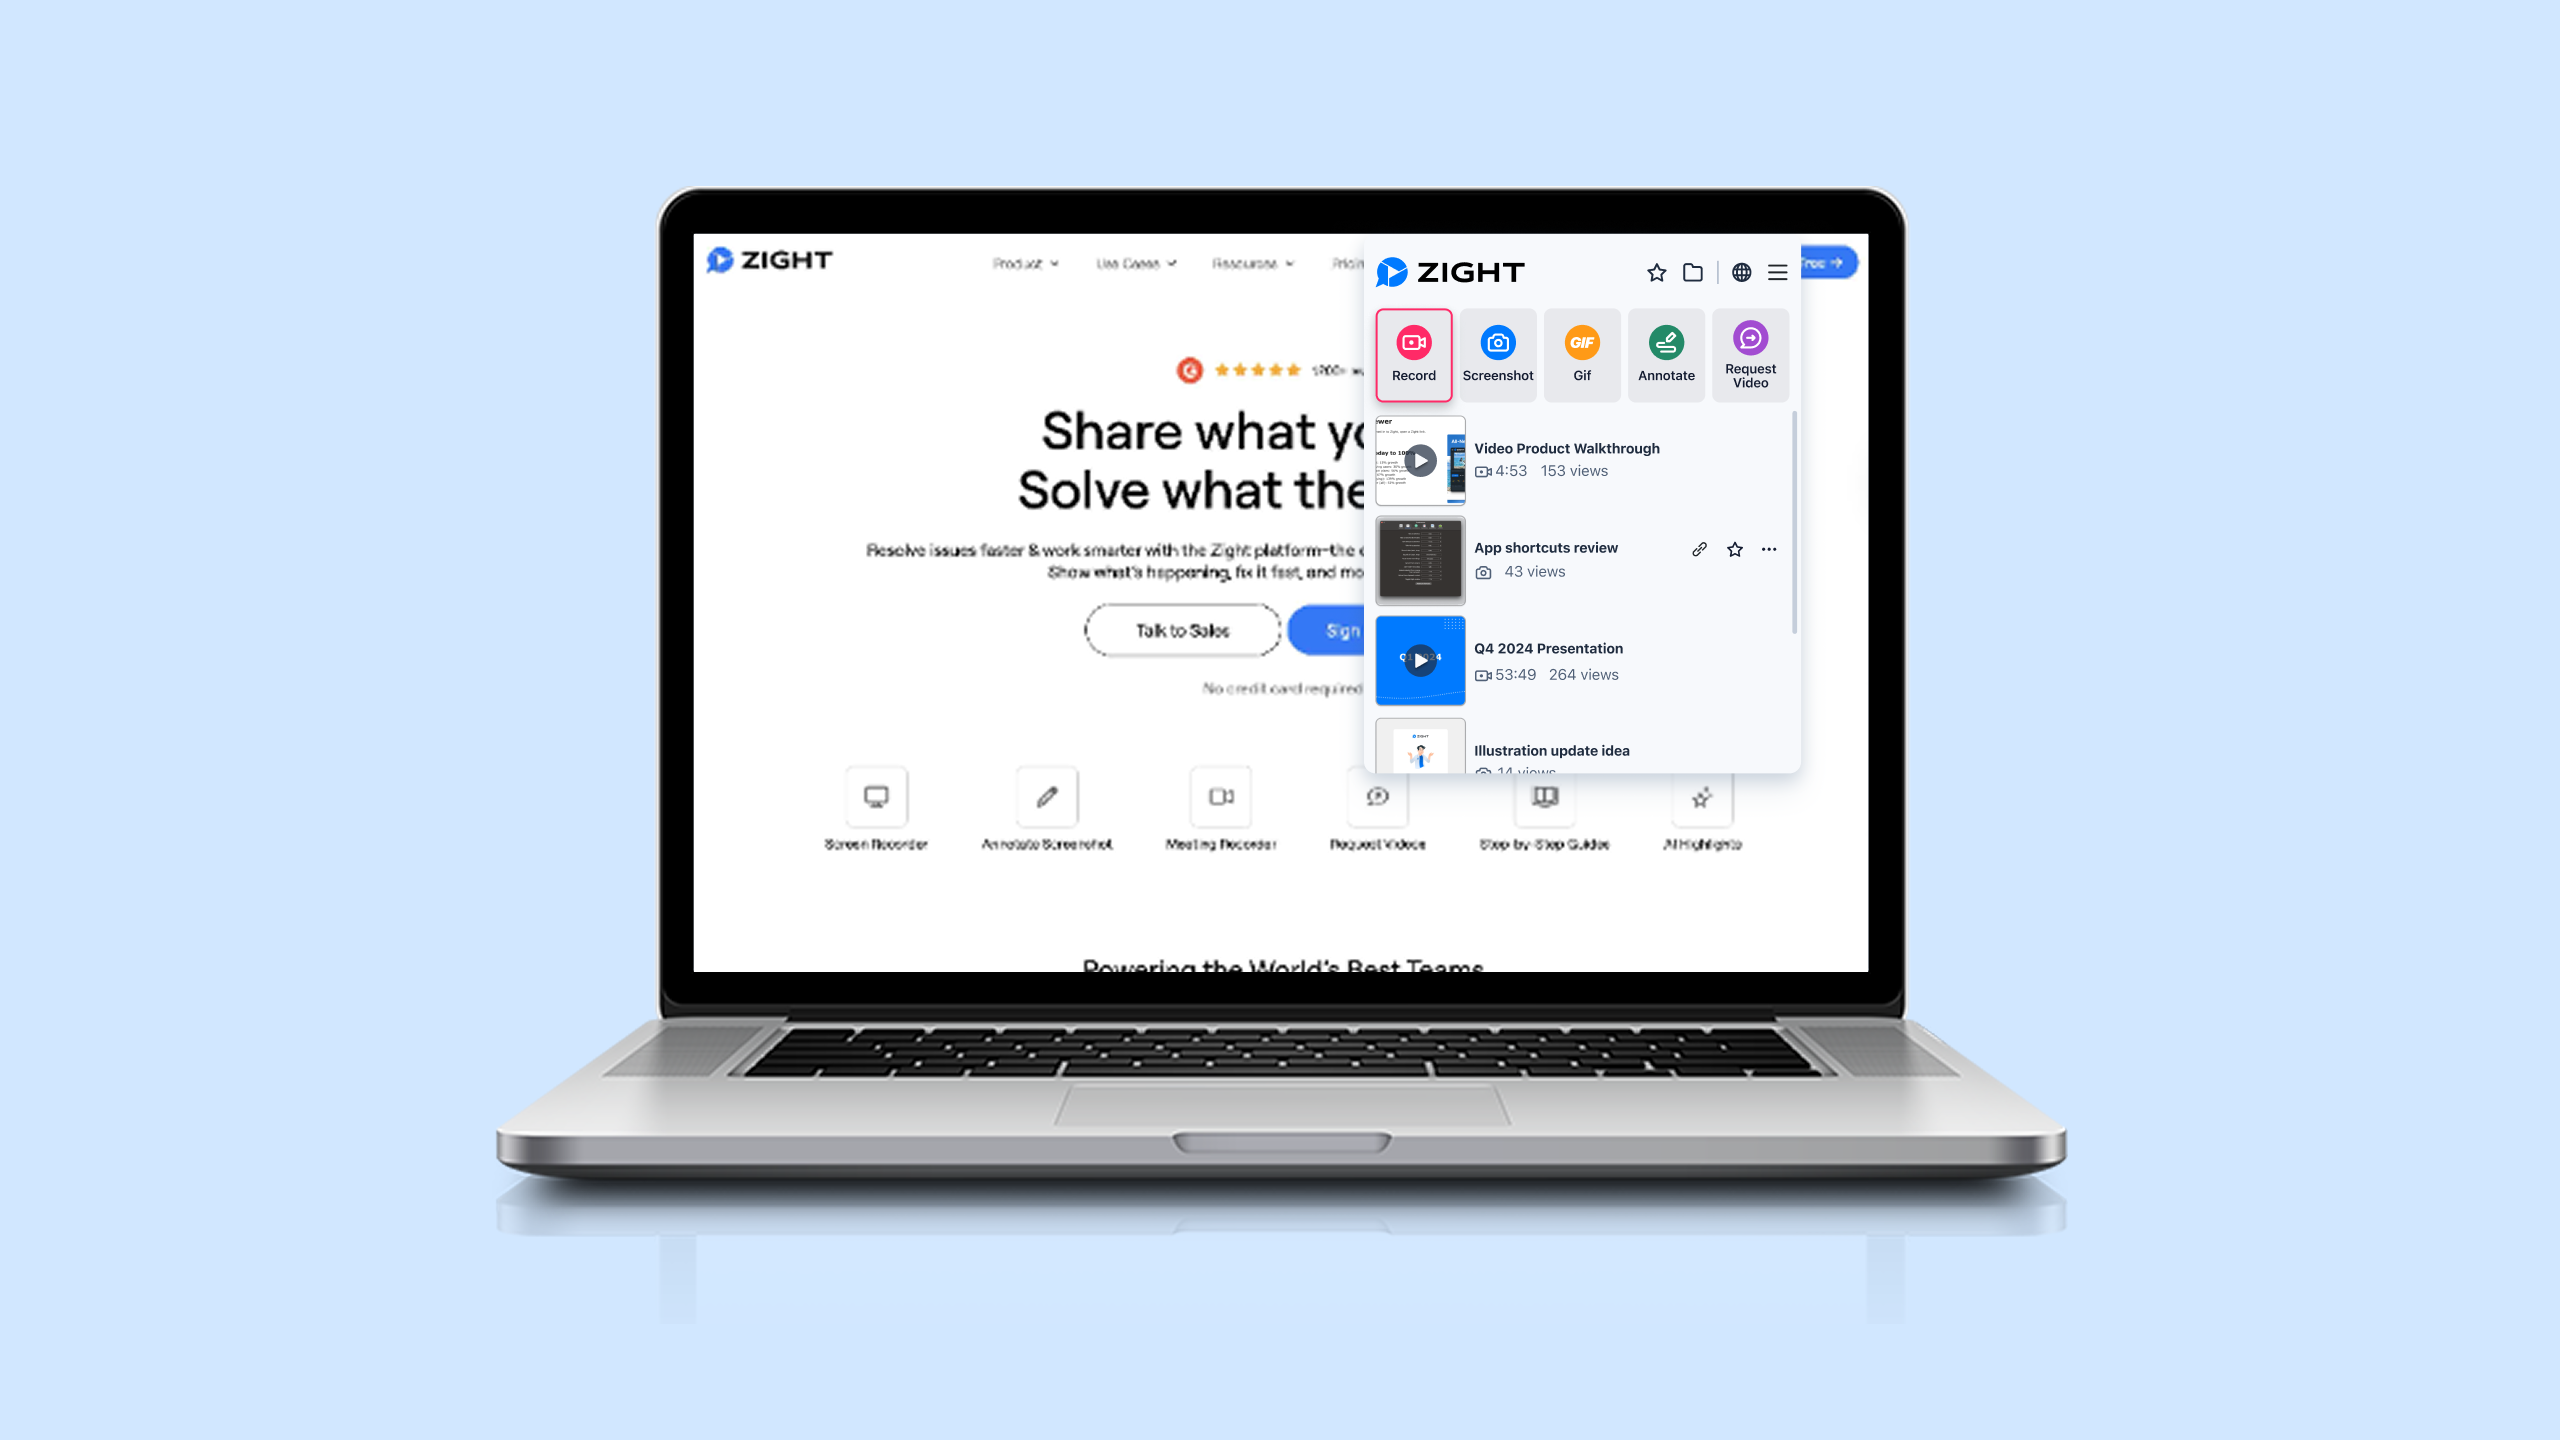
Zight is a screen recording, screenshot, GIF maker, and async video tool built for Mac, Windows, and Chrome. It’s designed for the workflow after you hit the record button — the sharing, annotating, and organizing that the native tool ignores. Zight generates an instant shareable link the second you stop recording, so there’s no file to upload, compress, or attach.
Here’s how to screen record on MacBook using Zight, step by step.
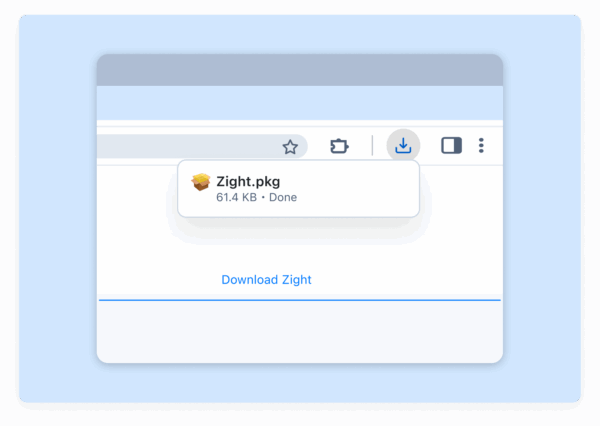
Step 1: Install Zight for Mac
Download Zight for Mac from the website. The installer takes under a minute. Once installed, Zight sits in your menu bar, ready to record with a single click or keyboard shortcut.
Step 2: Start a Screen Recording
Click the Zight icon in your menu bar and select Screen Recording, or use the keyboard shortcut (customizable in Preferences — the default is ⌘ + Shift + 6). You’ll see options to:
- Record your full screen or a selected area
- Include microphone audio and/or system audio
- Enable a webcam overlay for picture-in-picture
- Record as a video or a GIF
Select your preferences and click Start Recording.
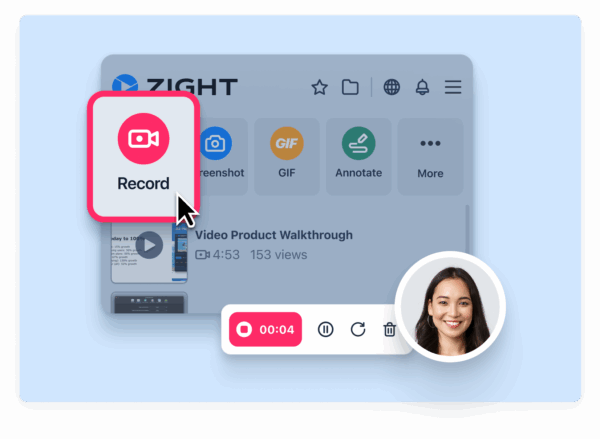
Step 3: Record Your Screen
Walk through whatever you need to capture — a bug, a workflow, a tutorial, a product demo. Zight records smoothly without impacting your Mac’s performance. You’ll see a small recording indicator so you always know it’s active.
Step 4: Stop Recording and Get an Instant Link
Click the Stop button or use the keyboard shortcut. Here’s where Zight diverges from the native tool: a shareable link is automatically copied to your clipboard within seconds. No uploading, no file compression, no waiting. You can paste that link into Slack, Jira, Notion, email, or any other tool immediately.
Step 5: Annotate and Edit (Optional)
Before sharing, you can open the recording in Zight’s editor to:
- Trim the beginning and end to remove dead air
- Add arrows, text, boxes, and highlights to draw attention to specific UI elements
- Blur sensitive information like emails, API keys, or personal data
- Add call-to-action buttons to link viewers to docs, tickets, or next steps
This is the feature set that makes Zight essential for teams. You’re not just recording — you’re communicating.
Step 6: Share, Embed, or Download
With your link already on your clipboard, drop it wherever your team works. Recipients click the link and watch instantly in their browser — no downloads, no accounts required. You can also:
- Embed recordings in Notion pages, Confluence docs, or your own website
- Download as MP4 or GIF for offline use or uploads
- Track views to see who watched your recording and when
- Organize recordings into collections for team onboarding, support libraries, or project docs
Learn more about how Zight transforms Mac screen recording in our detailed Zight screen recorder for Mac overview.
Mac Built-In Screen Recorder vs. Zight: Feature Comparison
Here’s how the two methods stack up for real-world screen capture Mac workflows:
| Feature | macOS Built-In (⌘+Shift+5) | Zight for Mac |
|---|---|---|
| Full screen recording | ✅ Yes | ✅ Yes |
| Selected area recording | ✅ Yes | ✅ Yes |
| Microphone audio | ✅ Yes | ✅ Yes |
| System audio recording | ❌ No (requires workarounds) | ✅ Yes |
| Webcam overlay (PiP) | ❌ No | ✅ Yes |
| Instant shareable link | ❌ No — saves a local .mov file | ✅ Yes — auto-copied to clipboard |
| Annotations (arrows, text, highlights) | ❌ No | ✅ Yes |
| GIF recording / export | ❌ No | ✅ Yes — record or export as GIF |
| Trim / edit before sharing | ✅ Basic trim only | ✅ Trim, annotate, blur, CTA |
| Cloud storage & organization | ❌ No — files saved locally | ✅ Yes — searchable cloud library |
| View tracking / analytics | ❌ No | ✅ Yes |
| Sensitive data blurring | ❌ No | ✅ Yes |
| Embed in Notion/Confluence | ❌ No | ✅ Yes |
| Price | Free (included with macOS) | Free plan available; Pro starts at $9.95/mo |
Bottom line: The built-in tool is fine for quick, one-off recordings you’ll watch yourself. Zight is built for recordings you need to share with other people — which is the entire point of recording your screen in a work context.
How to Record Screen on Mac with Audio (System + Microphone)
One of the most searched follow-up questions is how to include audio in your Mac screen recording. Here’s the reality:
Built-In Method: Microphone Only (No System Audio by Default)
The native Screenshot toolbar can record microphone audio — just select your mic under Options. However, macOS does not natively support recording system audio (the sound coming from apps, browser tabs, or video calls). To capture system audio with the built-in tool, you’d need to install a third-party audio routing utility like BlackHole or Loopback, configure a multi-output device in Audio MIDI Setup, and hope nothing breaks. It’s a fragile workaround at best.
Zight Method: Microphone + System Audio in One Click
Zight handles system audio capture natively. When you start a recording, just toggle on both Microphone and System Audio in the recording options. No third-party drivers, no Audio MIDI configuration, no troubleshooting. This is critical when you need to record a video call, a product walkthrough with sound effects, or a browser-based demo with audio.
When to Use GIF Recording Instead of Video
Not every screen capture needs to be a full video. GIFs are ideal for:
- Bug reports in GitHub/Jira — GIFs auto-play inline, so developers see the issue immediately without clicking a link.
- Slack messages — A 5-second GIF showing a UI glitch communicates faster than a paragraph of text.
- Documentation — Embed looping GIFs in README files, help docs, or Notion wikis to show quick interactions.
- Social media & email — GIFs play everywhere without a video player.
The built-in Mac screen recorder cannot create GIFs. You’d need to record a .mov file, then convert it with a separate tool like Gifski or FFmpeg. With Zight, you select GIF as the output format before you start recording. When you stop, you get an instant link to a perfectly looped, optimized GIF. No conversion step, no extra tools.
Pro Tips for Better Mac Screen Recordings
Regardless of which tool you use, these tips will make your recordings more professional and effective:
- Close unnecessary tabs and apps. Notifications, messy desktops, and open email tabs are distracting — and potentially leak sensitive information.
- Use Do Not Disturb mode. On macOS Sonoma and later, go to System Settings → Focus → Do Not Disturb and enable it before recording to suppress notifications.
- Plan your flow before hitting Record. Even a 10-second mental outline (“I’ll show the bug, then show the expected behavior”) makes recordings 50% shorter and clearer.
- Record at native resolution. Avoid scaling your display before recording. Both the built-in tool and Zight capture at your screen’s current resolution.
- Keep it short. Aim for under 2 minutes. If your recording is longer, consider breaking it into chapters or multiple clips — Zight’s collections feature makes this easy to organize.
- Use annotations to direct attention. If you’re using Zight, add an arrow or highlight to the exact element you’re discussing. Viewers shouldn’t have to guess what to look at.
Frequently Asked Questions
How do I record my screen on Mac with sound?
To record your screen on Mac with microphone audio, press ⌘ + Shift + 5, click Options, and select your microphone. However, the built-in tool does not capture system audio (the sound from apps and browser tabs) without a third-party audio routing utility. Zight supports both microphone and system audio capture natively — just toggle both options on before recording.
Where do Mac screen recordings get saved?
By default, recordings made with the macOS Screenshot toolbar save to your Desktop as .mov files with timestamped filenames (e.g., “Screen Recording 2026-01-15 at 3.42.12 PM.mov”). You can change the save location in the Options menu. Recordings made with Zight are automatically saved to your cloud account and accessible from any device — no local file management needed.
Can I record my screen as a GIF on Mac?
The built-in macOS screen recorder does not support GIF output. You would need to record a .mov file and then convert it using a separate tool. Zight lets you record directly as a GIF — select the GIF format before recording, and you’ll get an instant shareable GIF link when you stop.
Is there a time limit for screen recording on Mac?
The built-in macOS screen recorder has no time limit, but long recordings produce very large .mov files (roughly 1–2 GB per hour at Retina resolution) that quickly eat into storage. Zight stores recordings in the cloud, so your local storage is unaffected, and there’s no practical limit for standard use cases.
What is the best free screen recorder for Mac in 2026?
For basic recordings with no sharing needs, the built-in macOS Screenshot toolbar (⌘ + Shift + 5) is the best free option. For recordings you need to share, annotate, or convert to GIF, Zight offers a free plan that includes instant link sharing, annotation tools, and cloud storage — making it the best free screen recorder for professional Mac workflows.
Start Recording Your Mac Screen the Smarter Way
You now know two reliable ways to record screen on Mac: the built-in ⌘ + Shift + 5 shortcut for quick local captures, and Zight for recordings you actually need to share, annotate, and track.
If your current workflow involves recording a .mov → uploading to Google Drive → copying the link → pasting it in Slack → realizing you can’t annotate it → re-recording with a voiceover explaining what to look at — you’re spending five minutes on something that should take 30 seconds.
Zight collapses that entire workflow into: Record → Stop → Paste the link. That’s it.
Try Zight free → Record your first Mac screen capture with instant sharing in under 60 seconds. No credit card required.


Leave a Reply