How to Record a Presentation: Step-by-Step Guide With Audio and Webcam (2026)
You’ve built a great presentation — polished slides, clear talking points, maybe even a few animations. Now someone asks you to share it asynchronously. Suddenly, the question isn’t what to present but how to record a presentation so it actually looks and sounds professional. Whether you need to record a PowerPoint presentation with audio for a stakeholder update, create a training module for new hires, or deliver a pitch to a prospect in another time zone, the process is simpler than most people think — if you use the right tool and follow the right steps.
⚡ Quick Answer
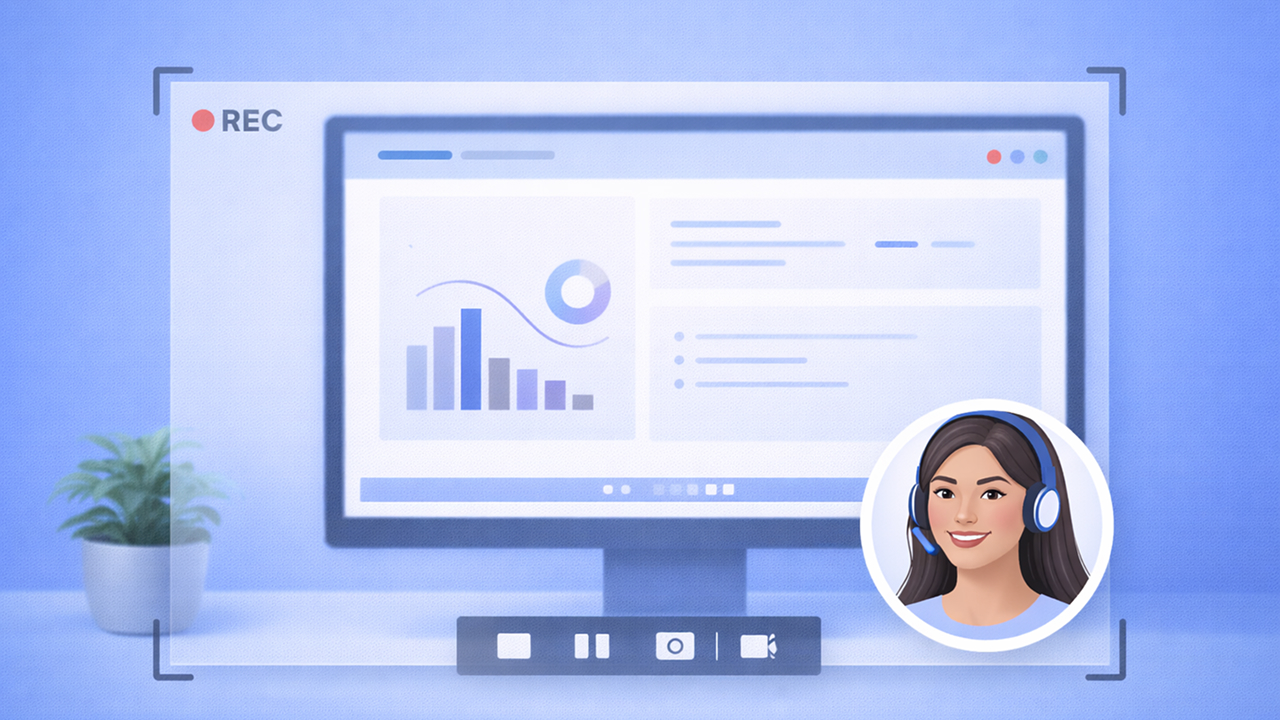
To record a presentation, open your slides in PowerPoint or Keynote, launch a screen recorder that captures your screen, microphone audio, and webcam simultaneously, then hit record. Zight is a screen recording and async video tool that lets you record your full screen or a selected region — with webcam overlay and mic audio — in one click, then instantly generates a shareable link. It works on Mac, Windows, and Chrome, making it the fastest way to turn any slide deck into a watchable, shareable video in under five minutes.
In this guide, you’ll learn exactly how to record a presentation step by step — using Zight, PowerPoint’s built-in recorder, and Keynote — so you can pick the method that fits your workflow. We’ll also cover how to screen record a presentation on Mac, how to add a webcam overlay for a personal touch, and the common mistakes that make recorded presentations look amateur.
Why Record a Presentation Instead of Presenting Live?
Before we dive into the how, let’s address the why — because understanding the use case helps you choose the right recording method.
- Async communication: Remote and hybrid teams span time zones. A recorded presentation lets everyone watch on their own schedule without coordinating a 30-minute meeting across three continents.
- Consistency: Training videos, product demos, and onboarding walkthroughs need to be delivered the same way every time. Recording once eliminates drift.
- Replayability: Stakeholders can pause, rewind, and re-watch. They can’t do that with a live meeting (or the inevitable “Can you repeat that?” Slack message).
- Documentation: A recorded presentation becomes a searchable, linkable artifact — far more useful than a stale PDF of slides.
Whether you’re a product manager presenting a roadmap, a customer success lead walking through a QBR deck, or a developer explaining an architecture decision, recording your presentation saves everyone time.
What You Need to Record a Presentation (Checklist)
Before you hit record, make sure you have these basics in place:
| Component | What It Does | Recommendation |
|---|---|---|
| Presentation software | Displays your slides | PowerPoint, Keynote, Google Slides, or Canva |
| Screen recorder | Captures your screen and audio | Zight (Mac, Windows, Chrome) |
| Microphone | Records your narration | Built-in mic works; USB mic is better |
| Webcam (optional) | Adds a face cam overlay for engagement | Built-in laptop cam or external 1080p webcam |
| Quiet environment | Reduces background noise | Close the door, mute notifications |
Method 1: How to Record a Presentation With Zight (Recommended)
Zight is purpose-built for this exact workflow. Unlike PowerPoint’s built-in recorder (which has limited export and sharing options) or Keynote’s recording feature (which doesn’t include webcam), Zight captures your screen, mic, and webcam simultaneously — then instantly gives you a shareable link. No file exports, no upload waiting, no compression headaches.
Here’s how to do it:
Step 1: Install Zight and Open Your Presentation
Download Zight for Mac, Windows, or Chrome. Installation takes about 60 seconds. Once installed, open your slide deck in PowerPoint, Keynote, or Google Slides and set it to presentation mode (or leave it in editing view if you plan to record a specific region of your screen).
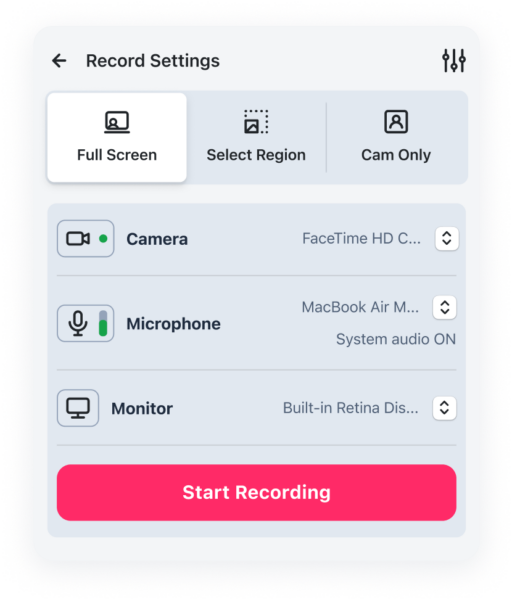
Step 2: Configure Your Recording Settings
Open the Zight app and select Screen Recording. You’ll see options to:
- Choose your capture area: Full screen (ideal for presentations) or a custom region.
- Enable microphone audio: Select your preferred mic from the dropdown. If you’re using an external USB mic, make sure it’s selected here — not your laptop’s built-in mic.
- Enable webcam overlay: Toggle this on to add a small circular or rectangular video of your face in the corner of the recording. This is critical for engagement — viewers retain 30% more information from presentations with a visible speaker, according to research from TechSmith.
If you want to record with just your webcam and no slides (for an intro or wrap-up segment, for example), Zight’s webcam recorder lets you do that as a standalone recording.
Step 3: Start Your Slide Show and Hit Record
Switch to your presentation app and enter slideshow mode (F5 in PowerPoint, Play in Keynote). Then use Zight’s keyboard shortcut to start recording — there’s a brief countdown so you’re not caught off guard. Begin narrating your slides naturally.
Pro tip: Don’t read your slides word-for-word. Your slides should be visual aids; your narration should add context, story, and emphasis that the text alone can’t convey.
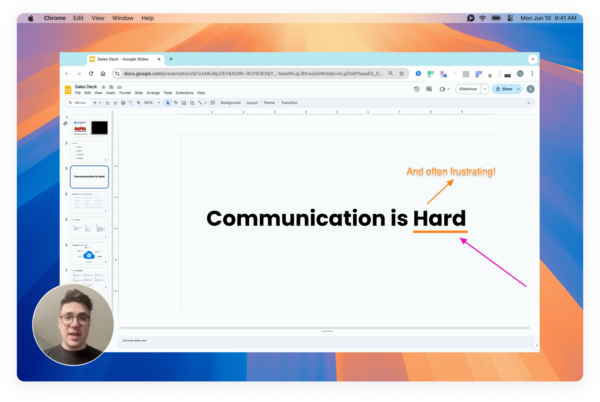
Step 4: Advance Through Your Slides Naturally
Click, use arrow keys, or use a wireless presenter remote to advance slides while you talk. Zight captures everything on screen — transitions, animations, embedded videos, cursor movement — exactly as your audience would see it.
If you make a mistake, you have two options:
- Keep going and trim the mistake out afterward (Zight includes a built-in video trimmer).
- Pause the recording, collect yourself, and resume. This creates a natural edit point.
Step 5: Stop Recording and Share Instantly
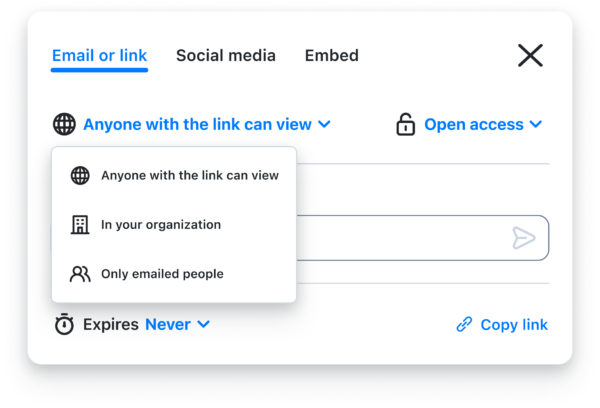
When you finish your last slide, stop the recording with the same keyboard shortcut or click the Zight stop button. Zight automatically uploads your recording to the cloud and copies a shareable link to your clipboard. Within seconds, you can:
- Paste the link in Slack, Teams, email, or Notion
- Embed it in a project management tool like Jira or Asana
- Download the MP4 if you need a local file
- Add password protection or set an expiration date for sensitive content
No uploading to YouTube, no attaching a 500 MB file to an email, no “Can you see my screen?” moments. That’s the entire workflow — five steps, usually under five minutes of setup.
Method 2: How to Record a PowerPoint Presentation With Audio (Built-in)
PowerPoint does include a built-in recording feature. It’s worth knowing about, even though it has significant limitations compared to a dedicated screen recorder like Zight.
Step 1: Open Your PowerPoint File
Open your .pptx file in Microsoft PowerPoint (desktop version — the web version has limited recording capabilities as of 2026).
Step 2: Go to the Record Tab
Click the Record tab in the ribbon (or Slide Show → Record Slide Show in older versions). You’ll see options to record from the beginning or from the current slide.
Step 3: Enable Audio and Webcam
In the recording toolbar, make sure your microphone is enabled. PowerPoint on Windows also supports a webcam overlay — toggle it on if you want a face cam. On Mac, the PowerPoint recorder is more limited and may not support webcam depending on your version.
Step 4: Record and Narrate
Click the red record button and start talking through your slides. PowerPoint records your narration, timings, and ink annotations per slide. You can re-record individual slides without redoing the whole presentation.
Step 5: Export as Video
Go to File → Export → Create a Video. Choose your resolution (1080p recommended) and let PowerPoint render the video. This can take several minutes for long presentations, and the resulting file is often 200–500 MB — awkward to share via email or chat.
Limitations of PowerPoint’s built-in recorder:
- No instant shareable link — you get a large video file you still need to upload somewhere
- Export rendering is slow (5–15 minutes for a 20-slide deck)
- Limited webcam support on Mac
- Can’t capture anything outside the PowerPoint window (no browser tabs, no demos, no app switching)
- No viewer analytics — you can’t see who watched or how far they got
Method 3: How to Screen Record a Presentation on Mac (Keynote)
If you’re an Apple user working in Keynote, here’s how to screen record a presentation on Mac.
Step 1: Open Keynote and Prepare Your Slides
Open your .key file and review your slides. Keynote does have a “Record Slideshow” feature (Play → Record Slideshow), but it only captures audio narration — no webcam overlay.
Step 2: Use Zight or macOS Screen Recording
For a more complete recording, use Zight’s Mac app or the built-in macOS screenshot toolbar (Cmd + Shift + 5). Zight is the better option here because it adds webcam overlay, instant cloud upload, and a shareable link — none of which the native macOS recorder provides.
Step 3: Start Keynote Presentation Mode, Then Record
Enter Keynote’s presentation mode (Play → Play Slideshow), then start your Zight screen recording. Narrate and advance slides as normal. When finished, stop the Zight recording and grab your shareable link.
Comparison: Zight vs. PowerPoint Built-In vs. Keynote for Recording Presentations/b>
Here’s an honest side-by-side to help you decide:
| Feature | Zight | PowerPoint Built-In | Keynote Built-In |
|---|---|---|---|
| Screen + audio recording | ✅ Yes | ✅ Yes (slides only) | ✅ Yes (audio only) |
| Webcam overlay | ✅ Yes | ⚠️ Windows only | ❌ No |
| Records outside the app | ✅ Full screen or region | ❌ PowerPoint only | ❌ Keynote only |
| Instant shareable link | ✅ Auto-generated | ❌ Must export + upload | ❌ Must export + upload |
| Cloud hosting | ✅ Included | ❌ No | ❌ No |
| Trim/edit after recording | ✅ Built-in trimmer | ⚠️ Per-slide only | ⚠️ Limited |
| Viewer analytics | ✅ View counts, engagement | ❌ No | ❌ No |
| Works on Mac + Windows | ✅ Both + Chrome | ✅ Both (limited on Mac) | ⚠️ Mac/iPad only |
| Price | Free plan available | Requires Microsoft 365 | Free with macOS |
Bottom line: If you just need a quick internal recording of a PowerPoint deck and don’t mind the export time, the built-in recorder works in a pinch. But if you need webcam, instant sharing, cross-platform support, or the ability to record anything beyond just your slides, Zight is the better workflow by a wide margin.
7 Tips to Make Your Recorded Presentation Look Professional
Recording is the easy part. Making it good takes a bit more intention. Here’s what separates a polished presentation recording from an awkward screen capture:
1. Clean Up Your Desktop Before Recording
Close unnecessary apps, hide personal bookmarks, and turn off notifications. Nothing undermines a professional presentation like a Slack ping about lunch plans popping up mid-recording.
2. Use an External Microphone If Possible
Your laptop’s built-in mic is acceptable, but a $50 USB microphone dramatically improves audio clarity. Viewers will forgive imperfect video quality before they’ll forgive bad audio.
3. Position Your Webcam at Eye Level
If you’re including a webcam overlay, angle the camera at eye level so you’re looking at the viewer, not down at them. Stack your laptop on a few books if needed.
4. Speak to One Person, Not a Crowd
Async presentations are usually watched by one person at a time. Use “you” instead of “everyone” and keep your tone conversational. Imagine you’re explaining something to a smart colleague over coffee.
5. Keep It Under 10 Minutes
Attention drops sharply after 6–10 minutes in async video (Wistia’s engagement data confirms this year after year). If your content runs longer, break it into multiple shorter recordings — one per section or theme.
6. Do a 30-Second Test Recording First
Record a quick test to check audio levels, webcam framing, and screen capture area. This takes half a minute and prevents you from discovering problems 15 minutes into your real recording.
7. Trim the Beginning and End
Every recording starts with a few seconds of fumbling — clicking the record button, switching windows, clearing your throat. Use Zight’s built-in trimmer to cut the dead air from the beginning and end. It takes 10 seconds and makes you look significantly more polished.
Common Use Cases for Recorded Presentations
Wondering when recorded presentations make more sense than live ones? Here are the most common scenarios our users at Zight rely on daily:
- Sales proposals and demo follow-ups: Record a personalized walkthrough of your deck and send it to the prospect. They can share it internally with decision-makers who weren’t on the original call.
- Employee onboarding: Record process walkthroughs once and add them to your onboarding library. New hires watch at their own pace instead of sitting through 6 hours of live presentations on day one.
- Sprint reviews and retrospectives: Product managers can record their sprint review deck and share it with the broader org instead of running the same meeting four times for different stakeholder groups.
- Course content and training: Educators and L&D teams record lecture-style presentations for self-paced learning.
- Investor updates: Founders can record a quarterly update with slides and face cam, then send it to their investor list — more personal than a PDF, less demanding than scheduling a call.
Frequently Asked Questions
How do I record a PowerPoint presentation with audio and video of myself?
The simplest way is to use a screen recorder like Zight that captures your screen, microphone, and webcam simultaneously. Open your PowerPoint slides, enter slideshow mode, start the Zight recording with webcam overlay enabled, and narrate your presentation. When you stop recording, Zight generates a shareable link instantly. PowerPoint’s built-in recorder also supports webcam on Windows, but it doesn’t offer instant sharing or cloud hosting.
Can I screen record a presentation on Mac for free?
Yes. macOS includes a built-in screen recorder (Cmd + Shift + 5) that captures your screen and microphone audio at no cost. However, it doesn’t include webcam overlay, cloud upload, or a shareable link. Zight offers a free plan that includes screen recording with webcam on Mac, plus instant link sharing — making it a more complete free option for recording presentations.
What is the best format to export a recorded presentation?
MP4 (H.264 codec) at 1080p resolution is the universal standard for recorded presentations in 2026. It’s compatible with every major platform, email client, and video player. Zight automatically records in MP4 and handles hosting for you, so you don’t need to worry about format at all — just share the link.
How long should a recorded presentation be?
Aim for 5–10 minutes. Engagement data from platforms like Wistia consistently shows that viewer drop-off increases significantly past the 6-minute mark for async video content. If your content requires more time, break it into a series of shorter recordings (e.g., Part 1: Overview, Part 2: Deep Dive, Part 3: Next Steps).
Can I record a Google Slides presentation the same way?
Absolutely. Since Zight records your screen (not just a specific app), it works with any presentation software — including Google Slides, Canva, Figma presentation mode, Prezi, or even a PDF. Just open your slides in your browser or app, start Zight’s screen recording, and present as normal.
Start Recording Your Presentations Today
Recording a presentation doesn’t require expensive software, a video editing degree, or a studio setup. With Zight, the workflow is: open your slides, click record, talk through your deck, and share a link. That’s it. Your recording is hosted in the cloud, viewable by anyone with the link, and ready to share in seconds — not minutes or hours.
Whether you need to record a PowerPoint presentation with audio for your team, screen record a presentation on Mac for a client, or add a webcam overlay to make your async updates more personal, Zight handles it all in a single tool.
👉 Try Zight’s screen recorder free and record your first presentation in under 5 minutes.


Leave a Reply