How to Share Screen Recording in Slack (Without Hitting File Limits or Losing Quality)
If you’ve ever tried to figure out how to share screen recording in Slack, you already know the frustration. You record a quick walkthrough, drag it into a Slack channel, and immediately hit the 1 GB file limit on a paid plan — or worse, the old 500 MB cap on a free workspace. The file uploads slowly, the preview is a tiny thumbnail that nobody clicks, and by the time your teammate opens it, they have to download the whole thing to actually watch it. For teams that send screen recordings in Slack dozens of times a day, this workflow is broken.
⚡ Quick Answer
The fastest way to share a screen recording in Slack is to record with Zight, which instantly generates a shareable link the moment you stop recording. Paste that link into any Slack channel or DM — your recipient watches the video inline without downloading anything, with no file-size limits and no quality loss. Zight is a screen recording, screenshot, and async video tool built for remote teams that need to communicate visually without scheduling calls.
In this guide, I’ll walk you through every method for sharing screen recordings in Slack — from Slack’s own native clips to the link-based workflow that our team at Zight uses hundreds of times per week. You’ll see exactly where each approach falls short and which one actually scales for teams that rely on async video communication.
Why Sharing Screen Recordings in Slack Is Harder Than It Should Be
Slack is the hub for most remote and hybrid teams — it’s where decisions happen, bugs get triaged, and feedback loops close. So naturally, when you record a screen walkthrough, you want to drop it right into the relevant channel. But Slack wasn’t built as a video platform, and it shows.
Here are the pain points I’ve run into repeatedly when trying to send screen recording in Slack natively:
- File size limits: Free Slack workspaces have a total storage cap (5 GB for the entire workspace). Paid plans allow files up to 1 GB each, but screen recordings at decent quality regularly exceed that — a 10-minute 1080p recording can hit 500 MB–1.5 GB depending on your codec.
- No inline preview: When you upload a .mp4 or .mov file, Slack renders a tiny thumbnail. Recipients have to click to expand, and sometimes download the file entirely to watch it — especially on mobile.
- Slack Clips are limited: Slack’s built-in recording feature (Clips) caps recordings at 5 minutes, records at compressed quality, and stores them within Slack’s own infrastructure. For anything longer than a quick status update, Clips fall short.
- No annotations or editing: Whether you use Clips or upload a file, there’s no way to trim dead air, add arrows, or highlight the part of the screen that matters. You end up with “okay, skip to 2:14 where the bug happens” messages that nobody follows.
- Ephemeral by design: On free plans, older messages and files get archived. That screen recording you shared three months ago explaining the API integration? Gone — or at least hidden behind a paywall to restore message history.
In practice, the difference between uploading a file to Slack and sharing a link in Slack is the difference between a teammate actually watching your recording and ignoring it because downloading a 400 MB file during a Zoom call isn’t happening.
Method 1: How to Share Screen Recording in Slack Using Native Clips
Let’s start with Slack’s own solution, because it’s what most people try first. Slack Clips let you record audio, video, or screen recordings directly inside Slack. Here’s how it works:
Step 1: Open the Slack Channel or DM
Navigate to the conversation where you want to share your recording. Clips are tied to the channel or DM — you can’t record first and then choose where to post.
Step 2: Click the Camera Icon in the Message Composer
In the message input field, look for the + button (or the camera/video icon depending on your Slack version). Select “Record video clip” or “Record screen” from the menu.
Step 3: Record Your Screen (Up to 5 Minutes)
Choose which screen or window to share, optionally enable your webcam overlay, and click Record. You get a maximum of 5 minutes.
Step 4: Send the Clip
Once you stop recording, the clip attaches to your message. Add any text context and hit Send.
Verdict: Slack Clips work for ultra-short, low-stakes recordings — a 90-second “here’s what I see” kind of thing. But the 5-minute cap, lack of editing, compressed quality, and the fact that clips don’t live outside Slack make this a non-starter for teams that share screen recordings as a core part of their workflow.
Method 2: Upload a Video File Directly to Slack
The brute-force approach: record with any tool (QuickTime, OBS, Windows Game Bar), save the file, then drag it into Slack.
Step 1: Record with Your Preferred Tool
On macOS, press ⌘+Shift+5 to open the built-in screen recorder. On Windows, press Win+G for Xbox Game Bar. Save the file to your desktop.
Step 2: Drag the File into the Slack Channel
Open the channel and drag the .mp4 or .mov file into the message area. Add a message for context.
Step 3: Wait for the Upload
This is where things break down. A 3-minute screen recording at 1080p is typically 100–300 MB. On a standard home internet connection, that’s a 2–5 minute upload. On the receiving end, your teammate either watches a compressed preview inside Slack or downloads the entire file.
Verdict: This works in a pinch, but it eats up workspace storage, the preview quality is poor, there’s no way to share the video outside Slack later, and you can’t track whether anyone actually watched it. If you’re sending one recording a week, fine. If your team shares 10+ a day, this approach collapses fast.
Method 3: How to Share Screen Recording in Slack with Zight (The Link-Based Workflow)
This is the method I use daily, and it’s the one I recommend for any Slack-heavy team. The core idea: share video in Slack without uploading a file. Instead, you paste a link that plays instantly — no download, no file limits, no quality loss.
Zight’s screen recorder generates a shareable link the moment you stop recording. The video is hosted in the cloud, streams on click, and unfurls as a rich preview inside Slack. Here’s the exact workflow:
Step 1: Install Zight on Mac, Windows, or Chrome
Download the Zight desktop app for macOS or Windows, or install the Chrome extension. Setup takes about 90 seconds. Once installed, Zight lives in your menu bar (Mac) or system tray (Windows) — always one click or one keyboard shortcut away.
Pro tip: Set up your Slack screen recording shortcut in Zight’s preferences. I use ⌘+Shift+6 on Mac (to sit right next to macOS’s native ⌘+Shift+5). On Windows, I set it to Ctrl+Shift+6. This way, triggering a recording is muscle memory — no hunting through menus.
Step 2: Record Your Screen
Click the Zight menu bar icon and select Record Screen, or hit your custom shortcut. Choose to record the full screen, a specific window, or a custom region. Toggle your webcam on or off (the floating bubble is great for walkthroughs where your face adds context). Toggle system audio and microphone independently.
There’s no time limit on recordings — I’ve recorded 45-minute onboarding sessions and 15-second bug reproductions with the same tool. Record what you need.
Step 3: Annotate or Trim (Optional)
When you stop recording, Zight opens a quick preview. From here you can:
- Trim the beginning and end to cut dead air (the one-click trim Zight introduced in version 3.x is genuinely the fastest I’ve used — drag two handles, done)
- Add annotations — arrows, text callouts, blur sensitive information
- Set a thumbnail so the Slack preview looks intentional, not like a random frame
This step is optional but it’s what separates a professional async update from a “here’s my raw screen dump.” After recording hundreds of screen sessions for bug reports and feature demos, the pattern that works best is: trim the first 3 seconds (where you’re clicking “start”), add one arrow pointing to the key element, and pick a thumbnail that shows the end state.
Step 4: Copy the Shareable Link (It’s Already on Your Clipboard)
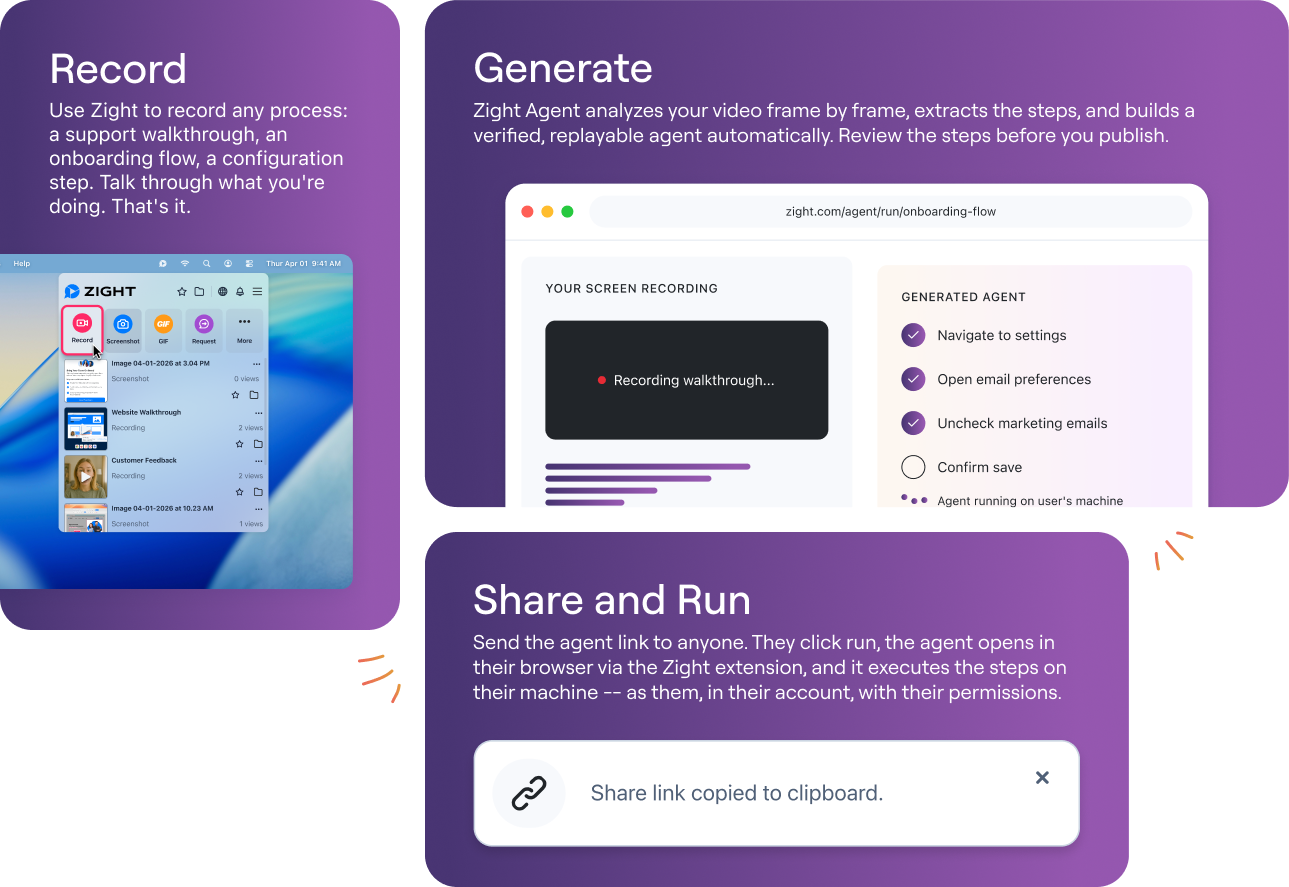
Here’s the magic: the moment you stop recording, Zight uploads your video in the background and copies a shareable link to your clipboard automatically. By the time you switch to Slack — literally by the time you press ⌘+Tab — the link is ready to paste.
No exporting. No choosing a file format. No waiting for a progress bar. The link is live.
Step 5: Paste the Link into Slack
Open your Slack channel or DM, press ⌘+V (or Ctrl+V), and send. Slack automatically unfurls the Zight link into a rich preview with the video title, thumbnail, and duration. Your teammate clicks once and watches the recording right there — no download, no new tab, no buffering.
The entire flow — from pressing record to pasting in Slack — takes under 10 seconds of “overhead” time beyond the recording itself. We’ve seen teams at Zight use this approach to replace 60–70% of their synchronous meetings, and the math works specifically because the friction is near zero.
Comparison: Three Ways to Send Screen Recording in Slack
Here’s how the three methods stack up in the areas that matter most for daily use:
| Feature | Slack Clips (Native) | File Upload to Slack | Zight Link in Slack |
|---|---|---|---|
| Max recording length | 5 minutes | Unlimited (limited by file size) | Unlimited |
| File size limit | N/A (compressed by Slack) | 1 GB (paid) / workspace cap (free) | No limit — cloud-hosted |
| Video quality | Compressed, lower resolution | Original quality but preview is poor | Up to 4K, streams at full quality |
| Inline preview in Slack | Yes (small player) | Thumbnail only — click to expand | Rich unfurl with thumbnail & title |
| Download required to watch | No | Often yes, especially on mobile | No — streams instantly |
| Trimming / editing | None | Requires separate tool | Built-in trim & annotations |
| Shareable outside Slack | No | No (file lives in Slack) | Yes — link works anywhere |
| View tracking | None | None | Yes — see who watched and for how long |
| Uses workspace storage | Yes | Yes | No — hosted on Zight |
| Keyboard shortcut to start | No native shortcut | N/A | Fully customizable |
The pattern is clear: if you’re sharing one or two short clips a week, Slack’s native tools are fine. But the moment screen recordings become a regular part of how your team communicates — bug reports, design reviews, customer escalations, onboarding walkthroughs — the link-based approach with Zight is significantly faster and more reliable.
Pro Tips for Sharing Screen Recordings in Slack Like a Pro
After helping teams set up async video workflows, here are the non-obvious tips that make the biggest difference:
1. Always Add a One-Line Text Summary Above Your Link
Don’t just paste a link into Slack. Write one sentence: “Here’s a 2-min recording showing the checkout flow bug on Safari — watch from 0:45 for the error state.” This respects your teammate’s time and tells them whether to watch now or later.
2. Use Zight’s Password Protection for Sensitive Recordings
If you’re recording customer data, internal financials, or anything that shouldn’t be accessible via a public link, Zight lets you password-protect individual recordings or restrict access to your team’s domain. This is something I’ve never seen Slack Clips or raw file uploads handle gracefully.
3. Create a #screen-recordings Channel
For teams that share a high volume of recordings, a dedicated Slack channel prevents walkthroughs from getting buried in general conversation. Pin the most-watched recordings so new team members can self-serve onboarding content.
4. Use Zight’s Collection Feature for Related Recordings
When you’re documenting a multi-step process — say, a 5-part feature walkthrough — group the recordings into a Zight collection and share a single link. One Slack message, five videos, zero confusion about viewing order.
5. Check View Analytics Before Following Up
Before pinging someone with “did you watch my recording?”, check Zight’s view analytics. You’ll see whether they opened the link, how much they watched, and when. If they watched 100% two hours ago and haven’t responded, that’s a different signal than if they haven’t clicked at all.
When Zight Isn’t the Right Choice (Honest Take)
Zight’s video editor handles trimming, annotations, and thumbnails beautifully — but it’s not a replacement for Premiere Pro or Final Cut. If you need multi-track editing, transitions, or complex post-production, you’ll want a dedicated video editor and then upload the final cut to Zight for sharing.
Similarly, if your team is exclusively on Slack’s free plan, records fewer than 2–3 videos per week, and those recordings are all under 2 minutes, Slack Clips genuinely might be enough. The case for Zight gets overwhelming when volume goes up, quality matters, or recordings need to live beyond a single Slack thread.
Frequently Asked Questions
Can you share a screen recording in Slack without uploading a file?
Yes. Tools like Zight let you record your screen and instantly generate a shareable link. When you paste that link into Slack, it unfurls as a rich preview — your teammate clicks to watch without any file download. The video is hosted on Zight’s cloud servers, so it doesn’t count against your Slack workspace storage and has no file size limit.
What is the maximum length for a Slack Clip recording in 2024?
As of 2024, Slack Clips have a 5-minute maximum recording length. This applies to both audio and video clips recorded natively within the Slack desktop and mobile apps. For longer recordings, you’ll need a third-party screen recorder like Zight, which has no time limit.
Is there a keyboard shortcut to start a screen recording for Slack?
Slack itself doesn’t offer a dedicated keyboard shortcut to start a screen recording or clip. However, Zight lets you configure a custom global shortcut (for example, ⌘+Shift+6 on Mac or Ctrl+Shift+6 on Windows) that starts a screen recording from anywhere on your computer. Once you stop recording, the shareable link is automatically copied to your clipboard — ready to paste into Slack.
Do Slack screen recordings expire or get deleted?
On Slack’s free plan, the workspace has a 90-day message and file history limit. Older files — including screen recordings uploaded or recorded as Clips — become inaccessible unless you upgrade. Recordings shared via Zight links are stored on Zight’s cloud independently from Slack, so they remain accessible regardless of your Slack plan or message history limits.
Can I see if someone watched my screen recording shared in Slack?
Slack does not provide view analytics for uploaded files or Clips. You have no way to know whether a teammate watched your recording, let alone how much of it they saw. Zight includes built-in view tracking that shows exactly who opened your recording, when they opened it, and what percentage they watched — giving you a clear signal for async follow-ups.
Start Sharing Screen Recordings in Slack the Fast Way
The async video revolution isn’t about the recording itself — it’s about what happens after you hit stop. If your recording sits on your desktop waiting to upload, or gets buried in Slack’s file storage with a useless thumbnail, it might as well not exist.
Zight collapses the entire workflow — record, edit, share, track — into a single flow that ends with a link on your clipboard. For Slack-heavy remote teams, that difference compounds into hours saved every week and fewer “can we hop on a quick call?” messages in your channels.
Try Zight’s screen recorder free and share your first recording in Slack in under 60 seconds. No file uploads, no size limits, no downloads on the other end — just a link that works.
Written and tested by the Zight team — based on workflows used daily across our own distributed team and thousands of Slack-first organizations.