How to Use Figma Slots
Figma Slots make components far more flexible by letting you insert structured content without creating endless variants. Instead of duplicating modals, cards, or layouts for every content scenario, slots allow designers to drop in predefined components while maintaining consistent structure and design rules.
This guide walks you through how to create and use Figma slots step by step. You’ll learn how to build a slot-enabled modal component, insert instances into slots, control available content with preferred instances, and add guardrails so your design system stays organized. By the end, you’ll be able to create modular components that scale across your design system while giving designers the flexibility they need.
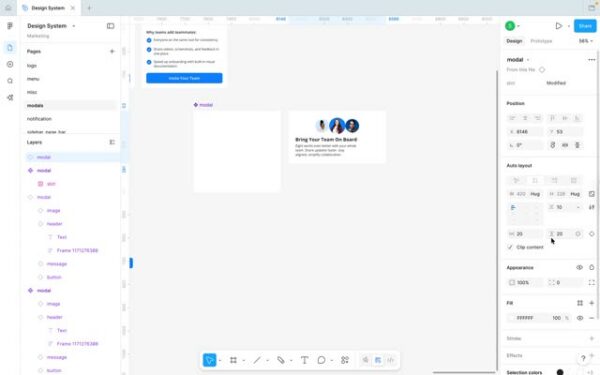
Step 1: Create the base container frame and turn the modal into a component.
- Create a new frame that will become your modal container.
- Label the frame **modal** so it’s easy to identify in the layers and component set.
- Convert the “modal” frame into a component.
- Apply Auto Layout to the modal component so slot content can flow and be repositioned correctly.
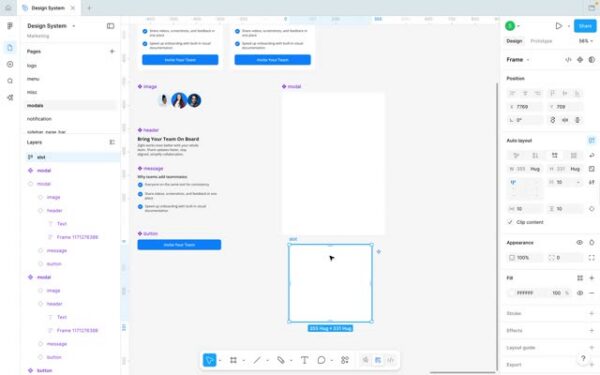
Step 2: Create a second frame for the slot and add auto layout to the slot frame.
- Add another frame that will act as the slot container.
- Label this second frame slot.
- Apply Auto Layout to the slot frame as well. Make sure the slot is a frame, slots won’t work if it’s just a square/rectangle shape
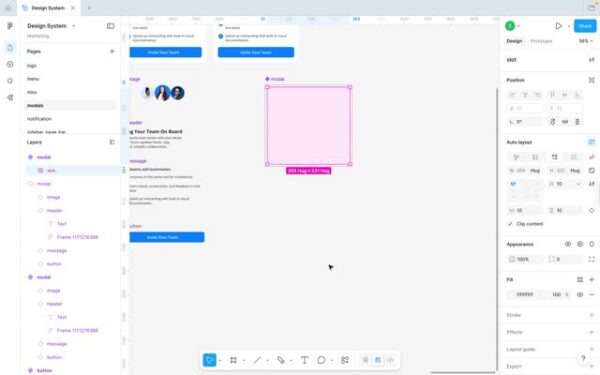
Step 3: Place the slot inside the modal component
- Drag the slot frame into the modal component so it becomes the flexible content area.
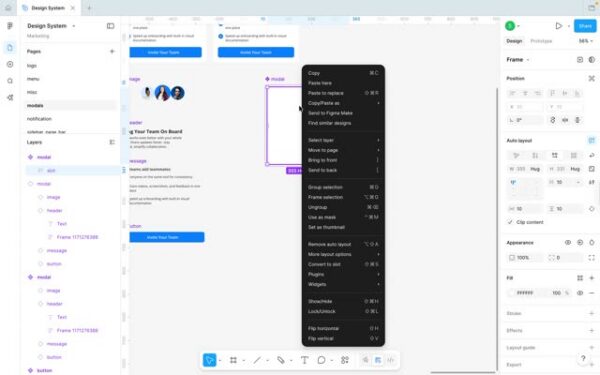
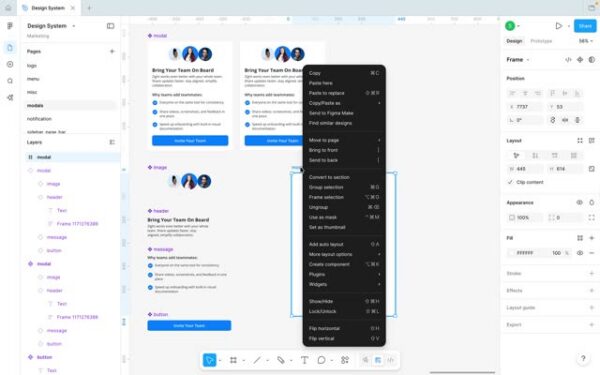
Step 4: Convert the frame into a Slot
- With the slot frame selected, right-click and choose Convert to slot.
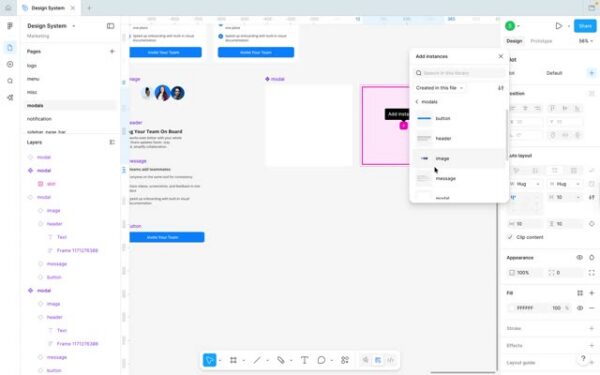
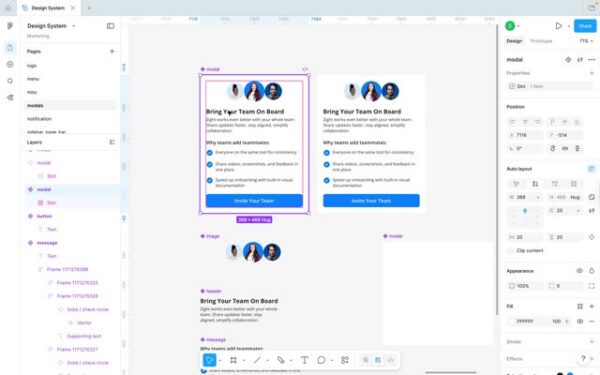
Step 5: Create an instance of the modal component
- Create an instance of the modal component; you should now see a plus (+) control for adding slot content.
- Use the plus menu (or the add option) to insert an instance into the slot.
Step 6: Alternate method, drag instances directly into the slot
- Instead of using the plus button, you can drag an existing component instance into the slot and keep building.
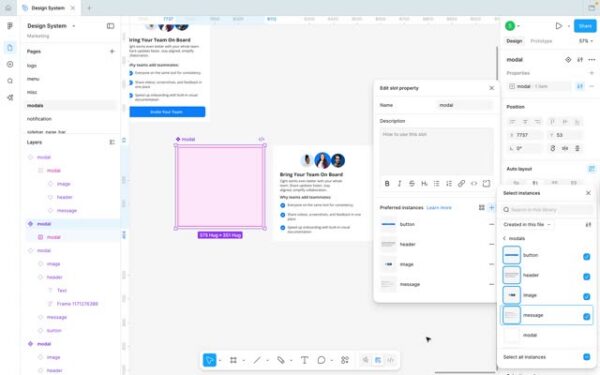
Step 7: Add guardrails by naming the slot and adding a description
- To guide other designers, select the slot and in the slot properties give it a clear name.
- In slot properties, add a description explaining how the slot should be used.
Step 8: Convert existing designs into slots using “Wrap in new slot”
- If you already have a designed set of components, select them and choose **Wrap in new slot** to turn the group into a slot-based structure.
The Ultimate Guide to Figma Slots
Figma slots make components far more flexible by allowing designers to insert structured content without creating endless variants. Instead of duplicating modals, cards, or layouts for every possible content combination, slots let you drop component instances into predefined areas while keeping the layout consistent.
This guide walks you through everything you need to know about Figma slots, what they are, when to use them, how to create them, and how they help scale a design system. By the end, you’ll understand how to build flexible components that stay organized and easy to maintain.
What Are Slots in Figma?
Slots in Figma are containers inside a component that allow designers to insert other component instances. They act like structured placeholders, letting you add flexible content while keeping the component’s layout and design rules intact.
Slots are especially useful for components that need to support different types of content while maintaining a consistent structure.
Common examples include:
-
Modals
-
Cards
-
Banners
-
Notifications
-
Layout sections
-
Dialogs
Instead of creating multiple component variants for every scenario, designers can insert different components into a slot while keeping the main component unchanged.
Why Use Slots in Figma?
Slots help design systems stay flexible and scalable. Without slots, teams often create large variant sets to support different content types. This quickly becomes difficult to manage. Slots solve this by letting designers insert content where it’s needed while maintaining consistent layouts.
Key benefits of slots
More flexible components
Insert different content blocks without creating additional variants.
Cleaner component libraries
Reduce the number of variants required for similar components.
Better design system guardrails
Use preferred instances to control which components can be inserted.
Faster design workflows
Designers can swap or insert content directly inside components.
Slots vs Variants in Figma
Slots and variants solve different problems.
Example
Variants might control:
-
Button states
-
Size options
-
Interaction states
Slots control:
-
Content areas
-
Layout regions
-
Replaceable sections
In many design systems, slots and variants are used together.
Adding Slots to Existing Components
If your design system already has components, you can convert them to use slots. Use Wrap in new slot to place an existing component inside a slot container without redesigning it. This makes it easier to gradually introduce slots into an existing system.
Conclusion
Figma slots introduce a powerful way to build modular, flexible components that scale across large design systems. By allowing designers to insert component instances into predefined areas, slots reduce variant complexity while keeping layouts consistent.
When used alongside Auto Layout and component properties, slots help teams create cleaner libraries, faster workflows, and more scalable UI systems.
Frequently Asked Questions
Figma slots are containers inside components that allow designers to insert and swap component instances. They make components more flexible by allowing content to change without creating additional variants.
Slots reduce the need for large variant sets. Instead of building many versions of the same component, you can insert different content instances into a slot while keeping the base structure consistent.
Yes. You can define Preferred instances so designers can quickly choose from approved components instead of searching through the entire library.
Yes. Slots work best when both the parent component and the slot frame use Auto Layout, allowing inserted content to flow and resize properly.
Slots must be created from a frame because frames support layout behavior and content structure. Shapes like rectangles won’t function as slots.
Yes. You can use Wrap in new slot on existing design system components to slot-enable them without rebuilding the component from scratch.
Designers can either use the plus (+) menu to insert a component instance or drag an existing component instance directly into the slot.
Yes. Content within a slot can be rearranged to change layout order without creating new component variants.


