How to Create a JIRA Ticket
Creating tickets in JIRA is a core part of managing tasks and tracking progress in any project. This step-by-step guide shows you how to create a JIRA ticket by selecting the right project and work type, assigning team members, and adding important details. Whether you’re logging a new task, bug, or feature request, this walkthrough will help you get it done quickly and accurately.
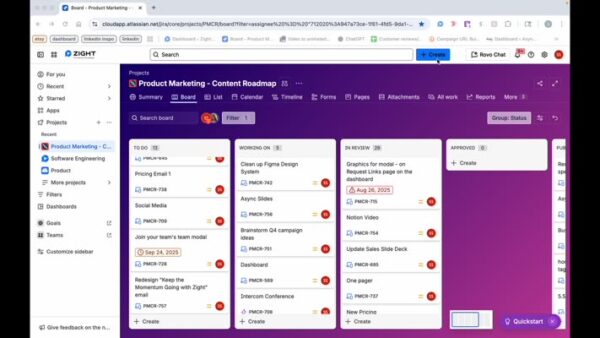
Step 1: Click on + Create
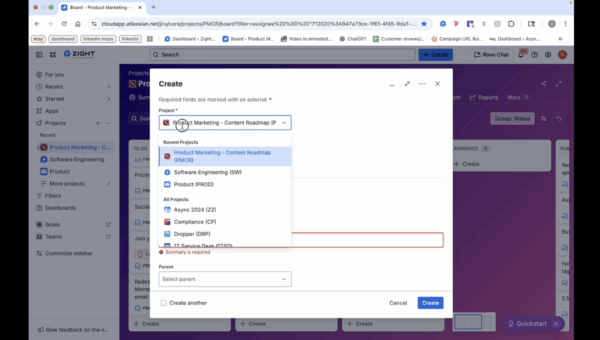
Step 2: Select the Project
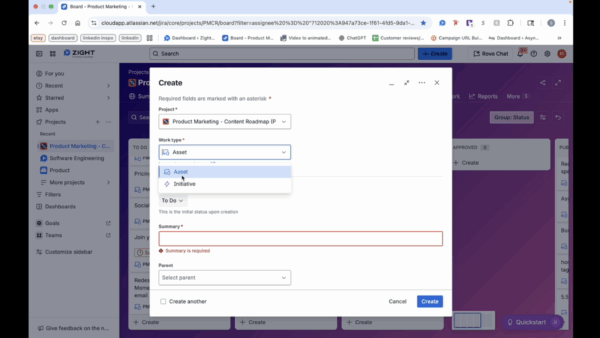
Step 3: Choose Work Type
- For work type, you can either choose asset or initiative.
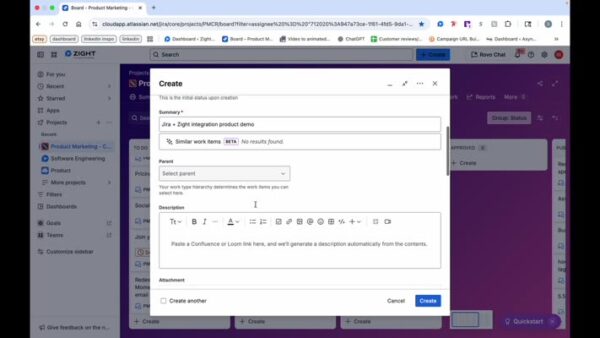
Step 4: Enter Summary
- Summary also means the title of the ticket.
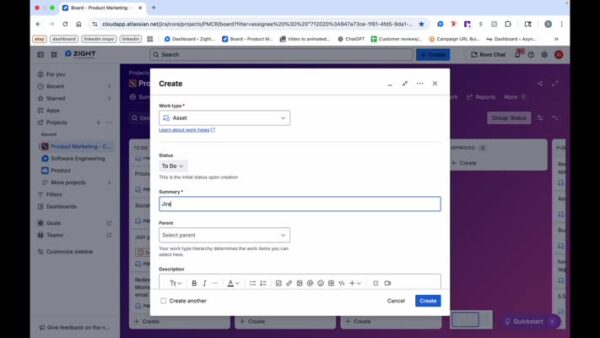
Step 5: Select Parent and Add Description (If Applicable)
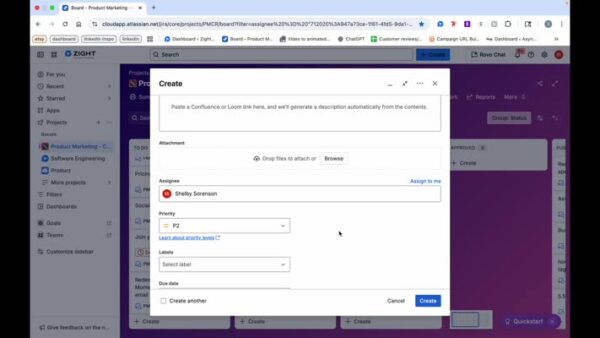
Step 6: Select an Assignee
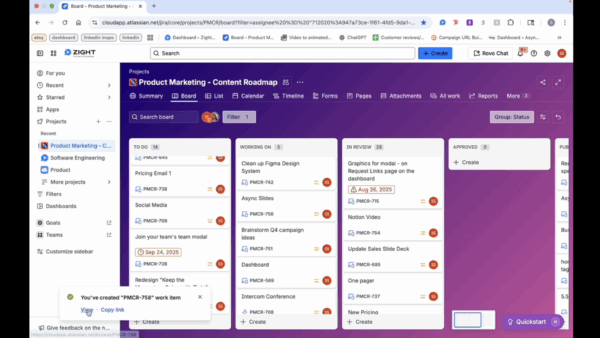
Step 7: Ticket Creation Confirmation
The Ultimate Guide to Creating a JIRA Ticket
If your team uses JIRA, you already know how powerful it is for tracking work, managing projects, and keeping everyone aligned. Whether you’re reporting a bug, assigning a new task, or logging a feature request, creating a ticket in JIRA is one of the most important actions you can take to keep your workflow running smoothly.
In this guide, we’ll explore how to create a JIRA ticket efficiently, what details to include, and how to make sure your tickets are clear, actionable, and easy for your team to understand.
Why JIRA tickets matter
A JIRA ticket is more than just a task; it’s a way to communicate clearly about what needs to get done, who’s responsible, and when it should be completed. Well-structured tickets help teams stay organized and reduce confusion during fast-paced projects.
Each ticket acts as a single source of truth for progress updates, documentation, and feedback. With every ticket properly labeled and categorized, your team can easily track project status and prioritize work effectively.
Getting started with ticket creation
Before you create a new JIRA ticket, it’s important to make sure you’re in the correct project workspace. Each project in JIRA has its own settings, fields, and workflows, so choosing the right project ensures your ticket lands in the right place.
When you click the “Create” button, a new window opens where you’ll select your project and work type. Depending on your setup, you might be choosing between categories like task, bug, story, initiative, or asset. Picking the right type helps others immediately understand the purpose of your ticket.
Writing a clear and concise summary
The summary field is essentially the title of your JIRA ticket. This is the first thing your teammates will see, so it should quickly describe what the issue or task is about.
For example, instead of writing “Fix bug,” try writing something specific like “Fix login error on mobile version.” A clear summary saves time for both the reporter and the assignee by eliminating guesswork.
Think of it as a headline: short, direct, and informative.
Adding a detailed description
After the summary, you can use the description field to provide more context. This is where you explain the task in detail, outline reproduction steps (for bugs), or describe expected outcomes.
The more information you include here, the easier it is for your team to take action. Include links, screenshots, or supporting documentation when necessary. A well-written description reduces follow-up questions and ensures everyone understands what’s needed before starting work.
If your task is part of a larger initiative, make sure to select a parent ticket so it stays organized within your project hierarchy.
Assigning the right team member
Once your ticket is ready, assign it to the person responsible for completing the work. Choosing the right assignee ensures accountability and keeps progress moving.
If you’re not sure who should handle the task, you can assign it to yourself temporarily or leave it unassigned until a team lead reviews it. JIRA also allows for watchers, so multiple people can stay updated on the ticket’s progress.
Reviewing and confirming your ticket
Before you click “Create,” double-check your inputs. Make sure the summary is accurate, the description is clear, and the correct project and work type are selected. Once submitted, the ticket will appear in your project’s backlog or active sprint, depending on your team’s workflow.
After creation, you can still edit fields, add comments, attach files, or tag teammates. Collaboration is key in JIRA, and each update keeps your project aligned and transparent.
Keeping your tickets organized
As your project grows, managing tickets becomes even more important. Use labels, components, and custom fields to group related items. This makes it easier to search for tickets later and helps your team see how work connects across different areas of the project.
Regularly reviewing open tickets also ensures that nothing falls through the cracks. JIRA’s filtering tools and dashboards make it easy to track deadlines and monitor project health.
Conclusion
Creating a JIRA ticket is one of the simplest yet most powerful ways to keep your projects organized. A well-crafted ticket ensures everyone on your team understands the task, its priority, and its context.
By including detailed descriptions, choosing the correct work type, and assigning the right people, you make collaboration smoother and more efficient.
Once you get the hang of it, ticket creation becomes second nature, a quick step that keeps your projects structured, transparent, and on track.
Frequently Asked Questions
A JIRA ticket is a digital record used to track a specific task, issue, or request within a project. It includes details such as description, assignee, and priority.
Include a clear summary, detailed description, relevant attachments, and assign it to the appropriate person. Adding labels or components helps categorize it further.
Yes. You can edit most fields after creation, including the summary, description, and assignee, as long as your project permissions allow it.
Work types represent categories such as task, bug, story, or initiative. They help define what kind of work the ticket represents.
When creating or editing a ticket, use the “Assignee” field to select the team member responsible for completing the task.
Selecting a parent ticket links your issue to a larger task or initiative, helping maintain project structure and hierarchy.
Yes. JIRA allows you to upload images, documents, and other files directly into the ticket to provide additional context.
You can track progress by viewing your project board or using filters and reports. JIRA updates the ticket status as it moves through each workflow stage.


