MP4 to MP3: How to Extract Audio from Video (5 Easy Methods in 2025)
Quick answer: To convert MP4 to MP3, upload your video to a free online converter like CloudConvert, use desktop software like VLC or Audacity, run a one-line FFmpeg command, or record and extract audio directly with Zight — a screen recording and async video tool that lets you capture, trim, and share audio without juggling separate conversion steps. Most methods take under 60 seconds.
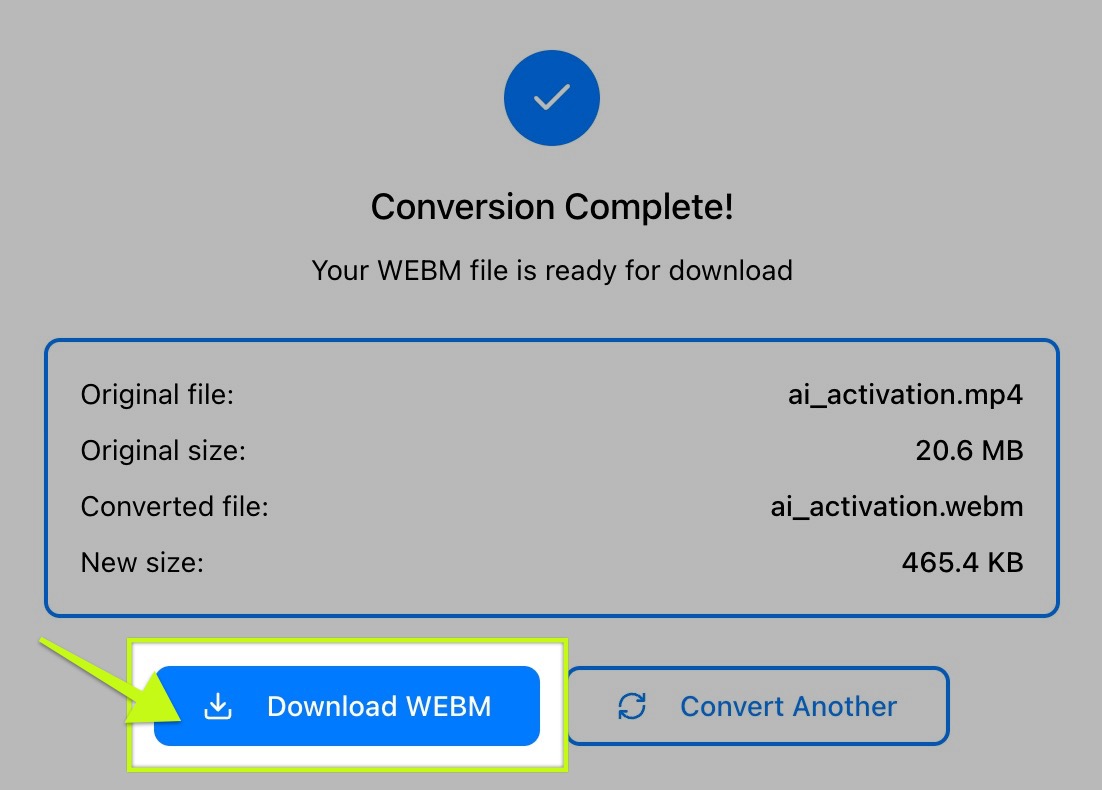
If you only need the audio track, Zight’s convert MP4 to MP3 tool extracts an MP3 from a video file.
You just recorded a 45-minute product demo, a customer interview, or a team standup — and now someone needs “just the audio.” Maybe you want to turn a training video into a podcast episode, pull a voice memo from a screen recording, or send a lightweight audio file instead of a 500 MB video attachment.
Whatever the reason, converting MP4 to MP3 is one of the most common file-conversion tasks on the internet. After testing every major method — online tools, desktop apps, command-line utilities, and workflow tools — here are the five approaches that actually work well in 2025, along with the trade-offs the other guides don’t mention.
MP4 vs. MP3: What’s the Difference (and Why Convert)?
Before diving into the how-to, it helps to understand what you’re actually doing when you convert MP4 to MP3 — because this isn’t a simple “format swap.”
- MP4 (MPEG-4 Part 14) is a container format. It holds video streams, audio streams (usually AAC or sometimes MP3), subtitles, chapter metadata, and even still images — all in a single file.
- MP3 (MPEG-1 Audio Layer III) is an audio-only format that uses lossy compression to shrink audio files dramatically while keeping quality perceptually close to the original.
When you “convert” MP4 to MP3, you’re really extracting the audio track from the MP4 container and re-encoding it (or, in rare cases, stream-copying it) into a standalone MP3 file. The video track is discarded entirely.
The result? A massive reduction in file size. In my testing, a 100 MB MP4 screen recording (1080p, 10 minutes) produced a 9 MB MP3 at 128 kbps — that’s a 91% reduction. For sharing meeting recaps, training audio, or podcast content, this size difference is the entire point.
Common Reasons to Convert MP4 to MP3
- Repurpose meeting recordings — Turn Zoom, Google Meet, or Zight screen recordings into audio files your team can listen to on the go.
- Create podcast episodes — Extract interview audio from video recordings without re-recording.
- Save storage space — Audio-only files use 10–20× less space than video.
- Share lightweight files — Email attachments, Slack messages, and LMS uploads all have file-size limits that MP3 files easily clear.
- Feed transcription tools — Some transcription services accept MP3 but not MP4, or process audio files faster.
5 Methods to Convert MP4 to MP3 (Step-by-Step)
I’ve tested each of these methods with the same source file — a 12-minute, 1080p MP4 screen recording (187 MB) captured with Zight’s screen recorder — so the comparisons below are apples-to-apples.
Method 1: Online Converters (Fastest for One-Off Files)
If you need to convert a single MP4 to MP3 right now and don’t want to install anything, browser-based converters are the fastest path. The two I keep coming back to are CloudConvert and FreeConvert.
Steps (using CloudConvert as the example):
- Go to cloudconvert.com/mp4-to-mp3.
- Click Select File and upload your MP4. You can also pull from Google Drive, Dropbox, or a URL.
- Confirm the output format is set to MP3.
- Click the wrench icon to adjust bitrate (I recommend 192 kbps for general use).
- Click Convert, then Download when finished.
Time in my test: Upload took 38 seconds (on a 100 Mbps connection), conversion took 11 seconds. Total: ~49 seconds.
Pros: No installation, works on any OS or device (including phones), simple UI.
Cons: Requires uploading your file to a third-party server (privacy concern for sensitive recordings), free tier limited to 25 conversions/day and 1 GB file size on CloudConvert, ads on some competitors.
Pro tip: If you’re converting a confidential meeting recording, avoid online converters entirely. Use VLC, FFmpeg, or Zight — your file never leaves your machine.
Method 2: VLC Media Player (Free, Offline, Cross-Platform)
VLC is on most people’s computers already, and its conversion feature is surprisingly capable — even though it’s buried in the menus. This is the method I recommend to anyone who wants a free, offline solution with no file-size limits.
Steps:
- Open VLC Media Player (version 3.0.20 or later recommended).
- Go to Media → Convert / Save (or press
Ctrl+Ron Windows,⌘+Shift+Son Mac). - Click Add and select your MP4 file, then click Convert / Save.
- Under Profile, select Audio – MP3 from the dropdown.
- Click the wrench icon next to the profile to set the bitrate under the Audio codec tab. Set it to 192 kbps or 320 kbps.
- Choose your Destination file (make sure it ends in
.mp3). - Click Start.
Time in my test: 8 seconds for the 12-minute file. No upload, no waiting — just local processing.
Pros: Completely free, no file-size limits, no internet required, available on Windows/Mac/Linux.
Cons: The conversion UI is unintuitive (you have to know where to look), no batch mode through the GUI (though VLC’s command line supports it), no trimming before conversion.
Gotcha: On macOS, VLC’s Convert dialog sometimes defaults to a .ps extension instead of .mp3. Always manually type the full filename including the .mp3 extension in the destination field.
Method 3: Audacity (Best for Trimming and Editing Before Export)
When you need to extract only a specific portion of audio from an MP4 — say, a 3-minute segment from a 60-minute recording — Audacity is the best free option. It’s a full audio editor, which means you can trim, normalize volume, remove background noise, and then export as MP3.
Steps:
- Download and install Audacity (version 3.6.x as of mid-2025) from audacityteam.org.
- Go to File → Import → Audio and select your MP4 file. Audacity will extract the audio track automatically using its built-in FFmpeg library (no separate FFmpeg install needed since Audacity 3.2+).
- Optional: Select the portion of audio you want, then go to Edit → Remove Special → Trim Audio to keep only your selection.
- Go to File → Export Audio.
- Set Format to MP3, choose your bitrate (128–320 kbps), and click Export.
Time in my test: Import took 4 seconds, export took 6 seconds. About 10 seconds of actual processing — plus whatever time you spend editing.
Pros: Full audio editor, trim and clean up audio before export, free and open source, supports batch export via macros.
Cons: Overkill if you just need a quick conversion, steeper learning curve than other methods, UI feels dated.
Pro tip: If you’re pulling audio from a screen recording with lots of keyboard clicks or background noise, apply Audacity’s Noise Reduction effect (under Effects → Noise Removal and Repair) before exporting. Select a “silent” portion that contains only the noise, click Get Noise Profile, then select the entire track and apply the reduction. It makes a dramatic difference for meeting audio.
Method 4: FFmpeg (Best for Power Users and Batch Conversion)
FFmpeg is the command-line tool that most of the online converters and desktop apps are secretly running behind the scenes. If you’re comfortable with a terminal, FFmpeg gives you the most control and the fastest conversion speeds — especially for batch jobs.
Steps:
- Install FFmpeg:
brew install ffmpeg(macOS),sudo apt install ffmpeg(Ubuntu/Debian), or download from ffmpeg.org (Windows). - Open your terminal and run:
ffmpeg -i input.mp4 -vn -acodec libmp3lame -ab 192k output.mp3 - That’s it. The flags explained:
-vnstrips the video,-acodec libmp3lameselects the MP3 encoder,-ab 192ksets bitrate to 192 kbps.
To batch convert an entire folder of MP4 files:
# macOS/Linux for f in *.mp4; do ffmpeg -i "$f" -vn -acodec libmp3lame -ab 192k "${f%.mp4}.mp3"; done # Windows PowerShell Get-ChildItem *.mp4 | ForEach-Object { ffmpeg -i $_.FullName -vn -acodec libmp3lame -ab 192k ($_.FullName -replace '\.mp4$','.mp3') }Time in my test: 3 seconds for the 12-minute file. Batch converting 20 files took 47 seconds. Nothing else comes close.
Pros: Fastest method by far, full control over every parameter, batch processing, completely free, no UI overhead.
Cons: Requires comfort with the command line, no visual interface, initial installation can be confusing on Windows.
Pro tip: If you want to extract audio from a specific time range without processing the whole file, add -ss 00:05:00 -to 00:08:30 before the output filename. This extracts audio from 5:00 to 8:30 only — and it’s nearly instantaneous because FFmpeg seeks directly to the timestamp.
Method 5: Zight (Record, Trim, and Extract Audio in One Workflow)
This is the method I use most often in practice — not because it’s the most technically flexible, but because it eliminates the conversion step entirely for the most common use case: you recorded something and now you need the audio.
Zight is a screen recording, screenshot, and async video tool for Mac, Windows, and Chrome. When you record a screen session or async video with Zight, the recording is stored in the cloud with an instant shareable link. Zight’s built-in editor lets you trim the recording before sharing, and from there you can download or share the audio separately.
Steps:
- Record your screen, webcam, or audio using Zight’s screen recorder (click the menu bar icon → Record Screen, or use the keyboard shortcut
⌘+Shift+6on Mac). - When finished, Zight uploads the recording automatically and copies a shareable link to your clipboard.
- Open the recording in the Zight dashboard. Use the Trim tool to cut out any dead time at the beginning or end.
- Download the file as MP4, then use any of the four methods above to extract the audio — or share the Zight link directly, since recipients can listen without downloading.
Why this matters: In practice, the “conversion” need usually comes up mid-workflow — you’ve just finished a recording and someone asks for the audio. With Zight, you’re already in the tool that created the file. There’s no hunting for the file on disk, no uploading to a separate converter, no waiting. The trimming step also means you’re not sending 45 minutes of audio when the recipient only needs the 5-minute recap at the end.
Pros: Capture-to-share workflow without switching tools, built-in trimming, instant shareable links, cloud storage included, AI-generated transcripts (which serve many of the same purposes as an MP3 extract).
Cons: Requires a Zight account, doesn’t convert standalone MP4 files you didn’t record in Zight. For files from other sources, pair Zight with FFmpeg or VLC.
Pro tip: If you’re extracting audio because someone wants to review a meeting or demo without watching the video, consider sharing the Zight link with the AI transcript instead. We’ve seen teams save hours per week by sending a skimmable transcript rather than a 30-minute audio file.
MP4 to MP3 Conversion Methods: Comparison Table
Here’s how the five methods compare side by side — based on my testing with the same 187 MB, 12-minute MP4 source file.
| Method | Price | Speed (12-min file) | Max File Size | Trim / Edit | Batch Convert | Offline | Best For |
|---|---|---|---|---|---|---|---|
| Online Converter (CloudConvert) | Free (25/day) | ~49 sec | 1 GB (free) | ❌ | Limited | ❌ | Quick one-off conversions |
| VLC | Free | ~8 sec | Unlimited | ❌ | CLI only | ✅ | Offline conversion without install hassle |
| Audacity | Free | ~10 sec | Unlimited | ✅ (full editor) | Via macros | ✅ | Trimming/editing audio before export |
| FFmpeg | Free | ~3 sec | Unlimited | ✅ (via flags) | ✅ (native) | ✅ | Power users, batch jobs, automation |
| Zight | Free tier available | N/A (integrated) | Per plan | ✅ (trim) | ❌ | ❌ | Record → trim → share in one workflow |
Choosing the Right MP3 Bitrate: A Practical Guide
Bitrate is the single setting that determines the trade-off between audio quality and file size. After converting dozens of files at different bitrates and A/B testing the results, here’s the practical guidance:
| Bitrate | Quality Level | File Size (1 hour) | Best Use Case |
|---|---|---|---|
| 64 kbps | Low (noticeable compression) | ~29 MB | Voice memos, dictation (where size matters most) |
| 128 kbps | Good (standard for speech) | ~57 MB | Meetings, lectures, spoken presentations |
| 192 kbps | Very good (recommended default) | ~86 MB | Podcasts, mixed content with music and voice |
| 256 kbps | Excellent | ~115 MB | Music, professional audio |
| 320 kbps | Maximum MP3 quality | ~144 MB | Archival, audiophile-grade (MP3’s ceiling) |
My recommendation: Use 128 kbps for anything that’s primarily voice (meetings, training recordings, screen recording narration). Use 192 kbps as a safe default when you’re not sure. Use 320 kbps only when the source audio is genuinely high quality and you need to preserve every nuance.
Keep in mind: the audio track inside most MP4 files is already compressed as AAC at 128–256 kbps. Converting compressed AAC to compressed MP3 adds a second generation of lossy compression. Going above the source bitrate won’t add quality — it just makes the file bigger. If your source MP4 has 128 kbps AAC audio, converting to 320 kbps MP3 wastes space without improving what you hear.
How to Convert MP4 to MP3 on Mobile (iOS and Android)
Sometimes you’re working from your phone — maybe you recorded a quick video walkthrough and need to pull the audio before a meeting. Here’s what works in 2025:
On iPhone / iPad (iOS 17+)
- Browser-based converters: Open CloudConvert or FreeConvert in Safari, upload your MP4 from the Files app, convert, and download. This is the simplest method.
- Shortcuts app: Apple’s Shortcuts app can encode media. Search the Shortcuts Gallery for “Video to Audio” — there are pre-built shortcuts that extract audio from any video in your camera roll and save it as an M4A (which you can then rename or convert to MP3).
- GarageBand: Open GarageBand, create a new project, import your MP4 as a media file, then share/export as an audio file.
On Android
- VLC for Android: Open the MP4 in VLC, tap the three-dot menu, and look for conversion options. (Note: the Android version’s conversion feature is more limited than desktop.)
- Timbre: A free app specifically designed for audio/video conversion on Android. Open your MP4, select MP3 as the output format, tap convert.
- Browser-based converters: Same as iOS — CloudConvert in Chrome works well.
Pro tip: If you recorded the video on your phone and want the audio for a work purpose, consider recording your next walkthroughs with Zight’s screen recorder instead. The recording goes straight to the cloud, and you (or your team) can access it from any device without file transfers or format conversions.
MP3 vs. Other Audio Formats: When to Choose Something Else
MP3 is the most widely compatible audio format — it plays everywhere and every tool supports it. But it’s not always the best choice. Here’s a quick comparison:
| Format | Type | Quality at Same Size | Compatibility | When to Use |
|---|---|---|---|---|
| MP3 | Lossy | Good | Universal | Maximum compatibility (sharing with anyone) |
| AAC (.m4a) | Lossy | Better than MP3 | Very good (all modern devices) | Apple ecosystem, slightly better quality than MP3 at same bitrate |
| OGG Vorbis | Lossy | Better than MP3 | Good (not all hardware players) | Open-source projects, web embedding |
| FLAC | Lossless | Perfect (no loss) | Good (most modern devices) | Archival, music production, quality-critical work |
| WAV | Uncompressed | Perfect (no loss) | Universal | Audio editing, production (very large files) |
For most people converting screen recordings, meeting recordings, or demo videos into audio files, MP3 at 128–192 kbps is the right choice. It’s small, it’s universal, and the quality is more than sufficient for spoken content.
When You Don’t Need to Convert at All
Before you convert that MP4 to MP3, ask yourself why you’re doing it. In many cases, the underlying need isn’t “I need an MP3 file” — it’s one of these:
- “Someone needs to review what was said in the meeting.” → Share a Zight recording link with the AI-generated transcript. They can search, skim, and jump to specific moments — faster than listening to a 30-minute MP3.
- “The video file is too large to share.” → Use Zight’s shareable link instead of attaching the file. No download required for the recipient.
- “I want to annotate what happened at a specific moment.” → Use Zight’s screenshot tool to capture and annotate specific frames, then share those alongside the recording link.
- “I need a written record, not just audio.” → Zight’s AI transcription creates a text version of any recording — no MP3 intermediate step needed.
We’ve seen teams at Zight realize they were converting MP4 to MP3 as a workaround for a sharing problem — and once they adopted shareable links with transcripts, the conversion step disappeared from their workflow entirely.
Privacy and Security Considerations
If your MP4 contains sensitive content — internal meetings, customer data, product roadmaps, HR conversations — think carefully before uploading it to a free online converter.
- Online converters upload your file to their servers. Most reputable ones (CloudConvert, Zamzar) delete files within 24 hours, but their privacy policies vary — and you’re trusting their claim.
- Desktop tools (VLC, Audacity, FFmpeg) process everything locally. Your file never leaves your machine. This is the safest option for confidential recordings.
- Zight stores recordings in cloud infrastructure with enterprise-grade security, SOC 2 compliance, and team-level access controls — which is a meaningful difference from uploading to a random free converter.
Bottom line: For anything confidential, use FFmpeg or VLC locally. For team workflows where you need sharing + security, use Zight. Save online converters for non-sensitive, one-off files.
Troubleshooting Common MP4 to MP3 Issues
After helping team members troubleshoot conversion issues over the years, these are the problems that come up most often:
“My MP3 file has no sound”
This usually means your MP4 didn’t have an audio track to begin with. Screen recordings made without microphone or system audio enabled produce video-only MP4 files. Open the MP4 in VLC and check Tools → Codec Information — if there’s no audio stream listed, there’s nothing to extract.
Fix for next time: When recording with Zight, make sure you’ve enabled microphone audio (and system audio if you want to capture what’s playing on your computer) before hitting record.
“The audio is out of sync” or “there’s a gap at the start”
Some converters struggle with MP4 files that have variable frame rates (common in screen recordings). FFmpeg handles this best — use the command in Method 4 above. If you’re using an online tool and getting sync issues, try VLC or FFmpeg instead.
“The file size is larger than expected”
Check your bitrate setting. An hour of audio at 320 kbps produces a 144 MB file. If you’re converting speech content, drop to 128 kbps — you’ll get a 57 MB file with no perceptible quality difference for voice.
“VLC outputs a broken file”
This is almost always a file extension issue on macOS. Make sure the destination filename ends in .mp3. VLC doesn’t always append the correct extension automatically.
Frequently Asked Questions
Can I convert MP4 to MP3 for free?
Yes. VLC Media Player, Audacity, and FFmpeg are all completely free desktop applications with no file-size limits and no watermarks. Online converters like CloudConvert and FreeConvert offer free tiers (typically limited to 25 conversions/day or 1 GB file size). You can convert MP4 to MP3 without spending anything.
Does converting MP4 to MP3 lose quality?
Technically, yes — MP3 is a lossy format, so some audio data is discarded during encoding. In practice, the loss is inaudible if you use a bitrate of 192 kbps or higher. Since the audio inside most MP4 files is already compressed as AAC, the additional quality loss from converting to MP3 is minimal. For spoken content like meetings and screen recordings, even 128 kbps sounds identical to the original.
What is the best bitrate for MP3?
Use 128 kbps for speech (meetings, lectures, narrated screen recordings). Use 192 kbps as a versatile default. Use 256–320 kbps for music or when audio quality is critical. Going above the source audio’s bitrate wastes space without improving quality.
Can I convert MP4 to MP3 on my phone?
Yes. On iOS, use browser-based converters (CloudConvert in Safari), the Shortcuts app, or GarageBand. On Android, use VLC for Android, Timbre, or browser-based converters. All of these work without requiring a computer.
Is it legal to convert MP4 to MP3?
Converting your own content — or content you have legal rights to — is absolutely legal. This includes your own screen recordings, meeting recordings, presentations, and original video content. Converting copyrighted content you don’t own (e.g., ripping audio from someone else’s YouTube video) may violate copyright laws depending on your jurisdiction and applicable fair-use provisions.
How do I extract just a portion of audio from an MP4?
Use Audacity to import the MP4, select the segment you want, trim, then export as MP3. Or use FFmpeg with the -ss and -to flags to specify exact start and end timestamps. In Zight, trim your recording using the built-in editor before downloading or sharing.
What is the difference between MP4 and MP3?
MP4 is a multimedia container that holds video, audio, subtitles, and metadata together. MP3 is an audio-only format. Converting MP4 to MP3 strips out the video and keeps only the audio track — reducing file size by 90% or more. A 100 MB MP4 video typically produces a 5–10 MB MP3 file.
Can I batch convert multiple MP4 files to MP3?
Yes. FFmpeg is the best tool for this — a single shell loop can process hundreds of files in minutes. VLC supports batch conversion via its command-line interface. Audacity has a macro system for batch exports. Most online converters also support multiple file uploads on paid tiers.
How long does it take to convert MP4 to MP3?
Desktop tools (FFmpeg, VLC, Audacity) convert a 12-minute file in 3–10 seconds. Online converters add upload time — a 200 MB file on a 50 Mbps connection takes about 30–50 seconds total including upload and conversion. For most files, the entire process takes under 60 seconds regardless of method.
The Bottom Line
Converting MP4 to MP3 is straightforward once you pick the right tool for your situation:
- For a quick, one-off conversion: Use CloudConvert or FreeConvert in your browser.
- For offline conversion with no limits: Use VLC (easiest) or FFmpeg (fastest).
- For trimming or editing audio before export: Use Audacity.
- For batch processing dozens of files: Use FFmpeg with a shell loop.
- For a seamless record → trim → share workflow: Use Zight to capture and share recordings with built-in trimming and AI transcription — often eliminating the need to convert at all.
And if you find yourself converting meeting recordings or screen recordings regularly, take a step back and ask whether a shareable link with a transcript would serve your team better than an audio file. In our experience, it usually does.
Based on testing by the Zight team · Last updated July 2025


